自动化测试入门-快速搭建一个自动化测试框架Pytest+Allure
前言
最近因为负责自动化测试的组长因身体原因离职,遂这部分工作我来交接。之前也有过调研自动化测试框架的经验,在网上找了一个不错的开源自动化测试框架Allure,目前的自动化测试框架可能分为两类,一类是类似与Robt Framework ,QTP这类的关键字驱动,还有一类是单元测试框架如Junit,Pytest等等。
1. Allure的优点:
- 报告非常好看且高大上,测试人员不需要在上面做太多的二次开发
- 支持Pytest,Pytest文档比较全面,而且Python简单易上手,同样支持Java
- 可以与Jekins做持续集成,Jekins提供插件支持
2.Pytest+Allure 配置
| 软件名称 | 说明 |
|---|---|
| allure_pytest-2.6.1-py2.py3-none-any.whl | 注意:有些博客写了使用pytest-allure-adaptor,该库已停止维护,建议使用allure_pytest,官方有文档,很全面,pytest-allure-adaptor与allure_pytest不能同时使用,否则执行脚本会报错 |
| pytest-4.4.0-py2.py3-none-any.whl | pytest单元测试框架,还有一些依赖,建议使用pip install 安装 |
| java1.8 | allure依赖的环境 |
安装allure2
若想生成html报告需要安装allure2
allure的版本目前有2个,从github上看,allure1不再被支持,请考虑使用allure2 https://dl.bintray.com/qameta/generic/io/qameta/allure/allure/
下载完成后解压,添加bin目录到环境变量(window与linux相同),下载版本时请注意allure_pytest与allure的版本兼容性问题(虽然我没有遇到这个坑,但是可能会有,我python用的是3.6.8)
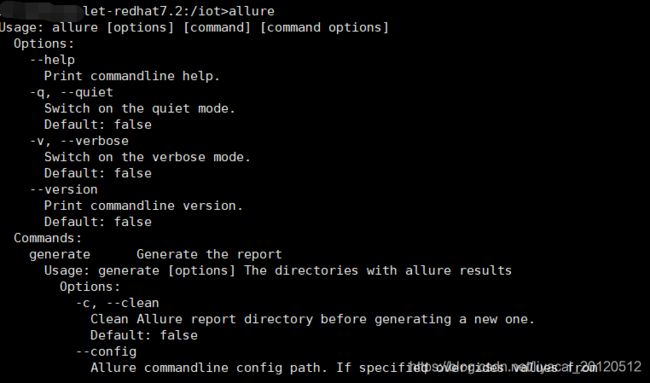
以Windows为例,若环境变量配置成功,输入allure会出现如下

若为linux,输入allure则为
3. 在测试代码中添加Allure特性
如果想在测试报告中添加环境信息,可以使用environment.xml,只需要将该文件放在生成的result文件夹中即可,目录结构如下:

environment.xml中的信息为:
// An highlighted block
<environment>
    <parameter>
        <key>Browser</key>
        <value>Chrome</value>
    </parameter>
    <parameter>
        <key>Browser.Version</key>
        <value>63.0</value>
    </parameter>
    <parameter>
        <key>Stand</key>
        <value>Production</value>
    </parameter>
</environment>
接着,在测试脚本中,添加allure特性,直接看下面的脚本,我通过在脚本中添加注释的方式给大家解释allure特性的用途。比如测试脚本是test_sample.py:
// An highlighted block
# -- coding: utf-8 --
'''
Created on 2019年3月26日

@author: lyc
'''
import pytest
import allure

@allure.feature('Testing')
class TestSample(object):


    def setup_class(self):
        self.a = 'aaaaa'
        print("------ setup before class UserLogin ------")


    @allure.story('001')
    def test_sample_1(self):
        allure.attach('杨婷婷')

        assert 'hello' in 'hello world'

    @allure.story('002')
    def test_sample_2(self):
        assert 'OK' in 'are you ok?'


if __name__ == '__main__':
    import os
    pytest.main(['-s', '-q', 'test_sample.py','--alluredir', './result/'])
    os.system('allure serve ./result/')
Allure的几个特性:
@allure.feature # 用于定义被测试的功能,被测产品的需求点
@allure.story # 用于定义被测功能的用户场景,即子功能点
with allure.step # 用于将一个测试用例,分成几个步骤在报告中输出
allure.attach # 用于向测试报告中输入一些附加的信息,通常是一些测试数据信息
@pytest.allure.step # 用于将一些通用的函数作为测试步骤输出到报告,调用此函数的地方会向报告中输出步骤
你可以在脚本处添加 pytest.main([’-s’, ‘-q’, ‘test_sample.py’,’–alluredir’, ‘./result/’]) 来执行脚本
allure可以向报告中添加截图,若使用allure_pytest库,则使用 allure.attach.file(source, name, attachment_type, extension)
具体使用如下:
// An highlighted block
import allure
import pytest


@pytest.fixture
def attach_file_in_module_scope_fixture_with_finalizer(request):
    allure.attach('A text attacment in module scope fixture', 'blah blah blah', allure.attachment_type.TEXT)
    def finalizer_module_scope_fixture():
        allure.attach('A text attacment in module scope finalizer', 'blah blah blah blah',
                      allure.attachment_type.TEXT)
    request.addfinalizer(finalizer_module_scope_fixture)


def test_with_attacments_in_fixture_and_finalizer(attach_file_in_module_scope_finalizer):
    pass


def test_multiple_attachments():
    allure.attach.file('./data/totally_open_source_kitten.png', attachment_type=allure.attachment_type.PNG)
    allure.attach(' a page ', 'Attach with HTML type', allure.attachment_type.HTML)
请查看官方文档:https://docs.qameta.io/allure/
最后生成的报告为:

以上就是我在Windos下配置Pytest+Allure的总结,因为网上大都是使用pytest-allure-adaptor,然而这个东西已经停止维护了,为什么不用新的allure_pytest呢?而且allure_pytest在Pypi上有官方的文档,写得比pytest-allure-adaptor好多了,很多api可以直接查到。
对于allure持续集成Jekins 我也遇到坑了,有时间再写一下心得吧,2019年04月09日,写下我的第一篇博客~ 小小的纪念下