1 前言
Java EE目前比较主流的authorization和authetication的库一个为Spring Security,另一个为apache shiro。由于之前的项目是用spring boot 和shiro + vue实现前后分离,shiro的文档和使用体验比较友好也没有什么需要特别记录的地方,权限控制粒度可以直接精确到方法。至于Spring Security属于Spring的全家桶系列怎么也得体验下。笔者原先用python的flask与php的laravel进行服务端开发,权限管理在python的项目中完全是轻量级的自我实现,收获良多,对于新手的建议先不要一来就上手这种设计复杂的库,对于源码的阅读和设计的理解会有很多障碍,最好先自己实现相应功能后再去学习Shiro与Spring Security的源码设计。 本来不太想写这种记录流水文,但是为了节约大家在Spring Boot + Spring Security + Thymeleaf的搭建时间,现在对搭建基础框架做详细说明,相关代码可以在Github获取。本人包含搭建流程与说明以及搭建过程中踩坑(对框架不够理解就会踩坑)心得。如果跟随文档搭建过程中遇到什么问题请拉到末尾看看友情提示中有无对应的解决办法。笔者尽量在代码注释中说明具体功能。
项目地址: https://github.com/alexli0707/spring_boot_security_themeleaf
2 目的
这是一个Spring Boot + Spring Security + Thymeleaf 的示例项目,我们将使用Spring Security 来进行权限控制。其中/admin 和 /user是两个角色不同权限的访问path。
3 项目
项目配置文件就不细说,在pom.xml里,为了排除干扰,所有依赖和代码都是最简配置。
3.1 Spring Boot 配置
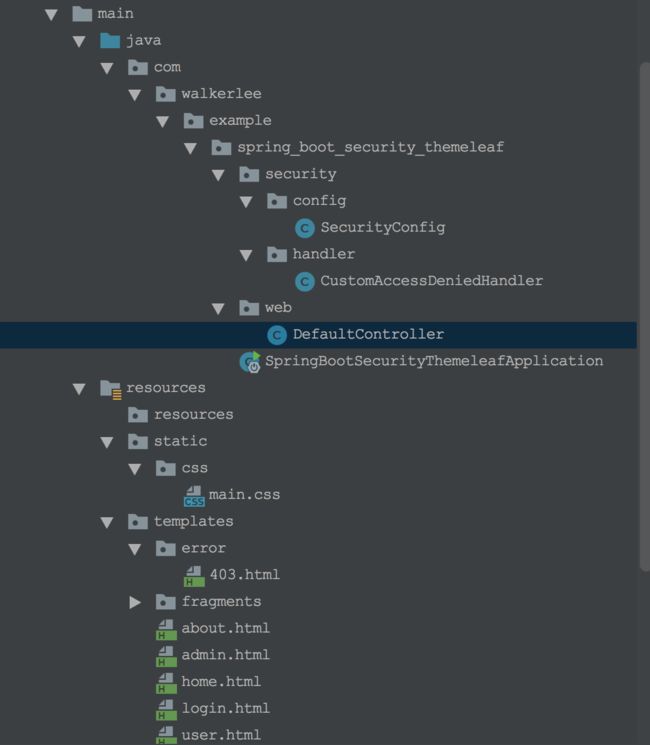
3.1.1 DefaultController
返回对应路由请求所要访问的模板文件。
package com.walkerlee.example.spring_boot_security_themeleaf.web;

import org.springframework.stereotype.Controller;
import org.springframework.web.bind.annotation.GetMapping;

@Controller
public class DefaultController {

    @GetMapping("/")
    public String home1() {
        return "/home";
    }

    @GetMapping("/home")
    public String home() {
        return "/home";
    }

    @GetMapping("/admin")
    public String admin() {
        return "/admin";
    }

    @GetMapping("/user")
    public String user() {
        return "/user";
    }

    @GetMapping("/about")
    public String about() {
        return "/about";
    }

    @GetMapping("/login")
    public String login() {
        return "/login";
    }

    @GetMapping("/403")
    public String error403() {
        return "/error/403";
    }

}
注意这边用的是@Controller不是@RestController二者的区别可以查阅对应文档。
3.1.2 SpringBootSecurityThemeleafApplication
应用启动入口。
package com.walkerlee.example.spring_boot_security_themeleaf;

import org.springframework.boot.SpringApplication;
import org.springframework.boot.autoconfigure.SpringBootApplication;

@SpringBootApplication
public class SpringBootSecurityThemeleafApplication {

    public static void main(String[] args) {
        SpringApplication.run(SpringBootSecurityThemeleafApplication.class, args);
    }
}
3.2 Spring Securtiy 配置
3.2.1 SecurityConfig
继承WebSecurityConfigurerAdapter,目前配置用户帐号密码角色于内存中,在配合db存储使用的时候需要实现org.springframework.security.core.userdetails.UserDetailsService 接口并作更多配置,此处先使用两个保存在内存中的模拟角色帐号进行登录与角色校验。
package com.walkerlee.example.spring_boot_security_themeleaf.security.config;

import org.springframework.beans.factory.annotation.Autowired;
import org.springframework.security.config.annotation.authentication.builders.AuthenticationManagerBuilder;
import org.springframework.security.config.annotation.web.builders.HttpSecurity;
import org.springframework.security.config.annotation.web.configuration.EnableWebSecurity;
import org.springframework.security.config.annotation.web.configuration.WebSecurityConfigurerAdapter;
import org.springframework.security.web.access.AccessDeniedHandler;

/**
 * SecurityConfig
 * Description:  Spring Security配置
 * Author:walker lee
 */
@EnableWebSecurity
public class SecurityConfig extends WebSecurityConfigurerAdapter {

    @Autowired
    private AccessDeniedHandler accessDeniedHandler;


    // roles admin allow to access /admin/**
    // roles user allow to access /user/**
    // custom 403 access denied handler
    @Override
    protected void configure(HttpSecurity http) throws Exception {

        http.csrf().disable()
                .authorizeRequests()
                .antMatchers("/css/**", "/js/**", "/fonts/**").permitAll()  // 允许访问资源
                .antMatchers("/", "/home", "/about").permitAll() //允许访问这三个路由
                .antMatchers("/admin/**").hasAnyRole("ADMIN")   // 满足该条件下的路由需要ROLE_ADMIN的角色
                .antMatchers("/user/**").hasAnyRole("USER")     // 满足该条件下的路由需要ROLE_USER的角色
                .anyRequest().authenticated()
                .and()
                .formLogin()
                .loginPage("/login")
                .permitAll()
                .and()
                .logout()
                .permitAll()
                .and()
                .exceptionHandling().accessDeniedHandler(accessDeniedHandler);           //自定义异常处理
    }


    // create two users, admin and user
    @Autowired
    public void configureGlobal(AuthenticationManagerBuilder auth) throws Exception {
        auth.inMemoryAuthentication()
                .withUser("user").password("user").roles("USER")
                .and()
                .withUser("admin").password("admin").roles("ADMIN");
    }

}
3.2.1 CustomAccessDeniedHandler
出现权限限制返回HTTP_CODE为403的时候自定义展示页面以及内容。
package com.walkerlee.example.spring_boot_security_themeleaf.security.handler;

import org.slf4j.Logger;
import org.slf4j.LoggerFactory;
import org.springframework.security.access.AccessDeniedException;
import org.springframework.security.core.Authentication;
import org.springframework.security.core.context.SecurityContextHolder;
import org.springframework.security.web.access.AccessDeniedHandler;
import org.springframework.stereotype.Component;

import javax.servlet.ServletException;
import javax.servlet.http.HttpServletRequest;
import javax.servlet.http.HttpServletResponse;
import java.io.IOException;

/**
 * CustomAccessDeniedHandler
 * Description:  handle 403 page
 * Author:walker lee
 */
@Component
public class CustomAccessDeniedHandler implements AccessDeniedHandler {

    private static Logger logger = LoggerFactory.getLogger(CustomAccessDeniedHandler.class);

    @Override
    public void handle(HttpServletRequest httpServletRequest, HttpServletResponse httpServletResponse, AccessDeniedException e) throws IOException, ServletException {
        Authentication auth
                = SecurityContextHolder.getContext().getAuthentication();

        if (auth != null) {
            logger.info("User '" + auth.getName()
                    + "' attempted to access the protected URL: "
                    + httpServletRequest.getRequestURI());
        }

        httpServletResponse.sendRedirect(httpServletRequest.getContextPath() + "/403");


    }
}
3.3 Thymeleaf + Resources + Static files
3.3.1 thymeleaf的模板文件保存在src/main/resources/templates/文件夹中,具体使用自行google官方文档,Thymeleaf可以支持前后分离的开发方式,具体玩法这边不做过多复述,该demo工程仅使用其中的基础特性,
3.3.2 Fragment
可参照官方文档
3.3.3 Demo中fragment需要特别说明的布局--footer.html,观察sec标签,这是一个与Spring Security协作比较有效的方法,具体可以参照Thymeleaf extra Spring Security
Note
关于Spring Boot的静态资源协议配置可以参照此处 Spring Boot Serving static content
4 运行Demo
4.1 运行命令,访问 http://localhost:8080
$ mvn spring-boot:run
页面
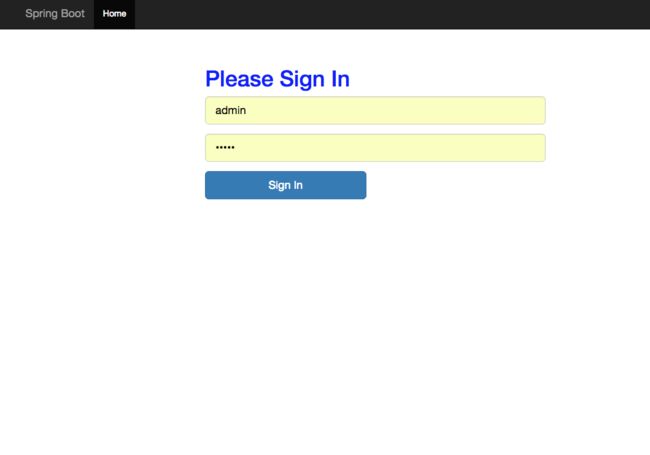
点击1访问管理员页面,因为没有登录被阻止跳转到登录页:
输入帐号
admin密码
admin 登录成功后重定向到
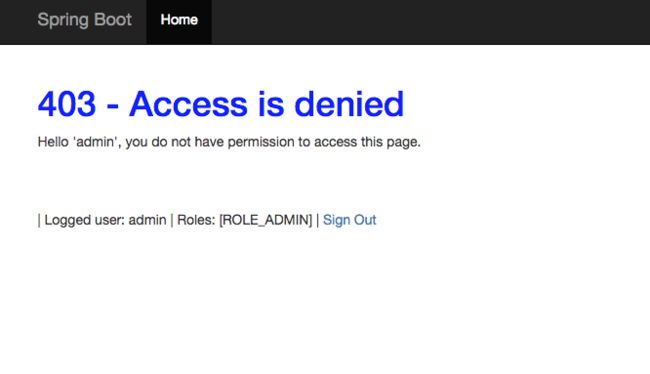
http://localhost:8080/admin 。此时返回主页进入2用户页面,提示403没有对应权限:
最终点击登出重定向到:
http://localhost:8080/login?logout,到此快速模板算是搭建完毕,如果需要更多深入的详解和展开这个篇幅肯定是不够的,先到这里。
Tip:聊下可能会遇到的问题
- 无法启动项目(如果用的是github上的工程项目肯定是不会的),如果是自己搭建的话可能是没有在pom配置 :
org.springframework.boot
spring-boot-starter-web
- 登录成功后重定向到你的css文件或者js文件而不是上一次访问的路径? 很有可能是没有配置允许资源文件被外网访问的权限,导致登录成功的回调handler中request的referer是被提示403的资源文件。
- 如果需要针对结合数据库以及更多功能的快速集成的话欢迎留个言,元旦有时间也会一并写下。
引用:
- Securing a Web Application
- Spring Security Reference
- Spring Boot Security features
- Spring Boot Hello World Example – Thymeleaf
- Spring Security Hello World Annotation Example
- Thymeleaf – Spring Security integration basics
- Thymeleaf extra – Spring Security integration basics
- Thymeleaf – Standard URL Syntax
- Spring Boot + Spring MVC + Spring Security + MySQL
- Spring Boot – Static content
- Spring Boot Spring security themeleaf example


