写在前面 #
本次 Space Shooter 实践通过实现以下功能达到加深对 U3D 游戏开发的认知.
- 键盘控制飞船移动;
- 发射子弹设计目标;
- 随机生成大量障碍物;
- 计分;
- 实现游戏对象的生命周期管理;
同时进一步练习场景元素的编辑, 脚本文件的创建和 GUI 的处理, 以及音频文件的添加等方法.
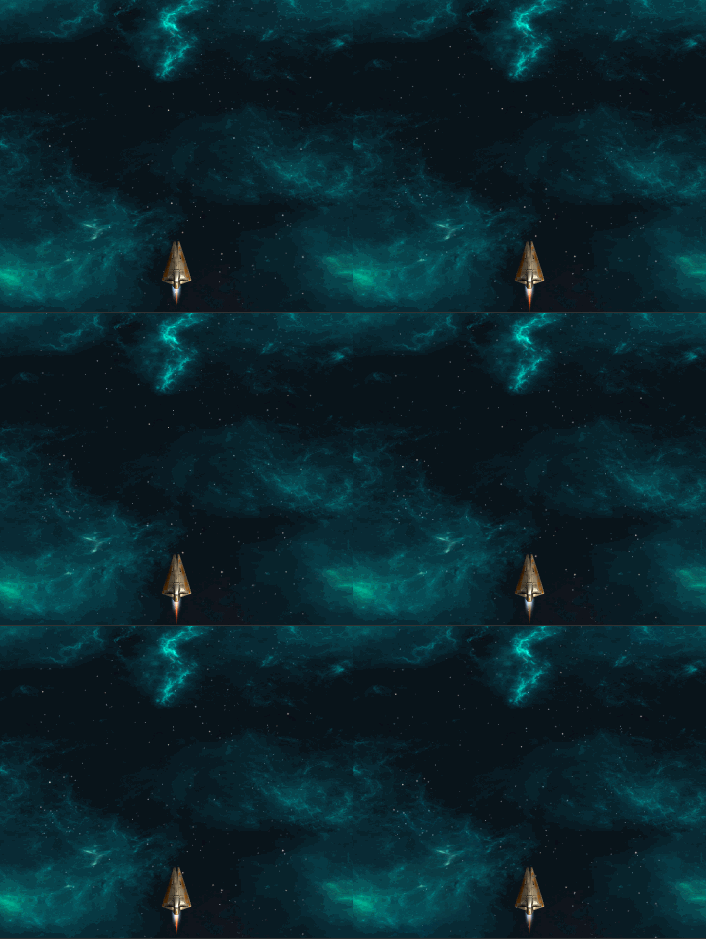
最终效果:
1. 导入模型,贴图和材质 #
步骤要注意的几点 :
导入的资源包中有可以正确运行已做好的 Done_Main 场景, 将其删除, 创建一个全新的空场景文件 Main, 实践复原 Done_Main 的功能;
将 File>>Build Settings>>Player Settings>>Default Is Full Screen 取消勾选, 宽高设置为 400x600;
飞船模型拖至 Hierarchy 命名为 Player, Reset Transform 组件;
添加 Rigidbody, 不希望飞船受重力影响而下坠, 取消勾选 Use Gravity 选项;
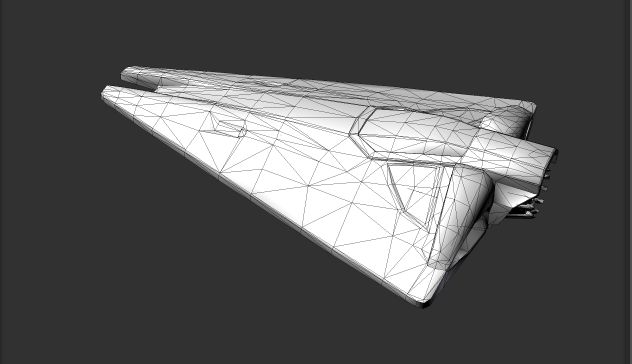
添加碰撞体组件 Mesh Collider, 这是一个网格碰撞体, 使飞船能够与随机出现的障碍物发生碰撞, 并在碰撞后触发销毁飞船和障碍物的事件, Mesh Collider 的 Mesh 属性为模型 vehicle_playerShip 的网格, 该网格模型包含许多细小的三角形面片
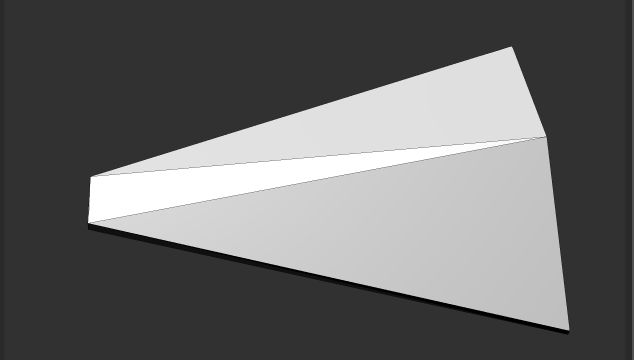
为了提高游戏的执行效率, 飞船网格模型不应该过于复杂, 不必进行如此精确的碰撞检测, 应该建立一个简化的模型, 减少不必要的碰撞计算;
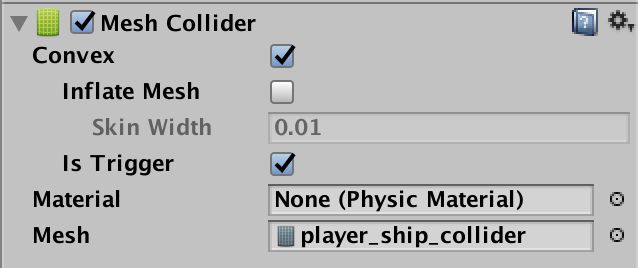
最后还要勾选 Convex 和 Is Trigger 选项框, 将 Mesh Collider 设置为触发器, 如图;
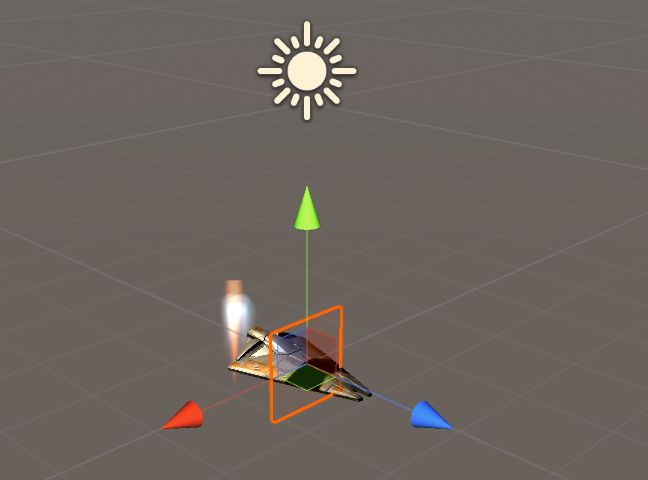
添加飞船尾部的火焰粒子效果, 要是 Player 的子对象;
使摄像机正对着飞船, Rotation(90,0,0). 使飞船处于 Viewport 视图窗口的下半部分, Position(0,10,4). 摄像机为正交投影;
添加背景图片, GameObject>>3D Object>>Quad 创建一个平面命名为 Background, 移除 Mesh Collider, 此时垂直于飞船;(Quad 默认情况下为背向剔除模式, 因此可能需要调整视角才能看到 Quad 平面) Quad 的 Position(90,0,0);
设置 Background 的纹理图片 Shader 模式为 Unlit/Texture;
为背景添加粒子效果繁星点点;
至此动图效果:
2. 编写脚本代码 #
2.1 控制飞船移动 ##
PlayerController.cs 实现方向键控制飞船移动的功能;
 using UnityEngine;
 using System.Collections;

 public class PlayerController : MonoBehaviour
 {
    // 想在 Inspector 视图显示, 就需要为 Boundary 类添加可序列化的属性 [System.Serializable]
    [System.Serializable]
    public class Boundary
    {
        // 用于管理飞船活动的边界值, XZ 平面
        public float xMin, xMax, zMin, zMax;
    }

    // 速度控制变量
    public float speed;
    public Boundary boundary;
    // 飞船倾斜系数
    public float tilt = 4.0f;

    void FixedUpdate ()
    {
        // 得到水平方向输入
        float moveHorizontal = Input.GetAxis ("Horizontal");
        // 得到垂直方向输入
        float moveVertical = Input.GetAxis ("Vertical");
        // 用上面的水平方向和垂直方向输入创建一个 Vector3 变量, 作为刚体速度, 是一个矢量
        Vector3 movement = new Vector3 (moveHorizontal, 0.0f, moveVertical);
        Rigidbody rb = GetComponent ();
        if (rb != null) {
            rb.velocity = movement * speed;
            // Mathf.Clamp 限定刚体的活动范围
            rb.position = new Vector3 (
                Mathf.Clamp (rb.position.x, boundary.xMin, boundary.xMax),
                0.0f,
                Mathf.Clamp (rb.position.z, boundary.zMin, boundary.zMax)
            );
            // 飞船左右移动时有一定的倾斜效果,
            // 绕 Z 轴旋转, 往左运动 X 轴上速度为负值, 旋转的角度为逆时针正值, 所以要乘以一个负系数
            rb.rotation = Quaternion.Euler (0.0f, 0.0f, rb.velocity.x * -tilt);
        }

    }
 }
至此动图效果为
2.2 实现射击行为 ##
步骤需要注意的几点
新建立一个空的游戏对象 Bolt, 添加 Rigidbody 取消勾选 Use Gravity 选项框.
为 Bolt 新建一个子对象 Quad 命名为 VFX, Rotation(90,0,0), 移除 Mesh Collider, 添加材质 fx_bolt_orange.
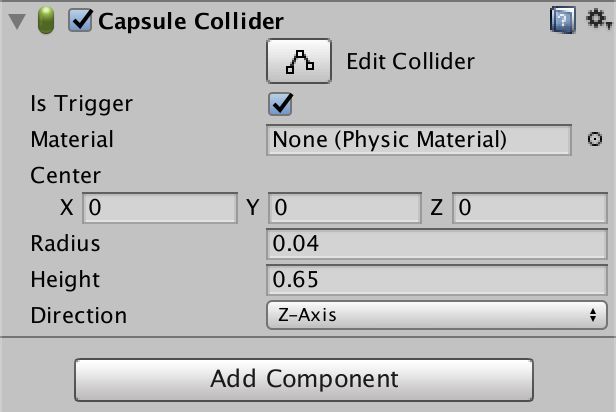
为 Bolt 添加一个胶囊碰撞体, 勾选 Is Trigger 设为触发器, 设置 Capsule Collider 的 Direction 属性值为 Z-Axis, 设置半径和高度.
为 Bolt 添加一个脚本 Mover.cs. 此段代码放在 Start() 函数里, 因为在脚本的生命周期中只需要调用一次, 不需要每一帧都调用.
将 Bolt 拖至 Prefabs 文件夹成为预制体, 预制体做好后将原本的 Bolt 删除.
using UnityEngine;
using System.Collections;

public class Mover : MonoBehaviour
{
    // 子弹的速度
    public float speed;

    void Start ()
    {
        GetComponent ().velocity = transform.forward * speed;
    }

}
脚本控制发射子弹, 为 Player 新建空的子对象 Shot Spawn, Position(0,0,0.7), 在此位置发射子弹
管理光电子弹的生命周期, 子弹在飞出有效区域之后自行销毁, 为游戏区域添加触发器, 当电光子弹飞出区域时触发事件, 在实践响应函数中调用 Destroy.
设置 Boundary 为触发器, 由于不需要在场景中显示 Boundary 对象, 移除 Mesh Renderer 组件.
为 Boundary 添加脚本 DestoryByBoundary.cs
using UnityEngine;
using System.Collections;

public class DestoryByBoundary : MonoBehaviour {

    void OnTriggerExit(Collider other){
        Destroy (other.gameObject);
    }
}
注意的 :
- 若要处理游戏对象移出触发器时的事件, 应该重载事件函数 OnTriggerExit;
- OnTriggerExit 的参数 Collider 表示移出触发器的对象, 这里就是飞出边界的子弹对象上的碰撞体;
2.3 添加小行星障碍物 ##
要注意的几点
小行星随机生成, 随机的角度旋转;
射击击中小行星时, 小行星爆炸并销毁;
飞船碰上小行星, 飞船爆炸, 游戏结束;
新建空对象 Asteroid Position(0,0,9) Rigidbody 取消 Use Gravity 添加 Capsule Collider 勾选 Is Trigger.
模型 prop_asteroid_01 添加为 Asteroid 的子对象.
Capsule Collider 属性 Radius = 0.5, Height = 1.6, Direction 为 Z-Axis
为 Asteroid 添加脚本 RandomRotator.cs;
using UnityEngine;
using System.Collections;

public class RandomRotator : MonoBehaviour
{
    // tumble 是旋转系数
    public float tumble;
    void Start ()
    {
        // angularVelocity 表示刚体的角速度;  insideUnitSphere 表示单位长度半径球体内的一个随机点(向量)
        // 乘积结果描述了在半径长度为 tumble 的球体中的随机点
        // 由此就可以实现刚体以一个随机的角速度旋转
        GetComponent ().angularVelocity = Random.insideUnitSphere * tumble;
    }
}
设定 Asteroid 对象的角阻力为0;
添加控制射击小行星的功能, 为小行星 Asteroid 添加一个脚本来控制碰撞事件 DestroyByContact.cs
using UnityEngine;
using System.Collections;

public class DestoryByContact : MonoBehaviour
{
    // 小行星爆炸时的粒子对象
    public GameObject explosion;
    // 飞船与小行星碰撞飞船爆炸的粒子对象
    public GameObject playerExplosion;

    void OnTriggerEnter (Collider other)
    {

        if (other.tag == "Boundary" || other.tag == "Enemy") {
            return;
        }
        if (explosion != null) {
            // 在小行星销毁的位置生成一个爆炸效果, explosion 是小行星的位置
            Instantiate (explosion, transform.position, transform.rotation);
        }

        if (other.tag == "Player") {
            // 在玩家飞机销毁的位置生成一个爆炸效果, playerExplosion 是飞船的位置
            Instantiate (playerExplosion, other.transform.position, other.transform.rotation);
        }
        // 销毁跟小行星碰撞的物体
        Destroy (other.gameObject);
        // 销毁小行星
        Destroy (this.gameObject);
    }
}
Boundary 的 Tag 设为 Boundary; Player 的 Tag 设为 Player
至此动图效果为
2.4 控制小行星运动和随机生成 ##
让小行星以一定的速度飞向飞船, 为 Asteroid 添加脚本 Mover.cs 设置 speed 属性值为 -5; 速度设为负值, 因为小行星与子弹的运动方向相反
需要先制作 Asteroid 预制体, 创建 Project>>GameController 空游戏对象, Tag 为 GameController, 并为之创建脚本 GameController.cs
using UnityEngine;
using System.Collections;

public class GameController : MonoBehaviour
{
    // 小行星数组
    public GameObject[] hazards;
    // 随机生成小行星的位置
    public Vector3 spawnValues;
    // 每一波小行星生成的数量
    public int hazardCount;
    // 每次生成小行星对象后延迟的时间, 单位秒
    public float spawnWait;
    // 表示开始生成小行星对象前等待的时间
    public float startWait;
    // 表示两批小行星阵列间的时间间隔
    public float waveWait;

    void Start ()
    {
        StartCoroutine (SpawnWave ());
    }

    // 一波一波地生成小行星
    IEnumerator SpawnWave ()
    {
        yield return new WaitForSeconds (startWait);

        while (true) {
            for (int i = 0; i < hazardCount; i++) {
                GameObject hazard = hazards [Random.Range (0, hazards.Length)];
                Vector3 spawnPosition = new Vector3 (Random.Range (-spawnValues.x, spawnValues.x), spawnValues.y, spawnValues.z);
                Instantiate (hazard, spawnPosition, Quaternion.identity);  // 生成随机的小行星
                yield return new WaitForSeconds (spawnWait);
            }

            yield return new WaitForSeconds (waveWait);
        }
    }
}
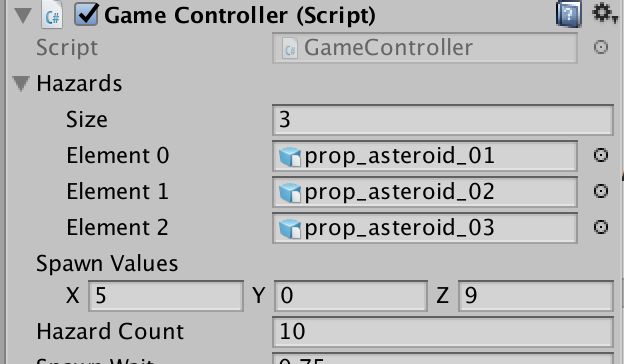
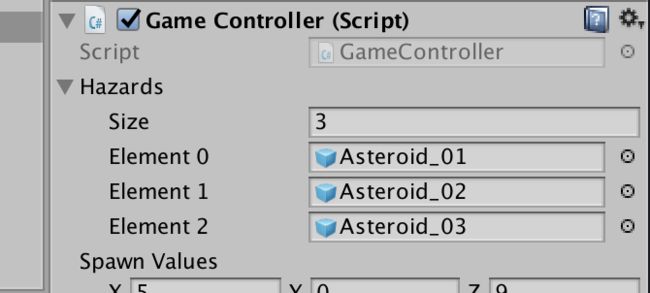
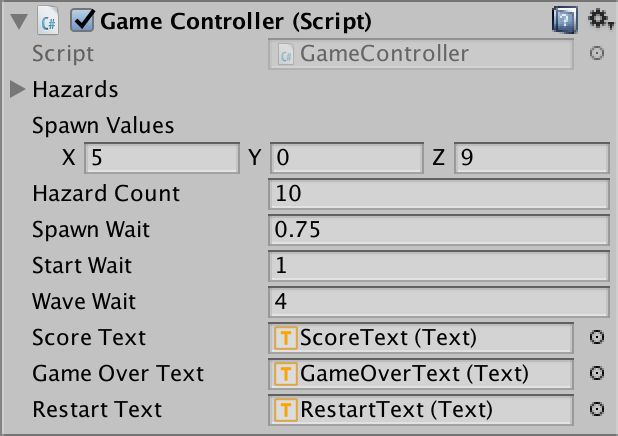
有一个要注意的地方, 对数组 Hazards 的内容不能拖成 model ,要是预制体, 否则生成的小行星无效导致不会运动, 如图
防止小行星数量太多, 距离近以致小行星之间相互碰撞销毁, 需要使用 协程类 WaitForSeconds
让爆炸后的粒子实例 explosion_asteroid 自动销毁, 建立脚本 DestroyByTime.cs 绑定到 explosion_asteroid 和 explosion_player 上
using System.Collections;
using System.Collections.Generic;
using UnityEngine;

public class DestroyByTime : MonoBehaviour
{

    public float lifeTime = 2.0f;

    void Start ()
    {
        Destroy (gameObject, lifeTime);
    }
}
3. 添加音频 #
将音频文件添加至预制体
是否勾选 Play On Awake 表明音频文件在唤醒时自动播放;
4. 添加积分文本 #
新版 Text 组件的使用方法, GameObject>>UI>>Text 生成 Canvas>>Text 和 EventSystem. 调整 Text 位置, Anchor Presets 选择 top-left.
积分功能包括以下作用 :
飞船发射子弹击中小行星后分值增加;
分值增加后更新 Text 组件的显示;
在 GameController.cs 脚本添加变量 scoreText 和 score
// 更新计分 Text 的组件
public Text scoreText;
// 保存当前分值
private int score;

void Start ()
{
  score = 0;
  UpdateScore ();
  StartCoroutine (SpawnWave ());
}
void UpdateScore ()
{
scoreText.text = "Get Score : " + score;
}
public void AddScore (int newScoreValue)
{
score += newScoreValue;
UpdateScore ();
}脚本 DestoryByContact.cs 可以调用 AddScore 函数.
// 表示小行星被击中后玩家分值增加的数量
public int scoreValue;
// 表示在游戏对象 GameController 上绑定的脚本 GameController.cs
private GameController gameController;

void Start ()
{
  GameObject go = GameObject.FindWithTag ("GameController");
  if (go != null) {
    gameController = go.GetComponent ();
  } else {
    Debug.Log ("Cannot Find a tag of GameController");
  }
  if (gameController == null) {
    Debug.Log ("Cannot Find the Script of GameController.cs");
  }
}
if (explosion != null) {
// 在小行星销毁的位置生成一个爆炸效果, explosion 是小行星的位置
Instantiate (explosion, transform.position, transform.rotation);
gameController.AddScore (scoreValue);
}5. 游戏结束与重新开始 #
添加游戏结束的 Text 组件
添加游戏结束的脚本
GameController 添加变量
// 更新 Text 组件的显示
public Text gameOverText;
// 游戏是否结束
private bool gameOver;
public void GameOver ()
{
gameOver = true;
gameOverText.text = "游戏结束";
}while (true) {
if (gameOver) {
break;
}
// ... ...
}在 DestroyByContact.cs 脚本加入对 GameOver() 函数的调用.
if (other.tag == "Player") {
    // 在玩家飞机销毁的位置生成一个爆炸效果, playerExplosion 是飞船的位置
    Instantiate (playerExplosion, other.transform.position, other.transform.rotation);
    gameController.GameOver ();
}
添加重新开始的 Text 组件, 按[R]键重新开始.
// 更新添加的 Text 组件
public Text restartText;
// 是否重新开始游戏, 只有游戏结束时重新开始
private bool restart;

void Start ()
{
  score = 0;
  UpdateScore ();
  gameOverText.text = "";
  gameOver = false;
  restartText.text = "";
  restart = false;
  StartCoroutine (SpawnWave ());
}

void Update ()
{
  if (restart) {
    if (Input.GetKeyDown (KeyCode.R)) {
      Application.LoadLevel (Application.loadedLevel);
    }
  }
}
Application.LoadLevel(Application.loadedLevel) 是 Unity 中重新加载场景的常用方法.
三个文本
至此完毕.
End.
学习自 Book《Unity 官方案例精讲》
导出包 →GitHub
