kvm的三种安装方法详解
1.前提准备
我们需要安装一台有可视化界面的虚拟机
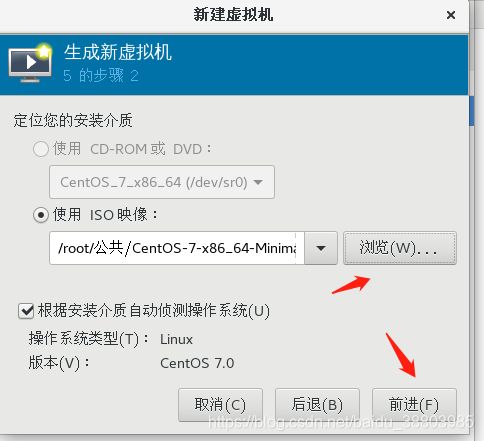
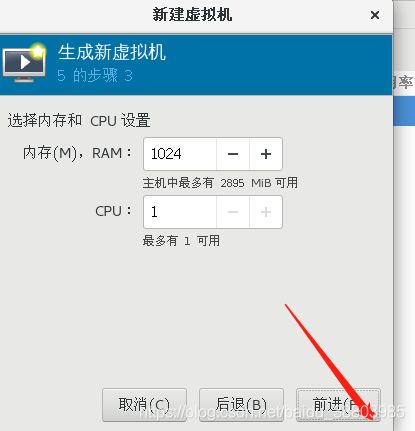
创建一台新的虚拟机,
其它步骤跟我们平时装虚拟机一样。
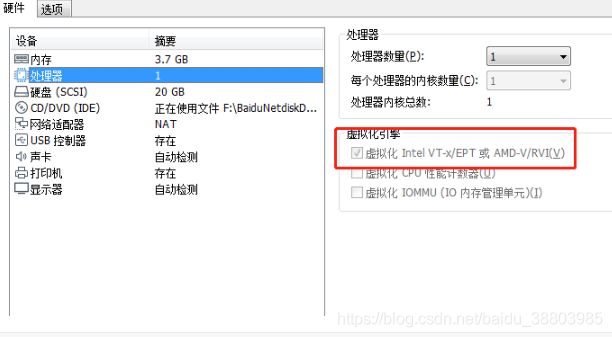
关机,并打开虚拟化引擎,使之支持VT技术
安装软件:
[root@localhost ~]# yum install qemu-kvm libvirt virt-manager librbd1-devel -y
启动服务:    centos7:
[root@localhost ~]# systemctl start libvirtd
查看kvm模块加载:
[root@localhost ~]# lsmod | grep kvm
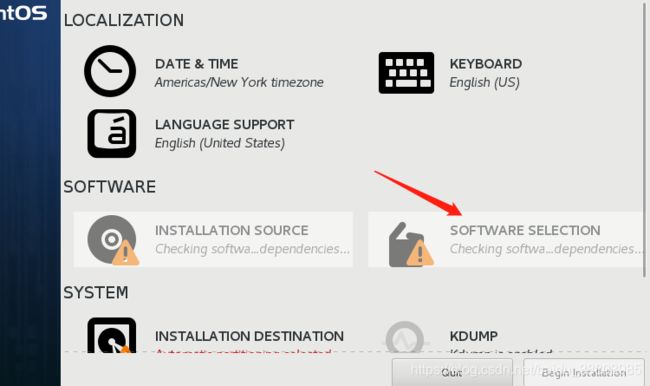
2.kvm图形模式安装
右键打开终端
[root@localhost ~]# virt-manager #打开系统管理器


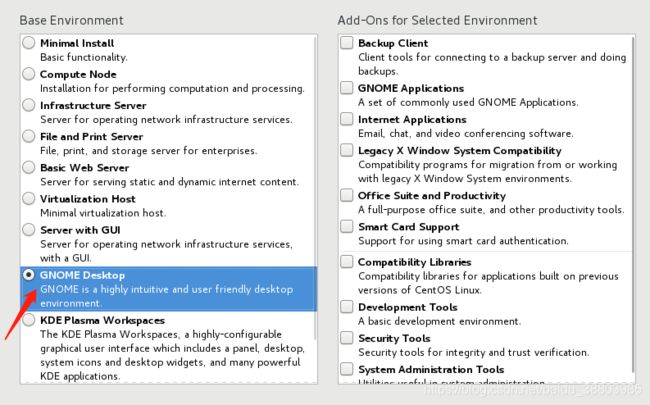
找到你的镜像文件,没有的话可以上传一份。
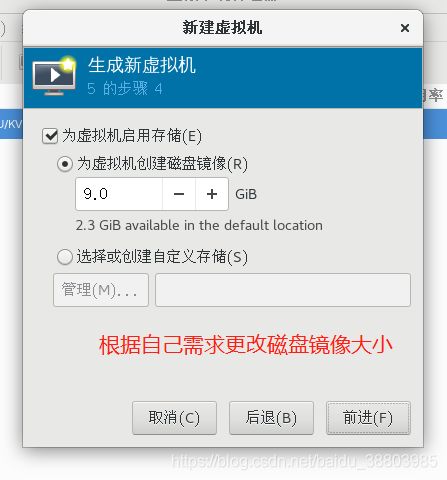
最后点击完成就可以了,这种安装方式比较简单。
3.完全文本方式安装:
如果你以文本的方式安装报错了,你可以看一下这篇文章
文本安装kvm报错
因为我们在治理用到了ftp服务,所以我们需要先把ftp服务装好
[root@localhost ~]# systemctl stop firewalld && setenforce 0  #关闭防火墙和selinux
[root@localhost ~]# yum -y install vsftpd     #安装服务
[root@localhost ~]# systemctl restart vsftpd   #启动服务
[root@localhost ~]# cd /var/ftp/
[root@localhost ftp]# mkdir centos7u3       #创建挂载点
[root@localhost ftp]# mount /root/Public/CentOS-7-x86_64-Minimal-1708.iso /var/ftp/centos7u3/   #将我们的镜像文件挂载在上面
mount: /dev/loop0 is write-protected, mounting read-only

[root@localhost ftp]# yum -y install virt-install
[root@localhost ftp]# virt-install --connect qemu:///system -n vm1 -r 2050 --disk path=/var/lib/libvirt/images/vm1.img,size=5  --os-type=linux --os-variant=centos7.0 --vcpus=1  --location=ftp://192.168.122.1/centos7u3 -x console=ttyS0 --nographics
====================================================================================
参数说明:
-n name
-r  以M为单位指定分配给虚拟机的内存大小
--disk 指定作为客户机存储的媒介 size以G为单位的存储
--os-type   针对一类操作系统优化虚拟机配置
--os-variant 针对特定操作系统变体进一步优化虚拟机配置
--vcpus
--location  客户虚拟机kernel+initrd 安装源,必须为镜像挂载在ftp目录下
-x 当执行从”–location”选项指定位置的客户机安装时,附加内核命令行参数到安装程序
--nographics 指定没有控制台被分配给客户机。
缺点:纯文本安装的输入时大小写莫名的变换,远程ssh没问题
     内存必须大于2048(-r后面)
易错:
    安装过程中:
        手动配置IP地址
        到url位置找不到路径,要返回去手动选择url,重新配置url为ftp://192.168.100.230/rhel6u4,这里的ip不要写127.0.0.1而是br0的ip
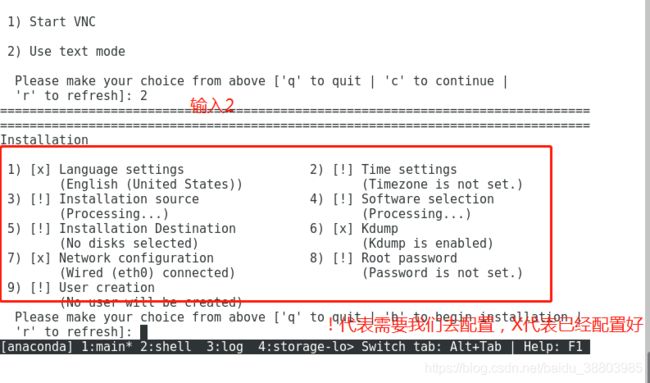


Installation

 1) [x] Language settings                 2) [x] Time settings
        (English (United States))                (Asia/Shanghai timezone)
 3) [x] Installation source               4) [x] Software selection
        (ftp://192.168.122.1/centos7u3)          (Minimal Install)
 5) [!] Installation Destination          6) [x] Kdump
        (No disks selected)                      (Kdump is enabled)
 7) [x] Network configuration             8) [!] Root password
        (Wired (eth0) connected)                 (Password is not set.)
 9) [!] User creation
        (No user will be created)
  Please make your choice from above ['q' to quit | 'b' to begin installation |
  'r' to refresh]: 5
  #1到4都默认配置好了,所以我们选择5来配置磁盘大小
================================================================================
================================================================================
Probing storage...
Installation Destination

[x] 1) : 5120 MiB (vda)

1 disk selected; 5120 MiB capacity; 5120 MiB free ...

  Please make your choice from above ['q' to quit | 'c' to continue |
  'r' to refresh]: c
  #默认是我们给的5个G,所以直接c继续
================================================================================
================================================================================
Autopartitioning Options

[ ] 1) Replace Existing Linux system(s)

[x] 2) Use All Space

[ ] 3) Use Free Space

Installation requires partitioning of your hard drive. Select what space to use
for the install target.

  Please make your choice from above ['q' to quit | 'c' to continue |
  'r' to refresh]: c
================================================================================
================================================================================
Partition Scheme Options

[ ] 1) Standard Partition

[ ] 2) Btrfs

[x] 3) LVM

[ ] 4) LVM Thin Provisioning

Select a partition scheme configuration.

  Please make your choice from above ['q' to quit | 'c' to continue |
  'r' to refresh]: c
Generating updated storage configuration
Checking storage configuration...

================================================================================
================================================================================
Installation

 1) [x] Language settings                 2) [x] Time settings
        (English (United States))                (Asia/Shanghai timezone)
 3) [x] Installation source               4) [x] Software selection
        (ftp://192.168.122.1/centos7u3)          (Minimal Install)
 5) [x] Installation Destination          6) [x] Kdump
        (Automatic partitioning                  (Kdump is enabled)
        selected)                         8) [!] Root password
 7) [x] Network configuration                    (Password is not set.)
        (Wired (eth0) connected)
 9) [!] User creation
        (No user will be created)
  Please make your choice from above ['q' to quit | 'b' to begin installation |
  'r' to refresh]: 8
  ================================================================================
================================================================================
Please select new root password. You will have to type it twice.

Password:
Password (confirm):
================================================================================
================================================================================
Question

       The password you have provided is weak: The password is too short.
       Would you like to use it anyway?

Please respond 'yes' or 'no': yes
================================================================================
================================================================================
Installation

 1) [x] Language settings                 2) [x] Time settings
        (English (United States))                (Asia/Shanghai timezone)
 3) [x] Installation source               4) [x] Software selection
        (ftp://192.168.122.1/centos7u3)          (Minimal Install)
 5) [x] Installation Destination          6) [x] Kdump
        (Automatic partitioning                  (Kdump is enabled)
        selected)                         8) [x] Root password
 7) [x] Network configuration                    (Password is set.)
        (Wired (eth0) connected)
 9) [ ] User creation
        (No user will be created)
  Please make your choice from above ['q' to quit | 'b' to begin installation |
  'r' to refresh]: 9
================================================================================
================================================================================
User creation

 1) [ ] Create user
  Please make your choice from above ['q' to quit | 'c' to continue |
  'r' to refresh]: 1
================================================================================
================================================================================
User creation

 1) [x] Create user
 2) Fullname
 3) Username
 4) [ ] Use password
 5) [ ] Administrator
 6) Groups
  Please make your choice from above ['q' to quit | 'c' to continue |
  'r' to refresh]: 4
================================================================================
================================================================================
 6) [ ] Administrator
 7) Groups
  Please make your choice from above ['q' to quit | 'c' to continue |
  'r' to refresh]: 2
================================================================================
================================================================================
Enter new value for 'Fullname' and press enter
yjssjm
================================================================================
================================================================================
User creation

 1) [x] Create user
 2) Fullname
    yjssjm
 3) Username
    yjssjm
 4) [x] Use password
 5) Password
 6) [ ] Administrator
 7) Groups
  Please make your choice from above ['q' to quit | 'c' to continue |
  'r' to refresh]: 5
================================================================================
================================================================================
Password:
Password (confirm):
================================================================================
================================================================================
Question

       The password you have provided is weak: The password is too short.
       Would you like to use it anyway?

Please respond 'yes' or 'no': yes
================================================================================
================================================================================
User creation

 1) [x] Create user
 2) Fullname
    yjssjm
 3) Username
    yjssjm
 4) [x] Use password
 5) Password
    Password set.
 6) [ ] Administrator
 7) Groups
  Please make your choice from above ['q' to quit | 'c' to continue |
  'r' to refresh]: c
================================================================================
================================================================================
Installation

 1) [x] Language settings                 2) [x] Time settings
        (English (United States))                (Asia/Shanghai timezone)
 3) [x] Installation source               4) [x] Software selection
        (ftp://192.168.122.1/centos7u3)          (Minimal Install)
 5) [x] Installation Destination          6) [x] Kdump
        (Automatic partitioning                  (Kdump is enabled)
        selected)                         8) [x] Root password
 7) [x] Network configuration                    (Password is set.)
        (Wired (eth0) connected)
 9) [x] User creation
        (User yjssjm will be created)
#这个时候所有的都配置好了,我们选择b就可以开始安装了。
Please make your choice from above ['q' to quit | 'b' to begin installation |
  'r' to refresh]: b
4.模板镜像+配置文件
1.拷贝模板镜像和配置文件
[root@localhost ~]# cp /var/lib/libvirt/images/vm1.img /var/lib/libvirt/images/vm2.img
[root@localhost ~]# cp /etc/libvirt/qemu/vm1.xml /etc/libvirt/qemu/vm2.xml
#拷贝之后,因为配置文件一模一样,所以我们需要修改配置文件
2.修改配置文件
[root@localhost ~]# vim /etc/libvirt/qemu/vm2.xml
需要修改的地方:(只要跟/etc/libvirt/qemu/vm1.xml文件里面的不一样就行)
	<name>vm2</name>        #名字肯定不能一样
  	<uuid>a2f62549-c6b7-4b8f-a8e2-c14edda35a78</uuid>    #uuid作为唯一标识,也需要修改

	<disk type='file' device='disk'>
      <driver name='qemu' type='qcow2'/>
      <source file='/var/lib/libvirt/images/vm2.img'/>    #镜像文件路径也要改
      <target dev='vda' bus='virtio'/>
      <address type='pci' domain='0x0000' bus='0x00' slot='0x06' function='0x0'/>
    </disk>

	<interface type='network'>
      <mac address='52:54:00:f2:28:6f'/>   #mac地址修改
      <source network='default'/>
      <model type='virtio'/>
      <address type='pci' domain='0x0000' bus='0x00' slot='0x03' function='0x0'/>
    </interface>

[root@localhost ~]# virsh define /etc/libvirt/qemu/vm2.xml      #加载配置文件
vm2 安装成功。