seaflle 云盘centos7 搭建
Seafile 一款开源企业云盘
环境要求
CentOS 7 64位
Python >= 2.7
SqLite 3
开始安装
复制下面的命令,依次输入,如果不出意外,会看到如下截图,请分别按照截图中的注释操作。
官方指导
wget https://bootstrap.pypa.io/get-pip.py
sudo python get-pip.py
sudo yum install java-1.7.0-openjdk poppler-utils python-setuptools \
python-imaging MySQL-python mariadb-server python-memcached python-ldap \
python-urllib3

sudo pip install boto requests
sudo /etc/init.d/mysqld start
自己总结
yum -y install wget
[root@VM_0_5_centos home]# yum -y install python-setuptools python-imaging python-ldap MySQL-python python-memcached python-urllib3
#不要忘记环境安装
wget http://seafile-downloads.oss-cn-shanghai.aliyuncs.com/seafile-server_6.3.4_x86-64.tar.gz
6.3.4版本
本来是建的mycloud手残没cd进去,在home目录下下载安装了
root@VM_0_5_centos home]# tar xzf seafile-server_6.3.4_x86-64.tar.gz
cd seafile-server-6.3.4/
./setup-seafile.sh
root@VM_0_5_centos seafile-server-6.3.4]# ./setup-seafile.sh       #执行安装
-----------------------------------------------------------------
This script will guide you to config and setup your seafile server.

Make sure you have read seafile server manual at

	https://github.com/haiwen/seafile/wiki

Note: This script will guide your to setup seafile server using sqlite3,
which may have problems if your disk is on a NFS/CIFS/USB.
In these cases, we sugguest you setup seafile server using MySQL.

Press [ENTER] to continue
-----------------------------------------------------------------


Checking packages needed by seafile ...

Checking python on this machine ...
Find python: python2.7

  Checking python module: setuptools ... Done.
  Checking python module: python-imaging ... Done.
  Checking python module: python-sqlite3 ... Done.

Checking for sqlite3 ...Done.

Checking Done.


What would you like to use as the name of this seafile server?
Your seafile users will be able to see the name in their seafile client.
You can use a-z, A-Z, 0-9, _ and -, and the length should be 3 ~ 15
[server name]: mycloud

What is the ip or domain of this server?
For example, www.mycompany.com, or, 192.168.1.101

[This server's ip or domain]: 129.28.152.162   #我自己的云端ip
输入服务名(如mycloud)
填写服务器公网IP
一路4个回车
What tcp port do you want to use for seafile fileserver?
8082 is the recommended port.
[default: 8082 ]


This is your config information:

server name:        mycloud               #
server ip/domain:   129.28.152.162        #                   #确认信息
seafile data dir:   /home/seafile-data    #
fileserver port:    8082                  #

If you are OK with the configuration, press [ENTER] to continue.

Generating ccnet configuration in /home/ccnet...

done
Successly create configuration dir /home/ccnet.

Generating seafile configuration in /home/seafile-data ...

Done.

-----------------------------------------------------------------
Seahub is the web interface for seafile server.
Now let's setup seahub configuration. Press [ENTER] to continue
-----------------------------------------------------------------


Creating seahub database now, it may take one minute, please wait...
./seafile.sh start
./seahub.sh start
----------------------------------------
It's the first time you start the seafile server. Now let's create the admin account
----------------------------------------

What is the email for the admin account?
[ admin email ] [email protected]        #管理员邮箱 格式要规范

What is the password for the admin account?
[ admin password ]

Enter the password again:
[ admin password again ]


----------------------------------------
Successfully created seafile admin
----------------------------------------
输入两次密码确认
设置管理员邮箱和密码(密码是不会显示的,输入完毕后直接回车)
当你看到如下界面,说明已经安装完成,直接输入http//:IP:8000进行访问,接下来的操作只要你能看懂中文就不是什么问题了,Seafile还提供了多平台客户端(见文末)。
输入刚刚设置的邮箱和密码登录
其它说明
安装目录和服务如下,如果您还需要配置更多的功能或扩展,请访问官方帮助文档:https://manual-cn.seafile.com/
安装目录
/home/
启动服务
/home/MyCloud/seafile-server/seafile.sh start
/home/MyCloud/seafile-server/seahub.sh start
停止服务
/home/MyCloud/seafile-server/seafile.sh stop
/home/MyCloud/seafile-server/seahub.sh stop
。
[root@VM_0_5_centos seafile-server-6.3.4]# ss -tnl
State       Recv-Q Send-Q      Local Address:Port                     Peer Address:Port
LISTEN      0      128             127.0.0.1:6379                                *:*
LISTEN      0      128                     *:80                                  *:*
LISTEN      0      128                     *:8082                                *:*
LISTEN      0      128                     *:22                                  *:*
LISTEN      0      128                     *:8000                                *:*
LISTEN      0      128                     *:10050                               *:*
LISTEN      0      128                     *:10051                               *:*
LISTEN      0      80                     :::3306                               :::*
LISTEN      0      32                     :::21                                 :::*
LISTEN      0      128                    :::3000                               :::*
LISTEN      0      128                    :::10050                              :::*
LISTEN      0      128                    :::10051                              :::*
8082,8000启动
输入ip访问
输入设置的邮箱名和密码
成功访问
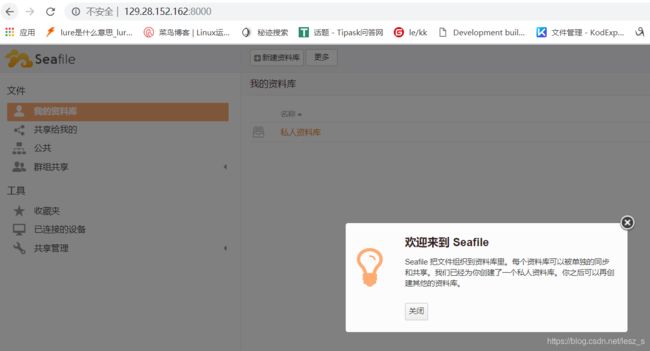
访问成功