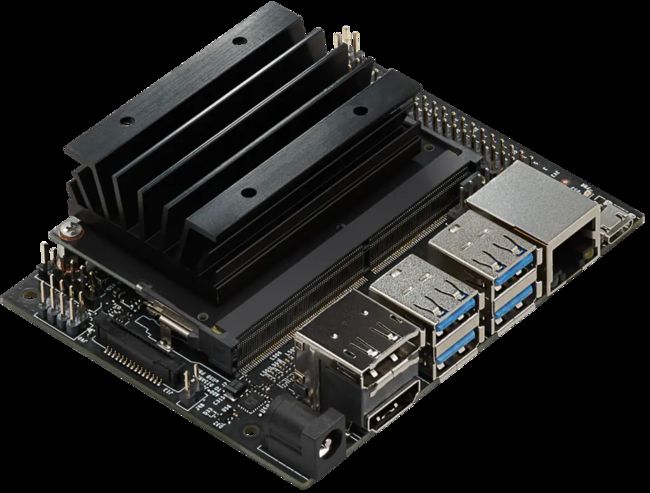
Nvidia Jetson Nano 安装
官方安装步骤
参考: https://developer.nvidia.com/embedded/learn/get-started-jetson-nano-devkit#intro
注意问题:
1、制作SD 镜像时,支持128GB的SD卡,刚开始用的SD卡读卡器太差,导致做出来的boot image启动不了,后面换了好的读卡器,用etcher烧写成功;
2、供电,通过5V,2.5A的micro USB供电会突然重启,换成了直流电源,跳到5.4V, 用电源口供电J48跳线帽要短接
性能
$ sudo nvpmodel -q --verbose
参考:https://docs.nvidia.com/deeplearning/dgx/install-tf-xavier/index.html
官方数据
https://devblogs.nvidia.com/jetson-nano-ai-computing/

安装tensorflow
官方:https://docs.nvidia.com/deeplearning/dgx/install-tf-xavier/index.html
$ pip3 install --pre --extra-index-url https://developer.download.nvidia.com/compute/redist/jp/v42 tensorflow-gpu
运行标准的mobilenetv2
参考:https://github.com/tensorflow/models/tree/master/research/slim/nets/mobilenet
-
下载:
模型:wget https://storage.googleapis.com/mobilenet_v2/checkpoints/mobilenet_v2_1.0_224.tgz
图片:wget https://upload.wikimedia.org/wikipedia/commons/f/fe/Giant_Panda_in_Beijing_Zoo_1.JPG -O panda.jpg -
在models-master/research/slim目录运行,test.py, 修改来自https://github.com/tensorflow/models/blob/master/research/slim/nets/mobilenet/mobilenet_example.ipynb
import tensorflow as tf
from nets.mobilenet import mobilenet_v2
from datasets import imagenet
import PIL
import numpy as np
import sys
import time
sys.path.append('/home/nvlab/ai/models-master/research/slim')

base_name = "mobilenet_v2_1.0_224"
checkpoint = base_name + '.ckpt'

tf.reset_default_graph()

# For simplicity we just decode jpeg inside tensorflow.
# But one can provide any input obviously.
file_input = tf.placeholder(tf.string, ())

image = tf.image.decode_jpeg(tf.read_file(file_input))

images = tf.expand_dims(image, 0)
images = tf.cast(images, tf.float32) / 128.  - 1
images.set_shape((None, None, None, 3))
images = tf.image.resize_images(images, (224, 224))

# Note: arg_scope is optional for inference.
with tf.contrib.slim.arg_scope(mobilenet_v2.training_scope(is_training=False)):
  logits, endpoints = mobilenet_v2.mobilenet(images)

# Restore using exponential moving average since it produces (1.5-2%) higher
# accuracy
ema = tf.train.ExponentialMovingAverage(0.999)
vars = ema.variables_to_restore()

saver = tf.train.Saver(vars)


with tf.Session() as sess:
  saver.restore(sess,  checkpoint)
  x = endpoints['Predictions'].eval(feed_dict={file_input: 'panda.jpg'})
label_map = imagenet.create_readable_names_for_imagenet_labels()
print("Top 1 prediction: ", x.argmax(),label_map[x.argmax()], x.max())

img = np.array(PIL.Image.open('panda.jpg').resize((224, 224))).astype(np.float) / 128 - 1
gd = tf.GraphDef.FromString(open(base_name + '_frozen.pb', 'rb').read())
inp, predictions = tf.import_graph_def(gd,  return_elements = ['input:0', 'MobilenetV2/Predictions/Reshape_1:0'])
with tf.Session(graph=inp.graph):
  print(time.time())
  x = predictions.eval(feed_dict={inp: img.reshape(1, 224,224, 3)})
  x = predictions.eval(feed_dict={inp: img.reshape(1, 224,224, 3)})
  x = predictions.eval(feed_dict={inp: img.reshape(1, 224,224, 3)})
  x = predictions.eval(feed_dict={inp: img.reshape(1, 224,224, 3)})
  x = predictions.eval(feed_dict={inp: img.reshape(1, 224,224, 3)})
  print(time.time())

label_map = imagenet.create_readable_names_for_imagenet_labels()
print("Top 1 Prediction: ", x.argmax(),label_map[x.argmax()], x.max())
测试时间为2s,显然不符合,需要运行优化后的TensorRT模型
运行官方优化过的TensorRT mobilenetv2
参考:https://devtalk.nvidia.com/default/topic/1049802/jetson-nano/object-detection-with-mobilenet-ssd-slower-than-mentioned-speed/
步骤
下载准备
$ cd ~/Downloads/
$ wget --no-check-certificate 'https://nvidia.box.com/shared/static/8oqvmd79llr6lq1fr43s4fu1ph37v8nt.gz' -O ssd-mobilenet-v2.tar.gz
$ tar -xvf ssd-mobilenet-v2.tar.gz
$ cd ssd-mobilenet-v2
$ sudo cp -R sampleUffSSD_rect /usr/src/tensorrt/samples
$ sudo cp sample_unpruned_mobilenet_v2.uff /usr/src/tensorrt/data/ssd/
$ sudo cp image1.ppm /usr/src/tensorrt/data/ssd/

编译
$ cd /usr/src/tensorrt/samples/sampleUffSSD_rect
$ sudo make

运行
$ sudo jetson_clocks
$ cd /usr/src/tensorrt/bin
$ sudo ./sample_uff_ssd_rect
测试时间为26ms,接近官方的数据
安装pycuda
出现找不到"cuda.h"和curand库
 src/cpp/cuda.hpp:14:10: fatal error: cuda.h: No such file or directory

 /usr/bin/ld: cannot find -lcurand
  collect2: error: ld returned 1 exit status
  error: command 'aarch64-linux-gnu-g++' failed with exit status 1

  ----------------------------------------
  Failed building wheel for pycuda
查找发现库不在标准路径
nvlab@nvlab-desktop:~$ find /usr/local -name "cuda.h"
/usr/local/cuda-10.0/targets/aarch64-linux/include/cuda.h

nvlab@nvlab-desktop:~$ find /usr/local -name "libcurand.so"
/usr/local/cuda-10.0/targets/aarch64-linux/lib/libcurand.so
/usr/local/cuda-10.0/targets/aarch64-linux/lib/stubs/libcurand.so
执行下面安装命令成功
export CPATH=$CPATH:/usr/local/cuda/targets/aarch64-linux/include
export LIBRARY_PATH=$LIBRARY_PATH:/usr/local/cuda-10.0/targets/aarch64-linux/lib/
pip3 install 'pycuda>=2017.1.1'
开发demo
https://docs.nvidia.com/deeplearning/sdk/tensorrt-sample-support-guide/index.html
参考:https://docs.nvidia.com/deeplearning/sdk/tensorrt-developer-guide/index.html#importing_trt_python
1 下载训练好的模型
https://github.com/tensorflow/models/blob/master/research/object_detection/g3doc/detection_model_zoo.md
2 转换模型
2.1 Freezing
参考:https://www.tensorflow.org/guide/extend/model_files#freezing
2.2 convert_to_uff.py
convert_to_uff.py命令位于:/usr/lib/python3.6/dist-packages/uff/bin
python3 convert_to_uff.py ../../ssd_mobilenet_v2_coco_2018_03_29/frozen_inference_graph.pb
结果异常
Traceback (most recent call last):
  File "convert_to_uff.py", line 93, in
    main()
  File "convert_to_uff.py", line 89, in main
    debug_mode=args.debug
  File "/usr/lib/python3.6/dist-packages/uff/converters/tensorflow/conversion_helpers.py", line 187, in from_tensorflow_frozen_model
    return from_tensorflow(graphdef, output_nodes, preprocessor, **kwargs)
  File "/usr/lib/python3.6/dist-packages/uff/converters/tensorflow/conversion_helpers.py", line 157, in from_tensorflow
    debug_mode=debug_mode)
  File "/usr/lib/python3.6/dist-packages/uff/converters/tensorflow/converter.py", line 94, in convert_tf2uff_graph
    uff_graph, input_replacements, debug_mode=debug_mode)
  File "/usr/lib/python3.6/dist-packages/uff/converters/tensorflow/converter.py", line 79, in convert_tf2uff_node
    op, name, tf_node, inputs, uff_graph, tf_nodes=tf_nodes, debug_mode=debug_mode)
  File "/usr/lib/python3.6/dist-packages/uff/converters/tensorflow/converter.py", line 47, in convert_layer
    return cls.registry_[op](name, tf_node, inputs, uff_graph, **kwargs)
  File "/usr/lib/python3.6/dist-packages/uff/converters/tensorflow/converter_functions.py", line 184, in convert_transpose
    raise UffException("Transpose permutation has op " + str(tf_permutation_node.op) + ", expected Const. Only constant permuations are supported in UFF.")
uff.model.exceptions.UffException: Transpose permutation has op Sub, expected Const. Only constant permuations are supported in UFF.
论坛帖子的答复是TensorRT uff对一些操作还不支持,需要用TF-TRT, 详见: https://devtalk.nvidia.com/default/topic/1048051/convert-a-mask-rcnn-with-tfs-fronzen-graph-format-to-uff-fail/

3 tf-tensorrt
参考:https://docs.nvidia.com/deeplearning/dgx/tf-trt-user-guide/index.html
python demo
https://docs.nvidia.com/deeplearning/sdk/tensorrt-sample-support-guide/index.html#introductory_parser_samples