springboot數據庫配置
知識點和問題匯總
- 1.对于数据访问层
- 2.jdbc访问mysql
- 3.配置druid连接
- 4.整合mybatis--注解方式
- 5.整合mybatis--配置文件方式
- 6.Spring Data
- 7.整合jpa来操作数据库
1.对于数据访问层
无论是SQL还是NOSQL,SpringBoot默认采用整合SpringData的方式进行统一处理,添加大量自动配置,屏蔽了很多设置。引入各种xxxTemplate,xxxRepository来简化我们对数据访问层的操作。对我们来说只需要进行简单的设置即可。
Spring-boot-starter-data-XXX
2.jdbc访问mysql
1.在创建项目的时候勾选上mysql和jdbc
2.pom.xml中的配置如下:
<dependency>
	<groupId>org.springframework.bootgroupId>
	<artifactId>spring‐boot‐starter‐jdbcartifactId>dependency>
<dependency>
<dependency>
	<groupId>mysqlgroupId>
	<artifactId>mysql-connector-javaartifactId>
	<scope>runtimescope>
dependency>
3.application.yml中配置如下
spring:
 datasource:
  username: rootpassword:123456
  url: jdbc:mysql://192.168.15.22:3306/jdbc
  driver‐class‐name: com.mysql.jdbc.Driver
效果:
默认是用org.apache.tomcat.jdbc.pool.DataSource作为数据源;
数据源的相关配置都在DataSourceProperties里面;
自动配置原理:org.springframework.boot.autoconfigure.jdbc:
1、参考DataSourceConfiguration,根据配置创建数据源,默认使用Tomcat连接池;可以使用spring.datasource.type指定自定义的数据源类型;
2、SpringBoot默认可以支持;
org.apache.tomcat.jdbc.pool.DataSource、HikariDataSource、BasicDataSource
3、自定义数据源类型
/**
* Generic DataSource configuration.
*/
@ConditionalOnMissingBean(DataSource.class)
@ConditionalOnProperty(name = "spring.datasource.type")
static class Generic {
@Bean
public DataSource dataSource(DataSourceProperties properties) {
//使用DataSourceBuilder创建数据源,利用反射创建响应type的数据源,并且绑定相关属性
return properties.initializeDataSourceBuilder().build();
}
}
4、DataSourceInitializer:ApplicationListener;
作用:
1)、runSchemaScripts();运行建表语句;
2)、runDataScripts();运行插入数据的sql语句;
默认只需要将文件命名为:
schema‐*.sql、data‐*.sql
默认规则:schema.sql,schema‐all.sql;
可以在datasource下面使用
 schema:
  - classpath:department.sql
指定位置
5、操作数据库:自动配置了JdbcTemplate操作数据库,可以通过标签@Autowired进行加载
3.配置druid连接
1.引入依赖
<dependency>
    <groupId>com.alibabagroupId>
    <artifactId>druidartifactId>
    <version>1.1.10version>
dependency>
2.修改配置文件
spring:
  datasource:
    username: root
    password: 123456
    url: jdbc:mysql://192.168.15.22:3306/jdbc
    driver-class-name: com.mysql.jdbc.Driver
    type: com.alibaba.druid.pool.DruidDataSource

    initialSize: 5
    minIdle: 5
    maxActive: 20
    maxWait: 60000
    timeBetweenEvictionRunsMillis: 60000
    minEvictableIdleTimeMillis: 300000
    validationQuery: SELECT 1 FROM DUAL
    testWhileIdle: true
    testOnBorrow: false
    testOnReturn: false
    poolPreparedStatements: true


#配置监控统计拦截的filters,去掉后监控界面sql无法统计,'wall'用于防火墙
    filters: stat,wall,log4j
    maxPoolPreparedStatementPerConnectionSize: 20
    useGlobalDataSourceStat: true
    connectionProperties: druid.stat.mergeSql=true;druid.stat.slowSqlMillis=500
    #   schema:
#- classpath:department.sql
3.配置测试:
RunWith(SpringRunner.class)
@SpringBootTest
public class SpringBoot06DataJdbcApplicationTests {
	@Autowired
	DataSource dataSource;
	@Test
	public void contextLoads() throws SQLException {
		//org.apache.tomcat.jdbc.pool.DataSource
		System.out.println(dataSource.getClass());

		Connection connection = dataSource.getConnection();
		System.out.println(connection);
		connection.close();
	}
}
4.自定义配置类
@Configuration
public class DruidConfig {
    @ConfigurationProperties(prefix = "spring.datasource")
    @Bean
    public DataSource druid(){
       return  new DruidDataSource();
    }
}
5.配置监控统
@Configuration
public class DruidConfig {
    @ConfigurationProperties(prefix = "spring.datasource")
    @Bean
    public DataSource druid(){
       return  new DruidDataSource();
    }
    //配置Druid的监控
    //1、配置一个管理后台的Servlet
    @Bean
    public ServletRegistrationBean statViewServlet(){
        ServletRegistrationBean bean = new ServletRegistrationBean(new StatViewServlet(), "/druid/*");
        Map<String,String> initParams = new HashMap<>();
        initParams.put("loginUsername","admin");
        initParams.put("loginPassword","123456");
        initParams.put("allow","");//默认就是允许所有访问
        initParams.put("deny","192.168.15.21");
        bean.setInitParameters(initParams);
        return bean;
    }
    //2、配置一个web监控的filter
    @Bean
    public FilterRegistrationBean webStatFilter(){
        FilterRegistrationBean bean = new FilterRegistrationBean();
        bean.setFilter(new WebStatFilter());
        Map<String,String> initParams = new HashMap<>();
        initParams.put("exclusions","*.js,*.css,/druid/*");
        bean.setInitParameters(initParams);
        bean.setUrlPatterns(Arrays.asList("/*"));
        return  bean;
    }
}
4.整合mybatis–注解方式
1.新建议一个工程
file->project->spring Initializr
web中勾选spring web
sql中勾选jdbc、mysql、mybatis
2.pom.xml中的关键配置依赖
    org.mybatis.spring.boot
    mybatis-spring-boot-starter
    2.1.3
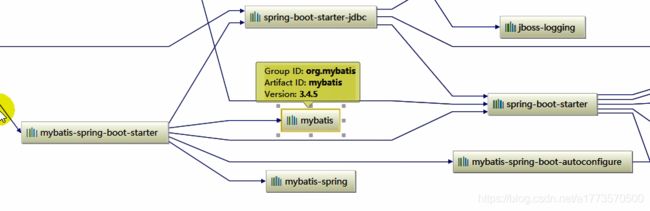
依赖包之间的关系图
3.引入druid连接池配置
    com.alibaba
    druid
    1.1.12
4.配置application.yml文件
spring:
  datasource:
    username: root
    password: 123456
    url: jdbc:mysql://192.168.15.22:3306/mybatis?useUnicode=true&characterEncoding=utf-8&serverTimezone=UTC&useSSL=true&allowMultiQueries=TRUE
    driver-class-name: com.mysql.jdbc.Driver
    type: com.alibaba.druid.pool.DruidDataSource

    initialSize: 5
    minIdle: 5
    maxActive: 20
    maxWait: 60000
    timeBetweenEvictionRunsMillis: 60000
    minEvictableIdleTimeMillis: 300000
    validationQuery: SELECT 1 FROM DUAL
    testWhileIdle: true
    testOnBorrow: false
    testOnReturn: false
    poolPreparedStatements: true
    #   配置监控统计拦截的filters,去掉后监控界面sql无法统计,'wall'用于防火墙
    filters: stat,wall,log4j
    maxPoolPreparedStatementPerConnectionSize: 20
    useGlobalDataSourceStat: true
    connectionProperties: druid.stat.mergeSql=true;druid.stat.slowSqlMillis=500
    initialization-mode: always
    schema:
      - classpath:sql/department.sql
      - classpath:sql/employee.sql
5.配置类
@Configuration
public class DruidConfig {
    @ConfigurationProperties(prefix = "spring.datasource")
    @Bean
    public DataSource druid(){
        return  new DruidDataSource();
    }
    //配置Druid的监控
    //1、配置一个管理后台的Servlet
    @Bean
    public ServletRegistrationBean statViewServlet(){
        ServletRegistrationBean bean = new ServletRegistrationBean(new StatViewServlet(), "/druid/*");
        Map<String,String> initParams = new HashMap<>();
        initParams.put("loginUsername","admin");
        initParams.put("loginPassword","123456");
        initParams.put("allow","");//默认就是允许所有访问
        initParams.put("deny","192.168.15.21");
        bean.setInitParameters(initParams);
        return bean;
    }
    //2、配置一个web监控的filter
    @Bean
    public FilterRegistrationBean webStatFilter(){
        FilterRegistrationBean bean = new FilterRegistrationBean();
        bean.setFilter(new WebStatFilter());
        Map<String,String> initParams = new HashMap<>();
        initParams.put("exclusions","*.js,*.css,/druid/*");
        bean.setInitParameters(initParams);
        bean.setUrlPatterns(Arrays.asList("/*"));
        return  bean;
    }
}
5.数据库中配置一些表
在application.yml中进行配置
schema:
- classpath:sql/department.sql
- classpath:sq/employee.sql
6.运行查看数据库表是否被创建、查看 druid页面是否可以登录
7.创建对应的bean
8.注解配置
创建mapper
@Mapper
public interface DepartmentMapper {
    @Select("select * from department where id=#{id}")
    public Department getDeptById(Integer id);
    @Delete("delect from department where id=#{id}")
    public int deleteDeptById(Integer id);
	@Options(useGeneratedKeys = true,keyProperty = "id")
    @Insert("insert into department(departmentName) values(#{departmentName})")
    public int insertDept(Department department);
    @Update("update department set departmentName=#{departmentName} where id=#{id}")
    public int updateDept(Department department);
}
9.编写controller测试
@RestController
public class DeptController {

    @Autowired
    DepartmentMapper departmentMapper;

    @GetMapping("/dept/{id}")
    public Department getDepartment(@PathVariable("id") Integer id) {
        return departmentMapper.getDeptById(id);
    }

    @GetMapping("/dept")
    public Department insertDept(Department department) {
        departmentMapper.insertDept(department);
        return department;
    }
}
10.配置pom.xml文件
<dependency>
		    <groupId>log4jgroupId>
		    <artifactId>log4jartifactId>
		    <version>1.2.17version>
		dependency>
11.运行测试
12.开启数据库查询语句到bean的驼峰命名映射配置类
@Configuration
public class MyBatisConfig {
    public ConfigurationCustomizer configurationCustomizer(){
        return new ConfigurationCustomizer() {
            @Override
            public void customize(org.apache.ibatis.session.Configuration configuration) {
                configuration.setMapUnderscoreToCamelCase(true);
            }
        };
    }
}
13.如果某个包下面不标注mapper注解,可以在启动类上添加图下配置:
@MapperScan(value="com.atguigu.springboot.mapper")
5.整合mybatis–配置文件方式
1.配置接口
@Mapper
public interface EmployeeMapper {
    public Employee getEmpById(Integer id);
    public void insertEmp(Employee employee);
}
2.配置目录resources/mybatis/mapper下的xml文件
<mapper namespace="com.atguigu.springbootmybatis.mapper.EmployeeMapper">

    <select id="getEmpById" resultType="com.atguigu.springbootmybatis.bean.Employee">
        SELECT * FROM employee WHERE id=#{id}
    select>
    <insert id="insertEmp">
        INSERT INTO employee(lastName,email,gender,d_id) VALUES (#{lastName},#{email},#{gender},#{dId})
    insert>
mapper>
3.配置yml文件
mybatis:
  config-location: classpath:mybatis/mybatis-config.xml
  mapper-locations: classpath:mybatis/mapper/*.xml
4.测试
@RestController
public class DeptController {
    @Autowired
    EmployeeMapper employeeMapper;
    @GetMapping("/emp/{id}")
    public Employee getEmp(@PathVariable("id") Integer id){
        return employeeMapper.getEmpById(id);
    }
}
5.可在配置文件mybatis/mybatis-config.xml中配置驼峰命名,上题中注解配置的方式无效
<configuration>
    <settings>
        <setting name="mapUnderscoreToCamelCase" value="true"/>
    settings>
configuration>
另一种配置方式,切换环境方式
配置文件application.yml的配置如下:
spring:
  profiles:
    active: test
application-test.yml的配置如下:
spring:
  datasource:
    #141
    master:
      driver-class-name: com.mysql.cj.jdbc.Driver
      url: jdbc:mysql://192.168.50.141:3306/skpathcenterdatabase?useUnicode=true&characterEncoding=utf-8&serverTimezone=UTC&useSSL=true&allowMultiQueries=TRUE
      username: XXX
      password: XXX

    slaver:
      driver-class-name: com.mysql.cj.jdbc.Driver
      url: jdbc:mysql://192.168.50.141:3306/skpathcenterdatabase?useUnicode=true&characterEncoding=utf-8&serverTimezone=UTC&useSSL=true&allowMultiQueries=TRUE
      username: XXX
      password: XXX
    backups:
      driver-class-name: com.mysql.cj.jdbc.Driver
      url: jdbc:mysql://192.168.50.141:3306/skpathcenterdatabase?useUnicode=true&characterEncoding=utf-8&serverTimezone=UTC&useSSL=true&allowMultiQueries=TRUE
      username: XXX
      password: XXX
配置类信息如下:
@Configuration
@MapperScan(basePackages = "com.changdao.skpathcenterapi.mapper.backups", sqlSessionTemplateRef  = "backupsSqlSessionTemplate")
public class BackupsDataSourceConfiguration {

	@Value("${spring.datasource.backups.driver-class-name}")
    private String driverClassName;

    @Value("${spring.datasource.backups.url}")
    private String url;

    @Value("${spring.datasource.backups.username}")
    private String username;

    @Value("${spring.datasource.backups.password}")
    private String password;


    @Bean(name = "backupsDataSource")
    public DataSource dataSource() {
    	DruidDataSource dataSource = new DruidDataSource();
        dataSource.setDriverClassName(this.driverClassName);
        dataSource.setUrl(this.url);
        dataSource.setUsername(this.username);
        dataSource.setPassword(this.password);
        return dataSource;
    }

    @Bean(name = "backupsSqlSessionFactory")
    public SqlSessionFactory sqlSessionFactory(@Qualifier("backupsDataSource") DataSource dataSource) throws Exception {
        SqlSessionFactoryBean bean = new SqlSessionFactoryBean();
        bean.setDataSource(dataSource);
        bean.setMapperLocations(new PathMatchingResourcePatternResolver().getResources("classpath*:mybatis/backups/*.xml"));
        return bean.getObject();
    }

    @Bean(name = "backupsTransactionManager")
    public DataSourceTransactionManager transactionManager(@Qualifier("backupsDataSource") DataSource dataSource) {
        return new DataSourceTransactionManager(dataSource);
    }

    @Bean(name = "backupsSqlSessionTemplate")
    public SqlSessionTemplate sqlSessionTemplate(@Qualifier("backupsSqlSessionFactory") SqlSessionFactory sqlSessionFactory) throws Exception {
        return new SqlSessionTemplate(sqlSessionFactory);
    }

}
6.Spring Data
SpringData为我们提供使用统一的API来对数据访问层进行操作;这主要是Spring Data Commons项目来实现的。Spring Data Commons让我们在使用关系型或者非关系型数据访问技术时都基于Spring提供的统一标准,标准包含了CRUD(创建、获取、更新、删除)、查询、排序和分页的相关操作。
2、统一的Repository接口
Repository
RevisionRepository
CrudRepository
PagingAndSortingRepository
3.提供数据访问模板类 xxxTemplate;
如:MongoTemplate、RedisTemplate等

7.整合jpa来操作数据库
file->new->project
选中web、jdbc、jpa、mysql
1.对配置文件application.yml进行配置
spring:
  datasource:
    username: root
    password: stoneSml@123
    url: jdbc:mysql://192.168.15.22:3306/mybatis?useUnicode=true&characterEncoding=utf-8&serverTimezone=UTC&useSSL=true&allowMultiQueries=TRUE
    driver-class-name: com.mysql.cj.jdbc.Driver
2.创建实体类,并放上相应的注解
@Entity//告诉JPA这是一个实体类
@Table(name="tb1_user")//指定是哪个表,如果省略默认表名是usr
public class User {
	@Id //这是一个主键
    @GeneratedValue(strategy = GenerationType.IDENTITY)//自增主键
    private Integer id;
	@Column(name = "last_name",length = 50) //这是和数据表对应的一个列
    private String lastName;
	@Column //省略默认列名就是属性名
    private String email;
	//省略get和set
}
//继承JpaRepository来完成对数据库的操作
public interface UserRepository extends JpaRepository<User,Integer> {
}
4.配置application.yml文件
spring:
  datasource:
    username: root
    password: stoneSml@123
    url: jdbc:mysql://192.168.15.22:3306/mybatis?useUnicode=true&characterEncoding=utf-8&serverTimezone=UTC&useSSL=true&allowMultiQueries=TRUE
    driver-class-name: com.mysql.cj.jdbc.Driver
  jpa:
    hibernate:
#     更新或者创建数据表结构
      ddl-auto: update
#    控制台显示SQL
    show-sql: true
5.运行测试类
@RestController
public class UserController {
    @Autowired
    UserRepository userRepository;
    @GetMapping("/user/{id}")
    public User getUser(@PathVariable("id") Integer id){
        User user = userRepository.findOne(id);
        return user;
    }
    @GetMapping("/user")
    public User insertUser(User user){
        User save = userRepository.save(user);
        return save;
    }
}