上一篇:5.Python多版本共存配置
下一篇:7.爬虫基本原理
urllib re
- python内置库:通常安装好python即可,防止万一测试,
C:\Users\Administrator>python
>>> import urllib
>>> import re
>>> import urllib.request
>>> urllib.request.urlopen("http://www.baidu.com")

>>>
requests
- 请求库,使用pip下载
C:\Users\Administrator>pip3 install requests
Collecting requests
  Downloading https://files.pythonhosted.org/packages/49/df/50aa1999ab9bde74656c2919d9c0c085fd2b3775fd3eca826012bef76d8c/requests-2.18.4-py2.py3-none-any.whl (88kB)
    100% |████████████████████████████████| 92kB 155kB/s
Requirement already satisfied: idna<2.7,>=2.5 in d:\python\lib\site-packages (from requests)
Collecting certifi>=2017.4.17 (from requests)
  Downloading https://files.pythonhosted.org/packages/7c/e6/92ad559b7192d846975fc916b65f667c7b8c3a32bea7372340bfe9a15fa5/certifi-2018.4.16-py2.py3-none-any.whl (150kB)
    100% |████████████████████████████████| 153kB 399kB/s
Collecting chardet<3.1.0,>=3.0.2 (from requests)
  Downloading https://files.pythonhosted.org/packages/bc/a9/01ffebfb562e4274b6487b4bb1ddec7ca55ec7510b22e4c51f14098443b8/chardet-3.0.4-py2.py3-none-any.whl (133kB)
    100% |████████████████████████████████| 143kB 964kB/s
Collecting urllib3<1.23,>=1.21.1 (from requests)
  Downloading https://files.pythonhosted.org/packages/63/cb/6965947c13a94236f6d4b8223e21beb4d576dc72e8130bd7880f600839b8/urllib3-1.22-py2.py3-none-any.whl (132kB)
    100% |████████████████████████████████| 133kB 1.3MB/s
Installing collected packages: certifi, chardet, urllib3, requests
Successfully installed certifi-2018.4.16 chardet-3.0.4 requests-2.18.4 urllib3-1.22
测试
C:\Users\Administrator>python
Python 3.6.4 (v3.6.4:d48eceb, Dec 19 2017, 06:54:40) [MSC v.1900 64 bit (AMD64)] on win32
Type "help", "copyright", "credits" or "license" for more information.
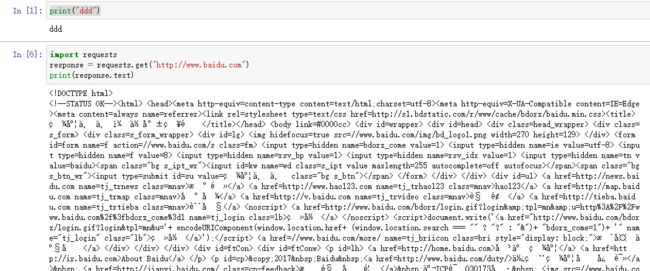
>>> import requests
>>> requests.get("http://www.baidu.com")
>>>
可以完成正常的网页请求
selenium
- 自动化测试使用,驱动浏览器
安装pip3 install selenium
测试:会报错,需要chromedriver库
>>> import selenium
>>> from selenium import webdriver
>>> driver= webdriver.Chrome()
chromedriver
国内镜像:http://npm.taobao.org/mirrors/chromedriver/2.28/下载
解压到:D:\python\Scripts
再次测试seleium,会看到浏览器闪烁(也有可能直接打开浏览器,但是提示测试)
>>> import selenium
>>> from selenium import webdriver
>>> driver = webdriver.Chorme()
Traceback (most recent call last):
  File "", line 1, in
AttributeError: module 'selenium.webdriver' has no attribute 'Chorme'
>>> driver = webdriver.Chrome()

DevTools listening on ws://127.0.0.1:12507/devtools/browser/3d0b8619-ce35-4256-a434-b7b3e9c8515f
[6148:6204:0516/185602.194:ERROR:ssl_client_socket_impl.cc(1147)] handshake failed; returned -1, SSL error code 1, net_error -100
>>>
继续输入
>>> driver.get("http://www.baidu.com")
浏览器跳出百度网址
driver.page_source打印源代码
phantomjs
- 无界面浏览器,不用打开浏览器爬虫
官网下载:http://phantomjs.org/
配置环境变量D:\phantomjs-2.1.1-windows\bin
可以在cmd操作:
C:\Users\Administrator>phantomjs
phantomjs> conslole.log("HelloWorld")
phantomjs> console.log("HelloWorld")
HelloWorld
undefined
phantomjs>
测试:期间提示联网确定,这样就不用打开浏览器,实现输出百度源代码
>>> from selenium import webdriver
>>> driver = webdriver.Phantomjs
>>> driver = webdriver.PhantomJS()
D:\python\lib\site-packages\selenium\webdriver\phantomjs\webdriver.py:49: UserWarning: Selenium support for PhantomJS has been deprecated, please use headless versions of Chrome or Firefox instead
 warnings.warn('Selenium support for PhantomJS has been deprecated, please use headless '
>>> driver = webdriver.PhantomJS()
>>> driver.get("http://www.baidu.com")
>>> driver.page_resouce
>>> driver.page_source
lxml
- 网页解析库
pip3 install lxml安装
如果速度过慢,可以使用pypi方式
1、pip3 install wheel
2、下载https://pypi.org/project/lxml/3.7.3/#files
3、pip install D:\360极速浏览器下载\lxml-3.7.3-cp36-cp36m-win_amd64.whl
beautifulsoup
- 网页解析库,需要先下载lxml
pip3 install beautifulsoup4
测试:
>>> from bs4 import BeautifulSoup
>>> soup = BeautifulSoup("","lxml")
pyquery
- 网页解析库
更加方便(jquery)
pip安装
测试
>>> from pyquery import PyQuery as pq
>>> doc = pq('')
>>> doc = pq('Hello')
>>> result  = doc('html').text()
>>> result
'Hello'
>>>
pymysql
pymongo
- 操作mongodb,打开mongdb服务然后下载
pip install pymogo
测试:
>>> import pymogo
>>> import pymongo
>>> client = pymogo.MongoClient('localhost')
>>> client = pymongo.MongoClient('localhost')
>>> db = client['newtestdb']
>>> db['table'].insert({"aa":"bb"})
ObjectId('5afc1f7f0b89c8123c4ba2e3')
>>> db['table'].find_one({"aa":"bb"})
{'_id': ObjectId('5afc1f7f0b89c8123c4ba2e3'), 'aa': 'bb'}
>>>
redis
pip安装pip3 install redis
测试
>>> import redis
>>> r = redis.Redis('localhost',6379)
>>> r.set('name',lsy)
>>> r.set('name','lsy')
True
>>> r.get('name')
b'lsy'
>>>
flask
web库
flask官方文档:http://docs.jinkan.org/docs/flask/
Django
jupyter
网页端强大的记事本
官方文档:http://jupyter.org/documentation
测试如果提示命令行错误。
PATH中添加:%SystemRoot%/system32;%SystemRoot%;
jupyter notebook
浏览器打开http://localhost:8888/tree
测试
如果是linux系统下,直接 pip3 intall 所有库,可以一次性安装。
pip3 install requests seleinum beautifulsoup......
上一篇:5.Python多版本共存配置
下一篇:7.爬虫基本原理