商城练习项目(上)
springcloud版本对应:https://cloud.spring.io/spring-cloud-static/Hoxton.SR5/reference/html/

controller --service–serviceImpl–dao 模式下,controller内 注入service接口(@Resource),serviceImpl实现类上添加注解@Service(不含参数),实现类内部注入dao接口(@Resource), 因为上面提到的接口接收实现类,因为唯一,所以调用的是ServiceImpl 里对应的方法。
1.项目分类
主要从需求方、盈利模式、技术侧重点这三个方面来看他们的不同
1.1传统项目
各种企业里面的管理系统(ERP企业资源计划即 ERP (Enterprise Resource Planning),、HR、OA办公自动化(Office Automation,简称OA)、CRM客户关系管理、物流管理系统)
- 需求方:公司、企业内部
- 盈利模式:项目本身实践
- 技术侧重点:业务功能
1.2互联网项目
门户网站、电商网站:baidu.com,qq.com
- 需求方:广大用户群体
- 盈利模式:虚拟币,增值服务,广告收益
- 技术侧重点:网站性能,业务功能
1.3电商
1.3.1技术特点
- 技术范围广
- 技术新
- 高并发(分布式、静态化技术、缓存技术、异步并发,池化、队列)
- 高可用(集群、负载均衡、限流、降级、熔断)
- 数据量大
- 业务复杂
- 数据安全
1.4常见电商模式
- B2C:商家对个人,如:亚马逊,当当
- C2C:个人对个人:如咸鱼
- B2B平台:商家对商家,如阿里巴巴
- O2O:线上线下结合:如饿了么
- P2P:在线金融:如网贷之家,人人聚财等
- B2C平台:天猫
1.6专业术语
-
SaaS:软件即服务
-
SOA:面向服务
-
RPC:远程过程调用
-
RMI:远程方法调用
-
PV:页面浏览量
用户每一次对网站中的每个网页访问均被记录一次,用户对同一页面访问,访问量累计 -
UV(unique vistior)独立访客
指访问某个站点或点击某条新闻的不同IP地址的人数。在同一天内,uv只记录第一次进入网站的具有独立IP的访问者,在同一天内再次访问该网站则不计数。 -
PV与带宽:
- 计算带宽大小需要关注两个指标:峰值流量和页面的平均大小。
- 计算公式是:网站带宽= ( PV * 平均页面大小(单位MB)* 8 )/统计时间(换算到秒)
- 为什么要乘以8?
- 网站大小为单位是字节(Byte),而计算带宽的单位是bit,1Byte=8bit
- 这个计算的是平均带宽,高峰期还需要扩大一定倍数
-
PV、QPS、并发
-
QPS:每秒处理的请求数量。
- 比如你的程序处理一个请求平均需要0.1S,那么1秒就可以处理10个请求。QPS自然就是10,多线程情况下,这个数字可能就会有所增加。
-
由PV和QPS如何需要部署的服务器数量?
- 根据二八原则,80%的请求集中在20%的时间来计算峰值压力:
- (每日PV * 80%) / (3600s * 24 * 20%) * 每个页面的请求数 = 每个页面每秒的请求数量
- 然后除以服务器的QPS值,即可计算得出需要部署的服务器数量
-
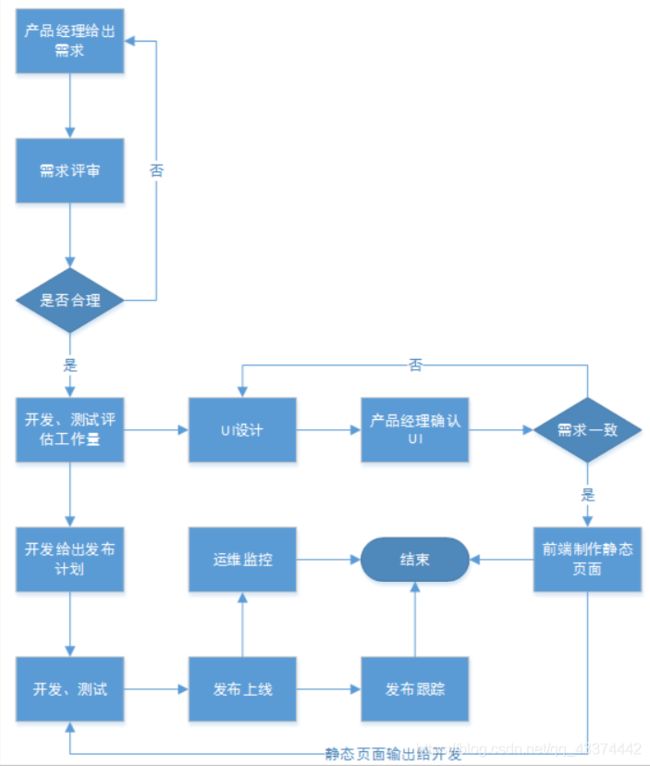
1.7项目开发流程
项目经理:管人
技术经理:
产品经理:设计需求原型
测试:细节多–黑盒测试:无需技术,表面测试 专业测试:专业的测试工具
前端:大前端:UI :根据需求画出页面、前端页面:根据UI生成静态脚本。nodejs可以做服务器端(小公司)
后端:Java
2.商城项目介绍
2.1.项目介绍
- 商城是一个全品类的电商购物网站(B2C)。
- 用户可以在线购买商品、加入购物车、下单
- 可以评论已购买商品
- 管理员可以在后台管理商品的上下架、促销活动
- 管理员可以监控商品销售状况
- 客服可以在后台处理退款操作
- 希望未来3到5年可以支持千万用户的使用
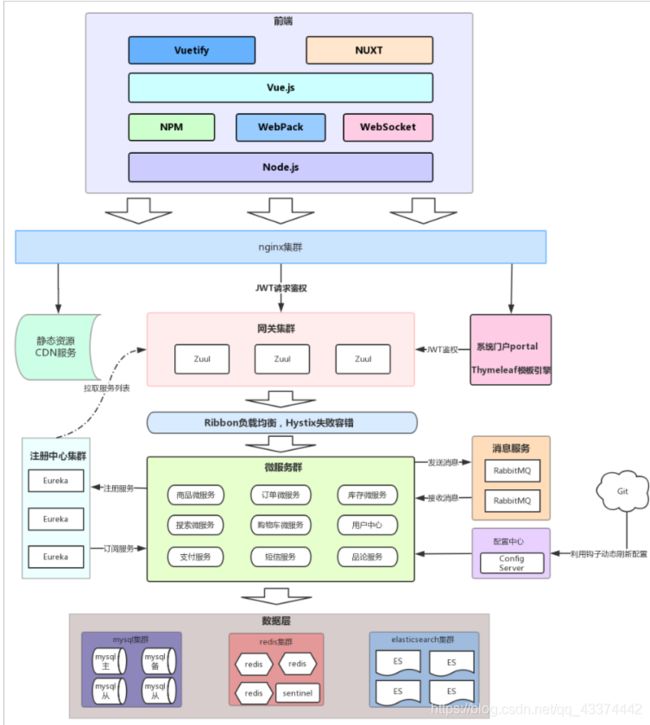
2.2.系统架构
2.2.1.架构图
2.2.2.系统架构解读
整个商城可以分为两部分:后台管理系统、前台门户系统。
- 后台管理:
- 后台系统主要包含以下功能:
- 商品管理,包括商品分类、品牌、商品规格等信息的管理
- 销售管理,包括订单统计、订单退款处理、促销活动生成等
- 用户管理,包括用户控制、冻结、解锁等
- 权限管理,整个网站的权限控制,采用JWT鉴权方案,对用户及API进行权限控制
- 统计,各种数据的统计分析展示
- 后台系统会采用前后端分离开发,而且整个后台管理系统会使用Vue.js框架搭建出单页应用(SPA)。
- 后台系统主要包含以下功能:
- 前台门户
- 前台门户面向的是客户,包含与客户交互的一切功能。例如:
- 搜索商品
- 加入购物车
- 下单
- 评价商品等等
- 前台系统我们会使用Thymeleaf模板引擎技术来完成页面开发。出于SEO优化的考虑,我们将不采用单页应用。
无论是前台还是后台系统,都共享相同的微服务集群,包括:
- 前台门户面向的是客户,包含与客户交互的一切功能。例如:
- 商品微服务:商品及商品分类、品牌、库存等的服务
- 搜索微服务:实现搜索功能
- 订单微服务:实现订单相关
- 购物车微服务:实现购物车相关功能
- 用户中心:用户的登录注册等功能
- Eureka注册中心
- Zuul网关服务
- …
SEO:搜索引擎优化
common—通用工具类:utils pojo
gateway :网关服务:服务路由,请求过滤
item—商品的聚合工程
item-interface:分享一些pojo,接口异常
item-service:商品的微服务
registry—注册中心
3项目的搭建
3.1技术选型
前端技术:
- 基础的HTML、CSS、JavaScript(基于ES6标准)
- JQuery
- Vue.js 2.0以及基于Vue的框架:Vuetify(UI框架)
- 前端构建工具:WebPack—打包
- 前端安装包工具:NPM–安装工具
- Vue脚手架:Vue-cli
- Vue路由:vue-router
- ajax框架:axios
- 基于Vue的富文本框架:quill-editor
后端技术:
- 基础的SpringMVC、Spring 5.x和MyBatis3
- Spring Boot 2.0.7版本
- Spring Cloud 最新版 Finchley.SR2
- Redis-4.0
- RabbitMQ-3.4
- Elasticsearch-6.3
- nginx-1.14.2
- FastDFS - 5.0.8
- MyCat
- Thymeleaf
- mysql 5.6
3.2.开发环境
为了保证开发环境的统一,希望每个人都按照我的环境来配置:
- IDE:我们使用Idea 2017.3 版本
- JDK:统一使用JDK1.8
- 项目构建:maven3.3.9以上版本即可(3.5.2)
- 版本控制工具:git
3.3.域名
我们在开发的过程中,为了保证以后的生产、测试环境统一。尽量都采用域名来访问项目。
一级域名:www.tudou.com,tudou.com tudou.cn
二级域名:manage.tudou.com/item , api.tudou.com
我们可以通过switchhost工具来修改自己的host对应的地址,只要把这些域名指向127.0.0.1,那么跟你用localhost的效果是完全一样的。
3.4.创建父工程
创建统一的父工程:tudou,用来管理依赖及其版本,注意是创建project,而不是module
3.4.1创建maven工程,不使用spring脚手架
3.4.2加入依赖
<?xml version="1.0" encoding="UTF-8"?>
<project xmlns="http://maven.apache.org/POM/4.0.0"
         xmlns:xsi="http://www.w3.org/2001/XMLSchema-instance"
         xsi:schemaLocation="http://maven.apache.org/POM/4.0.0 http://maven.apache.org/xsd/maven-4.0.0.xsd">
    <modelVersion>4.0.0</modelVersion>

    <groupId>cn.tudou.parent</groupId>
    <artifactId>tudou</artifactId>
    <version>1.0.0-SNAPSHOT</version>
    <modules>
        <module>tudou-registry</module>
    </modules>
    <packaging>pom</packaging>

    <name>tudou</name>
    <description>Demo project for Spring Boot</description>

    <parent>
        <groupId>org.springframework.boot</groupId>
        <artifactId>spring-boot-starter-parent</artifactId>
        <version>2.2.1.RELEASE</version>
        <relativePath/> <!-- lookup parent from repository -->
    </parent>

    <properties>
        <project.build.sourceEncoding>UTF-8</project.build.sourceEncoding>
        <project.reporting.outputEncoding>UTF-8</project.reporting.outputEncoding>
        <java.version>1.8</java.version>
        <spring-cloud.version>Hoxton.SR5</spring-cloud.version>
        <mybatis.starter.version>1.3.2</mybatis.starter.version>
        <mapper.starter.version>2.0.2</mapper.starter.version>
        <druid.starter.version>1.1.9</druid.starter.version>
        <mysql.version>8.0.19</mysql.version>
        <pageHelper.starter.version>1.2.3</pageHelper.starter.version>
        <tudou.latest.version>1.0.0-SNAPSHOT</tudou.latest.version>
        <fastDFS.client.version>1.26.1-RELEASE</fastDFS.client.version>
    </properties>
    <!--统一管理版本-->
    <dependencyManagement>
        <dependencies>
            <!-- springCloud -->
            <dependency>
                <groupId>org.springframework.cloud</groupId>
                <artifactId>spring-cloud-dependencies</artifactId>
                <version>${spring-cloud.version}</version>
                <type>pom</type>
                <scope>import</scope>
            </dependency>
            <!-- mybatis启动器 -->
            <dependency>
                <groupId>org.mybatis.spring.boot</groupId>
                <artifactId>mybatis-spring-boot-starter</artifactId>
                <version>${mybatis.starter.version}</version>
            </dependency>
            <!-- 通用Mapper启动器 -->
            <dependency>
                <groupId>tk.mybatis</groupId>
                <artifactId>mapper-spring-boot-starter</artifactId>
                <version>${mapper.starter.version}</version>
            </dependency>
            <!-- 分页助手启动器 -->
            <dependency>
                <groupId>com.github.pagehelper</groupId>
                <artifactId>pagehelper-spring-boot-starter</artifactId>
                <version>${pageHelper.starter.version}</version>
            </dependency>
            <!-- mysql驱动 -->
            <dependency>
                <groupId>mysql</groupId>
                <artifactId>mysql-connector-java</artifactId>
                <version>${mysql.version}</version>
            </dependency>
            <!--FastDFS客户端-->
            <dependency>
                <groupId>com.github.tobato</groupId>
                <artifactId>fastdfs-client</artifactId>
                <version>${fastDFS.client.version}</version>
            </dependency>
        </dependencies>
    </dependencyManagement>

    <build>
        <plugins>
            <plugin>
                <groupId>org.springframework.boot</groupId>
                <artifactId>spring-boot-maven-plugin</artifactId>
            </plugin>
        </plugins>
    </build>
</projec
3.4.3创建EurekaServer
- 注册服务中心,起名为:tudou-registry
- 选择新建module:-maven—不选择骨架
- 填写项目坐标,名称为tudou-registry;
- 选择安装目录,因为是聚合项目,目录应该是在父工程的下面:
- 添加依赖
添加EurekaServer的依赖
       <!--引入eureka服务端依赖-->
        <dependency>
            <groupId>org.springframework.cloud</groupId>
            <artifactId>spring-cloud-starter-netflix-eureka-server</artifactId>
            <version>2.2.0.RELEASE</version>
        </dependency>
- 编写启动引导类
package cn.tudou;
@SpringBootApplication//开启Spring自动配置注解
@EnableEurekaServer//开启Eureka服务端
public class TuDouResgistryApplication {
    public static void main(String[] args) {
        //项目启动入口
        SpringApplication.run(TuDouResgistryApplication.class);
    }
}
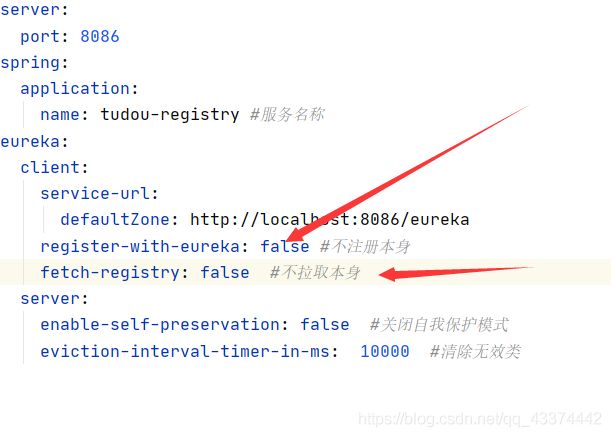
- 配置文件
server:
  port: 8086
spring:
  application:
    name: tudou-registry
eureka:
  client:
    service-url:
      defaultZone: http://localhost:8086/eureka
  server:
    enable-self-preservation: false #关闭自我保护模式
    eviction-interval-timer-in-ms: 10000 #清理无效类
- 项目的结构
- 启动成功
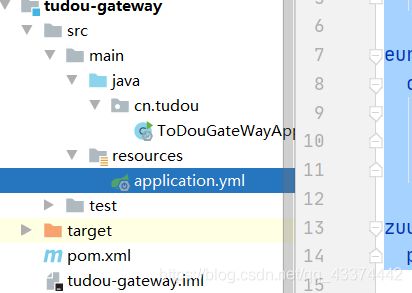
3.4.4创建zuul网关
- 创建工程,与上面类似—命名为:tudou-gateway
- 填写保存的目录
- 添加依赖
        <dependency>
            <groupId>org.springframework.cloud</groupId>
            <artifactId>spring-cloud-starter-netflix-eureka-client</artifactId>
            <version>2.2.0.RELEASE</version>
        </dependency>
        <!--引入zuul网关-->
        <dependency>
            <groupId>org.springframework.cloud</groupId>
            <artifactId>spring-cloud-starter-netflix-zuul</artifactId>
        </dependency>
    </dependencies>
- 编写启动引导类
package cn.tudou;

import org.springframework.boot.SpringApplication;
import org.springframework.boot.autoconfigure.SpringBootApplication;
import org.springframework.cloud.client.discovery.EnableDiscoveryClient;
import org.springframework.cloud.netflix.zuul.EnableZuulProxy;

@SpringBootApplication  //配置springboot自动配置
@EnableZuulProxy  //开启zuul网关
@EnableDiscoveryClient //开启eureka客户端
public class ToDouGateWayApplication {
    //启动入口
    public static void main(String[] args) {
        SpringApplication.run(ToDouGateWayApplication.class);
    }
}
- 配置文件
server:
  port: 8090
spring:
  application:
    name: tudou-gateway

eureka:
  client:
    service-url:
      defaultZone: http://localhost:8086/eureka #把网关注册到eureka
    registry-fetch-interval-seconds: 5 #拉取服务的间隔时间

zuul:
  prefix: /api #配置网关前缀
3.4.5创建商品微服务
既然是一个全品类的电商购物平台,那么核心自然就是商品。因此我们要搭建的第一个服务,就是商品微服务。其中会包含对于商品相关的一系列内容的管理,包括:
- 商品分类管理
- 品牌管理
- 商品规格参数管理
- 商品管理
- 库存管理
3.4.6
-
创建商品微服务聚合模块
声明是一个聚合模块—打包方式为pom
创建两个子模块 -
创建item子模块—interfaces
引入依赖 -
创建微服务模块–tudou-item-service
1引入依赖
<dependencies>
        <!--微服务引入eureka客户端依赖-->
        <dependency>
            <groupId>org.springframework.cloud</groupId>
            <artifactId>spring-cloud-starter-netflix-eureka-client</artifactId>
            <version>2.2.0.RELEASE</version>
        </dependency>
        <!--web启动器-->
        <dependency>
            <groupId>org.springframework.boot</groupId>
            <artifactId>spring-boot-starter-web</artifactId>
        </dependency>
        <!--jdbc的启动器-->
        <dependency>
            <groupId>org.springframework.boot</groupId>
            <artifactId>spring-boot-starter-jdbc</artifactId>
        </dependency>
        <!--mysql的驱动-->
        <dependency>
            <groupId>mysql</groupId>
            <artifactId>mysql-connector-java</artifactId>

        </dependency>
        <!--mybatis的启动器-->
        <dependency>
            <groupId>org.mybatis.spring.boot</groupId>
            <artifactId>mybatis-spring-boot-starter</artifactId>
        </dependency>
        <!--tk启动器-->
        <dependency>
            <groupId>tk.mybatis</groupId>
            <artifactId>mapper-spring-boot-starter</artifactId>
        </dependency>
        <!--分页助手启动器-->
        <dependency>
            <groupId>com.github.pagehelper</groupId>
            <artifactId>pagehelper-spring-boot-starter</artifactId>
        </dependency>
        <!--微服务于商品接口依赖-->
        <dependency>
            <groupId>cn.tudou.item</groupId>
            <artifactId>tudou-item-interfaces</artifactId>
            <version>1.0.0-SNAPSHOT</version>
        </dependency>
        <!--单元测试-->
        <dependency>
            <groupId>com.tang</groupId>
            <artifactId>test</artifactId>
            <version>0.0.1-SNAPSHOT</version>
        </dependency>
    </dependencies>
- 配置文件
server:
  port: 8081
spring:
  application:
    name: item-service
  datasource:
    url: jdbc:mysql://localhost:3306/tudou?serverTimezone=UTC
    username: root
    password:
eureka:
  client:
    service-url:
      dafaultZone: http://localhost:8086/eureka
  instance:
    lease-renewal-interval-in-seconds: 5  #心跳时间(续约时间)
    lease-expiration-duration-in-seconds:  #过期时间

mybatis:
  type-aliases-package: cn.tudou.pojo #配置mybatis别名扫描
- 编写引导类
package cn.tudou;

import org.springframework.boot.SpringApplication;
import org.springframework.boot.autoconfigure.SpringBootApplication;
import org.springframework.cloud.client.discovery.EnableDiscoveryClient;
import org.springframework.cloud.netflix.eureka.EnableEurekaClient;

@SpringBootApplication //开启spring自动配置
@EnableDiscoveryClient //开启eureka客户端
public class TuDouItemApplication {
    public static void main(String[] args) {
        SpringApplication.run(TuDouItemApplication.class);
    }

}
3.4.7创建通用的工具模块
4ES6语法
4.1什么是ECMAScript
1.最初的网页以HTML为主,是纯静态的网页。网页是只读的,信息流只能从服务的到客户端单向流通。开发人员也只关心页面的样式和内容即可。
2.
- 1995年,网景工程师Brendan Eich 花了10天时间设计了JavaScript语言。
- 1996年,微软发布了JScript,其实是JavaScript的逆向工程实现。
- 1997年,为了统一各种不同script脚本语言,ECMA(欧洲计算机制造商协会)以JavaScript为基础,制定了
ECMAscript标准规范。JavaScript和JScript都是ECMAScript的标准实现者,随后各大浏览器厂商纷纷实现了ECMAScript标准。
所以,ECMAScript是浏览器脚本语言的规范,而各种我们熟知的 js语言,如JavaScript则是规范的具体实现。
4.2.ES5和6的一些新特性
4.2.1创建一个前端工程
新建Javascript模块–新建html文件
<!DOCTYPE html>
<html lang="en">
<head>
    <meta charset="UTF-8">
    <title>Title</title>
</head>
<body>

    <script>
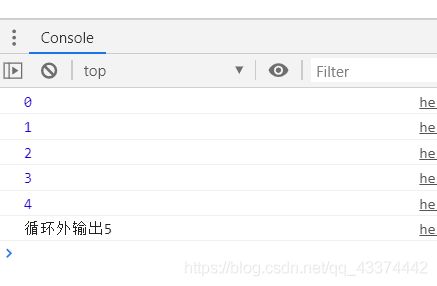
        for (var i=0;i<5;i++){
            console.log(i);
        }
        console.log("循环外输出"+i);
    </script>
</body>
</html>
4.2.2字符串的补充
includes():返回布尔值,表示是否找到了参数字符串。startsWith():返回布尔值,表示参数字符串是否在原字符串的头部。endsWith():返回布尔值,表示参数字符串是否在原字符串的尾部。


4.2.3解构表达式
数据解构
const arr=[10,15,16]
const [x,y,z] = arr;// x,y,z将与arr中的每个位置对应来取值
比如有一个数组:
let arr = [1,2,3]
我想获取其中的值,只能通过角标。ES6可以这样:
const [x,y,z] = arr;// x,y,z将与arr中的每个位置对应来取值
// 然后打印
console.log(x,y,z);
对象解构
例如有个person对象:
const person = {
    name:"jack",
    age:21,
    language: ['java','js','css']
}
// 解构表达式获取值
const {name,age,language} = person;
// 打印
console.log(name);
console.log(age);
console.log(language);
如过想要用其它变量接收,需要额外指定别名:
`{name:n}`:name是person中的属性名,冒号后面的n是解构后要赋值给的变量。


### 4.2.4.函数优化
> 函数参数默认值
在ES6以前,我们无法给一个函数参数设置默认值,只能采用变通写法:
```js
    function add(a , b) {
        // 判断b是否为空,为空就给默认值1
        b = b || 1;
        return a + b;
    }
    // 传一个参数
    console.log(add(10));
function add(a , b = 1) {
    return a + b;
}
// 传一个参数
console.log(add(10));
箭头函数
ES6中定义函数的简写方式:
一个参数时:
var print = function (obj) {
    console.log(obj);
}
// 简写为:
var print2 = obj => console.log(obj);
多个参数:
// 两个参数的情况:
var sum = function (a , b) {
    return a + b;
}
// 简写为:
var sum2 = (a,b) => a+b;
代码不止一行,可以用{}括起来
var sum3 = (a,b) => {
    return a + b;
}
对象的函数属性简写
比如一个Person对象,里面有eat方法:
let person = {
    name: "jack",
    // 以前:
    eat: function (food) {
        console.log(this.name + "在吃" + food);
    },
    // 箭头函数版:
    eat2: food => console.log(person.name + "在吃" + food),// 这里拿不到this
    // 简写版:
    eat3(food){
        console.log(this.name + "在吃" + food);
    }
}
箭头函数结合解构表达式
比如有一个函数:
const person = {
    name:"jack",
    age:21,
    language: ['java','js','css']
}

function hello(person) {
    console.log("hello," + person.name)
}
如果用箭头函数和解构表达式
var hi = ({name}) => console.log("hello," + name);
4.2.5.map和reduce
数组中新增了map和reduce方法。
map
map():接收一个函数,将原数组中的所有元素用这个函数处理后放入新数组返回。
举例:有一个字符串数组,我们希望转为int数组
let arr = ['1','20','-5','3'];
console.log(arr)

arr = arr.map(s => parseInt(s));
console.log(arr)
[外链图片转存失败,源站可能有防盗链机制,建议将图片保存下来直接上传(img-U48I2UDp-1592202209501)(assets/1526110796839.png)]
reduce
reduce():接收一个函数(必须)和一个初始值(可选)。
第一个参数(函数)接收两个参数:
- 第一个参数是上一次reduce处理的结果
- 第二个参数是数组中要处理的下一个元素
reduce()会从左到右依次把数组中的元素用reduce处理,并把处理的结果作为下次reduce的第一个参数。如果是第一次,会把前两个元素作为计算参数,或者把用户指定的初始值作为起始参数
举例:
const arr = [1,20,-5,3]
没有初始值:
[外链图片转存失败,源站可能有防盗链机制,建议将图片保存下来直接上传(img-Xx62Qpos-1592202209512)(assets/1526111537204.png)]
指定初始值:
[外链图片转存失败,源站可能有防盗链机制,建议将图片保存下来直接上传(img-bMSEu102-1592202209521)(assets/1526111580742.png)]
4.2.6.对象扩展
ES6给Object拓展了许多新的方法,如:
- keys(obj):获取对象的所有key形成的数组
- values(obj):获取对象的所有value形成的数组
- entries(obj):获取对象的所有key和value形成的二维数组。格式:
[[k1,v1],[k2,v2],...] - assign(dest, …src) :将多个src对象的值 拷贝到 dest中(浅拷贝)。
[外链图片转存失败,源站可能有防盗链机制,建议将图片保存下来直接上传(img-5OfXZlVi-1592202209526)(assets/1527210872966.png)]
4.2.7.数组扩展
ES6给数组新增了许多方法:
- find(callback):数组实例的find方法,用于找出第一个符合条件的数组成员。它的参数是一个回调函数,所有数组成员依次执行该回调函数,直到找出第一个返回值为true的成员,然后返回该成员。如果没有符合条件的成员,则返回undefined。
- findIndex(callback):数组实例的findIndex方法的用法与find方法非常类似,返回第一个符合条件的数组成员的位置,如果所有成员都不符合条件,则返回-1。
- includes(数组元素):与find类似,如果匹配到元素,则返回true,代表找到了。
5vue
MVVM,关注模型和视图
2008年,google的Chrome发布,随后就以极快的速度占领市场,超过IE成为浏览器市场的主导者。
2009年,Ryan Dahl在谷歌的Chrome V8引擎基础上,打造了基于事件循环的异步IO框架:Node.js。
- 基于事件循环的异步IO
- 单线程运行,避免多线程的变量同步问题
- JS可以编写后台代码,前后台统一编程语言
MVVM模式
- M:即Model,模型,包括数据和一些基本操作
- V:即View,视图,页面渲染结果
- VM:即View-Model,模型与视图间的双向操作(无需开发人员干涉)
在MVVM之前,开发人员从后端获取需要的数据模型,然后要通过DOM操作Model渲染到View中。而后当用户操作视图,我们还需要通过DOM获取View中的数据,然后同步到Model中。
而MVVM中的VM要做的事情就是把DOM操作完全封装起来,开发人员不用再关心Model和View之间是如何互相影响的:
- 只要我们Model发生了改变,View上自然就会表现出来。
- 当用户修改了View,Model中的数据也会跟着改变。
5.1简介
Vue (读音 /vjuː/,类似于 view) 是一套用于构建用户界面的渐进式框架。与其它大型框架不同的是,Vue 被设计为可以自底向上逐层应用。Vue 的核心库只关注视图层,不仅易于上手,还便于与第三方库或既有项目整合。另一方面,当与现代化的工具链以及各种支持类库结合使用时,Vue 也完全能够为复杂的单页应用提供驱动。
前端框架三巨头:Vue.js、React.js、AngularJS,vue.js以其轻量易用著称,vue.js和React.js发展速度最快,AngularJS还是老大。
5.2安装node.js
官网:https://cn.vuejs.org/
直接安装
检测:
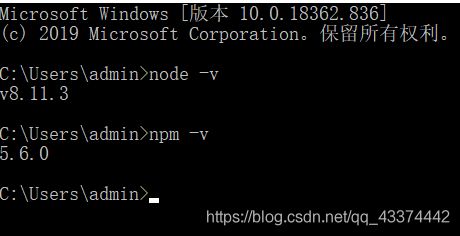
npm默认的仓库地址是在国外网站,速度较慢,切换镜像的工具:nrm
首先安装nrm,这里-g代表全局安装。
npm install nrm -g
然后通过nrm ls命令查看npm的仓库列表,带*的就是当前选中的镜像仓库:
通过nrm use taobao来指定要使用的镜像源:
然后通过nrm test npm来测试速度:

5.3安装vue
5.3.1创建静态模块
5.3.2安装Vue
下载地址:https://github.com/vuejs/vue
npm安装:
在idea的左下角,有个Terminal按钮,点击打开控制台:

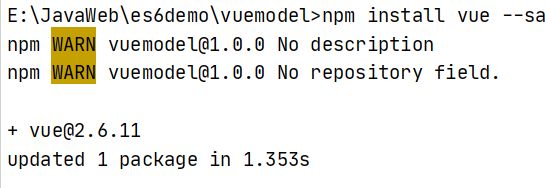

安装完成
5.4简单操作Vue(本质上是封装了dom)
<!DOCTYPE html>
<html lang="en">
<head>
    <meta charset="UTF-8">
    <title>Title</title>
</head>
<body>
//vue对象的html模板
<div id="app">
<!--花括号是:js表达式-->
    <h1>hell0{{name}}</h1>
</div>
<!--引入Vue-->
<script src="node_modules/vue/dist/vue.js"></script>

<script>
//初始化了一个vue实例
    const  app =new Vue({
        el:"#app",  //作用域
        //数据
        data: {
            name:"周新池"
        }
    })
</script>
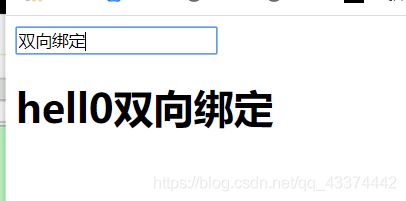
5.5 双向捆绑
<!DOCTYPE html>
<html lang="en">
<head>
    <meta charset="UTF-8">
    <title>Title</title>
</head>
<body>
<div id="app">
    <!--双向绑定的元素-->
    <input type="text" v-model="name">
    <h1>hell0{{name}}</h1>
</div>
<!--引入Vue-->
<script src="node_modules/vue/dist/vue.js"></script>

<script>
    const  app =new Vue({
        el:"#app",  //作用域
        //数据
        data: {
            name:"周新池"
        }
    })
</script>
</body>
</html>
5.5创建vue实例
每个Vue实例都需要关联一段Html模板,Vue会基于此模板进行视图渲染。
可以通过el属性来指定。
例如一段html模板:
<div id="app">

div>
然后创建Vue实例,关联这个div
var vm = new Vue({
	el:"#app"
})
这样,Vue就可以基于id为app的div元素作为模板进行渲染了。在这个div范围以外的部分是无法使用vue特性的。
当Vue实例被创建时,它会尝试获取在data中定义的所有属性,用于视图的渲染,并且监视data中的属性变化,当data发生改变,所有相关的视图都将重新渲染,这就是“响应式“系统。
html:
<div id="app">
    <input type="text" v-model="name"/>
div>
js:
var vm = new Vue({
    el:"#app",
    data:{
        name:"刘德华"
    }
})
- name的变化会影响到
input的值 - input中输入的值,也会导致vm中的name发生改变
Vue实例中除了可以定义data属性,也可以定义方法,并且在Vue实例的作用范围内使用。
html:
<div id="app">
    {{num}}
    <button v-on:click="add">加button>
div>
js:
var vm = new Vue({
    el:"#app",
    data:{
        num: 0
    },
    methods:{
        add:function(){
            // this代表的当前vue实例
            this.num++;
        }
    }
})
5.6生命周期钩子
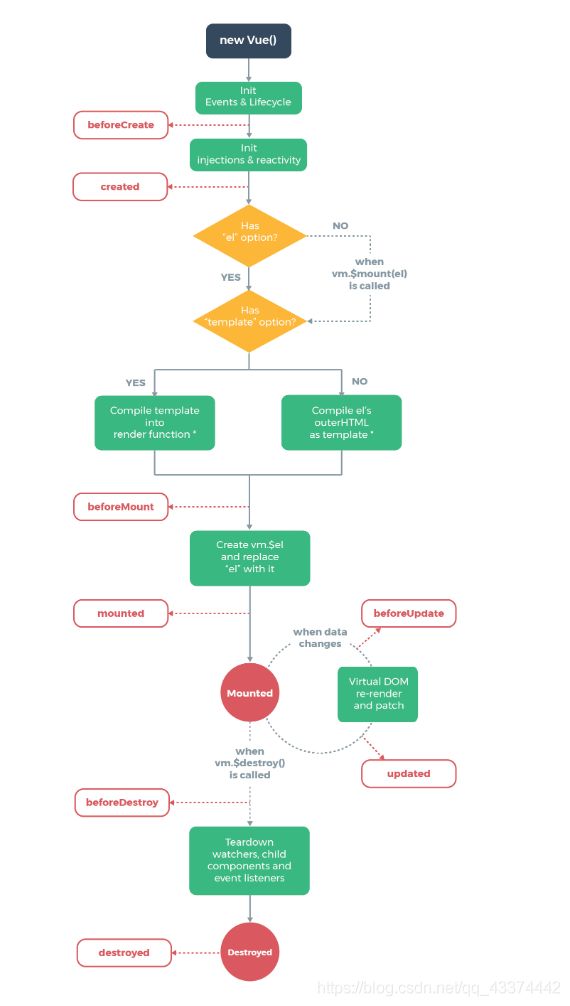
5.6.1生命周期
每个vue实例在被创建时都要经过一系列的初始化过程,创建实例,装载模板,渲染模板等,Vue为生命周期中的每个状态都设置了钩子函数(监听函数),没当vue实例处于不同的生命周期时,对应的函数就会被触发调用
生命周期:
5.7指令
什么是指令?
指令 (Directives) 是带有 v- 前缀的特殊特性。指令特性的预期值是:单个 JavaScript 表达式。指令的职责是,当表达式的值改变时,将其产生的连带影响,响应式地作用于 DOM。
例如v-on,代表绑定事件。
5.7.1 插值表达式
5.7.1.1花括号
格式: {{表达式}}
- 该表达式支持JS语法,可以调用js内置函数(必须有返回值)
- 表达式必须有返回结果。例如 1 + 1,没有结果的表达式不允许使用,如:var a = 1 + 1;
- 可以直接获取Vue实例中定义的数据或函数
5.7.1.2 解决花括号网速问题 v-text,v-html
使用v-html 和v-text 指令来代替{{}}
5.7.2 v-model
v-text和v-html可以看做是单向绑定,数据影响了视图渲染,但是反过来就不行。接下来学习的v-model是双向绑定,视图(View)和模型(Model)之间会互相影响。
既然是双向绑定,一定是在视图中可以修改数据,这样就限定了视图的元素类型。目前v-model的可使用元素有:
- input
- select
- textarea
- checkbox
- radio
- components(Vue中的自定义组件)
```html
<div id="app">
    <input type="checkbox" v-model="language" value="Java" />Java<br/>
    <input type="checkbox" v-model="language" value="PHP" />PHP<br/>
    <input type="checkbox" v-model="language" value="Swift" />Swift<br/>
    <h1>
        你选择了:{{language.join(',')}}
    </h1>
</div>
<script src="./node_modules/vue/dist/vue.js"></script>
<script type="text/javascript">
    var vm = new Vue({
        el:"#app",
        data:{
            language: []
        }
    })
</script>
- 多个
CheckBox对应一个model时,model的类型是一个数组,单个checkbox值默认是boolean类型 - radio对应的值是input的value值
text和textarea默认对应的model是字符串select单选对应字符串,多选对应也是数组
5.7.3v-on
基本用法
v-on指令用于给页面元素绑定事件。
语法:
v-on:事件名="js片段或函数名"
示例:
<div id="app">

    <button v-on:click="num++">增加一个button><br/>

    <button v-on:click="decrement">减少一个button><br/>
    <h1>有{{num}}个女神迷恋我h1>
div>
<script src="./node_modules/vue/dist/vue.js">script>
<script type="text/javascript">
    var app = new Vue({
        el:"#app",
        data:{
            num:100
        },
        methods:{
            decrement(){
                this.num--;
            }
        }
    })
script>
另外,事件绑定可以简写,例如v-on:click='add'可以简写为@click='add'
5.7.4事件修饰符
在事件处理程序中调用 event.preventDefault() 或 event.stopPropagation() 是非常常见的需求。尽管我们可以在方法中轻松实现这点,但更好的方式是:方法只有纯粹的数据逻辑,而不是去处理 DOM 事件细节。
为了解决这个问题,Vue.js 为 v-on 提供了事件修饰符。修饰符是由点开头的指令后缀来表示的。
.stop:阻止事件冒泡到父元素.prevent:阻止默认事件发生*.capture:使用事件捕获模式.self:只有元素自身触发事件才执行。(冒泡或捕获的都不执行).once:只执行一次
阻止默认事件
<div id="app">

    <button v-on:contextmenu.prevent="num++">增加一个button>
    <br/>

    <button v-on:contextmenu="decrement($event)">减少一个button>
    <br/>
    <h1>有{{num}}个女神迷恋峰哥h1>
div>
<script src="./node_modules/vue/dist/vue.js">script>
<script type="text/javascript">
    var app = new Vue({
        el: "#app",
        data: {
            num: 100
        },
        methods: {
            decrement(ev) {
                // ev.preventDefault();
                this.num--;
            }
        }
    })
script>
效果:(右键“增加一个”,不会触发默认的浏览器右击事件;右键“减少一个”,会触发默认的浏览器右击事件)
5.7.5.按键修饰符
在监听键盘事件时,我们经常需要检查常见的键值。Vue 允许为 v-on 在监听键盘事件时添加按键修饰符:
<input v-on:keyup.13="submit">
记住所有的 keyCode 比较困难,所以 Vue 为最常用的按键提供了别名:
<input v-on:keyup.enter="submit">


<input @keyup.enter="submit">
全部的按键别名:
.enter*.tab.delete(捕获“删除”和“退格”键).esc.space.up.down.left.right
5.7.6.组合按钮
可以用如下修饰符来实现仅在按下相应按键时才触发鼠标或键盘事件的监听器。
.ctrl.alt.shift
5.8.v-for
遍历数据渲染页面是非常常用的需求,Vue中通过v-for指令来实现。
5.8.1.遍历数组
语法:
v-for="item in items"
- items:要遍历的数组,需要在vue的data中定义好。
- item:迭代得到的数组元素的别名
示例
<div id="app">
    <ul>
        <li v-for="user in users">
            {{user.name}} - {{user.gender}} - {{user.age}}
        li>
    ul>
div>
<script src="./node_modules/vue/dist/vue.js">script>
<script type="text/javascript">
    var app = new Vue({
        el: "#app",
        data: {
            users:[
                {name:'张三', gender:'女', age: 21},
                {name:'李四', gender:'男', age: 18},
                {name:'王五', gender:'女', age: 24},
                {name:'赵柳', gender:'女', age: 18},
                {name:'乔布斯', gender:'女', age: 25}
            ]
        },
    })
script>
5.8.2.数组角标
在遍历的过程中,如果我们需要知道数组角标,可以指定第二个参数:
语法
v-for="(item,index) in items"
- items:要迭代的数组
- item:迭代得到的数组元素别名
- index:迭代到的当前元素索引,从0开始。
示例
    <ul>
        <li v-for="(user, index) in users">
            {{index + 1}}. {{user.name}} - {{user.gender}} - {{user.age}}
        li>
    ul>
5.8.3.遍历对象
v-for除了可以迭代数组,也可以迭代对象。语法基本类似
语法:
v-for="value in object"
v-for="(value,key) in object"
v-for="(value,key,index) in object"
- 1个参数时,得到的是对象的属性值
- 2个参数时,第一个是属性值,第二个是属性名
- 3个参数时,第三个是索引,从0开始
示例:
<div id="app">
    <ul>
        <li v-for="(value, key, index) in user">
            {{index + 1}}. {{key}} - {{value}}
        li>
    ul>
div>
<script src="./node_modules/vue/dist/vue.js">script>
<script type="text/javascript">
    var vm = new Vue({
        el:"#app",
        data:{
            user:{name:'张三', gender:'男', age: 18}
        }
    })
script>
5.9 v-if和v-show
5.9.1.基本使用
v-if,顾名思义,条件判断。当得到结果为true时,所在的元素才会被渲染。
语法:
v-if="布尔表达式"
示例:
<div id="app">
    <button v-on:click="show = !show">点我呀button>
    <br>
    <h1 v-if="show">
        看到我啦?!
    h1>
    <h1 v-show="show">
        看到我啦?!show
    h1>
div>
<script src="./node_modules/vue/dist/vue.js">script>
<script type="text/javascript">
    var app = new Vue({
        el: "#app",
        data: {
            show: true
        }
    })
script>
5.9.2.与v-for结合
当v-if和v-for出现在一起时,v-for优先级更高。也就是说,会先遍历,再判断条件。
修改v-for中的案例,添加v-if:
    <ul>
        <li v-for="(user, index) in users" v-if="user.gender == '女'">
            {{index + 1}}. {{user.name}} - {{user.gender}} - {{user.age}}
        li>
    ul>
只显示女性用户信息
5.9.3.v-else
你可以使用 v-else 指令来表示 v-if 的“else 块”:
<div id="app">
    <h1 v-if="Math.random() > 0.5">
        看到我啦?!if
    h1>
    <h1 v-else>
        看到我啦?!else
    h1>
div>
v-else 元素必须紧跟在带 v-if 或者 v-else-if 的元素的后面,否则它将不会被识别。
v-else-if,顾名思义,充当 v-if 的“else-if 块”,可以连续使用:
<div id="app">
    <button v-on:click="random=Math.random()">点我呀button><span>{{random}}span>
    <h1 v-if="random >= 0.75">
        看到我啦?!if
    h1>
    <h1 v-else-if="random > 0.5">
        看到我啦?!if 0.5
    h1>
    <h1 v-else-if="random > 0.25">
        看到我啦?!if 0.25
    h1>
    <h1 v-else>
        看到我啦?!else
    h1>
div>
<script src="./node_modules/vue/dist/vue.js">script>
<script type="text/javascript">
    var app = new Vue({
        el: "#app",
        data: {
            random: 1
        }
    })
script>
类似于 v-else,v-else-if 也必须紧跟在带 v-if 或者 v-else-if 的元素之后。
演示:
5.9.4.v-show
另一个用于根据条件展示元素的选项是 v-show 指令。用法大致一样:
Hello!
不同的是带有 v-show 的元素始终会被渲染并保留在 DOM 中。v-show 只是简单地切换元素的 CSS 属性 display。
示例:
    <div id="app">

        <button v-on:click="show = !show">点击切换button><br/>
        <h1 v-if="show">
            你好
        h1>
    div>
    <script src="./node_modules/vue/dist/vue.js">script>
    <script type="text/javascript">
        var app = new Vue({
            el:"#app",
            data:{
                show:true
            }
        })
    script>
5.6.v-bind
html属性不能使用双大括号形式绑定,只能使用v-bind指令。
在将 v-bind 用于 class 和 style 时,Vue.js 做了专门的增强。表达式结果的类型除了字符串之外,还可以是对象或数组。
<div id="app">

    <div v-bind:title="title" style="border: 1px solid red; width: 50px; height: 50px;">div>
div>
<script src="./node_modules/vue/dist/vue.js">script>
<script type="text/javascript">
    var app = new Vue({
        el: "#app",
        data: {
            title: "title",
        }
    })
script>
在将 v-bind 用于 class 和 style 时,Vue.js 做了专门的增强。表达式结果的类型除了字符串之外,还可以是对象或数组。
5.10.1.绑定class样式
数组语法
我们可以借助于v-bind指令来实现:
HTML:
<div id="app">
    <div v-bind:class="activeClass">div>
    <div v-bind:class="errorClass">div>
    <div v-bind:class="[activeClass, errorClass]">div>
div>
<script src="./node_modules/vue/dist/vue.js">script>
<script type="text/javascript">
    var app = new Vue({
        el: "#app",
        data: {
            activeClass: 'active',
            errorClass: ['text-danger', 'text-error']
        }
    })
script>
渲染后的效果:(具有active和hasError的样式)
对象语法、、
我们可以传给 v-bind:class 一个对象,以动态地切换 class:
<div v-bind:class="{ active: isActive }">div>
上面的语法表示 active 这个 class 存在与否将取决于数据属性 isActive 的 truthiness(所有的值都是真实的,除了false,0,“”,null,undefined和NaN)。
你可以在对象中传入更多属性来动态切换多个 class。此外,v-bind:class 指令也可以与普通的 class 属性共存。如下模板:
<div class="static"
     v-bind:class="{ active: isActive, 'text-danger': hasError }">
div>
和如下 data:
data: {
  isActive: true,
  hasError: false
}
结果渲染为:
<div class="static active">div>
active样式和text-danger样式的存在与否,取决于isActive和hasError的值。本例中isActive为true,hasError为false,所以active样式存在,text-danger不存在。
5.10.2.绑定style样式
数组语法
数组语法可以将多个样式对象应用到同一个元素上:
<div v-bind:style="[baseStyles, overridingStyles]">div>
数据:
data: {
    baseStyles: {'background-color': 'red'},
    overridingStyles: {border: '1px solid black'}
}
渲染后的结果:
<div style="background-color: red; border: 1px solid black;">div>
对象语法
v-bind:style 的对象语法十分直观——看着非常像 CSS,但其实是一个 JavaScript 对象。CSS 属性名可以用驼峰式 (camelCase) 或短横线分隔 (kebab-case,记得用单引号括起来) 来命名:
<div v-bind:style="{ color: activeColor, fontSize: fontSize + 'px' }">div>
数据:
data: {
  activeColor: 'red',
  fontSize: 30
}
效果:
<div style="color: red; font-size: 30px;">div>
5.10.3.简写
v-bind:class可以简写为:class
5.11计算属性
在插值表达式中使用js表达式是非常方便的,而且也经常被用到。
但是如果表达式的内容很长,就会显得不够优雅,而且后期维护起来也不方便,例如下面的场景,我们有一个日期的数据,但是是毫秒值:
data:{
    birthday:1529032123201 // 毫秒值
}
我们在页面渲染,希望得到yyyy-MM-dd的样式:
<h1>您的生日是:{{
    new Date(birthday).getFullYear() + '-'+ new Date(birthday).getMonth()+ '-' + new Date(birthday).getDay()
    }}
h1>
虽然能得到结果,但是非常麻烦。
Vue中提供了计算属性,来替代复杂的表达式:
var vm = new Vue({
    el:"#app",
    data:{
        birthday:1429032123201 // 毫秒值
    },
    computed:{
        birth(){// 计算属性本质是一个方法,但是必须返回结果
            const d = new Date(this.birthday);
            return d.getFullYear() + "-" + d.getMonth() + "-" + d.getDay();
        }
    }
})
- 计算属性本质就是方法,但是一定要返回数据。然后页面渲染时,可以把这个方法当成一个变量来使用。
页面使用:
    <div id="app">
       <h1>您的生日是:{{birth}} h1>
    div>
我们可以将同一函数定义为一个方法而不是一个计算属性。两种方式的最终结果确实是完全相同的。然而,不同的是计算属性是基于它们的依赖进行缓存的。计算属性只有在它的相关依赖发生改变时才会重新求值。这就意味着只要birthday还没有发生改变,多次访问 birthday 计算属性会立即返回之前的计算结果,而不必再次执行函数。
5.12.watch
watch可以让我们监控一个值的变化。从而做出相应的反应。
示例:
<div id="app">
    <input type="text" v-model="message">
div>
<script src="./node_modules/vue/dist/vue.js">script>
<script type="text/javascript">
    var vm = new Vue({
        el:"#app",
        data:{
            message:""
        },
        watch:{
            message(newVal, oldVal){
                console.log(newVal, oldVal);
            }
        }
    })
script>
6.组件化
在大型应用开发的时候,页面可以划分成很多部分。往往不同的页面,也会有相同的部分。例如可能会有相同的头部导航。
但是如果每个页面都独自开发,这无疑增加了我们开发的成本。所以我们会把页面的不同部分拆分成独立的组件,然后在不同页面就可以共享这些组件,避免重复开发。
在vue里,所有的vue实例都是组件
6.1.全局组件
我们通过Vue的component方法来定义一个全局组件。
<div id="app">
<counter>counter>
div>
<script src="./node_modules/vue/dist/vue.js">script>
<script type="text/javascript">
// 定义全局组件,两个参数:1,组件名称。2,组件参数
Vue.component("counter",{
template:'',
data(){
return {
count:0
}
}
})
var app = new Vue({
el:"#app"
})
script>
- 组件其实也是一个Vue实例,因此它在定义时也会接收:data、methods、生命周期函数等
- 不同的是组件不会与页面的元素绑定,否则就无法复用了,因此没有el属性。
- 但是组件渲染需要html模板,所以增加了template属性,值就是HTML模板
- 全局组件定义完毕,任何vue实例都可以直接在HTML中通过组件名称来使用组件了。
- data必须是一个函数,不再是一个对象。
6.2.组件的复用
定义好的组件,可以任意复用多次:
<div id="app">

    <counter>counter>
    <counter>counter>
    <counter>counter>
div>
效果:
[外链图片转存失败,源站可能有防盗链机制,建议将图片保存下来直接上传(img-G1O3otJA-1592287463226)(assets/1530084943778.png)]
你会发现每个组件互不干扰,都有自己的count值。怎么实现的?
组件的data属性必须是函数!
当我们定义这个
data: {
  count: 0
}
取而代之的是,一个组件的 data 选项必须是一个函数,因此每个实例可以维护一份被返回对象的独立的拷贝:
data: function () {
  return {
    count: 0
  }
}
如果 Vue 没有这条规则,点击一个按钮就会影响到其它所有实例!
6.3.局部组件
一旦全局注册,就意味着即便以后你不再使用这个组件,它依然会随着Vue的加载而加载。
因此,对于一些并不频繁使用的组件,我们会采用局部注册。
我们先在外部定义一个对象,结构与创建组件时传递的第二个参数一致:
const counter = {
template:'',
data(){
return {
count:0
}
}
};
然后在Vue中使用它:
var app = new Vue({
    el:"#app",
    components:{
        counter:counter // 将定义的对象注册为组件
    }
})
- components就是当前vue对象子组件集合。
- 其key就是子组件名称
- 其值就是组件对象名
- 效果与刚才的全局注册是类似的,不同的是,这个counter组件只能在当前的Vue实例中使用
6.4.组件通信
通常一个单页应用会以一棵嵌套的组件树的形式来组织:
[外链图片转存失败,源站可能有防盗链机制,建议将图片保存下来直接上传(img-2F5DRzjj-1592287463229)(assets/1525855149491.png)]
- 页面首先分成了顶部导航、左侧内容区、右侧边栏三部分
- 左侧内容区又分为上下两个组件
- 右侧边栏中又包含了3个子组件
各个组件之间以嵌套的关系组合在一起,那么这个时候不可避免的会有组件间通信的需求。
6.4.1.props(父向子传递)
- 父组件使用子组件时,自定义属性(属性名任意,属性值为要传递的数据)
- 子组件通过props接收父组件数据,通过自定义属性的属性名
父组件使用子组件,并自定义了title属性:
<div id="app">
<h1>打个招呼:h1>
<introduce title="大家好,我是锋哥"/>
div>
<script src="./node_modules/vue/dist/vue.js">script>
<script type="text/javascript">
Vue.component("introduce",{
// 直接使用props接收到的属性来渲染页面
template:'{{title}}
',
props:['title'] // 通过props来接收一个父组件传递的属性
})
var app = new Vue({
el:"#app"
})
script>
6.4.2.props验证
我们定义一个子组件,并接收复杂数据:
const myList = {
template: '\
\
- {{item.id}} : {{item.name}}
\
\
',
props: {
items: {
type: Array,
default: [],
required: true
}
}
};
- 这个子组件可以对 items 进行迭代,并输出到页面。
- props:定义需要从父组件中接收的属性
- items:是要接收的属性名称
- type:限定父组件传递来的必须是数组
- default:默认值
- required:是否必须
- items:是要接收的属性名称
当 prop 验证失败的时候,(开发环境构建版本的) Vue 将会产生一个控制台的警告。
我们在父组件中使用它:
<div id="app">
    <h2>hell0:h2>

    <my-list :items="lessons"/>
div>
var app = new Vue({
    el:"#app",
    components:{
        myList // 当key和value一样时,可以只写一个
    },
    data:{
        lessons:[
            {id:1, name: 'java'},
            {id:2, name: 'php'},
            {id:3, name: 'ios'},
        ]
    }
})
效果:
[外链图片转存失败,源站可能有防盗链机制,建议将图片保存下来直接上传(img-73BYOPqP-1592287463234)(assets/1530107338625.png)]
type类型,可以有:
[外链图片转存失败,源站可能有防盗链机制,建议将图片保存下来直接上传(img-OQKwnQll-1592287463235)(assets/1530108427358.png)]
注意:子组件模板有且只有一个根标签
6.4.3.动态静态传递
给 prop 传入一个静态的值:
<introduce title="大家好,我是锋哥"/>
给 prop 传入一个动态的值: (通过v-bind从数据模型中,获取title的值)
<introduce :title="title"/>
静态传递时,我们传入的值都是字符串类型的,但实际上任何类型的值都可以传给一个 props。
<blog-post v-bind:likes="42">blog-post>


blog-post v-bind:likes="post.likes">blog-post>
6.4.4.子向父的通信:$emit
来看这样的一个案例:
<div id="app">
<h2>num: {{num}}h2>
<counter :num="num">counter>
div>
<script src="./node_modules/vue/dist/vue.js">script>
<script type="text/javascript">
Vue.component("counter", {// 子组件,定义了两个按钮,点击数字num会加或减
template:'\
\
\
\
',
props:['num']// count是从父组件获取的。
})
var app = new Vue({
el:"#app",
data:{
num:0
}
})
script>
- 子组件接收父组件的num属性
- 子组件定义点击按钮,点击后对num进行加或减操作
子组件接收到父组件属性后,默认是不允许修改的。怎么办?
既然只有父组件能修改,那么加和减的操作一定是放在父组件:
var app = new Vue({
    el:"#app",
    data:{
        num:0
    },
    methods:{ // 父组件中定义操作num的方法
        increment(){
            this.num++;
        },
        decrement(){
            this.num--;
        }
    }
})
但是,点击按钮是在子组件中,那就是说需要子组件来调用父组件的函数,怎么做?
我们可以通过v-on指令将父组件的函数绑定到子组件上:
<div id="app">
    <h2>num: {{num}}h2>
    <counter :count="num" @inc="increment" @dec="decrement">counter>
div>
在子组件中定义函数,函数的具体实现调用父组件的实现,并在子组件中调用这些函数。当子组件中按钮被点击时,调用绑定的函数:
Vue.component("counter", {
template:'\
\
\
\
',
props:['count'],
methods:{
plus(){
this.$emit("inc");
},
reduce(){
this.$emit("dec");
}
}
})
- vue提供了一个内置的this.$emit()函数,用来调用父组件绑定的函数
7.路由vue-router
7.1.场景模拟
现在我们来实现这样一个功能:
一个页面,包含登录和注册,点击不同按钮,实现登录和注册页切换:
7.1.1.编写父组件
为了让接下来的功能比较清晰,我们先新建一个文件夹:src
然后新建一个HTML文件,作为入口:index.html
然后编写页面的基本结构:
<div id="app">
    <span>登录span>
    <span>注册span>
    <hr/>
    <div>
        登录页/注册页
    div>
div>
<script src="../node_modules/vue/dist/vue.js">script>
<script type="text/javascript">
    var vm = new Vue({
        el:"#app"
    })
script>
样式:
7.1.2.编写登录及注册组件
接下来我们来实现登录组件,以前我们都是写在一个文件中,但是为了复用性,开发中都会把组件放入独立的JS文件中,我们新建一个user目录以及login.js及register.js:
编写组件,这里我们只写模板,不写功能。
login.js内容如下:
const loginForm = {
    template:'\
    \
    登录页 \
    用户名:
\
    密码:
\
    \
    '
}
register.js内容:
const registerForm = {
    template:'\
    \
    注册页 \
    用 户 名:
\
    密  码:
\
    确认密码:
\
    \
    '
}
7.1.3.在父组件中引用
<div id="app">
    <span>登录span>
    <span>注册span>
    <hr/>
    <div>


        <login-form>login-form>
        <register-form>register-form>
    div>
div>
<script src="../node_modules/vue/dist/vue.js">script>
<script src="user/login.js">script>
<script src="user/register.js">script>
<script type="text/javascript">
    var vm = new Vue({
        el: "#app",
        components: {
            loginForm,
            registerForm
        }
    })
script>
7.1.5.问题
我们期待的是,当点击登录或注册按钮,分别显示登录页或注册页,而不是一起显示。
但是,如何才能动态加载组件,实现组件切换呢?
虽然使用原生的Html5和JS也能实现,但是官方推荐我们使用vue-router模块。
7.2.vue-router简介和安装
使用vue-router和vue可以非常方便的实现 复杂单页应用的动态路由功能。
官网:https://router.vuejs.org/zh-cn/
使用npm安装:npm install vue-router --save
[外链图片转存失败,源站可能有防盗链机制,建议将图片保存下来直接上传(img-GXBfXnmo-1592293353777)(assets/1530161293338.png)]
在index.html中引入依赖:
<script src="../node_modules/vue-router/dist/vue-router.js">script>
7.3.快速入门
新建vue-router对象,并且指定路由规则:
// 创建VueRouter对象
const router = new VueRouter({
    routes:[ // 编写路由规则
        {
            path:"/login", // 请求路径,以“/”开头
            component:loginForm // 组件名称
        },
        {
            path:"/register",
            component:registerForm
        }
    ]
})
- 创建VueRouter对象,并指定路由参数
- routes:路由规则的数组,可以指定多个对象,每个对象是一条路由规则,包含以下属性:
- path:路由的路径
- component:组件名称
在父组件中引入router对象:
var vm = new Vue({
    el:"#app",
    components:{// 引用登录和注册组件
        loginForm,
        registerForm
    },
    router // 引用上面定义的router对象
})
页面跳转控制:
<div id="app">

    <span><router-link to="/login">登录router-link>span>
    <span><router-link to="/register">注册router-link>span>
    <hr/>
    <div>

        <router-view>router-view>
    div>
div>
- 通过
- 通过
注意:单页应用中,页面的切换并不是页面的跳转。仅仅是地址最后的hash值变化。
事实上,我们总共就一个HTML:index.html
8搭建后台的前台页面
8.1http://vuejs-templates.github.io/webpack/项目结构
导入已有前台文件
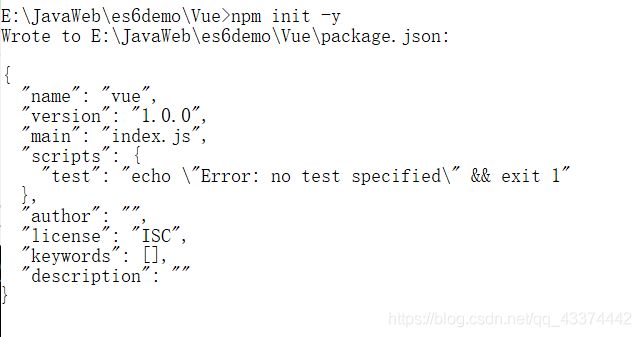
执行 npm installl—安装所需要的依赖
执行 npm run dev启动热部署前台项目
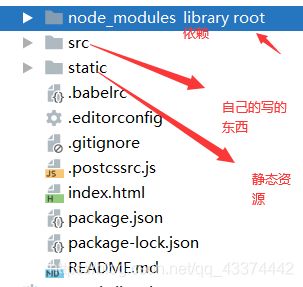
项目结构:
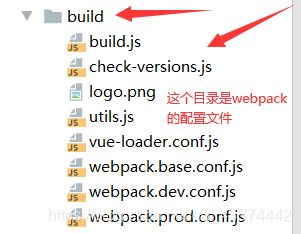
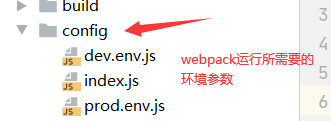

8.2Vuetify框架
8.2.1.为什么要学习UI框架
Vue虽然会帮我们进行视图的渲染,但样式还是由我们自己来完成。这显然不是我们的强项,因此后端开发人员一般都喜欢使用一些现成的UI组件,拿来即用,常见的例如:
- BootStrap
- LayUI
- EasyUI
- ZUI
然而这些UI组件的基因天生与Vue不合,因为他们更多的是利用DOM操作,借助于jQuery实现,而不是MVVM的思想。
而目前与Vue吻合的UI框架也非常的多,国内比较知名的如: - element-ui:饿了么出品
- i-view:某公司出品
一款国外的框架:Vuetify
官方网站:https://vuetifyjs.com/
https://vuetifyjs.com/zh-Hans/getting-started/quick-start/
8.2.3.为什么是Vuetify
有中国的为什么还要用外国的?原因如下:
- Vuetify几乎不需要任何CSS代码,而element-ui许多布局样式需要我们来编写
- Vuetify从底层构建起来的语义化组件。简单易学,容易记住。
- Vuetify基于Material Design(谷歌推出的多平台设计规范),更加美观,动画效果酷炫,且风格统一
这是官网的说明:
缺陷: - 目前官网虽然有中文文档,但因为翻译问题,几乎不太能看。
8.2.3.怎么用?
基于官方网站的文档进行学习:
我们重点关注UI components即可,里面有大量的UI组件,我们要用的时候再查看,不用现在学习,先看下有什么:
以后用到什么组件,就来查询即可。
8.2.4.项目页面布局
接下来我们一起看下页面布局。
Layout组件是我们的整个页面的布局组件:
一个典型的三块布局。包含左,上,中三部分:
里面使用了Vuetify中的2个组件和一个布局元素:
v-navigation-drawer:导航抽屉,主要用于容纳应用程序中的页面的导航链接。v-toolbar:工具栏通常是网站导航的主要途径。可以与导航抽屉一起很好地工作,动态选择是否打开导航抽屉,实现可伸缩的侧边栏。v-content:并不是一个组件,而是标记页面布局的元素。可以根据您指定的app组件的结构动态调整大小,使得您可以创建高度可定制的组件。
那么问题来了:v-content中的内容来自哪里?- Layout映射的路径是
/ - 除了Login以外的所有组件,都是定义在Layout的children属性,并且路径都是
/的下面 - 因此当路由到子组件时,会在Layout中定义的锚点中显示。
- 并且Layout中的其它部分不会变化,这就实现了布局的共享。
8.3.使用域名访问本地项目
8.3.1.统一环境
我们现在访问页面使用的是:http://localhost:9001
有没有什么问题?
实际开发中,会有不同的环境:
- 开发环境:自己的电脑
- 测试环境:提供给测试人员使用的环境
- 预发布环境:数据是和生成环境的数据一致,运行最新的项目代码进去测试
- 生产环境:项目最终发布上线的环境
如果不同环境使用不同的ip去访问,可能会出现一些问题。为了保证所有环境的一致,我们会在各种环境下都使用域名来访问。
我们将使用以下域名: - 主域名是:www.tudou.cn,tudou.cn
- 管理系统域名:manage.tu.cn
8. 3.2.域名解析
一个域名一定会被解析为一个或多个ip。这一般会包含两步:
- 本地域名解析
浏览器会首先在本机的hosts文件中查找域名映射的IP地址,如果查找到就返回IP ,没找到则进行域名服务器解析,一般本地解析都会失败,因为默认这个文件是空的。- Windows下的hosts文件地址:C:/Windows/System32/drivers/etc/hosts
- Linux下的hosts文件所在路径: /etc/hosts
样式:
# My hosts 127.0.0.1 localhost - 域名服务器解析
本地解析失败,才会进行域名服务器解析,域名服务器就是网络中的一台计算机,里面记录了所有注册备案的域名和ip映射关系,一般只要域名是正确的,并且备案通过,一定能找到。
8.3.3.解决域名解析问题
我们不可能去购买一个域名,因此我们可以伪造本地的hosts文件,实现对域名的解析。修改本地的host为:
C:\Windows\System32\drivers\etc
127.0.0.1 api.tudou.cn
127.0.0.1 manage.tudou.cn
这样就实现了域名的关系映射了。
使用SwitchHosts-win工具
运行exe文件,y效果:

以管理员的身份运行
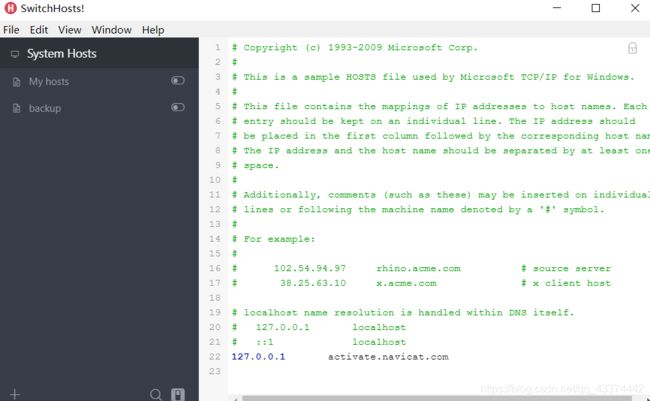


重启webpack

访问的是域名加上端口号
9 使用Nginx解决端口号问题
nginx可以作为web服务器,但更多的时候,我们把它作为网关,因为它具备网关必备的功能:
- 反向代理
- 负载均衡
- 动态路由
- 请求过滤
什么是反向代理
代理:通过客户机的配置,实现让一台服务器代理客户机,客户的所有请求都交给服务器处理。
反向代理:用一台服务器,代理真实服务器,用户访问时,不再是访问真实服务器,而是代理服务器
Nginx可以当做反向代理服务器来使用
- 需要提前在Nginx中配置好反向代理的规则,不同的请求交给不同的真是服务器来处理
- 当请求达到Nginx,Nginx会根据已经定义的规则进行请求转发,从而实现路由功能
Nginx是一个高性能的Web和单项代理服务器,他具有很多非常优越的特性:
作为web服务器,相比Apache Nginx使用更少的资源,去支持更多地并发连接,体现更高的效率,这点Nginx尤其受到虚拟主机提供商的欢迎,能够支持达到50000个并发连接数的响应。
作为负载均衡服务器:Nginx既可以在内部直接支持Rails和PHP,也可以支持作为HtTp代理服务器,对外进行服务.。Nginx用c编写,不论是资源开销还是CPU使用率都比Perlbal要好的多
利用反向代理,就可以解决端口问题
9.1安装和使用
9.2反向代理的配置
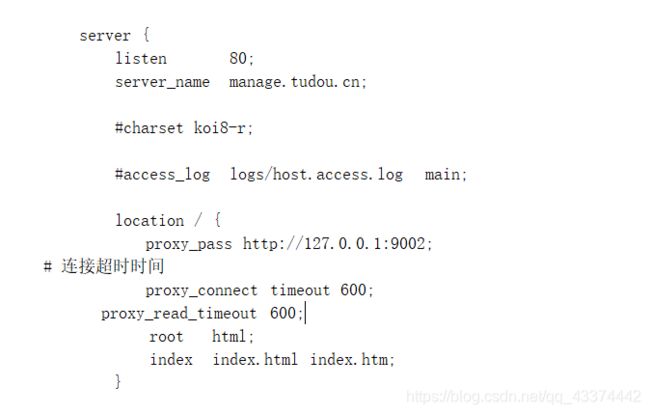
Nginx中的每一个server就是一个反向代理的配置,可以有多个server
全部配置文件:
#user  nobody;
worker_processes  1;

#error_log  logs/error.log;
#error_log  logs/error.log  notice;
#error_log  logs/error.log  info;

#pid        logs/nginx.pid;


events {
    worker_connections  1024;
}


http {
    include       mime.types;
    default_type  application/octet-stream;

    #log_format  main  '$remote_addr - $remote_user [$time_local] "$request" '
    #                  '$status $body_bytes_sent "$http_referer" '
    #                  '"$http_user_agent" "$http_x_forwarded_for"';

    #access_log  logs/access.log  main;

    sendfile        on;
    #tcp_nopush     on;

    #keepalive_timeout  0;
    keepalive_timeout  65;

    #gzip  on;


    server {
        listen       80;
        server_name  manage.tudou.cn;
	 proxy_set_header X-Forwarded-Host $host;
        proxy_set_header X-Forwarded-Server $host;
        proxy_set_header X-Forwarded-For $proxy_add_x_forwarded_for;

        #charset koi8-r;

        #access_log  logs/host.access.log  main;

        location / {
            proxy_pass http://127.0.0.1:9002;
	     proxy_connect_timeout 600;
	     proxy_read_timeout 600;
            root   html;
            index  index.html index.htm;

                    }


        #error_page  404              /404.html;

        # redirect server error pages to the static page /50x.html
        #
        error_page   500 502 503 504  /50x.html;
        location = /50x.html {
            root   html;
        }

        # proxy the PHP scripts to Apache listening on 127.0.0.1:80
        #
        #location ~ \.php$ {
        #    proxy_pass   http://127.0.0.1;
        #}

        # pass the PHP scripts to FastCGI server listening on 127.0.0.1:9000
        #
        #location ~ \.php$ {
        #    root           html;
        #    fastcgi_pass   127.0.0.1:9000;
        #    fastcgi_index  index.php;
        #    fastcgi_param  SCRIPT_FILENAME  /scripts$fastcgi_script_name;
        #    include        fastcgi_params;
        #}

        # deny access to .htaccess files, if Apache's document root
        # concurs with nginx's one
        #
        #location ~ /\.ht {
        #    deny  all;
        #}
    }


    # another virtual host using mix of IP-, name-, and port-based configuration
    #
    #server {
    #    listen       8000;
    #    listen       somename:8080;
    #    server_name  somename  alias  another.alias;

    #    location / {
    #        root   html;
    #        index  index.html index.htm;
    #    }
    #}


    # HTTPS server
    #
    #server {
    #    listen       443 ssl;
    #    server_name  localhost;

    #    ssl_certificate      cert.pem;
    #    ssl_certificate_key  cert.key;

    #    ssl_session_cache    shared:SSL:1m;
    #    ssl_session_timeout  5m;

    #    ssl_ciphers  HIGH:!aNULL:!MD5;
    #    ssl_prefer_server_ciphers  on;

    #    location / {
    #        root   html;
    #        index  index.html index.htm;
    #    }
    #}

}
配置好之后重新加载配置文件:

访问80端口:----
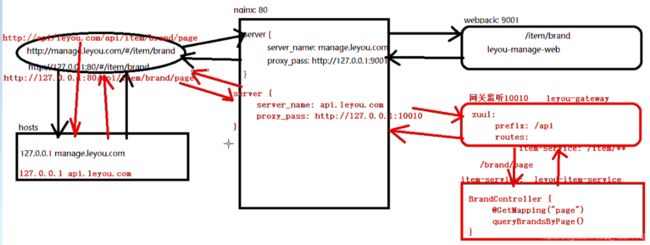
路径:manage.tudou.cn---->(host文件)解析为 IP --127.0.0.1端口为80—Nginx监听80端口----server配置转发–解析到代理

webpack再 监听9001------这里面放着web项目---->响应给Nginx---->响应到页面
在Nginx.conf添加服务网关配置:
网关端口:8090
server {
        listen       80;
        server_name  api.tudou.cn;
	 proxy_set_header X-Forwarded-Host $host;
        proxy_set_header X-Forwarded-Server $host;
        proxy_set_header X-Forwarded-For $proxy_add_x_forwarded_for;

        #charset koi8-r;

        #access_log  logs/host.access.log  main;

        location / {
            proxy_pass http://127.0.0.1:8090;
	     proxy_connect_timeout 600;
	     proxy_read_timeout 600;
            root   html;
            index  index.html index.htm;

                    }
}
然后重新加载配置文件
nginx -s reload
配置完成
10实现商品的分类查询
商城的核心是商品,商品多了之后就要进行分类,不同的商品会有不同的品牌信息,需要依次完成商品分类,品牌,商品的开发
一般有三种情况
1.根据开发好的前端页面调用关系去开发
2.api接口文档进行前后端的开发
3.后台开发好,前端根据路径,请求方式,参数,返回结果进行前端开发
导入SQL文件创建数据模型
其中mysql中没有布尔类型,所以是tinyint
因为商品分类会有层级关系,因此加入了parent_id字段,对本表中的其它分类进行自关联。
10.1实现功能
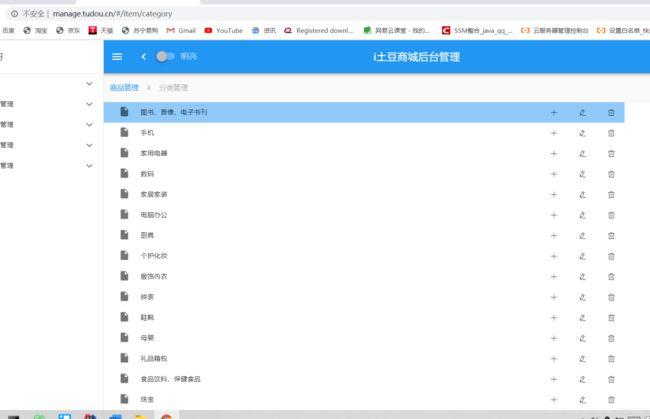
在浏览器页面点击“分类管理”菜单:
http://manage.tudou.cn/#/item/category
根据这个路由路径到路由文件(src/route/index.js),可以定位到分类管理页面:
由路由文件知,页面是src/pages/item/Category.vue
10.1.1.url异步请求
点击商品管理下的分类管理子菜单,在浏览器控制台可以看到
页面中没有,只是发起了一条请求:http://api.tudou.cn/api/item/category/list?pid=0
明明是使用的相对路径:/item/category/list,讲道理发起的请求地址应该是:
http://manage.tudou.com/item/category/list
但实际却是:
http://api.tudou.com/api/item/category/list?pid=0
这是因为,有一个全局的配置文件,对所有的请求路径进行了约定:
路径是http://api.tudou.com,并且默认加上了/api的前缀,这恰好与我们的网关设置匹配,我们只需要把地址改成网关的地址即可,因为我们使用了nginx反向代理,这里可以写域名。
接下来,编写后台接口,返回对应的数据即可。
10.2编写接口
10.2.1编写实体类
在 tudou-item-interface中添加category实体:
@Table(name="tb_category")
public class Category {
	@Id
	@GeneratedValue(strategy=GenerationType.IDENTITY)
	private Long id;
	private String name;
	private Long parentId;
	private Boolean isParent; // 注意isParent生成的getter和setter方法需要手动加上Is
	private Integer sort;
	// getter和setter略
需要引入依赖—jpa的注解,因此我们在iterface`中添加jpa依赖
<dependency>
            <groupId>javax.persistence</groupId>
            <artifactId>persistence-api</artifactId>
            <version>1.0</version>
 </dependency>
10.2.2在服务中编写mapper接口
package cn.tudou.item.mapper;
import cn.tudou.pojo.Category;
import tk.mybatis.mapper.common.Mapper;
public interface CategoryMapper extends Mapper<Category> {
}
在引导类中开启mapper扫描注解
@MapperScan(“cn.tudou.item.mapper”) //开启mapper扫描
10.2.3编写service接口和实现类
package cn.tudou.item.service.impl;

import cn.tudou.item.mapper.CategoryMapper;
import cn.tudou.item.service.categoryService;
import org.springframework.beans.factory.annotation.Autowired;
import org.springframework.stereotype.Service;

@Service //开启service注解,交给spring容器进行管理
public class categoryServiceImpl implements categoryService {
    @Autowired //自动注入mapper
    private CategoryMapper categoryMapper;
}
10.2.4编写controller
package cn.tudou.item.controller;
import cn.tudou.item.service.impl.categoryServiceImpl;
import cn.tudou.pojo.Category;
import org.springframework.beans.factory.annotation.Autowired;
import org.springframework.http.HttpStatus;
import org.springframework.http.RequestEntity;
import org.springframework.http.ResponseEntity;
import org.springframework.stereotype.Controller;
import org.springframework.util.CollectionUtils;
import org.springframework.web.bind.annotation.GetMapping;
import org.springframework.web.bind.annotation.RequestMapping;
import org.springframework.web.bind.annotation.RequestParam;
import javax.xml.ws.Response;
import java.util.Collection;
import java.util.List;
@Controller //开启controller注解,交由springIOC容器管理
@RequestMapping("category") //开启springmvc映射访问路径注解
public class CatalgoryController {
    @Autowired //开启自动注入service注解,注入实现类
    private categoryServiceImpl categoryService;

    @GetMapping("list")//@GetMapping用于处理请求方法的GET类型,@ PostMapping用于处理请求方法的POST类型
         /*ResponseEntity
ResponseEntity标识整个http相应:状态码、头部信息以及相应体内容。
ResponseEntity是通用类型,因此可以使用任意类型作为响应体-*/
    //?后面的参数使用@RequestParam来接受,设置在没有传参数的时候默认值0;
    public ResponseEntity<List<Category>> queryCategoriesByPid(@RequestParam(value = "pid", defaultValue = "0") Long pid) {
        try {
            if (pid == null || pid < 0) {
                //返回参数不合法 400
                // return ResponseEntity.status(HttpStatus.BAD_REQUEST).build();
                //另一种方式
                // return new RequestEntity<>(HttpStatus.BAD_GATEWAY)

                //另一种方式
                return ResponseEntity.badRequest().build();
            }
            //返回集合,如果为空的话使用categories.size()==0会报空值异常,404服务器未找到资源
            List<Category> categories = this.categoryService.queryCategoriesByPid(pid);
            if (CollectionUtils.isEmpty(categories)) {//该方法判断集合是否为空
                //返回404
                //return ResponseEntity.status(HttpStatus.NOT_FOUND).build();
                //另一种方式
                return ResponseEntity.notFound().build();
            }
            //返回值200,响应查询成功
            return ResponseEntity.ok(categories);
        } catch (Exception e) {
            e.printStackTrace();//捕捉异常,可不捕捉,程序异常本身响应500
        }
        //500;服务器内部异常
        return ResponseEntity.status(HttpStatus.INTERNAL_SERVER_ERROR).build();
    }
}
10.2.4编写service方法
package cn.tudou.item.service.impl;

import cn.tudou.item.controller.CatalgoryController;
import cn.tudou.item.mapper.CategoryMapper;
import cn.tudou.item.service.categoryService;
import cn.tudou.pojo.Category;
import org.springframework.beans.factory.annotation.Autowired;
import org.springframework.stereotype.Service;

import java.util.List;
import java.util.zip.ZipEntry;

@Service //开启service注解,交给spring容器进行管理
public class categoryServiceImpl implements categoryService {
    @Autowired //自动注入mapper
    private CategoryMapper categoryMapper;

        /**
        * @Description: 根据父节点查询子节点
        * @Param: [pid]
        * @return: java.util.List
        * @Author: Mr.Wang
        * @Date: 2020/6/17
        */
        @Override
    public List<Category> queryCategoriesByPid(Long pid) {
       //new 一个Category类对象
        Category record = new Category();
        record.setParentId(pid);
        return this.categoryMapper.select(record);
    }
}
11跨域问题
跨域:浏览器对于Javascript同源策略的限制
以下情况属于跨域:
域名不同 :www.badui,com------>www,taobao.com
域名相同端口不同 www.baidu.8080---->www.baidu.com:8081
二级域名不同 item.baidu.con---->tekuai.baidu.com
如果域名和端口都相同,但是请求路径不同不属于跨域
11.1出现跨域问题的原因
跨域问题是浏览器对于ajax的一种限制:一个页面发起的ajax请求,只能是与当前域名相同的路径,这能有效组织跨站攻击
因此,跨域问题只是针对ajax的一种限制
11.2 跨域问题解决
常用的跨域问题解决方案有三种
- jsonp 最早的解决方案,利用script标签跨域原理的实现
限制: 需要服务器的支持
只能发起get请求 - Nginx反向代理
利用Nginx把跨域反向代理为不跨域,支持各种请求方式
缺点:需要在Nginx进行额外的配置 - cors 规范化的跨域请求解决方案,安全可靠
优势:在服务端进行控制是否允许跨域可自定义规则
支持各种请求方式
缺点:会产生额外的请求
11.3解决跨域问题
CORS是一个W3C标准,全称是"跨域资源共享"(Cross-origin resource sharing)。
它允许浏览器向跨源服务器,发出[XMLHttpRequest请求,从而克服了AJAX只能[同源]使用的限制。
CORS需要浏览器和服务器同时支持。目前,所有浏览器都支持该功能,IE浏览器不能低于IE10。
- 浏览器端:
目前,所有浏览器都支持该功能(IE10以下不行)。整个CORS通信过程,都是浏览器自动完成,不需要用户参与。 - 服务端:
CORS通信与AJAX没有任何差别,因此你不需要改变以前的业务逻辑。只不过,浏览器会在请求中携带一些头信息,我们需要以此判断是否允许其跨域,然后在响应头中加入一些信息即可。这一般通过过滤器完成即可。
11.3.2.原理
浏览器会将ajax请求分为两类,其处理方案略有差异:简单请求、特殊请求。
5.3.2.1.简单请求
只要同时满足以下两大条件,就属于简单请求。:
(1) 请求方法是以下三种方法之一:
- HEAD
- GET
- POST
(2)HTTP的头信息不超出以下几种字段: - Accept
- Accept-Language
- Content-Language
- Last-Event-ID
- Content-Type:只限于三个值
application/x-www-form-urlencoded、multipart/form-data、text/plain
当浏览器发现发起的ajax请求是简单请求时,会在请求头中携带一个字段:Origin.
Origin中会指出当前请求属于哪个域(协议+域名+端口)。服务会根据这个值决定是否允许其跨域。
如果服务器允许跨域,需要在返回的响应头中携带下面信息:
Access-Control-Allow-Origin: http://manage.tudou.com
Access-Control-Allow-Credentials: true
Content-Type: text/html; charset=utf-8
- Access-Control-Allow-Origin:可接受的域,是一个具体域名或者*(代表任意域名)
- Access-Control-Allow-Credentials:是否允许携带cookie,默认情况下,cors不会携带cookie,除非这个值是true
有关cookie:
操作cookie,需要满足3个条件:
- 服务的响应头中需要携带Access-Control-Allow-Credentials并且为true。
- 浏览器发起ajax需要指定withCredentials 为true
- 响应头中的Access-Control-Allow-Origin一定不能为*,必须是指定的域名
11.3.2.2.特殊请求
不符合简单请求的条件,会被浏览器判定为特殊请求,,例如请求方式为PUT。
预检请求
特殊请求会在正式通信之前,增加一次HTTP查询请求,称为"预检"请求(preflight)。
浏览器先询问服务器,当前网页所在的域名是否在服务器的许可名单之中,以及可以使用哪些HTTP动词和头信息字段。只有得到肯定答复,浏览器才会发出正式的XMLHttpRequest请求,否则就报错。
一个“预检”请求的样板:
OPTIONS /cors HTTP/1.1
Origin: http://manage.leyou.com
Access-Control-Request-Method: PUT
Access-Control-Request-Headers: X-Custom-Header
Host: api.tudou.cn
Accept-Language: en-US
Connection: keep-alive
User-Agent: Mozilla/5.0...
与简单请求相比,除了Origin以外,多了两个头:
- Access-Control-Request-Method:接下来会用到的请求方式,比如PUT
- Access-Control-Request-Headers:会额外用到的头信息
预检请求的响应
服务的收到预检请求,如果许可跨域,会发出响应:
HTTP/1.1 200 OK
Date: Mon, 01 Dec 2008 01:15:39 GMT
Server: Apache/2.0.61 (Unix)
Access-Control-Allow-Origin: http://manage.leyou.com
Access-Control-Allow-Credentials: true
Access-Control-Allow-Methods: GET, POST, PUT
Access-Control-Allow-Headers: X-Custom-Header
Access-Control-Max-Age: 1728000
Content-Type: text/html; charset=utf-8
Content-Encoding: gzip
Content-Length: 0
Keep-Alive: timeout=2, max=100
Connection: Keep-Alive
Content-Type: text/plain
除了Access-Control-Allow-Origin和Access-Control-Allow-Credentials以外,这里又额外多出3个头:
- Access-Control-Allow-Methods:允许访问的方式
- Access-Control-Allow-Headers:允许携带的头
- Access-Control-Max-Age:本次许可的有效时长,单位是秒,过期之前的ajax请求就无需再次进行预检了
如果浏览器得到上述响应,则认定为可以跨域,后续就跟简单请求的处理是一样的了。
11.3.3.实现非常简单
虽然原理比较复杂
- 浏览器端都有浏览器自动完成,我们无需操心
- 服务端可以通过拦截器统一实现,不必每次都去进行跨域判定的编写。
事实上,SpringMVC已经帮我们写好了CORS的跨域过滤器:CorsFilter ,内部已经实现了刚才所讲的判定逻辑,直接用就好了。
在tudou-gateway中编写一个配置类,并且注册CorsFilter:
    package cn.tudou.gateway.config;
    import org.springframework.context.annotation.Bean;
    import org.springframework.context.annotation.Configuration;
    import org.springframework.web.cors.CorsConfiguration;
    import org.springframework.web.cors.UrlBasedCorsConfigurationSource;
    import org.springframework.web.filter.CorsFilter;

    @Configuration//声明这是一个配置类
    public class ToDouCordConfiguration {
        @Bean
        public CorsFilter corsFilter() {
            //初始化cors配置对象
            CorsConfiguration corsConfiguration =new CorsConfiguration();
            //允许跨域的域名,如果要携带cookie,不能写*,*代表所有的域名都可访问
            corsConfiguration.addAllowedOrigin("http://manage.tudou.cn");
            //设置允许携带cookies
            corsConfiguration.setAllowCredentials(true);
            //*代表所有的请求方法
            corsConfiguration.addAllowedMethod("*");
            //允许携带任何头信息
            corsConfiguration.addAllowedHeader("*");
            //初始化cors配置源对象
            UrlBasedCorsConfigurationSource corsConfigurationSource = new UrlBasedCorsConfigurationSource();
            //添加映射路径拦截一切请求
            corsConfigurationSource.registerCorsConfiguration("/**",corsConfiguration);
            //返回一个CorsFilter实例,参数:cors配置源对象
            return new CorsFilter(corsConfigurationSource);

        }
    }
12.品牌的查询
商品分类完成以后,到了品牌
点击“品牌管理”菜单:
路由路径:/item/brand
根据路由文件知,对应的页面是:src/pages/item/Brand.vue
页面会发送如下请求:
12.1.后台提供查询接口
前台页面已经准备好,接下来就是后台提供数据接口了。
12.1.1.数据库表
CREATE TABLE `tb_brand` (
  `id` bigint(20) NOT NULL AUTO_INCREMENT COMMENT '品牌id',
  `name` varchar(50) NOT NULL COMMENT '品牌名称',
  `image` varchar(200) DEFAULT '' COMMENT '品牌图片地址',
  `letter` char(1) DEFAULT '' COMMENT '品牌的首字母',
  PRIMARY KEY (`id`)
) ENGINE=InnoDB AUTO_INCREMENT=325400 DEFAULT CHARSET=utf8 COMMENT='品牌表,一个品牌下有多个商品(spu),一对多关系';
这里需要注意的是,品牌和商品分类之间是多对多关系。因此有一张中间表,来维护两者间关系:
CREATE TABLE `tb_category_brand` (
  `category_id` bigint(20) NOT NULL COMMENT '商品类目id',
  `brand_id` bigint(20) NOT NULL COMMENT '品牌id',
  PRIMARY KEY (`category_id`,`brand_id`)
) ENGINE=InnoDB DEFAULT CHARSET=utf8 COMMENT='商品分类和品牌的中间表,两者是多对多关系';
这张表中并没有设置外键约束,似乎与数据库的设计范式不符。
- 外键会严重影响数据库读写的效率
- 数据删除时会比较麻烦
在电商行业,性能是非常重要的。我们宁可在代码中通过逻辑来维护表关系,也不设置外键。
12.1.2.实体类
@Table(name = "tb_brand")
public class Brand {
    @Id
    @GeneratedValue(strategy = GenerationType.IDENTITY)
    private Long id;
    private String name;// 品牌名称
    private String image;// 品牌图片
    private Character letter;
    // getter setter 略
}
12.1.3.mapper
通用mapper来简化开发:
public interface BrandMapper extends Mapper<Brand> {
}
12.1.4.controller
编写controller先思考四个问题,参照前端页面的控制台
- 请求方式:查询,肯定是Get
- 请求路径:分页查询,/brand/page
- 请求参数:根据我们刚才编写的页面,有分页功能,有排序功能,有搜索过滤功能,因此至少要有5个参数:
- page:当前页,int
- rows:每页大小,int
- sortBy:排序字段,String
- desc:是否为降序,boolean
- key:搜索关键词,String
- 响应结果:分页结果一般至少需要两个数据
- total:总条数
- items:当前页数据
- totalPage:有些还需要总页数
在tudou-common中封装一个类,来表示分页结果:
public class PageResult<T> {
    private Long total;// 总条数
    private Integer totalPage;// 总页数
    private List<T> items;// 当前页数据

    public PageResult() {
    }

    public PageResult(Long total, List<T> items) {
        this.total = total;
        this.items = items;
    }

    public PageResult(Long total, Long totalPage, List<T> items) {
        this.total = total;
        this.totalPage = totalPage;
        this.items = items;
    }

    public Long getTotal() {
        return total;
    }

    public void setTotal(Long total) {
        this.total = total;
    }

    public List<T> getItems() {
        return items;
    }

    public void setItems(List<T> items) {
        this.items = items;
    }

    public Long getTotalPage() {
        return totalPage;
    }

    public void setTotalPage(Long totalPage) {
        this.totalPage = totalPage;
    }
}
另外,这个PageResult以后可能在其它项目中也有需求,因此我们将其抽取到leyou-common中,提高复用性:
不要忘记在tudou-item-service工程的pom.xml中引入tudou-common的依赖:
<dependency>
<groupId>com.leyou.commongroupId>
<artifactId>leyou-commonartifactId>
<version>1.0.0-SNAPSHOTversion>
dependency>
``
编写Controller
```java
package cn.tudou.item.controller;
import cn.tudou.item.service.BrandService;
import cn.tudou.item.service.impl.BrandServiceImpl;
import cn.tudou.pojo.Brand;
import cn.tuodu.common.pojo.PageResult;
import org.springframework.beans.factory.annotation.Autowired;
import org.springframework.http.ResponseEntity;
import org.springframework.stereotype.Controller;
import org.springframework.util.CollectionUtils;
import org.springframework.web.bind.annotation.GetMapping;
import org.springframework.web.bind.annotation.RequestMapping;
import org.springframework.web.bind.annotation.RequestParam;
@Controller //交由springIOC容器管理
@RequestMapping("brand") //请求路径
public class BrandController {
@Autowired
private BrandService brandService;
/**
* @Description: 分页并排序查询品牌信息
* @Param: [key, page, rows, sortBy, desc]
* @return: org.springframework.http.ResponseEntity<cn.tudou.pojo.Brand> >
* @Author: Mr.Wang
* @Date: 2020/6/18
*/
@GetMapping("page")
public ResponseEntity<Brand> > queryBrandsByPage(
@RequestParam(value = "key",required = false) String key,//关键字查询
@RequestParam(value = "page",defaultValue = "1") Integer page,//默认页数
@RequestParam(value = "rows",defaultValue = "5") Integer rows,//每页行数参数,默认是五行
@RequestParam(value = "sortBy",required = false) String sortBy,
@RequestParam(value = "desc",required = false) Boolean desc
){
PageResult<Brand> result= this.brandService.queryBrandsByPage(key,page,rows,sortBy,desc);
if (result==null|| CollectionUtils.isEmpty(result.getItems())){
//如果为空,返回404
return ResponseEntity.notFound().build();
}
//响应OK返回结果集
return ResponseEntity.ok(result);
}
}
12.1.5.Service
package cn.tudou.item.service.impl;

import cn.tudou.item.mapper.BrandMapper;
import cn.tudou.item.service.BrandService;
import cn.tudou.pojo.Brand;
import cn.tuodu.common.pojo.PageResult;
import com.github.pagehelper.PageHelper;
import com.github.pagehelper.PageInfo;
import org.apache.commons.lang.StringUtils;
import org.springframework.beans.factory.annotation.Autowired;
import org.springframework.stereotype.Service;
import tk.mybatis.mapper.entity.Example;
import java.util.List;
@Service //交由springIOC容器管理
public class BrandServiceImpl implements BrandService {
    @Autowired//注入mapper
    private BrandMapper brandMapper;
    /**
     * @Description: 分页并排序查询品牌信息
     * @Param:
     * @return:
     * @Author: Mr.Wang
     * @Date: 2020/6/18
     */
    @Override
    public PageResult<Brand> queryBrandsByPage(String key, Integer page, Integer rows, String sortBy, Boolean desc) {
        //初始化example对象
        Example example = new Example(Brand.class);
        Example.Criteria criteria=example.createCriteria();
        //根据name模糊查询,或者根据首字母查询
        if (StringUtils.isNotBlank(key)){
            criteria.andLike("name","%"+key+"%").orEqualTo("letter",key);
        }
        //添加分页条件
        PageHelper.startPage(page,rows);
        //添加排序条件
        if (StringUtils.isNotBlank(sortBy)){
            example.setOrderByClause(sortBy+" "+(desc?"desc": "asc"));
        }
        List<Brand> brands= this.brandMapper.selectByExample(example);
        //包装成pageInfo
        PageInfo<Brand> pageInfo =new PageInfo<>(brands);
        //包装成分页结果集返回pageInfo.getList()返回的是一个结果集
        return new PageResult<>(pageInfo.getTotal(),pageInfo.getList());

    }
12.1.6.测试
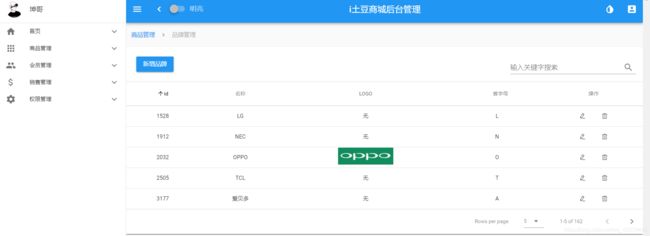
http://manage.tudou.cn/#/item/brand路径
12.2.异步查询工具axios
异步查询数据,自然是通过ajax查询,jQuery。但jQuery与MVVM的思想不吻合,而且ajax只是jQuery的一小部分。因此不可能为了发起ajax请求而去引用这么大的一个库。
12.2.1.axios入门
Vue官方推荐的ajax请求框架叫做:axios,
axios的Get请求语法:
axios.get("/item/category/list?pid=0") // 请求路径和请求参数拼接
    .then(function(resp){
    	// 成功回调函数
	})
    .catch(function(){
    	// 失败回调函数
	})
// 参数较多时,可以通过params来传递参数
axios.get("/item/category/list", {
        params:{
            pid:0
        }
	})
    .then(function(resp){})// 成功时的回调
    .catch(function(error){})// 失败时的回调
axios的POST请求语法:
比如新增一个用户
axios.post("/user",{
    	name:"Jack",
    	age:21
	})
    .then(function(resp){})
    .catch(function(error){})
注意,POST请求传参,不需要像GET请求那样定义一个对象,在对象的params参数中传参。post()方法的第二个参数对象,就是将来要传递的参数
12.2.2.axios的全局配置
而在我们的项目中,已经引入了axios,并且进行了简单的封装,在src下的http.js中:
http.js中对axios进行了一些默认配置:
import Vue from 'vue'
import axios from 'axios'
import config from './config'
// config中定义的基础路径是:http://api.leyou.com/api
axios.defaults.baseURL = config.api; // 设置axios的基础请求路径
axios.defaults.timeout = 2000; // 设置axios的请求时间

Vue.prototype.$http = axios;// 将axios赋值给Vue原型的$http属性,这样所有vue实例都可使用该对象
- http.js中导入了config的配置,
- http.js对axios进行了全局配置:
baseURL=config.api,即http://api.leyou.com/api。因此以后所有用axios发起的请求,都会以这个地址作为前缀。 - 通过
Vue.property.$http = axios,将axios赋值给了 Vue原型中的$http。这样以后所有的Vue实例都可以访问到$http,也就是访问到了axios了。
12.2.3.项目中使用
我们在组件Brand.vue的getDataFromServer方法,通过$http发起get请求
可以看到,在请求成功的返回结果response中,有一个data属性,里面就是真正的响应数据。
响应结果中与我们设计的一致,包含3个内容:
- total:总条数,目前是165
- items:当前页数据
- totalPage:总页数,我们没有返回
12.3.完成分页和过滤
12.3.1.分页
点击分页,会发起请求,通过浏览器工具查看,会发现pagination对象的属性一直在变化:
我们可以利用Vue的监视功能:watch,当pagination发生改变时,会调用回调函数,在回调函数中进行数据的查询!
具体实现:
成功实现分页功能:
12.3.2.过滤
过滤字段对应的是search属性,我们只要监视这个属性即可
13后台实现新增操作
13.1.1.controller
,先分析四个内容:
- 请求方式:POST
- 请求路径:/brand
- 请求参数:brand对象,外加商品分类的id数组cids
- 返回值:无,只需要响应状态码
代码:
        @PostMapping
    /**
    * @Description:
    * @Param: [brand, cids]
    * @return: org.springframework.http.ResponseEntity
    * @Author: Mr.Wang
    * @Date: 2020/6/18
    */
    public ResponseEntity<Void> saveBrand(Brand brand, @RequestParam("cids") List<Long> cids) {
        this.brandService.saveBrand(brand, cids);
        return ResponseEntity.status(HttpStatus.CREATED).build();
    }
13.2.2.Service
这里要注意,我们不仅要新增品牌,还要维护品牌和商品分类的中间表。
    /**
    * @Description: 新增品牌
    * @Param:
    * @return:
    * @Author: Mr.Wang
    * @Date: 2020/6/18
    */
    @Override
    @Transactional//增加操作需要开启事务注解,事务不成功直接回滚,下面判断可以直接省略
    public void saveBrand(Brand brand, List<Long> cids) {
        //先新增brand,判断影响条数,成功必然为1
        Boolean flag = this.brandMapper.insertSelective(brand) == 1;
        //再新增中间表
        if (flag) {
            cids.forEach(cid -> {
                this.brandMapper.insertCategoryAndBrand(cid, brand.getId());
            });
        }

    }
}
这里调用了brandMapper中的一个自定义方法,来实现中间表的数据新增
13.2.3.Mapper
通用Mapper只能处理单表,也就是Brand的数据,因此我们手动编写一个方法及sql,实现中间表的新增:
public interface BrandMapper extends Mapper<Brand> {

    /**
     * 新增商品分类和品牌中间表数据
     * @param cid 商品分类id
     * @param bid 品牌id
     * @return
     */
    @Insert("INSERT INTO tb_category_brand(category_id, brand_id) VALUES (#{cid},#{bid})")
    int insertBrandAndCategory(@Param("cid") Long cid, @Param("bid") Long bid);
}
13.2.4.测试失败
13.3.解决400
13.3.1.原因分析
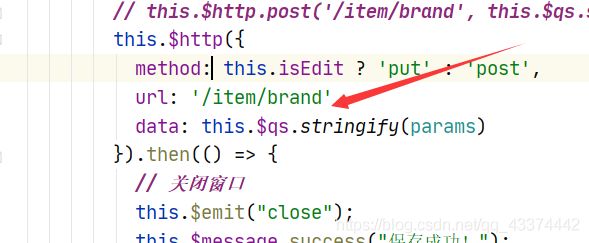
我们填写表单并提交,发现报错了。发现请求的数据格式是JSON格式。
原因分析:
axios处理请求体的原则会根据请求数据的格式来定:
- 如果请求体是对象:会转为json发送
- 如果请求体是String:会作为普通表单请求发送,但需要我们自己保证String的格式是键值对。
如:name=jack&age=12
13.3.2.QS工具
QS是一个第三方库,可以用npm install qs --save来安装
工具的名字:QS,即Query String,请求参数字符串。
什么是请求参数字符串?例如: name=jack&age=21
QS工具可以便捷的实现 JS的Object与QueryString的转换。
在我们的项目中,将QS注入到了Vue的原型对象中,我们可以通过this.$qs来获取这个工具:
我们将this.$qs对象打印到控制台:
created(){
    console.log(this.$qs);
}
发现其中有3个方法:
这里使用的方法是stringify,它可以把Object转为QueryString。
测试一下,使用浏览器工具,把qs对象保存为一个临时变量temp1,然后调用stringify方法:
成功将person对象变成了 name=zhangsan&age=30的字符串了
13.4.新增完成后关闭窗口
我们发现有一个问题:新增不管成功还是失败,窗口都一致在这里,不会关闭。
这样很不友好,我们希望如果新增失败,窗口保持;但是新增成功,窗口关闭才对。
因此,我们需要在新增的ajax请求完成以后,关闭窗口
但问题在于,控制窗口是否显示的标记在父组件:MyBrand.vue中。子组件如何才能操作父组件的属性?或者告诉父组件该关闭窗口了?
之前我们讲过一个父子组件的通信,有印象吗
- 第一步:在父组件中定义一个函数,用来关闭窗口,不过之前已经定义过了。父组件在使用子组件时,绑定事件,关联到这个函数:Brand.vue
<v-card-text class="px-5" style="height:400px">
    <brand-form @close="closeWindow" :oldBrand="oldBrand" :isEdit="isEdit"/>
v-card-text>
- 第二步,子组件通过
this.$emit调用父组件的函数:BrandForm.vue
我们优化一下,关闭的同时重新加载数据:
closeWindow(){
    // 关闭窗口
    this.show = false;
    // 重新加载数据
    this.getDataFromServer();
}
14.实现图片上传
文件的上传并不只是在品牌管理中有需求,以后的其它服务也可能需要,因此我们创建一个独立的微服务,专门处理各种上传。
14.1.搭建项目
14.1.1.创建module
因为上传会占用大量的带宽,为了利于扩展新建服务模块
14.1.2.依赖
我们需要EurekaClient和web依赖:
<project xmlns="http://maven.apache.org/POM/4.0.0"
         xmlns:xsi="http://www.w3.org/2001/XMLSchema-instance"
         xsi:schemaLocation="http://maven.apache.org/POM/4.0.0 http://maven.apache.org/xsd/maven-4.0.0.xsd">
    <parent>
        <artifactId>leyouartifactId>
        <groupId>com.leyou.parentgroupId>
        <version>1.0.0-SNAPSHOTversion>
    parent>
    <modelVersion>4.0.0modelVersion>

    <groupId>com.leyou.uploadgroupId>
    <artifactId>leyou-uploadartifactId>
    <version>1.0.0-SNAPSHOTversion>

    <dependencies>
        <dependency>
            <groupId>org.springframework.cloudgroupId>
            <artifactId>spring-cloud-starter-netflix-eureka-clientartifactId>
        dependency>
        <dependency>
            <groupId>org.springframework.bootgroupId>
            <artifactId>spring-boot-starter-webartifactId>
        dependency>
        <dependency>
            <groupId>org.springframework.bootgroupId>
            <artifactId>spring-boot-starter-testartifactId>
        dependency>
    dependencies>
project>
14.1.3.编写配置
server:
  port: 8082
spring:
  application:
    name: upload-service
  servlet:
    multipart:
      max-file-size: 5MB # 限制文件上传的大小
# Eureka
eureka:
  client:
    service-url:
      defaultZone: http://127.0.0.1:10086/eureka
  instance:
    lease-renewal-interval-in-seconds: 5 # 每隔5秒发送一次心跳
    lease-expiration-duration-in-seconds: 10 # 10秒不发送就过期
需要注意的是,我们应该添加了限制文件大小的配置
14.1.4.引导类
@SpringBootApplication
@EnableDiscoveryClient
public class LeyouUploadApplication {

    public static void main(String[] args) {
        SpringApplication.run(LeyouUploadApplication.class, args);
    }
}
14.2.编写上传功能
14.2.1.controller
编写controller需要知道4个内容:结合用法指南
- 请求方式:上传肯定是POST
- 请求路径:/upload/image
- 请求参数:文件,参数名是file,SpringMVC会封装为一个接口:MultipartFile
- 返回结果:上传成功后得到的文件的url路径,也就是返回String
代码如下:
@Controller
@RequestMapping("upload")
public class UploadController {

    @Autowired
    private UploadService uploadService;

    /**
     * 图片上传
     * @param file
     * @return
     */
    @PostMapping("image")
    public ResponseEntity<String> uploadImage(@RequestParam("file") MultipartFile file){
        String url = this.uploadService.upload(file);
        if (StringUtils.isBlank(url)) {
            return ResponseEntity.badRequest().build();
        }
        return ResponseEntity.status(HttpStatus.CREATED).body(url);
    }
}
14.2.2.service
在上传文件过程中,我们需要对上传的内容进行校验:
- 校验文件大小
- 校验文件的媒体类型
- 校验文件的内容
文件大小在Spring的配置文件中设置,因此已经会被校验,我们不用管。
具体代码:
@Service
public class UploadService {

    private static final List<String> CONTENT_TYPES = Arrays.asList("image/jpeg", "image/gif");

    private static final Logger LOGGER = LoggerFactory.getLogger(UploadService.class);

    public String upload(MultipartFile file) {

        String originalFilename = file.getOriginalFilename();
        // 校验文件的类型
        String contentType = file.getContentType();
        if (!CONTENT_TYPES.contains(contentType)){
            // 文件类型不合法,直接返回null
            LOGGER.info("文件类型不合法:{}", originalFilename);
            return null;
        }

        try {
            // 校验文件的内容
            BufferedImage bufferedImage = ImageIO.read(file.getInputStream());
            if (bufferedImage == null){
                LOGGER.info("文件内容不合法:{}", originalFilename);
                return null;
            }

            // 保存到服务器
            file.transferTo(new File("C:\\\images\\" + originalFilename));

            // 生成url地址,返回
            return "http:///" + originalFilename;
        } catch (IOException e) {
            LOGGER.info("服务器内部错误:{}", originalFilename);
            e.printStackTrace();
        }
        return null;
    }
}
这里有一个问题:为什么图片地址需要使用另外的url?
- 图片不能保存在服务器内部,这样会对服务器产生额外的加载负担
- 一般静态资源都应该使用独立域名,这样访问静态资源时不会携带一些不必要的cookie,减小请求的数据量
配置nginx
server {
listen 80;
server_name image.tudou.cn;
proxy_set_header X-Forwarded-Host $host;
proxy_set_header X-Forwarded-Server $host;
proxy_set_header X-Forwarded-For $proxy_add_x_forwarded_for;
    #charset koi8-r;

    #access_log  logs/host.access.log  main;

    location / {
        root   C:\\image;


                }
}
14.2.3.测试上传
通过RestClient工具来测试:
14.3.绕过网关
图片上传是文件的传输,如果也经过Zuul网关的代理,文件就会经过多次网路传输,造成不必要的网络负担。在高并发时,可能导致网络阻塞,Zuul网关不可用。这样我们的整个系统就瘫痪了。
所以,我们上传文件的请求就不经过网关来处理了。
}
14.3.1.Zuul的路由过滤
Zuul中提供了一个ignored-patterns属性,用来忽略不希望路由的URL路径,示例:
zuul.ignored-patterns: /upload/**
路径过滤会对一切微服务进行判定。
Zuul还提供了ignored-services属性,进行服务过滤:
zuul.ignored-services: upload-servie
我们这里采用忽略服务:
zuul:
  ignored-services:
    - upload-service # 忽略upload-service服务
上面的配置采用了集合语法,代表可以配置多个。
14.3.2.Nginx的rewrite指令
现在,我们修改页面的访问路径:
<v-upload
      v-model="brand.image"
      url="/upload/image"
      :multiple="false"
      :pic-width="250" :pic-height="90"
      />
查看页面的请求路径:
可以看到这个地址不对,依然是去找Zuul网关,因为我们的系统全局配置了URL地址。怎么办?
注意:原则上,我们是不能把除了网关以外的服务对外暴露的,不安全。
既然不能修改页面请求,那么就只能在Nginx反向代理上做文章了。
我们修改nginx配置,将以/api/upload开头的请求拦截下来,转交到真实的服务地址:
location /api/upload {
    proxy_pass http://127.0.0.1:8082;
    proxy_connect_timeout 600;
    proxy_read_timeout 600;
}
ip和端口虽然对了,但是路径没变,依然是:http://127.0.0.1:8002/api/upload/image
前面多了一个/api
Nginx提供了rewrite指令,用于对地址进行重写,语法规则:
rewrite "用来匹配路径的正则" 重写后的路径 [指令];
	server {
        listen       80;
        server_name  api.leyou.com;

        proxy_set_header X-Forwarded-Host $host;
        proxy_set_header X-Forwarded-Server $host;
        proxy_set_header X-Forwarded-For $proxy_add_x_forwarded_for;

    	# 上传路径的映射
		location /api/upload {
			proxy_pass http://127.0.0.1:8082;
			proxy_connect_timeout 600;
			proxy_read_timeout 600;

			rewrite "^/api/(.*)$" /$1 break;
        }

        location / {
			proxy_pass http://127.0.0.1:10010;
			proxy_connect_timeout 600;
			proxy_read_timeout 600;
        }
    }
- 首先,我们映射路径是/api/upload,而下面一个映射路径是 / ,根据最长路径匹配原则,/api/upload优先级更高。也就是说,凡是以/api/upload开头的路径,都会被第一个配置处理
proxy_pass:反向代理,这次我们代理到8082端口,也就是upload-service服务rewrite "^/api/(.*)$" /$1 break,路径重写:"^/api/(.*)$":匹配路径的正则表达式,用了分组语法,把/api/以后的所有部分当做1组/$1:重写的目标路径,这里用$1引用前面正则表达式匹配到的分组(组编号从1开始),即/api/后面的所有。这样新的路径就是除去/api/以外的所有,就达到了去除/api前缀的目的break:指令,常用的有2个,分别是:last、break- last:重写路径结束后,将得到的路径重新进行一次路径匹配
- break:重写路径结束后,不再重新匹配路径。
我们这里不能选择last,否则以新的路径/upload/image来匹配,就不会被正确的匹配到8082端口了
修改完成,输入nginx -s reload命令重新加载配置。然后再次上传试试。
14.4.跨域问题
重启nginx,再次上传,发现跟上次的状态码已经不一样了,但是依然报错:
不过庆幸的是,这个错误已经不是第一次见了,跨域问题。
我们在upload-service中添加一个CorsFilter即可:
@Configuration
public class LeyouCorsConfiguration {

    @Bean
    public CorsFilter corsFilter() {
        //1.添加CORS配置信息
        CorsConfiguration config = new CorsConfiguration();
        //1) 允许的域,不要写*,否则cookie就无法使用了
        config.addAllowedOrigin("http://manage.tudou.cn");
        //3) 允许的请求方式
        config.addAllowedMethod("OPTIONS");
        config.addAllowedMethod("POST");
        // 4)允许的头信息
        config.addAllowedHeader("*");

        //2.添加映射路径,我们拦截一切请求
        UrlBasedCorsConfigurationSource configSource = new UrlBasedCorsConfigurationSource();
        configSource.registerCorsConfiguration("/**", config);

        //3.返回新的CorsFilter.
        return new CorsFilter(configSource);
    }
}
再次测试:
14.5.文件上传的缺陷
上传本身没有任何问题,问题出在保存文件的方式,我们是保存在服务器机器,就会有下面的问题:
- 单机器存储,存储能力有限
- 无法进行水平扩展,因为多台机器的文件无法共享,会出现访问不到的情况
- 数据没有备份,有单点故障风险
- 并发能力差
这个时候,最好使用分布式文件存储来代替本地文件存储。
15.FastDFS
15.1.什么是分布式文件系统
分布式文件系统(Distributed File System)是指文件系统管理的物理存储资源不一定直接连接在本地节点上,而是通过计算机网络与节点相连
通俗来讲:
- 传统文件系统管理的文件就存储在本机。
- 分布式文件系统管理的文件存储在很多机器,这些机器通过网络连接,要被统一管理。无论是上传或者访问文件,都需要通过管理中心来访问
15.2.什么是FastDFS
FastDFS是由淘宝的余庆先生所开发的一个轻量级、高性能的开源分布式文件系统。用纯C语言开发,功能丰富:
- 文件存储
- 文件同步
- 文件访问(上传、下载)
- 存取负载均衡
- 在线扩容
适合有大容量存储需求的应用或者系统,同类的分布式文件系统有谷歌的GFS、HDFS、TFS等
15.3FastDFS

FastDFS两个主要的角色:Tracker Server和Storage Server
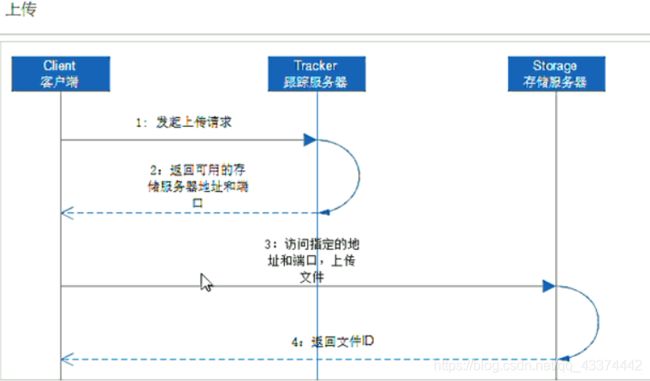
- Trackerserver:跟踪服务器,主要负责调度storage节点与client通信在访问上超负载均衡的作用,和记录storage节点的运行状态,是连接client和storage节点的枢纽
- Storageserver :存储服务器,保存文件和文件的meta data(元数据),每个storage server会启动一个但单独县城主动向Tracker cluster 中每个tracker server报告其状态信息,包括磁盘的使用情况,文件同步情况以及文件上传下载次数等统计信息
- Group:文件组,多台Storage server的集群,上传一个文件到同组内的一台机器上之后,FastDFS会将该文件及时同步到同组内的其他所有机器上,起到备份的作用,不同租的服务器,保存数据不同,而且相互独立,不进行通信
- Tracker cluster:跟踪服务器的集群,有一组Tracker server(跟踪服务器)组成
- Storage Cluster :存储集群,有多个Group组成
15.3.2上传和下载流程
- client通过Tracker server 查找可用的Storage server
- Tracker server 向client 返回一台可用的Storage server的IP地址和端口号
- Client 直接通过Tracker server返回的IP地址和端口与其中的一台storageserver 建立连接并进行文件上传 上
- 上传完成,Storage server返回Client一个文件id,文件上传结束
- Client 通过tracker server 查找要下载文件所在的Storage server
- Tracker server 向Client返回包含指定文件的某个Storage server的IP地址和端口号
- Client直接通过Tracker server返回的IP地址和端口与其中一台Storage server建立连接并指定要下载的文件
- 下载文件成功
15.4FastDFS安装
15.4.1 单节点FastDFS
这里使用阿里云服务器
- 安装gcc
GCC用来对C语言代码进行编译运行,使用yum命令进行安装
yum install gcc

会用到解压命令(unzip),所以这里使用yum把unzip安装下来
yum install unzip zip
15.4.2安装libevent
yum -y install libevent
15.4.3安装libfastcommon-master
- 这里需要上传文件到云服务器进行安装
安装ftp工具:https://filezilla-project.org/download.php?type=client
安装好之后然后点击软件左上方“文件”下边的图标“打开站点管理器”,点击“新站点”。

然后点击新站点
打开阿里云ECS控制台,选择想要访问的服务器的IP地址(公)。
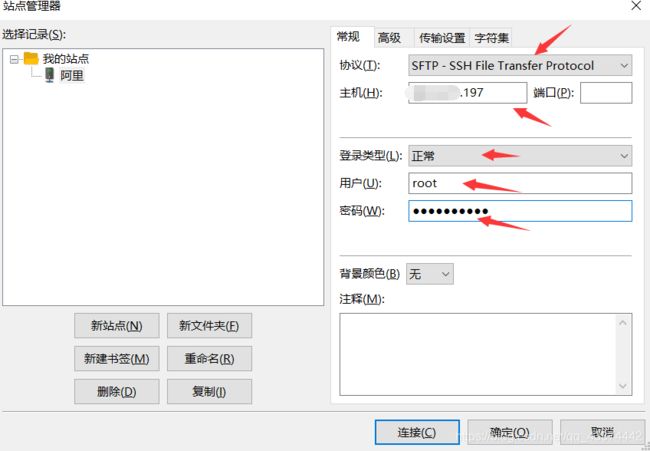
点击连接

切换目录到local
![]()
创建项目文件夹:
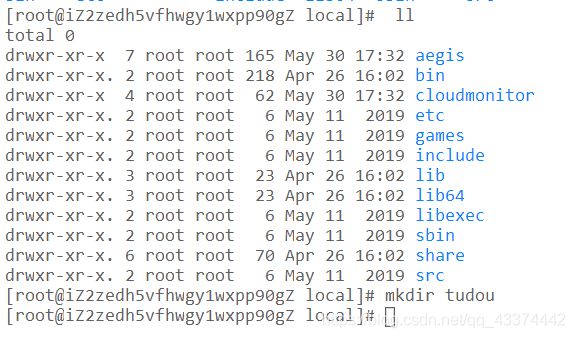
上传苏需要的文件

在工具中上传

- 解压上传的libfastcommon-master.zip
unzip libfastcommo-master.zip
进入解压完成的目录
cd libfastercommon -master
编译并安装
由于是c语言编写的所以需要make一下
./make.sh
./make.sh install
15.4.4安装FastDFS
tar -zxvf FastDFS_v5.08.tar.gz
cd FastDFS
./make.sh
./make.sh install
如果安装成功会看到/etc/init.d 下看到提供的脚本文件:
ll /etc/init.d| grep fdfs
在 /etc/fdfs/目录下看到默认的配置文件模板:
ll/etc/fdfs/
-rw-r–r-- 1 root root 1461 Jun 20 09:39 client.conf.sample
-rw-r–r-- 1 root root 7927 Jun 20 09:39 storage.conf.sample
-rw-r–r-- 1 root root 7200 Jun 20 09:39 tracker.conf.sample
- tracker.conf.sample是tracker的配置文件模板
- storage.conf.sample是stroage 的配置文件的模板
- client.conf.sample 是客户端的配置文件的模板
15.4.5配置并启动tracker服务
FastDFS的tracker 和storage这两种角色的安装方式是一样的
不同的是,两种需要不同的配置文件
要启动tracker ,修改刚刚看到的tracker.conf 并且启动fdfs_tracker脚本即可
1.首先将模板文件复制
cp /etc/fdfs/tracker.conf.sample /etc/fdfs/tracker.conf
2.修改复制后的配置文件(i—>进行编辑)—Esc 退出编辑+:wq保存
vim /etc/fdfs/tracker,conf
base_path=/tudou/tracker
3.新建目录
mkdir -p /tudou/tracker ///-p是级联创建
注意:关闭防火墙
chkconfig iptables off
4 启动和停止
启动tracker服务器: /etc/init/fdfs_tracker start
停止tracker 服务器 / etc/init.d/fdfs_trackerd stop
不过安装过程中,fdfs已经被设置系统服务,我们可以采用熟悉的服务启动方式:
service fdfs_trackerd start #启动fdfs_tracker 服务 停止用stop
检查是否启动成功
ps -ef |grep fdfs_trackerd
设置开机启动服务
chkconfig fdfs_trackerd on
15.4.6配置并启动storage服务
(1)首先将模板文件复制
1
cp /etc/fdfs/storage.conf.sample /etc/fdfs/storage.conf
(2)修改复制后的配置文件:
vim /etc/fdfs/storage.conf
-
修改的内容如下
-
3 新建目录mkdir -p/tudou/storage
注意关闭防火墙:chkconfig iptables off -
4启动和停止
-
启动storage服务武器 : /etc/init.d/fdfs_storaged start
-
停止storage服务器: /etc/init.d/fdfs_storaged stop
-使用:
service fdfs_storaged start -
开启开机自启动
-
chkconfig fdfs_storaged on
15.5使用nginx访问FastDFs(负载均衡)
1为什么需要用Nginx访问
FastDFS通过Tracker 服务器,将文件放在Storage服务器存储,但是同组服务器之间需要进入文件复制,有同步和延迟的问题
假设Tracker服务器将文件上传到了一个192.00000.125,上传成功后文件id已经返回给客户端,此时Fastdfs存储集群机制会将这个文件同步到同组存储192.0000.126,在文件还没有复制完成的情况下,客户端如果这个文件ID在192.1000.126上取文件,就会出现文件无法访问的错误
而 fastfs-nginx-module 可以重定向文件连接到文件上传的资源服务器取文件,避免客户单由于复制延迟导致的文件无法访问错误
2.安装 fastfs-nginx-module
1.解压 tar -zxvf fastdfs-nginx-module_v1.16.tar.gz
3.修改config
.进入src目录
cd fasrfs-nginx-module/src/
编辑config
vim config
使用以下底行命令:%s+/usr/local/+/usr/-g
将所有的/usr/local替换为/usr,这个才是正确的目录
15.5.2.配置nginx与FastDFS关联配置文件
复制 fastdfs-nginx-module 源码中的配置文件到/etc/fdfs 目录, 并修改
cp /usr/local/leyou/fastdfs-nginx-module/src/mod_fastdfs.conf /etc/fdfs/

vi /etc/fdfs/mod_fastdfs.conf
修改以下配置:
connect_timeout=10                       # 客户端访问文件连接超时时长(单位:秒)

tracker_server=192.168.56.101:22122    # tracker服务IP和端口

url_have_group_name=true                # 访问链接前缀加上组名

store_path0=/leyou/storage            # 文件存储路径
复制 FastDFS 的部分配置文件到/etc/fdfs 目录
cd /usr/local/leyou/FastDFS/conf/
cp http.conf mime.types /etc/fdfs/
15.6.安装Nginx的插件
15.6.1.如果没有安装过nginx
- 安装nginx的依赖库
yum -y install gcc pcre pcre-devel zlib zlib-devel openssl openssl-devel
- 解压安装包
tar -zxvf nginx-1.10.0.tar.gz
- 配置nginx安装包,并指定fastdfs-nginx-model
cd nginx-1.10.0

./configure --prefix=/opt/nginx --sbin-path=/usr/bin/nginx --add-module=/usr/local/leyou/fastdfs-nginx-module/src
注意:在执行./configure配置nginx参数的时候,需要将fastdfs-nginx-moudle源码作为模块编译进去。
- 编译并安装
make && make install
15.6.2.如果已经安装过nginx
1) 进入nginx目录:
cd /usr/local/leyou/nginx-1.10.0/
2) 配置FastDFS 模块
./configure --prefix=/opt/nginx --sbin-path=/usr/bin/nginx --add-module=/usr/local/leyou/fastdfs-nginx-module/src
注意:这次配置时,要添加fastdfs-nginx-moudle模块
3) 编译,注意,这次不要安装(install)
make
4) 替换nginx二进制文件:
备份:
mv /usr/bin/nginx /usr/bin/nginx-bak
用新编译的nginx启动文件替代原来的:
cp objs/nginx /usr/bin/
15.6.3.启动nginx
配置nginx整合fastdfs-module模块
我们需要修改nginx配置文件,在/opt/nginx/config/nginx.conf文件中:
vim /opt/nginx/conf/nginx.conf
将文件中,原来的server 80{ ...} 部分代码替换为如下代码:
    server {
        listen       80;
        server_name  image.leyou.com;

    	# 监听域名中带有group的,交给FastDFS模块处理
        location ~/group([0-9])/ {
            ngx_fastdfs_module;
        }

        location / {
            root   html;
            index  index.html index.htm;
        }

        error_page   500 502 503 504  /50x.html;
        location = /50x.html {
            root   html;
        }
    }
启动nginx:
nginx	# 启动nginx

nginx -s stop	# 停止nginx

nginx -s reload	# 重新载入配置文件
# 可通过ps -ef | grep nginx查看nginx是否已启动成功
15.6.4.设置nginx开机启动
创建一个开机启动的脚本:
vim /etc/init.d/nginx
添加以下内容:
#!/bin/sh
#
# nginx - this script starts and stops the nginx daemon
#
# chkconfig:   - 85 15
# description:  NGINX is an HTTP(S) server, HTTP(S) reverse \
#               proxy and IMAP/POP3 proxy server
# processname: nginx
# config:      /etc/nginx/nginx.conf
# config:      /etc/sysconfig/nginx
# pidfile:     /var/run/nginx.pid

# Source function library.
. /etc/rc.d/init.d/functions

# Source networking configuration.
. /etc/sysconfig/network

# Check that networking is up.
[ "$NETWORKING" = "no" ] && exit 0

nginx="/usr/bin/nginx"
prog=$(basename $nginx)

NGINX_CONF_FILE="/opt/nginx/conf/nginx.conf"

[ -f /etc/sysconfig/nginx ] && . /etc/sysconfig/nginx

lockfile=/var/lock/subsys/nginx

make_dirs() {
   # make required directories
   user=`$nginx -V 2>&1 | grep "configure arguments:.*--user=" | sed 's/[^*]*--user=\([^ ]*\).*/\1/g' -`
   if [ -n "$user" ]; then
      if [ -z "`grep $user /etc/passwd`" ]; then
         useradd -M -s /bin/nologin $user
      fi
      options=`$nginx -V 2>&1 | grep 'configure arguments:'`
      for opt in $options; do
          if [ `echo $opt | grep '.*-temp-path'` ]; then
              value=`echo $opt | cut -d "=" -f 2`
              if [ ! -d "$value" ]; then
                  # echo "creating" $value
                  mkdir -p $value && chown -R $user $value
              fi
          fi
       done
    fi
}

start() {
    [ -x $nginx ] || exit 5
    [ -f $NGINX_CONF_FILE ] || exit 6
    make_dirs
    echo -n $"Starting $prog: "
    daemon $nginx -c $NGINX_CONF_FILE
    retval=$?
    echo
    [ $retval -eq 0 ] && touch $lockfile
    return $retval
}

stop() {
    echo -n $"Stopping $prog: "
    killproc $prog -QUIT
    retval=$?
    echo
    [ $retval -eq 0 ] && rm -f $lockfile
    return $retval
}

restart() {
    configtest || return $?
    stop
    sleep 1
    start
}

reload() {
    configtest || return $?
    echo -n $"Reloading $prog: "
    killproc $nginx -HUP
    RETVAL=$?
    echo
}

force_reload() {
    restart
}

configtest() {
  $nginx -t -c $NGINX_CONF_FILE
}

rh_status() {
    status $prog
}

rh_status_q() {
    rh_status >/dev/null 2>&1
}

case "$1" in
    start)
        rh_status_q && exit 0
        $1
        ;;
    stop)
        rh_status_q || exit 0
        $1
        ;;
    restart|configtest)
        $1
        ;;
    reload)
        rh_status_q || exit 7
        $1
        ;;
    force-reload)
        force_reload
        ;;
    status)
        rh_status
        ;;
    condrestart|try-restart)
        rh_status_q || exit 0
            ;;
    *)
        echo $"Usage: $0 {start|stop|status|restart|condrestart|try-restart|reload|force-reload|configtest}"
        exit 2
esac
修改文件权限,并加入服务列表
# 修改权限
chmod 777 /etc/init.d/nginx
# 添加到服务列表
chkconfig --add /etc/init.d/nginx
设置开机启动
chkconfig nginx on
15.7.java客户端
余庆先生提供了一个Java客户端,但是作为一个C程序员,写的java代码可想而知。而且已经很久不维护了。
这里推荐一个开源的FastDFS客户端,支持最新的SpringBoot2.0。
配置使用极为简单,支持连接池,支持自动生成缩略图
地址:tobato/FastDFS_client
接下来,我们就用FastDFS改造tuou-upload工程。
15.7.1.引入依赖
在父工程中,我们已经管理了依赖,版本为:
<fastDFS.client.version>1.26.2fastDFS.client.version>
因此,这里我们直接在taotao-upload工程的pom.xml中引入坐标即可:
<dependency>
    <groupId>com.github.tobatogroupId>
    <artifactId>fastdfs-clientartifactId>
dependency>
3.5.2.引入配置类
[外链图片转存失败,源站可能有防盗链机制,建议将图片保存下来直接上传(img-gzhBozw1-1592642063792)(assets/1528206263148.png)]
纯java配置:
@Configuration
@Import(FdfsClientConfig.class)
// 解决jmx重复注册bean的问题
@EnableMBeanExport(registration = RegistrationPolicy.IGNORE_EXISTING)
public class FastClientImporter {

}
15.7.2.编写FastDFS属性
在application.yml配置文件中追加如下内容:
fdfs:
  so-timeout: 1501 # 超时时间
  connect-timeout: 601 # 连接超时时间
  thumb-image: # 缩略图
    width: 60
    height: 60
  tracker-list: # tracker地址:你的虚拟机服务器地址+端口(默认是22122)
    - 192.168.56.101:22122
15.7.4.配置hosts
将来通过域名:image.tudou.cn这个域名访问fastDFS服务器上的图片资源。所以,需要代理到虚拟机地址:
配置hosts文件,使image.tudou.cn可以访问fastDFS服务器
15.7.5.测试
创建测试类:
把以下内容copy进去:
@SpringBootTest
@RunWith(SpringRunner.class)
public class FastDFSTest {

    @Autowired
    private FastFileStorageClient storageClient;

    @Autowired
    private ThumbImageConfig thumbImageConfig;

    @Test
    public void testUpload() throws FileNotFoundException {
        // 要上传的文件
        File file = new File("C:\\Users\\joedy\\Pictures\\xbx1.jpg");
        // 上传并保存图片,参数:1-上传的文件流 2-文件的大小 3-文件的后缀 4-可以不管他
        StorePath storePath = this.storageClient.uploadFile(
                new FileInputStream(file), file.length(), "jpg", null);
        // 带分组的路径
        System.out.println(storePath.getFullPath());
        // 不带分组的路径
        System.out.println(storePath.getPath());
    }

    @Test
    public void testUploadAndCreateThumb() throws FileNotFoundException {
        File file = new File("C:\\Users\\joedy\\Pictures\\xbx1.jpg");
        // 上传并且生成缩略图
        StorePath storePath = this.storageClient.uploadImageAndCrtThumbImage(
                new FileInputStream(file), file.length(), "png", null);
        // 带分组的路径
        System.out.println(storePath.getFullPath());
        // 不带分组的路径
        System.out.println(storePath.getPath());
        // 获取缩略图路径
        String path = thumbImageConfig.getThumbImagePath(storePath.getPath());
        System.out.println(path);
    }
}
结果:
group1/M00/00/00/wKg4ZVsWl5eAdLNZAABAhya2V0c424.jpg
M00/00/00/wKg4ZVsWl5eAdLNZAABAhya2V0c424.jpg
group1/M00/00/00/wKg4ZVsWmD-ARnWiAABAhya2V0c772.png
M00/00/00/wKg4ZVsWmD-ARnWiAABAhya2V0c772.png
M00/00/00/wKg4ZVsWmD-ARnWiAABAhya2V0c772_60x60.png
访问第二组第一个路径:
访问最后一个路径(缩略图路径),注意加组名(group1):
15.7.6.改造上传逻辑
@Service
public class UploadService {

    @Autowired
    private FastFileStorageClient storageClient;

    private static final List<String> CONTENT_TYPES = Arrays.asList("image/jpeg", "image/gif");

    private static final Logger LOGGER = LoggerFactory.getLogger(UploadService.class);

    public String upload(MultipartFile file) {

        String originalFilename = file.getOriginalFilename();
        // 校验文件的类型
        String contentType = file.getContentType();
        if (!CONTENT_TYPES.contains(contentType)){
            // 文件类型不合法,直接返回null
            LOGGER.info("文件类型不合法:{}", originalFilename);
            return null;
        }

        try {
            // 校验文件的内容
            BufferedImage bufferedImage = ImageIO.read(file.getInputStream());
            if (bufferedImage == null){
                LOGGER.info("文件内容不合法:{}", originalFilename);
                return null;
            }

            // 保存到服务器
            // file.transferTo(new File("C:\\leyou\\images\\" + originalFilename));
            String ext = StringUtils.substringAfterLast(originalFilename, ".");
            StorePath storePath = this.storageClient.uploadFile(file.getInputStream(), file.getSize(), ext, null);

            // 生成url地址,返回
            return "http://image.leyou.com/" + storePath.getFullPath();
        } catch (IOException e) {
            LOGGER.info("服务器内部错误:{}", originalFilename);
            e.printStackTrace();
        }
        return null;
    }
}
只需要把原来保存文件的逻辑去掉,然后上传到FastDFS即可。
15.7.7.测试
通过RestClient测试:
15.8.页面测试上传
16.修改品牌
修改的难点在于回显。
当我们点击编辑按钮,希望弹出窗口的同时,看到原来的数据:
16.1.点击编辑出现弹窗
这个比较简单,修改show属性为true即可实现,我们绑定一个点击事件:
<v-icon small class="mr-2" @click="editItem(props.item)">
    edit
v-icon>
然后编写事件,改变show 的状态:
如果仅仅是这样,编辑按钮与新增按钮将没有任何区别,关键在于,如何回显呢?
16.2.回显数据
回显数据,就是把当前点击的品牌数据传递到子组件(MyBrandForm)。而父组件给子组件传递数据,通过props属性。
-
第一步:在编辑时获取当前选中的品牌信息,并且记录到data中
先在data中定义属性,用来接收用来编辑的brand数据:
我们在页面触发编辑事件时,把当前的brand传递给editBrand方法:<v-btn color="info" @click="editBrand(props.item)">编辑v-btn>然后在editBrand中接收数据,赋值给oldBrand:
editItem(oldBrand){ // 使编辑窗口可见 this.dialog = true; // 初始化编辑的数据 this.oldBrand = oldBrand; } -
第二步:把获取的brand数据 传递给子组件
<v-card-text class="px-5"> <my-brand-form @close="close" :oldBrand="oldBrand">my-brand-form> v-card-text> -
第三步:在子组件(MyBrandForm.vue)中通过props接收要编辑的brand数据,Vue会自动完成回显
接收数据:
通过watch函数监控oldBrand的变化,把值copy到本地的brand:
watch: { oldBrand: {// 监控oldBrand的变化 handler(val) { if(val){ // 注意不要直接赋值,否则这边的修改会影响到父组件的数据,copy属性即可 this.brand = Object.deepCopy(val) }else{ // 为空,初始化brand this.brand = { name: '', letter: '', image: '', categories: [] } } }, deep: true } }- Object.deepCopy 自定义的对象进行深度复制的方法。
- 需要判断监听到的是否为空,如果为空,应该进行初始化
测试:发现数据回显了,除了商品分类以外:
16.3.商品分类回显
为什么商品分类没有回显?
因为品牌中并没有商品分类数据。我们需要在进入编辑页面之前,查询商品分类信息:
16.3.1.后台提供接口
controller
/**
     * 通过品牌id查询商品分类
     * @param bid
     * @return
     */
@GetMapping("bid/{bid}")
public ResponseEntity<List<Category>> queryByBrandId(@PathVariable("bid") Long bid) {
    List<Category> list = this.categoryService.queryByBrandId(bid);
    if (list == null || list.size() < 1) {
        return new ResponseEntity<>(HttpStatus.NOT_FOUND);
    }
    return ResponseEntity.ok(list);
}
Service
public List<Category> queryByBrandId(Long bid) {
    return this.categoryMapper.queryByBrandId(bid);
}
mapper
因为需要通过中间表进行子查询,所以这里要手写Sql:
/**
     * 根据品牌id查询商品分类
     * @param bid
     * @return
     */
@Select("SELECT * FROM tb_category WHERE id IN (SELECT category_id FROM tb_category_brand WHERE brand_id = #{bid})")
List<Category> queryByBrandId(Long bid);
16.3.2.前台查询分类并渲染
我们在编辑页面打开之前,先把数据查询完毕:
editBrand(oldBrand){
    // 根据品牌信息查询商品分类
    this.$http.get("/item/category/bid/" + oldBrand.id)
        .then(({data}) => {
        // 控制弹窗可见:
        this.dialog = true;
        // 获取要编辑的brand
        this.oldBrand = oldBrand
        // 回显商品分类
        this.oldBrand.categories = data;
    })
}
再次测试:数据成功回显了
16.3.3.新增窗口数据干扰
但是,此时却产生了新问题:新增窗口竟然也有数据?
原因:
如果之前打开过编辑,那么在父组件中记录的oldBrand会保留。下次再打开窗口,如果是编辑窗口到没问题,但是新增的话,就会再次显示上次打开的品牌信息了。
解决:
新增窗口打开前,把数据置空。
addBrand() {
    // 控制弹窗可见:
    this.dialog = true;
    // 把oldBrand变为null
    this.oldBrand = null;
}
16.3.4.提交表单时判断是新增还是修改
新增和修改是同一个页面,我们该如何判断?
父组件中点击按钮弹出新增或修改的窗口,因此父组件非常清楚接下来是新增还是修改。
因此,最简单的方案就是,在父组件中定义变量,记录新增或修改状态,当弹出页面时,把这个状态也传递给子组件。
第一步:在父组件中记录状态:
第二步:在新增和修改前,更改状态:
第三步:传递给子组件
第四步,子组件接收标记:
标题的动态化:
表单提交动态:
axios除了除了get和post外,还有一个通用的请求方式:
// 将数据提交到后台
// this.$http.post('/item/brand', this.$qs.stringify(params))
this.$http({
    method: this.isEdit ? 'put' : 'post', // 动态判断是POST还是PUT
    url: '/item/brand',
    data: this.$qs.stringify(this.brand)
}).then(() => {
    // 关闭窗口
    this.$emit("close");
    this.$message.success("保存成功!");
})
    .catch(() => {
    this.$message.error("保存失败!");
});
需要资料的联系哦
