在iOS中总会遇到一些不规则图片或者一些圆角设置的问题,一般情况下我们设置圆角可以通过layer上来实现,
   self.imgview.layer.masksToBounds=YES;
   self.imgview.layer.cornerRadius=10;
但是遇到一些不规则的我们该怎么处理呢?这个时候我们就需要使用到CaShapeLayer了.
废话不多说 先上代码 然后仔细讲解
#import

@interface WWCustomerView : UIView

@end


#import "WWCustomerView.h"


@interface WWCustomerView()
{
    CALayer* contentLayer;
    CAShapeLayer* maskLayer;
}
@end
@implementation WWCustomerView

-(id)initWithFrame:(CGRect)frame{
    if (self=[super initWithFrame:frame]) {


        //[self makeContents1];

        //[self makeContents2];

       // [self makeContents3];

        [self makeContents4];
    }
    return self;
}

/**
 正常切割成圆形
 */
-(void)makeContents1
{

    maskLayer= [CAShapeLayer layer];
    //路径
    maskLayer.path=[UIBezierPath bezierPathWithOvalInRect:self.bounds].CGPath;

    maskLayer.fillColor=[UIColor blackColor].CGColor;//填充色
    maskLayer.strokeColor=[UIColor redColor].CGColor;
    maskLayer.frame=self.bounds;
    maskLayer.contentsCenter=CGRectMake(0.5, 0.5, 0.1, 0.1);
    maskLayer.contentsScale=[UIScreen mainScreen].scale;

    //
    contentLayer=[CALayer layer];
    contentLayer.mask=maskLayer;
    contentLayer.frame=self.bounds;

    [self.layer addSublayer:contentLayer];

    contentLayer.contents=(__bridge id _Nullable)([UIImage imageNamed:@"2.jpg"].CGImage);

}

//切割为圆角  只需要改maskLayer.path部分 的方法
-(void)makeContents2
{

    maskLayer= [CAShapeLayer layer];
    //路径
    //maskLayer.path=[UIBezierPath bezierPathWithOvalInRect:self.bounds:].CGPath;

    maskLayer.path=[UIBezierPath bezierPathWithRoundedRect:self.bounds cornerRadius:30].CGPath;

    maskLayer.fillColor=[UIColor blackColor].CGColor;//填充色
    maskLayer.strokeColor=[UIColor redColor].CGColor;
    maskLayer.frame=self.bounds;
    maskLayer.contentsCenter=CGRectMake(0.5, 0.5, 0.1, 0.1);
    //按比例放大 不变形
    maskLayer.contentsScale=[UIScreen mainScreen].scale;

    //
    contentLayer=[CALayer layer];
    contentLayer.mask=maskLayer;
    contentLayer.frame=self.bounds;

    [self.layer addSublayer:contentLayer];

    contentLayer.contents=(__bridge id _Nullable)([UIImage imageNamed:@"2.jpg"].CGImage);

}


/**
 根据几何知识规则 生成不规则图形
 */
-(void)makeContents3{
    //生成path
    CGMutablePathRef path =CGPathCreateMutable();
    CGPoint orginPoint=self.bounds.origin;//起点
    CGFloat radius=CGRectGetWidth(self.bounds)/6;//半径

    CGPathMoveToPoint(path, NULL, orginPoint.x, orginPoint.y+5*radius);//左边直线下点

    CGPathMoveToPoint(path, NULL, orginPoint.x, orginPoint.y+radius );//左边直线上点


    //2个点 和半径画圆弧
    CGPathAddArcToPoint(path,NULL, orginPoint.x, orginPoint.y, orginPoint.x+ radius, orginPoint.y, radius);

    CGPathAddArcToPoint(path, NULL, orginPoint.x+5*radius, orginPoint.y, orginPoint.x+5*radius, orginPoint.y+radius, radius);

    CGPathAddArcToPoint(path, NULL, orginPoint.x+5*radius, orginPoint.y+5*radius, orginPoint.x+radius, orginPoint.y+2*radius, radius);

    CGPathAddLineToPoint(path, NULL, orginPoint.x, orginPoint.y+5*radius);


    maskLayer= [CAShapeLayer layer];

//    maskLayer.path=[UIBezierPath bezierPathWithRoundedRect:self.bounds cornerRadius:30].CGPath;

    maskLayer.path=path;

    maskLayer.fillColor=[UIColor blackColor].CGColor;//填充色
    maskLayer.strokeColor=[UIColor redColor].CGColor;
    maskLayer.frame=self.bounds;
    maskLayer.contentsCenter=CGRectMake(0.5, 0.5, 0.1, 0.1);
    //按比例放大 不变形
    maskLayer.contentsScale=[UIScreen mainScreen].scale;

    //
    contentLayer=[CALayer layer];
    contentLayer.mask=maskLayer;
    contentLayer.frame=self.bounds;

    [self.layer addSublayer:contentLayer];

    contentLayer.contents=(__bridge id _Nullable)([UIImage imageNamed:@"2.jpg"].CGImage);

}

/**
 可以通过设置CAShapedLayer的contents来设置maskLayer
 4png 是一张带有右边气泡尖角的图片
 */
-(void)makeContents4
{
    maskLayer= [CAShapeLayer layer];
    //路径
    //maskLayer.path=[UIBezierPath bezierPathWithOvalInRect:self.bounds:].CGPath;

    maskLayer.path=[UIBezierPath bezierPathWithRoundedRect:self.bounds cornerRadius:30].CGPath;

    maskLayer.fillColor=[UIColor blackColor].CGColor;//填充色
    maskLayer.strokeColor=[UIColor redColor].CGColor;
    maskLayer.frame=self.bounds;
    maskLayer.contentsCenter=CGRectMake(0.5, 0.5, 0.1, 0.1);
    //按比例放大 不变形
    maskLayer.contentsScale=[UIScreen mainScreen].scale;

    //
    contentLayer=[CALayer layer];
    contentLayer.mask=maskLayer;
    contentLayer.frame=self.bounds;

    [self.layer addSublayer:contentLayer];

    contentLayer.contents=(__bridge id _Nullable)([UIImage imageNamed:@"4png"].CGImage);
}

@end
我们自定义了一个继承于UIView的类WWCustomerView
在类的实现文件中声明了2个成员变量
 CALayer* contentLayer;
 CAShapeLayer* maskLayer;
-
-
正圆形的图片
调用方法 -(void)makeContents1生成的结果如下 和使用layer 效果是一样的
-
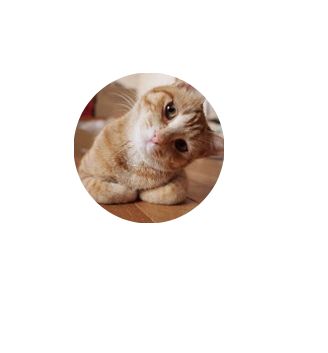
1.png
-
- 部分圆角的
调用方法
-(void)makeContents2
- 部分圆角的
生成的结果如下 和使用layer 效果是一样的
相比较于方法1 只是修改了利用贝塞尔曲线生成path
[UIBezierPath bezierPathWithRoundedRect:self.bounds cornerRadius:30].CGPath;
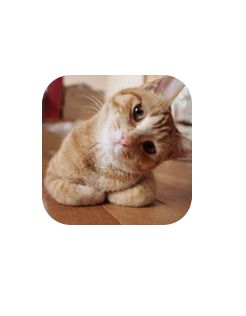
2.png
-
-
根据几何知识规则 生成不规则图形
-(void)makeContents3
生成的结果如下
-
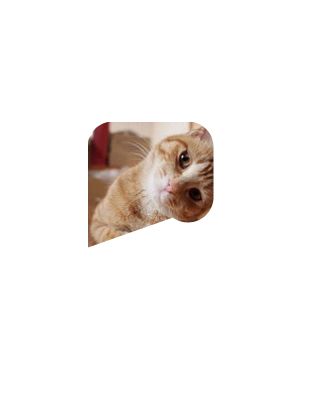
3.png
-
-
可以通过设置CAShapedLayer的contents来设置maskLayer
-(void)makeContents4
生成的结果如下
-
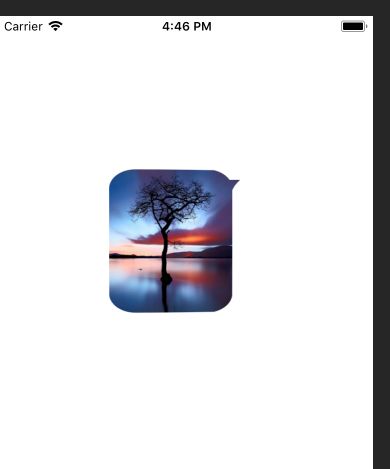
4.png