React Native Flexbox
今天我们来聊聊Flexbox,它是前端的一个布局方式。在React Native中是主流布局方式。如果你刚刚入门React Native,或者没有多少前端的技术经验,亦或者对其半知半解,那么这篇文章将很好的帮助你参透Flexbox的整个全貌。
purpose
通过这篇文章你将快速吃透整个Flexbox,因为对于Flexbox你只需掌握以下几点属性即可。
- flex
- flexDirection
- justifyContent
- alignItems
- flexWrap
- alignSelf
flex
Flexbox使用的是弹性布局,它有个属性flex用来控制它的弹性。有点类似与Android布局中的weight属性。当然与前端的css中的flex也有所不同,它支持的类型是number不是string。它有三种状态:正数、零与负数。直接看代码:
import React, {Component} from 'react';
import {StyleSheet, Text, View} from 'react-native';

export default class App extends Component {
  render() {
    return (


    );
  }
}

const styles = StyleSheet.create({
  container: {
    flex: 1,
    justifyContent: 'center',
    alignItems: 'center',
    backgroundColor: '#F5FCFF',
  },
  red: {
      flex: 1,
      width: 100,
      backgroundColor: 'red'
  },
  blue: {
      flex: 2,
      width: 100,
      backgroundColor: 'blue'
  },
  orange: {
      width: 100,
      height: 100,
      backgroundColor: 'orange'
  }
});
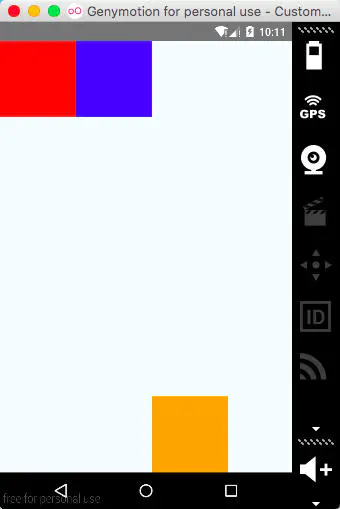
父容器使用flex:1来撑满整个屏幕,orange是固定的一个view,而red与blue使用flex,通过flex的值进行等比(1:2)分摊剩余的空间。来看下运行效果。
这是为正数的情况,如果flex:0,控件的大小就会根据设置的width与height来固定显示。
如果flex:-1,如果空间足够,控件的大小也会根据width与height来展示;如果空间不足,会根据minWidth与minHeight来展示。
一般都不会使用flex:-1,而且经过测试,空间不足时minWidth与minHeight并不会生效。如果发现生效的方式请务必告知。
flexDirection
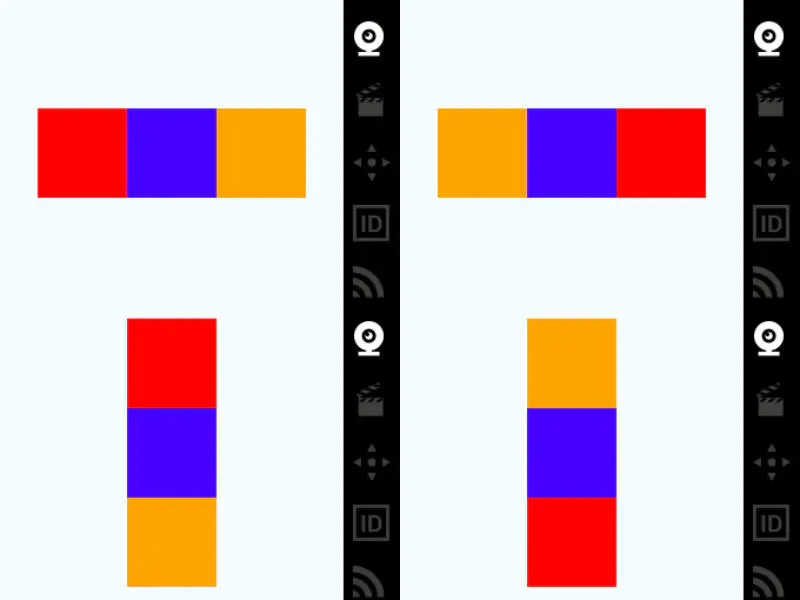
在Flexbox中有主轴与副轴之分,主轴控制child的排列方向,默认为column。可以通过flexDirection属性改变主轴方向。它有四个可选值分别为
- row: child水平方向排列
- column: child竖直方向排列(默认)
- row-reverse: child水平方向反向排列
- column-reverse: child竖直方向反向排列
在上面的demo基础上改变style样式:
const styles = StyleSheet.create({
  container: {
    flex: 1,
    flexDirection: 'row',
    justifyContent: 'center',
    alignItems: 'center',
    backgroundColor: '#F5FCFF',
  },
  red: {
      height: 100,
      width: 100,
      backgroundColor: 'red'
  },
  blue: {
      width: 100,
      height: 100,
      backgroundColor: 'blue'
  },
  orange: {
      width: 100,
      height: 100,
      backgroundColor: 'orange'
  }
});
分别改变container中flexDirection的值:row、row-reverse、column、column-reverse
justifyContent
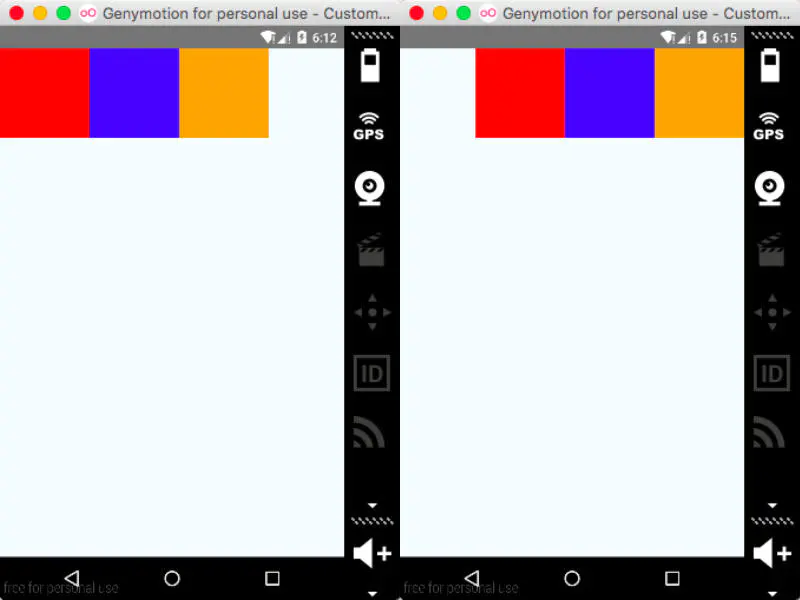
固定好主轴之后,可以通过justifyContent来指定主轴方向child的排列方式,它有六个可选值
- flex-start: child对齐主轴的起点(默认)
- flex-end: child对齐主轴的终点
- center: child居中对齐主轴
- space-between: child在主轴方向相邻child等间距对齐,首尾child与父容器对齐
- space-around: child在主轴方向相邻child等间距对齐,首尾child与父容器的间距相等且为相邻child间距的一半
- space-evenly: child在主轴方向均匀分布。相邻间距与首尾间距相等
  container: {
    flex: 1,
    flexDirection: 'row',
    justifyContent: 'flex-start',
    backgroundColor: '#F5FCFF',
  }
依次改变container中的justifyContent:flex-start、flex-end、center、space-between、space-around与space-evenly
alignItems
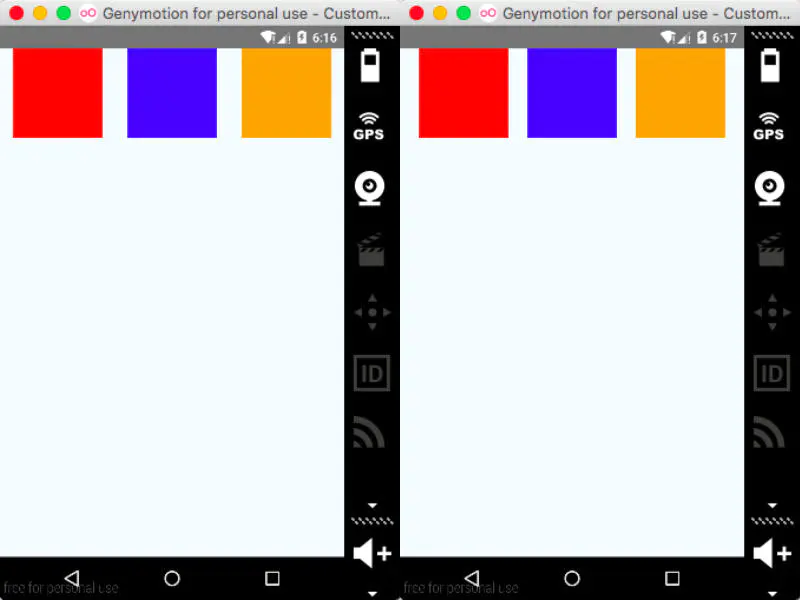
主轴固定之后,剩下的就是副轴,alignItems可以用来控制副轴上的child排列方式。它有五个可选项分别为
- flex-start: child对齐副轴起点(默认)
- flex-end: child对齐副轴终点
- center: child居中对齐副轴
- stretch: child为弹性布局时(未设置副轴方向的大小或者为auto),拉伸对齐副轴
- baseline: 有文本存在时,child在副轴方向基于第一个文本基线对齐
改变container的style,主轴设置为row,依次改变alignItems:flex-start、flex-end、center
  container: {
    flex: 1,
    flexDirection: 'row',
    alignItems: 'flex-start',
    backgroundColor: '#F5FCFF',
  }
最后将alignItems设置为stretch,并且改变red的height,red会被拉伸
  container: {
    flex: 1,
    flexDirection: 'row',
    alignItems: 'stretch',
    backgroundColor: '#F5FCFF',
  },
  red: {
      width: 100,
      height: 'auto',
      backgroundColor: 'red'
  }
alignItems: baseline,并不是文本的正中心,而是文本View的容器底部。在上面基础上添加一个Text,让文本自身居中展示。
  container: {
    flex: 1,
    flexDirection: 'row',
    alignItems: 'baseline',
    backgroundColor: '#F5FCFF',
  },
  text: {
      width: 80,
      height: 80,
      fontSize: 20,
      color: 'white',
      marginTop: 110,
      backgroundColor: 'black',
      textAlign: 'center',
      textAlignVertical: 'center'
  }
flexWrap
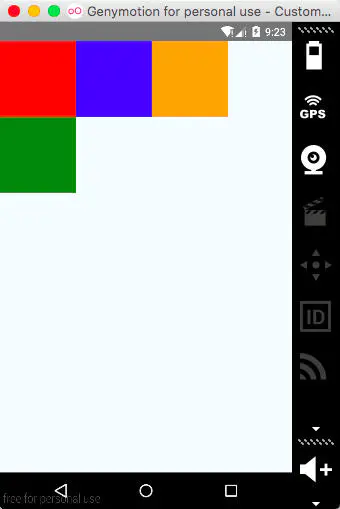
如果再增加一个View,由于空间不足它会展示不全。这时可以使用flexWrap属性,它可以支持自动换行展示。
- nowrap: 不换行(默认)
- wrap: 自动换行
在container中添加flexWrap属性,并且再添加一个green view
  container: {
    flex: 1,
    flexDirection: 'row',
    flexWrap: 'wrap',
    justifyContent: 'flex-start',
    backgroundColor: '#F5FCFF',
  },
  green: {
      width: 100,
      height: 100,
      backgroundColor: 'green'
  }
alignSelf
alignSelf属性类似于alignItems,它也是控制副轴上的排列规则,不同的是它使用的对象是child自己。它可以改变父容器alignItems的属性控制的child排列规则,在副轴上实现自己的排列规则。默认值为auto,继承父容器的alignItems属性。因此它也有五个可选值:flex-start、flex-end、center、stretch与baseline。例如我们为range添加alignSelf,其它的child不变,都继承父容器的alignItems: flex-start
  orange: {
      width: 100,
      height: 100,
      backgroundColor: 'orange',
      alignSelf: 'flex-end'
  }
其它的可选值就不一一说明,可以参考alignItems
other
最后还有三个比较冷门属性,这里就不详细一一代码与贴图,简单的说下它们的作用,相同点是它们都是在child中使用,与alignSelf的作用域一样。
- flexBasis: 设置主轴方向上的初始值,默认为auto。如果与width或者height同时存在,则会覆盖它们的值
- flexGrow: 设置chid的放大比例,类似于flex,空间充足时自动按比例放大,默认为0
- flexShrink: 设置chid的缩小比例。空间不足时自动按比例缩小,默认为0
有关Flexbox,纵观全文只需掌握开头所列的六种属性,React Native中的绝大多数布局也就不成问题。现在对于Flexbox是否清晰了许多呢?赶紧亲自去试试吧~

