安卓硬件服务实例:手把手教你如何从驱动到应用添加硬件服务
序言:
这篇文章在安卓7.1源码添加自己的硬件访问服务,从内核驱动,hal层,jni层,application framework,最后到app调用 包装类,在内核实现简单的打印输出,通过这篇文章,会让你对安卓整个的框架有深刻的认识。
本文为原创,转载请标明原址:https://blog.csdn.net/kai_zone/article/details/81305222
系列文章: Android硬件服务框架实例之Vibrator(驱动到应用)
安卓硬件访问服务框架
为了便于理解,我们从底层到上层逐个添加和修改。
1. 添加驱动,只实现一个简单的ioctl函数,驱动里打印app设置的值。
led.c代码如下:
#include
#include
#include
#include
#include
#include
#include
#include
#include
static struct class *led_class;
static int led_open(struct inode *inode, struct file *file)
{
printk(KERN_INFO "*******In %s ***************\n", __func__);
return 0;
}
static int led_release(struct inode *inodp, struct file *filp)
{
printk(KERN_INFO "*******In %s ***************\n", __func__);
return 0;
}
static long led_ioctl
(struct file *filp, unsigned int status, unsigned long which)
{
printk("******(%s)status:%d;which:%d********\n", __func__,(int)status,(int)which);
return 123;
}
static struct file_operations led_fops = {
.owner = THIS_MODULE,
.open = led_open,
.release = led_release,
.unlocked_ioctl = led_ioctl,
};
int major;
static int led_init(void)
{
major = register_chrdev(0, "leds", &led_fops);
led_class = class_create(THIS_MODULE, "leddrv");
device_create(led_class, NULL, MKDEV(major, 0), NULL, "led"); /*dev/led */
return 0;
}
static void led_exit(void)
{
unregister_chrdev(major, "leds");
device_destroy(led_class, MKDEV(major, 0));
class_destroy(led_class);
}
module_init(led_init);
module_exit(led_exit);
MODULE_LICENSE("GPL");
修改Makefile直接配置到内核,增加语句obj-y += led.o。编译:make bootimage -j16烧写到开发板会生成/dev/led设备节点。
2. hal层修改。
(1). hardware/libhardware/modules/下新建目录led目录,在led目录下创建Android.mk和led_hal.c.
Android.mk代码如下:
LOCAL_PATH := $(call my-dir)

include $(CLEAR_VARS)

LOCAL_MODULE := led.default

# HAL module implementation stored in
# hw/.default.so
LOCAL_MODULE_RELATIVE_PATH := hw
LOCAL_C_INCLUDES := hardware/libhardware
LOCAL_SRC_FILES := led_hal.c
LOCAL_SHARED_LIBRARIES := liblog
LOCAL_MODULE_TAGS := eng

include $(BUILD_SHARED_LIBRARY)
led_hal.c代码如下:
#define LOG_TAG "LedHal"
#include
#include
#include
#include
#include
#include
#include
#include
#include
#include
#include
#include
#include
#include
static int fd;
/** Close this device */
static int led_close(struct hw_device_t* device)
{
close(fd);
return 0;
}
static int led_open(struct led_device_t* dev)
{
fd = open("/dev/led", O_RDWR);
ALOGI("led_open : %d", fd);
if (fd >= 0)
return 0;
else
return -1;
}
static int led_ctrl(struct led_device_t* dev, int which, int status)
{
if(fd < 0) {
fd = open("/dev/led", O_RDWR);
}
int ret = ioctl(fd, status, which);
ALOGI("led_ctrl : %d, %d, %d, %d", which, status, ret, fd);
return ret;
}
static struct led_device_t led_dev = {
.common = {
.tag = HARDWARE_DEVICE_TAG,
.close = led_close,
},
.led_open = led_open,
.led_ctrl = led_ctrl,
};
static int led_device_open(const struct hw_module_t* module, const char* id,
struct hw_device_t** device)
{
*device = &led_dev;
return 0;
}
static struct hw_module_methods_t led_module_methods = {
.open = led_device_open,
};
struct hw_module_t HAL_MODULE_INFO_SYM = {
.tag = HARDWARE_MODULE_TAG,
.id = LED_HARDWARE_MODULE_ID,//JNI会通过这个id获取到hal生成的库
.methods = &led_module_methods,
};
(2) 添加led_hal.h:hardware/libhardware/include/hardware/led_hal.h;led_hal.h代码如下:
#ifndef ANDROID_LED_INTERFACE_H
#define ANDROID_LED_INTERFACE_H
#include
#include
#include
#include

#define LED_HARDWARE_MODULE_ID "led"

__BEGIN_DECLS
struct led_device_t {
    struct hw_device_t common;

        int (*led_open)(struct led_device_t* dev);
        int (*led_ctrl)(struct led_device_t* dev,int which, int status);
};

__END_DECLS

#endif  // ANDROID_LED_INTERFACE_H
3. JNI层:
(1) 创建文件:frameworks/base/services/core/jni/com_android_server_LedService.cpp,代码如下:
#define LOG_TAG "LedService"
#include "jni.h"
#include "JNIHelp.h"
#include "android_runtime/AndroidRuntime.h"
#include
#include
#include
#include
#include
#include
#include
#include
#include
namespace android
{
static led_device_t* led_device;
jint ledOpen(JNIEnv *env, jobject cls)
{
jint err;
hw_module_t* module;
hw_device_t* device;
ALOGI("native ledOpen ...");
/* 1. hw_get_module 通过"led"(这是hal的id)找到对应的库.*/
err = hw_get_module("led", (hw_module_t const**)&module);
if (err == 0) {
/* 2. get device : module->methods->open */
err = module->methods->open(module, NULL, &device);
if (err == 0) {
/* 3. call led_open */
led_device = (led_device_t *)device;
return led_device->led_open(led_device);
} else {
return -1;
}
}
return -1;
}
void ledClose(JNIEnv *env, jobject cls)
{
//ALOGI("native ledClose ...");
//close(fd);
}
jint ledCtrl(JNIEnv *env, jobject cls, jint which, jint status)
{
ALOGI("native ledCtrl %d, %d", which, status);
return led_device->led_ctrl(led_device, which, status);
}
//注册本地方法。
static const JNINativeMethod methods[] = {
{"native_ledOpen", "()I", (void *)ledOpen},
{"native_ledClose", "()V", (void *)ledClose},
{"native_ledCtrl", "(II)I", (void *)ledCtrl},
};
int register_android_server_LedService(JNIEnv *env)
{//本地方法对应的java类LedService
return jniRegisterNativeMethods(env, "com/android/server/LedService",
methods, NELEM(methods));
}
}
(2) 修改frameworks/base/services/core/jni/onload.cpp,修改如下:
+int register_android_server_LedService(JNIEnv* env);
int register_android_server_connectivity_Vpn(JNIEnv* env);
@@ -74,6 +75,7 @@ extern "C" jint JNI_OnLoad(JavaVM* vm, void* /* reserved */)
register_android_server_VibratorService(env);
+ register_android_server_LedService(env);
(3) 修改:frameworks/base/services/core/jni/Android.mk;添加如下:
     $(LOCAL_REL_DIR)/com_android_server_VibratorService.cpp \
+    $(LOCAL_REL_DIR)/com_android_server_LedService.cpp \
至此,c/c++代码已经修改完成了。下面进入java程序的修改。
4. framework层:
(1) 增加文件:frameworks/base/core/java/android/os/ILedService.aidl。代码如下:
package android.os;

/** {@hide} */
interface ILedService
{
        int ledCtrl(int which, int status);
}
(2) 创建文件: frameworks/base/services/core/java/com/android/server/LedService.java。代码如下:
package com.android.server;
import android.os.ILedService;

public class LedService extends ILedService.Stub {
    private static final String TAG = "LedService";

        /* call native c function to access hardware */
        public int ledCtrl(int which, int status) throws android.os.RemoteException
        {
                return native_ledCtrl(which, status);
        }
        public LedService() {
                native_ledOpen();
        }

        public static native int native_ledOpen();
        public static native void native_ledClose();
        public static native int native_ledCtrl(int which, int status);
}
LedService.java通过JNI,调用本地函数,
(3) 修改:frameworks/base/Android.mk:
        core/java/android/os/IVibratorService.aidl \
+       core/java/android/os/ILedService.aidl \
        core/java/android/security/IKeystoreService.aidl \
(4) 在文件frameworks/base/services/java/com/android/server/SystemServer.java添加如下内容:
+
+            traceBeginAndSlog("StartLedService");
+            LedService led = new LedService();
+            ServiceManager.addService("led", led);
+            Trace.traceEnd(Trace.TRACE_TAG_SYSTEM_SERVER);
+
             if (!disableConsumerIr) {
到这里,LedService服务就已经注册添加到系统里了。下面是使用服务。
5. application framework:
(1)创建文件: frameworks/base/core/java/android/os/SystemLed.java,这个类供app获取,
通过getSystemService(Context.LED_SERVICE);
package android.os;

import android.content.Context;
import android.media.AudioAttributes;
import android.util.Log;

/**
 * Led implementation that controls the main system led.
 *
 * @hide
 */
public class SystemLed {
    private static final String TAG = "Led";

    private final ILedService mService;
    public SystemLed() {
        mService = ILedService.Stub.asInterface(
                ServiceManager.getService("led"));
    }

    public SystemLed(Context context) {
        mService = ILedService.Stub.asInterface(
                ServiceManager.getService("led"));
    }

   public void ledCtrl(int which,int status)
        {
                try{
                mService.ledCtrl(which, status);
                }catch(Exception e){}
        }
}
(2) 修改文件:frameworks/base/core/java/android/content/Context.java
     public static final String VIBRATOR_SERVICE = "vibrator";
+    public static final String LED_SERVICE = "led";
(3) 最后修改文件:frameworks/base/core/java/android/app/SystemServiceRegistry.java
+import android.os.SystemLed;
 import android.os.UserHandle;
 import android.os.UserManager;
 import android.os.Vibrator;
@@ -486,6 +487,13 @@ final class SystemServiceRegistry {
             public Vibrator createService(ContextImpl ctx) {
                 return new SystemVibrator(ctx);
             }});
+        registerService(Context.LED_SERVICE, SystemLed.class,
+                new CachedServiceFetcher() {
+            @Override
+            public SystemLed createService(ContextImpl ctx) {
+                return new SystemLed(ctx);
+            }});
安卓源码的修改已全部完成。
make update-api 更新api;
make systemimage -j16 编译system.img 并烧写到开发板。
6. APP应用:
由于源码里怎加了很多类,而在安卓sdk中是没有这些类的,解决这个办法就是eclipse或者android studio关联下面这个文件:
out/target/common/obj/JAVA_LIBRARIES/framework_intermediates/classes.jar。
eclipse关联方法:https://blog.csdn.net/mazhaojuan/article/details/21403717
android studio关联:https://www.jetbrains.com/idea/help/configuring-module-dependencies-and-libraries.html
APP主要代码如下:
import android.view.Menu;
import android.view.MenuItem;
import android.view.View;
import android.widget.TextView;
import android.os.SystemLed;
import android.os.RemoteException;
import android.os.ServiceManager;
public class MainActivity extends Activity {
private SystemLed ledservice = null;
private static int STATUS = 0,WHICH =1 ;
private TextView text= null;
@Override
protected void onCreate(Bundle savedInstanceState) {
super.onCreate(savedInstanceState);
setContentView(R.layout.activity_main);
text = (TextView) findViewById(R.id.text);
text.setText("STATUS:"+STATUS+";WHICH:"+WHICH);
//通过getSystemService()来获取SystemLed.
ledservice = (SystemLed) getSystemService(Context.LED_SERVICE);
}
public void add(View view)
{
ledservice.ledCtrl(++WHICH, ++STATUS);
text.setText("STATUS:"+STATUS+";WHICH:"+WHICH);
}
public void reduce(View view)
{
ledservice.ledCtrl(--WHICH, --STATUS);
text.setText("STATUS:"+STATUS+";WHICH:"+WHICH);
}
7. 效果图:
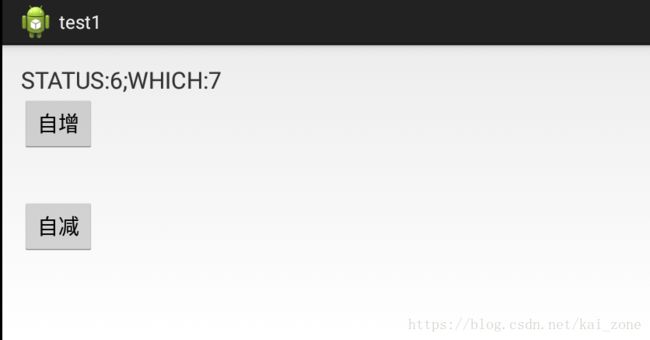
(1)APP界面(比较简单,凑合看吧,嘿嘿...):
(2)内核打印: 命令:cat /dev/kmsg | grep led,点击自增或者自减按钮,会看到输出变化。
APP代码下载:https://download.csdn.net/download/kai_zone/10575497
本文涉及的代码:https://download.csdn.net/download/kai_zone/10575551
容易出现的问题:
a .设备节点权限问题,没有权限,open设备节点会失败,chmod 777 dev/led给权限,也可以在.rc文件。
b. classes.jar导包问题,如果app没有你添加的类,肯定是类还没编译到classes.jar文件,重新编译再次导入。

