利用tomcat实现负载均衡
一、环境配置:
1.解压安装包:
[root@server1 ~]# ls
[root@server1 ~]# tar zxf jdk-7u79-linux-x64.tar.gz
[root@server1 ~]# tar zxf apache-tomcat-7.0.37.tar.gz
2.添加环境变量
[root@server1 ~]# vim /etc/profile
 80 export JAVA_HOME=/usr/local/java
 81 export CLASSPATH=.:$JAVA_HOME/lib:$JAVA_HOME/jre/lib
 82 export PATH=$PATH:$JAVA_HOME/bin

[root@server1 ~]# source /etc/profile  #使配置生效
3.创建软链接
[root@server1 ~]# ln -s apache-tomcat-7.0.37/ tomcat
[root@server1 ~]# ln -s jdk1.7.0_79/ java
4.编辑一个java程序运行测试
安装java编译工具:
yum install -y 1:java-1.7.0-openjdk-devel-1.7.0.45-2.4.3.3.el6.x86_64
[root@server1 ~]# vim test.java
1 public class test {
2 public static void main(String[] args)
3 {
4 System.out.println("Hello World!");
5 }
6 }
[root@server1 ~]# javac test.java #编译
[root@server1 ~]# java test #执行
Hello World!5.打开tomcat:
[root@server1 local]# cd /usr/local/tomcat/
[root@server1 tomcat]# cd bin/
[root@server1 bin]# ls
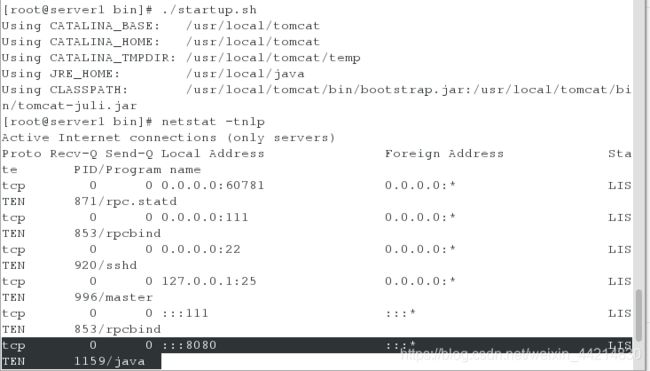
[root@server1 bin]# ./startup.sh
[root@server1 bin]# netstat -tnlp  #查看tomcat的端口是否打开

tcp        0      0 :::8080                     :::*                        LISTEN      1159/java
6.编辑openresty配置文件
[root@server1 ~]# cd   /usr/local/openresty/nginx/conf
[root@server1 conf]# vim nginx.conf

 70         location ~ \.jsp$ {
 71             proxy_pass   http://127.0.0.1:8080;
 72         }

[root@server1 sbin]# /usr/local/openresty/nginx/sbin/nginx #打开openresty
[root@server1 sbin]# /usr/local/openresty/nginx/sbin/nginx -s reload
7.编辑测试页:
[root@server1 html]# cd /usr/local/tomcat/webapps/ROOT/
[root@server1 html]# vim test.jsp

  1 server1 the time is: <%=new java.util.Date() %>
8.打开浏览器:http://172.25.60.1/test.jsp
二、实现负载均衡
1.server2安装tomcat,安装步骤与server1相同
[root@server2 ~]# scp -r root@server1:/usr/local/java /usr/local/
[root@server2 ~]# scp -r root@server1:/usr/local/tomcat /usr/local/

[root@server2 local]# vim /etc/profile

export JAVA_HOME=/usr/local/java
export CLASSPATH=.:$JAVA_HOME/lib:$JAVA_HOME/jre/lib
export PATH=$PATH:$JAVA_HOME/bin

[root@server2 local]# source /etc/profile
2.server1上编辑openresty的配置文件,实现负载均衡
vim /usr/local/openresty/nginx/conf/nginx.conf

 17 http {
 18         upstream tomcat {
 19                 server 172.25.60.1:8080;
 20                 server 172.25.60.2:8080;
 21         }

 70         location ~ \.jsp$ {
 71             proxy_pass   http://tomcat;
 72         }
 73        # location /memc {
 74        #    internal;
 75        #    memc_connect_timeout 100ms;
 76        #    memc_send_timeout 100ms;
 77        #    memc_read_timeout 100ms;
 78        #    set $memc_key $query_string;
 79        #    set $memc_exptime 300;
 80        #    memc_pass memcache;
 81        # }
 82
 83         location ~ \.php$ {
 84        #      set $key $uri$args;
 85        #      srcache_fetch GET /memc $key;
 86        #      srcache_store PUT /memc $key;
 87              root           html;
 88              fastcgi_pass   127.0.0.1:9000;
 89              fastcgi_index  index.php;
 90        #      #fastcgi_param  SCRIPT_FILENAME  /scripts$fastcgi_script_        name;
 91              include        fastcgi.conf;
 92
 93         }
[root@server1 html]# /usr/local/openresty/nginx/sbin/nginx -t #语法检测
[root@server1 html]# /usr/local/openresty/nginx/sbin/nginx -s reload #重新加载
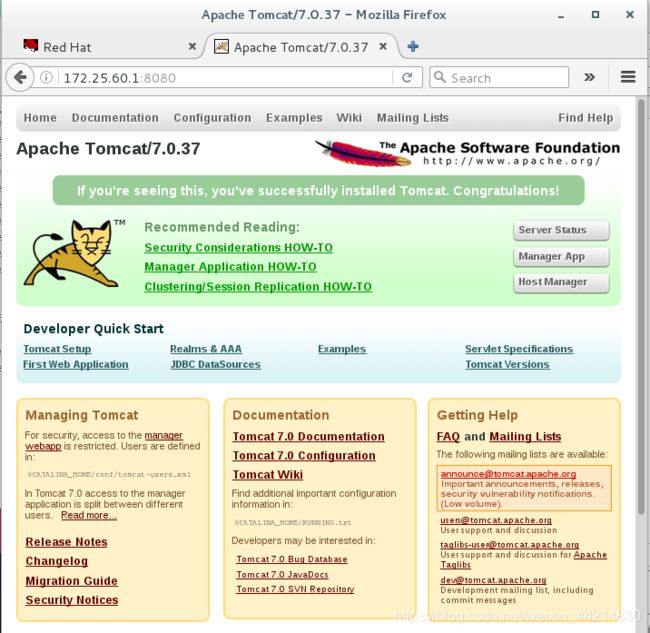
3.打开浏览器测试能否正常访问:http://172.25.60.1:8080/
4.编辑srever2的测试页
[root@server1 html]# cd /usr/local/tomcat/webapps/ROOT/
[root@server1 ROOT]# vim test.jsp

  1 server2 the time is: <%=new java.util.Date() %>
打开tomcat服务
[root@server2 bin]# cd /usr/local/tomcat/bin
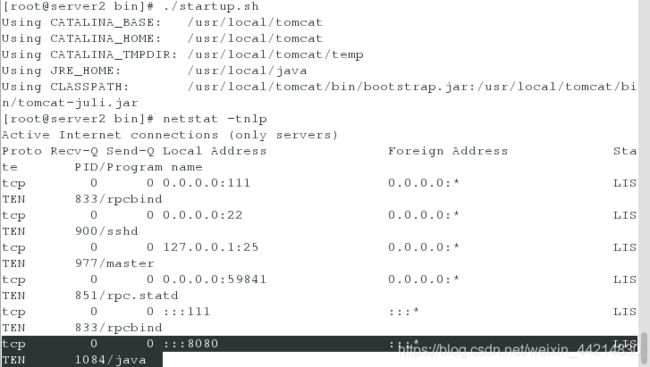
[root@server2 bin]# ./startup.sh
[root@server2 bin]# netstat -tnlp

tcp        0      0 :::8080                     :::*                        LISTEN      1084/java
打开openresty(nginx页可以)
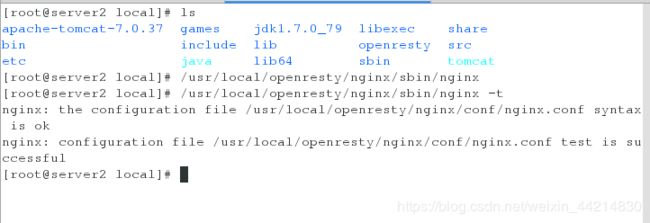
[root@server2 local]# /usr/local/openresty/nginx/sbin/nginx -t
[root@server2 local]# /usr/local/openresty/nginx/sbin/nginx
5.测试:访问http://172.25.60.1/test.jsp


