Azkaban使用总结
文章目录
- 安装&配置solo server mode
- 安装& 配置 two server mode | multiple executor mode
- 1. 安装azkaban-executor-server
- 2. 安装azkaban-web-server
- 使用azkaban
- 案例1——运行shell命令
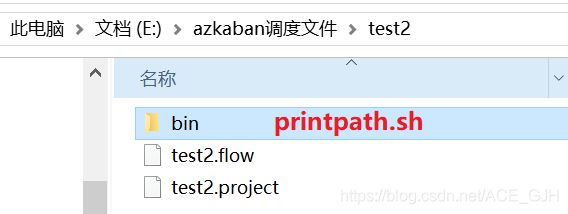
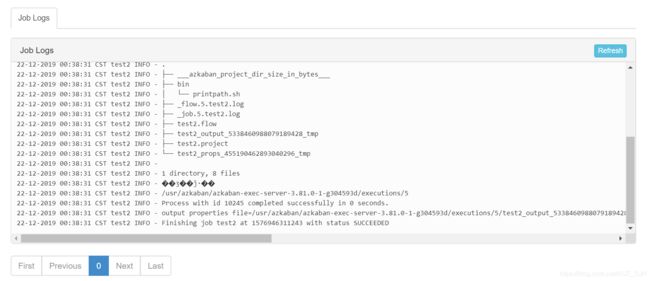
- 案例2——运行shell脚本
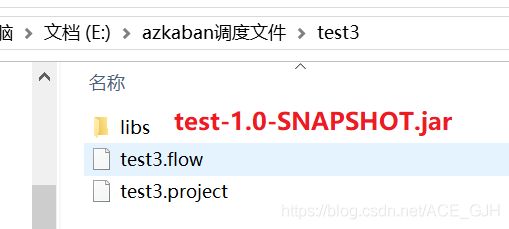
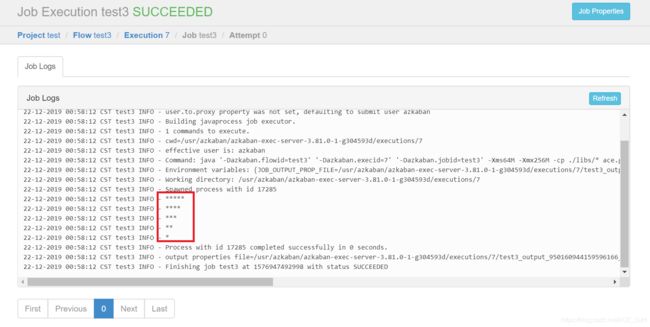
- 案例3——运行Java代码
- 进阶azkaban
- 进阶案例1——带有依赖的flow
- 进阶案例2——内嵌flow
- 进阶案例3——WebUI传值
- 进阶案例4——shell传值
- 进阶案例5——Job间传值
- 进阶案例6——条件flow
- 进阶案例7——Job配置
- 进阶案例8——事件触发器配置
Azkaban是由Linkedin开源的一个批量工作流任务调度器。用于在一个工作流内以一个特定的顺序运行一组工作和流程。
下面我们先来看一下azkaban的安装和配置。
安装&配置solo server mode
solo server mode 使用的内嵌的H2 DB,所有的web server和executor server运行在一个相同的进程中,该种模式适合测试或者任务调度规模比较小的情况。
步骤:
- 编译好的azkaban的安装目录azkaban\azkaban-solo-server\build\distributions下会有相应的安装包
azkaban-solo-server-*.tar.gz,将该安装解压到/usr目录下
# 目录结构
.
└── azkaban-solo-server
    ├── bin
    ├── conf
    ├── lib
    ├── plugins
    ├── sql
    └── web
- 修改配置文件
vim conf/azkaban.properties
# mail settings
[email protected]	#使用哪个邮箱发送
mail.host=smtp.163.com			#邮箱服务器
[email protected]		#邮箱账户名
mail.password=XXXXXXXXXXXXXXXXX  #邮箱授权码
[email protected] 	#任务失败发送给谁
[email protected] 	#任务成功发送给谁
- 修改commonprivate配置文件
vim plugins/jobtypes/commonprivate.properties
memCheck.enabled=false # 关闭执行节点内存检查,默认如果执行节点内存小于6GB,不会提交任务
- 运行solo-server
这里重点强调一下,启动一定要在根目录下用./bin/XXX启动,还记得配置文件里面的web.resource.dir=web/吗?这可是相对路径!!!
./bin/start-solo.sh
访问8081端口,登录页面:
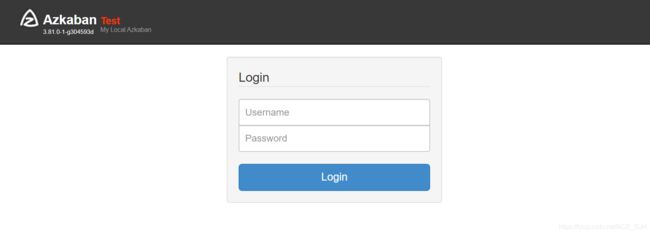
账户名和密码默认都是azkaban

登录的账户信息存储在azkaban-users.xml配置文件中
安装& 配置 two server mode | multiple executor mode
two server mode和multiple executor mode用于生产环境,后台的DB数据库使用MySQL,其中Webserver和executorserver应该被部署在不同的主机上。
1. 安装azkaban-executor-server
步骤:
- 安装配置MySQL
注意:需要mysql开启远程访问权限,如果你还没有安装MySQL,可以参考我的这几篇博客。
MySQL在Windows上的安装及配置
MySQL在CentOS7上的安装
MySQL在CentOS6上的安装 - 在mysql上初始化azkaban的数据
注意,初始化azkaban的sql文件在编译好的azkaban的安装目录azkaban\azkaban\azkaban-db\build\sql下有一个叫create-all-sql-3.81.0-1-g304593d.sql文件
mysql> create database azkaban character set=latin1; # 需要设置编码为latin1
mysql> source xxx\azkaban\azkaban-db\build\sql\create-all-sql-3.81.0-1-g304593d.sql
- 用
show tables;命令查看,一共创建了34个表 - 编译好的azkaban的安装目录
azkaban\azkaban\azkaban-exec-server\build\distributions下会有相应的安装包azkaban-exec-server-*.tar.gz,将该安装解压到/usr目录下
.
├── azkaban-exec-server-3.81.0-1-g304593d
    ├── bin
    ├── conf
    ├── lib
    └── plugins
- 修改配置文件
vim conf/azkaban.properties
default.timezone.id=Asia/Shanghai	 #修改时区为上海
# Where the Azkaban web server is located
azkaban.webserver.url=http://Jack:8081 # 修改自己的主机名,以便WebUI访问
# mail settings
[email protected]	#使用哪个邮箱发送
mail.host=smtp.163.com			#邮箱服务器
[email protected]		#邮箱账户名
mail.password=XXXXXXXXXXXXXXXXX  #邮箱授权码
[email protected] 	#任务失败发送给谁
[email protected] 	#任务成功发送给谁
# Azkaban mysql settings by default. Users should configure their own username and password.
database.type=mysql
mysql.port=3306
mysql.host=localhost  #修改mysql所在主机的访问地址
mysql.database=azkaban
mysql.user=root
mysql.password=root
mysql.numconnections=100
- 修改commonprivate配置文件
vim plugins/jobtypes/commonprivate.properties
memCheck.enabled=false # 关闭执行节点内存检查,默认如果执行节点内存小于6GB,不会提交任务
- 启动azkaban-executor-server
这里重点强调一下,启动一定要在根目录下用./bin/XXX启动,还记得配置文件里面的web.resource.dir=web/吗?这可是相对路径!!!
./bin/start-exec.sh
- 激活azkaban-executor-server
粘贴下面命令运行:
curl -G "localhost:$(<./executor.port)/executor?action=activate" && echo
结果:
{"status":"success"}
2. 安装azkaban-web-server
- 编译好的azkaban的安装目录
azkaban\azkaban\azkaban-web-server\build\distributions下会有相应的安装包azkaban-web-server-*.tar.gz,将该安装解压到/usr目录下
.
├── bin
├── conf
├── lib
└── web
- 修改配置文件
vim conf/azkaban.properties
default.timezone.id=Asia/Shanghai # 修改时区
# mail settings
[email protected]	#使用哪个邮箱发送
mail.host=smtp.163.com			#邮箱服务器
[email protected]		#邮箱账户名
mail.password=XXXXXXXXXXXXXXXXX  #邮箱授权码
[email protected] 	#任务失败发送给谁
[email protected] 	#任务成功发送给谁
# Azkaban mysql settings by default. Users should configure their own username and password.
database.type=mysql
mysql.port=3306
mysql.host=localhost  #修改mysql所在主机的访问地址
mysql.database=azkaban
mysql.user=root
mysql.password=root
mysql.numconnections=100
#azkaban.executorselector.filters=StaticRemainingFlowSize,MinimumFreeMemory,CpuStatus
azkaban.executorselector.filters=StaticRemainingFlowSize,CpuStatus # 关闭内存检查,仅仅测试环境
- 启动azkaban-web-server
这里重点强调一下,启动一定要在根目录下用./bin/XXX启动,还记得配置文件里面的web.resource.dir=web/吗?这可是相对路径!!!
./bin/start-web.sh
查看进程:
[root@SparkOnYarn azkaban-web-server]# jps
51696 AzkabanWebServer
46836 AzkabanExecutorServer
51804 Jps
下面我们介绍如何使用azkaban,首先要说明的是,本博客不可能全部详细的讲解完所有的内容,如果读者想要完全掌握azkaban的内容,阅读官方文档是个不错的选择。
推荐:Azkaban官方文档
使用azkaban
注意:现在我们用的都是flow2.0版本,flow1.0版本已经过时了,所以在任务的文件夹中一定要放一个后缀为.project的文件,内容如下:
azkaban-flow-version: 2.0
案例1——运行shell命令
nodes:
  - name: test1
    type: command
    config:
      command: echo 'Hello Azkaban!'
      command.1: echo 'Hello World!'
- 打包为
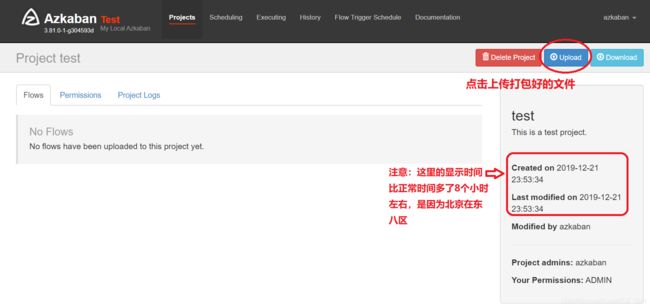
test1.zip - 在WebUI上创建一个Project
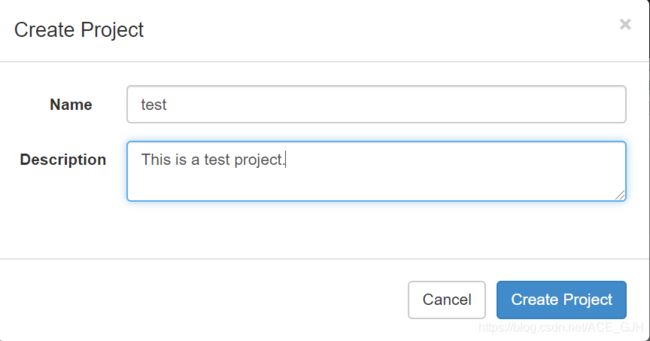
- 上传文件
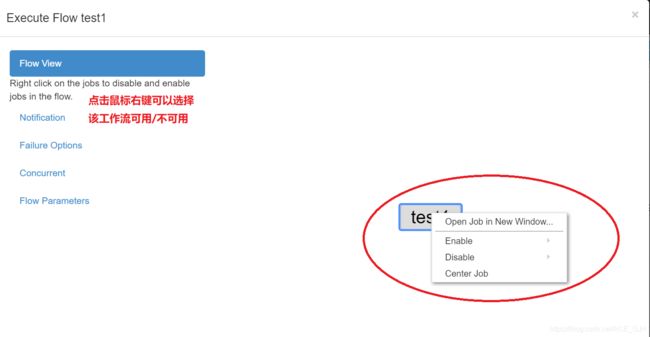
- 点击 Execute Flow
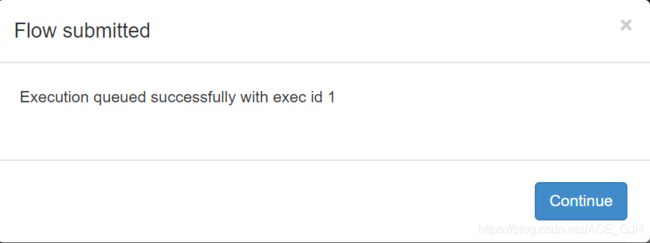
- 点击右下方的Execute按钮,再点击Continue按钮
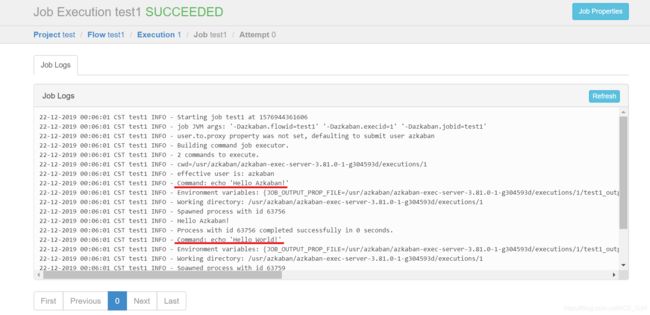
- 查看执行结果

- 点击“log”查看执行过程,说明我们的命令被运行了
案例2——运行shell脚本
- flow文件
nodes:
  - name: test2
    type: command
    config:
      command: sh ./bin/printpath.sh
- shell脚本文件
path=$(pwd)
echo '查看当前文件夹'
tree -L 2
echo '打印当前路径'
echo $path
案例3——运行Java代码
- flow文件
nodes:
  - name: test3
    type: javaprocess
    config:
      classpath: ./libs/*
      java.class: ace.gjh.TestAzkaban
- java代码
package ace.gjh;
public class TestAzkaban {
    public static void main(String[] args) {
        for (int i = 0; i < 5; i++) {
            for (int j = 5; j > i; j--) {
                System.out.print("*");
            }
            System.out.println();
        }
    }
}
进阶azkaban
进阶案例1——带有依赖的flow
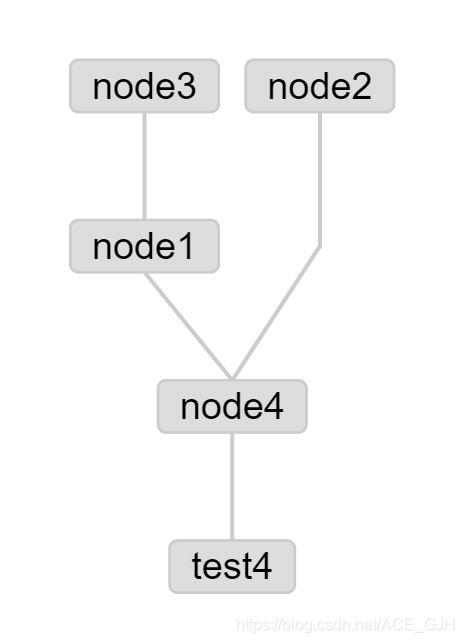
nodes:
  - name: node4
    type: noop
    dependsOn:
      - node1
      - node2
  - name: node1
    type: command
    config:
      command: echo 'I am node1, I depend on node3.'
    dependsOn:
      - node3
  - name: node2
    type: command
    config:
      command: echo 'I am node2.'
  - name: node3
    type: command
    config:
      command: echo 'I am node3.'
  - name: test4
    type: command
    config:
      command: echo 'I am test4.'
    dependsOn:
      - node4
进阶案例2——内嵌flow
nodes:
  - name: test5
    type: command
    config:
      command: echo 'I am test5.'
    dependsOn:
      - node4

  - name: node4
    type: noop
    dependsOn:
      - node1
      - node2

  - name: node2
    type: command
    config:
      command: echo 'I am node2.'

  - name: node1
    type: flow
    nodes:
      - name: node3
        type: command
        config:
          command: echo 'I am innerFlow node3'
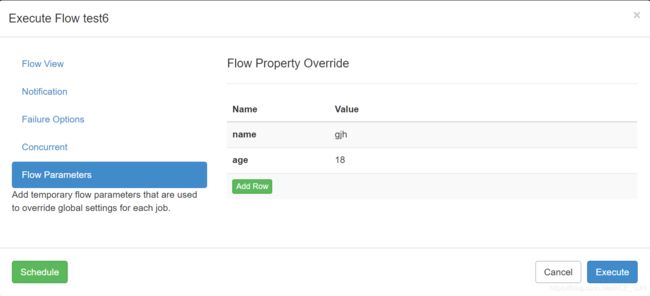
进阶案例3——WebUI传值
nodes:
  - name: test6
    type: command
    config:
      command: echo "My Message-- name:"${name}",age:"${age}
进阶案例4——shell传值
shell文件
name=$1
sex=$2
start=$(date -d -7day '+%Y-%m-%d')
end=$(date '+%Y-%m-%d')
echo '{"name":"'$name'","sex":"'$sex'","start":"'$start'","end":"'$end'"}'
flow文件
nodes:
  - name: test7
    type: command
    config:
      command: sh ./bin/needvalue.sh ${name} ${sex}
进阶案例5——Job间传值
shell文件(注意:传递到下一个job的值必须用json格式!!!)
start=$(date -d -7day '+%Y-%m-%d')
end=$(date '+%Y-%m-%d')
echo '{"start":"$start","end":"$end"}' > $JOB_OUTPUT_PROP_FILE
flow文件
nodes:
  - name: giveValue
    type: command
    config:
      command: sh ./bin/givevalue.sh

  - name: test8
    type: command
    config:
      command: echo ${start}' ~ '${end}
    dependsOn:
      - giveValue
进阶案例6——条件flow
详情参考:Azkaban文档——有条件的工作流
shell文件
echo '{"param1": "1"}' > $JOB_OUTPUT_PROP_FILE
flow文件
nodes:
 - name: JobA
   type: command
   config:
     command: sh ./bin/condition.sh

 - name: JobB
   type: command
   dependsOn:
     - JobA
   config:
     command: echo "This is JobB."
   condition: ${JobA:param1} == 1

 - name: JobC
   type: command
   dependsOn:
     - JobA
   config:
     command: echo "This is JobC."
   condition: ${JobA:param1} == 2

 - name: JobD
   type: command
   dependsOn:
     - JobB
     - JobC
   config:
     command: echo 'this is jodD!'
   condition: one_success
进阶案例7——Job配置
shell文件
touch /root/azkaban.txt
flow文件
---
config:
  user.to.proxy: azkaban
  failure.emails: [email protected]
  success.emails: [email protected]
  notify.emails: [email protected]
nodes:
  - name: test10
    type: command
    config:
      command: sh ./bin/createfile.sh
进阶案例8——事件触发器配置
- 在配置文件
conf/azkaban.properties中添加下面内容
azkaban.dependency.plugin.dir=plugins/dependency
azkaban.server.schedule.enable_quartz=true
- 创建配置文件
mkdir -p plugins/dependency/kafka
touch plugins/dependency/kafka/dependency.properties
touch conf/azkaban.private.properties
- 拷贝
azkaban\az-flow-trigger-dependency-type\kafka-event-trigger\build\libs下的kafka-event-trigger-3.81.0-1-g304593d-fat.jar到plugins/dependency/kafka/ - 修改
dependency.properties
dependency.classpath=/usr/azkaban-web-server/plugins/dependency/kafka/kafka-event-trigger-3.81.0-1-g304593d-fat.jar
dependency.class=trigger.kafka.KafkaDependencyCheck
kafka.broker.url=kafka主机名:9092
- 修改
azkaban.private.properties
org.quartz.dataSource.quartzDS.user=root
org.quartz.dataSource.quartzDS.password=root
org.quartz.dataSource.quartzDS.driver = com.mysql.jdbc.Driver
org.quartz.dataSource.quartzDS.URL = jdbc:mysql://localhost:3306/azkaban
org.quartz.threadPool.threadCount = 3
org.quartz.jobStore.class=org.quartz.impl.jdbcjobstore.JobStoreTX
org.quartz.jobStore.driverDelegateClass=org.quartz.impl.jdbcjobstore.StdJDBCDelegate
org.quartz.jobStore.tablePrefix=QRTZ_
org.quartz.jobStore.dataSource=quartzDS
- flow文件
案例请参考:Azkaban文档——在Azkaban上部署事件触发器的入门
至此,基本上azkaban所有的内容基本上都说了一遍,如果读者对本博客的案例有兴趣,欢迎到我的github上去下载
本博客所有案例下载


