win10下搭建grpc 以及demo(idea maven java)
grpc是谷歌发布的rpc框架,开源的远程调用框架,多语言支持(Python,Java,C、C++、Node.js、Ruby、Objective-C),目前已有Java版本,grpc-java,Go版本,grpc-go以及C版本。
win下搭建grpc-java(idea maven)
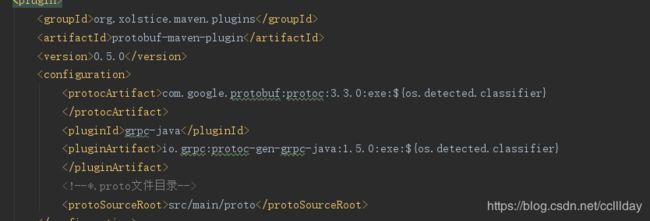
一、pom.xml build标签做如下配置
1、引入构建工具
                kr.motd.maven
                os-maven-plugin
                1.4.1.Final


                org.xolstice.maven.plugins
                protobuf-maven-plugin
                0.5.0

                    com.google.protobuf:protoc:3.3.0:exe:${os.detected.classifier}

                    grpc-java
                    io.grpc:protoc-gen-grpc-java:1.5.0:exe:${os.detected.classifier}


                    src/main/proto


                            compile
                            compile-custom


                src/main/java

                    **/*.xml
自动解析主机

protoc和grpc-java
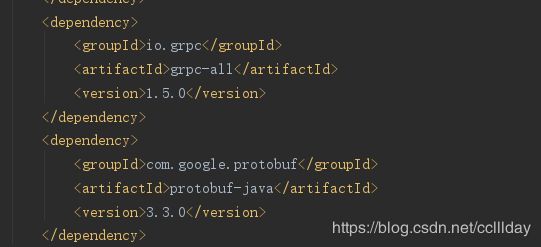
2、写入maven依赖
            io.grpc
            grpc-all
            1.5.0


            com.google.protobuf
            protobuf-java
            3.3.0
3、重建maven项目,下载对应的依赖

二、开始写第一个demo
我们在之前配置的.proto文件目录在src/main/proto

1、在src/main下新建proto文件夹,创建test.proto文件
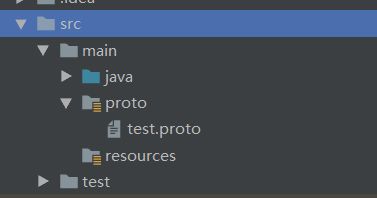
将proto文件夹marked as resources root资源目录
2、编辑test.proto文件
syntax = "proto3";

option java_multiple_files = true;
option java_package = "com.ymm.usercenter.proto";
option java_outer_classname = "UserRegister";

package com.ymm.usercenter;

service UserCenterService {
    rpc userCenter (InvokeRequest) returns (InvokeResponse) {
    }
}

message InvokeRequest {
     string id = 1;
     string userName = 2;
     int32 sex = 3;
     int32 age =4;
     string telephone = 5;
     string address = 6;

}

message InvokeResponse {
    string msg = 1;
}
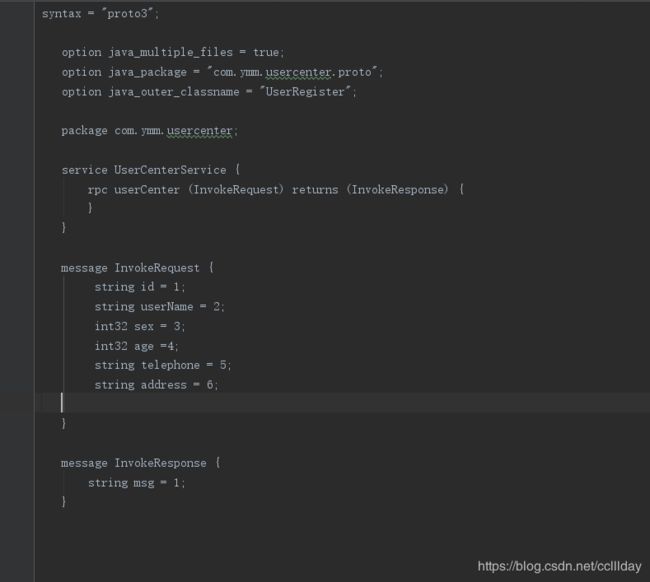
syntax = “proto3”;
指定proto3语法,不指定默认是proto2语法
option java_package
输出包名,在target目录打包
service UserCenterService {
rpc userCenter (InvokeRequest) returns (InvokeResponse) {
}
}
定义服务名(UserCenterService),服务方法名(userCenter),传入参数类型(InvokeRequest),返回值类型(InvokeResponse)
**注:命名可以自行修改(下面代码会示例)**
定义InvokeRequest
 message InvokeRequest {
        string id = 1;
        string userName = 2;
        int32 sex = 3;
        int32 age =4;
        string telephone = 5;
        string address = 6;
 }
注:fileId不可以重复,否则,编译生成target会报错提示
定义InvokeResponse
message InvokeResponse {
       string msg = 1;
   }
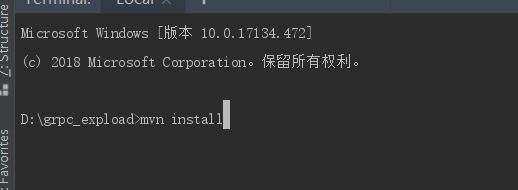
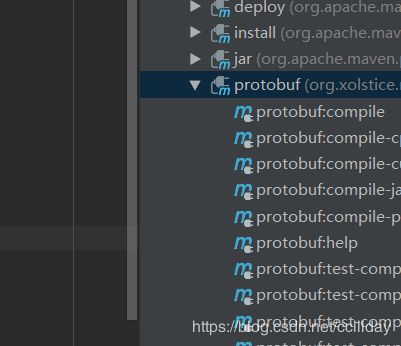
3、mvn install用插件生成target grpc目录
或者在右侧maven工具栏,执行protobuf compile

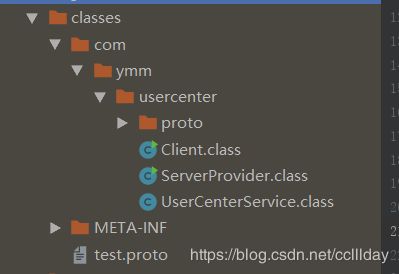
执行完毕我们可以看到在target下生成了grpc代码。
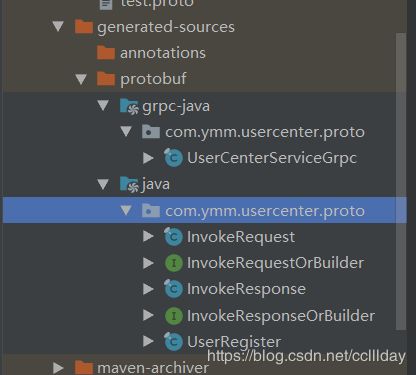
4、我们需要用这些类,我们需要将

grpc-java和java这两个目录,需要我们marked as sources root
5、下面开始写我们demo测试类
/*
 *   服务提供类
 */
package com.ymm.usercenter;

import io.grpc.Server;
import io.grpc.ServerBuilder;

import java.io.IOException;


public class ServerProvider {
    public static void main(String[] args) throws IOException,InterruptedException {
        int port = 50052;
        Server server = ServerBuilder.forPort(port)
                .addService(new UserCenterService())
                .build();
        server.start();
        System.out.println("--------start--------");
        Thread.sleep(1000 * 60 * 5);
        server.shutdown();
        System.out.println("--------shutdown------");
    }
}
package com.ymm.usercenter;

import com.ymm.usercenter.proto.InvokeRequest;
import com.ymm.usercenter.proto.InvokeResponse;
import com.ymm.usercenter.proto.UserCenterServiceGrpc;
import io.grpc.stub.StreamObserver;
    /*
        服务实现类
     */
    public class UserCenterService extends UserCenterServiceGrpc.UserCenterServiceImplBase {

        public void userCenter(InvokeRequest request, StreamObserver responseObserver){
            System.out.println("-------------request->--"+ request);
            String name = request.getUserName();
            Integer age = request.getAge();
            String address = request.getAddress();
            String id = request.getId();
            InvokeResponse response = InvokeResponse.newBuilder()
                    .setMsg(name + "cs" + " age " + String.valueOf(age)
                            + " from " +  address + " id " + id)
                    .build();
            responseObserver.onNext(response);
            responseObserver.onCompleted();
        }
    }
package com.ymm.usercenter;

import com.ymm.usercenter.proto.InvokeRequest;
import com.ymm.usercenter.proto.InvokeResponse;
import com.ymm.usercenter.proto.UserCenterServiceGrpc;
import io.grpc.Channel;
import io.grpc.ManagedChannelBuilder;

/*
 * 客户端类
 */
public class Client {

        public static void main(String[] args) {
            //InvokeRequest request = InvokeRequest.newBuilder().setUserName("cclllday").build();
            InvokeRequest.Builder builder = InvokeRequest.newBuilder();
            builder.setUserName("cclllday");
            builder.setAge(22);
            builder.setSex(1);
            builder.setAddress("tiansu");
            builder.setId("123456789");
            builder.setTelephone("1394545646");
            InvokeRequest request = builder.build();
            Channel channel = ManagedChannelBuilder.forAddress("localhost", 50052).usePlaintext(true).build();
            //UserCenterServiceGrpc.UserCenterServiceBlockingStub blockingStub = UserCenterServiceGrpc.newBlockingStub(channel);
            UserCenterServiceGrpc.UserCenterServiceBlockingStub blockingStub = UserCenterServiceGrpc.newBlockingStub(channel);
            InvokeResponse response = blockingStub.userCenter(request);
            System.out.println(response.getMsg());
        }
}
注: userCenter是方法名,我们之前在test.proto定义过的,没有定义不可用
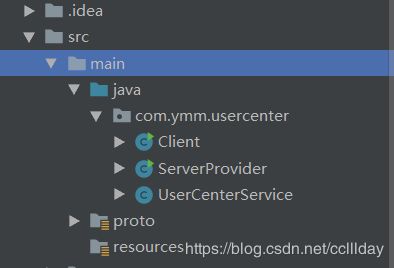
项目结构:
6、先启动serviceProvider,再启动Client(本地application启动)


至此,一个grpc demo构建完成。