基于TF2.0和Keras深度学习模型的车道线检测方法
深度学习车道线检测方法
一、训练数据集实例
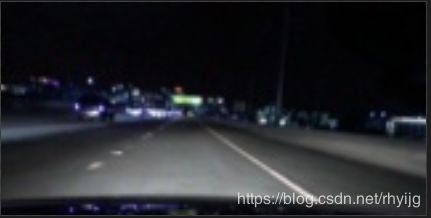
本文的训练图片文件使用 full_CNN_train.p 对应的标签图片文件为 full_CNN_labels.p 其中包含了12764张图片,包括各种场景下的车道线图片。其尺寸为(80,160,3)标签文件大小为(80,160,1)。将其集合到两个.p文件当中。其中示例图片为:


读取.p文件操作可以使用以下代码:
import pickle as pl
import cv2
fr = open('full_CNN_train.p','rb')
images = pl.load(fr)
fr.close()

img1 = images[50]

cv2.namedWindow('Image')
cv2.imshow('Image', img1)

cv2.imwrite("new_img_1.jpg", img1)

cv2.waitKey(0)
cv2.destroyAllWindows()
二、训练网络的搭建
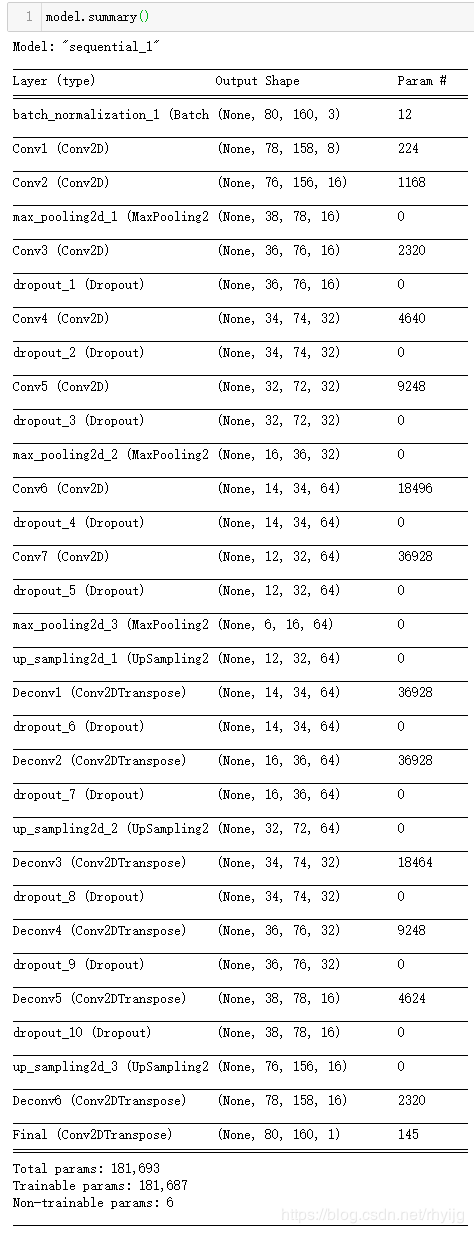
训练使用的神经网络模型搭建如下图所示,首先使用批归一化层对输入的训练数据进行归一化处理;每两个卷积后面加上一层池化层,适当使用dropout层防止其过拟合。后面通过上采样层和反卷积层,将其特征进一步还原。如下图即是搭建的网络的模型,其输入网络数据shape与输出shape保持一致。

训练神经网络结构如下:
### Here is the actual neural network ###
model = Sequential()
# Normalizes incoming inputs. First layer needs the input shape to work
model.add(BatchNormalization(input_shape=input_shape))

# Below layers were re-named for easier reading of model summary; this not necessary
# Conv Layer 1
model.add(Conv2D(8, (3, 3), padding='valid', strides=(1,1), activation = 'relu', name = 'Conv1'))

# Conv Layer 2
model.add(Conv2D(16, (3, 3), padding='valid', strides=(1,1), activation = 'relu', name = 'Conv2'))

# Pooling 1
model.add(MaxPooling2D(pool_size=pool_size))

# Conv Layer 3
model.add(Conv2D(16, (3, 3), padding='valid', strides=(1,1), activation = 'relu', name = 'Conv3'))
model.add(Dropout(0.2))

# Conv Layer 4
model.add(Conv2D(32, (3, 3), padding='valid', strides=(1,1), activation = 'relu', name = 'Conv4'))
model.add(Dropout(0.2))

# Conv Layer 5
model.add(Conv2D(32, (3, 3), padding='valid', strides=(1,1), activation = 'relu', name = 'Conv5'))
model.add(Dropout(0.2))

# Pooling 2
model.add(MaxPooling2D(pool_size=pool_size))

# Conv Layer 6
model.add(Conv2D(64, (3, 3), padding='valid', strides=(1,1), activation = 'relu', name = 'Conv6'))
model.add(Dropout(0.2))

# Conv Layer 7
model.add(Conv2D(64, (3, 3), padding='valid', strides=(1,1), activation = 'relu', name = 'Conv7'))
model.add(Dropout(0.2))

# Pooling 3
model.add(MaxPooling2D(pool_size=pool_size))

# Upsample 1
model.add(UpSampling2D(size=pool_size))

# Deconv 1
model.add(Conv2DTranspose(64, (3, 3), padding='valid', strides=(1,1), activation = 'relu', name = 'Deconv1'))
model.add(Dropout(0.2))

# Deconv 2
model.add(Conv2DTranspose(64, (3, 3), padding='valid', strides=(1,1), activation = 'relu', name = 'Deconv2'))
model.add(Dropout(0.2))

# Upsample 2
model.add(UpSampling2D(size=pool_size))

# Deconv 3
model.add(Conv2DTranspose(32, (3, 3), padding='valid', strides=(1,1), activation = 'relu', name = 'Deconv3'))
model.add(Dropout(0.2))

# Deconv 4
model.add(Conv2DTranspose(32, (3, 3), padding='valid', strides=(1,1), activation = 'relu', name = 'Deconv4'))
model.add(Dropout(0.2))

# Deconv 5
model.add(Conv2DTranspose(16, (3, 3), padding='valid', strides=(1,1), activation = 'relu', name = 'Deconv5'))
model.add(Dropout(0.2))

# Upsample 3
model.add(UpSampling2D(size=pool_size))

# Deconv 6
model.add(Conv2DTranspose(16, (3, 3), padding='valid', strides=(1,1), activation = 'relu', name = 'Deconv6'))

# Final layer - only including one channel so 1 filter
model.add(Conv2DTranspose(1, (3, 3), padding='valid', strides=(1,1), activation = 'relu', name = 'Final'))

### End of network ###
通过model.summary()打印出其网络结构,可以看到输入输出shape相同,参数也较多。

三、增强训练数据及训练(保存)模型
再使用ImageDataGenerator()对数据集进行扩充,ImageDataGenerator()是keras.preprocessing.image模块中的图片生成器,同时也可以在batch中对数据进行增强,扩充数据集大小,增强模型的泛化能力。比如进行旋转,变形,归一化等等。
keras.preprocessing.image.ImageDataGenerator(featurewise_center=False, samplewise_center=False, featurewise_std_normalization=False, samplewise_std_normalization=False, zca_whitening=False, zca_epsilon=1e-06, rotation_range=0.0, width_shift_range=0.0, height_shift_range=0.0, brightness_range=None, shear_range=0.0, zoom_range=0.0, channel_shift_range=0.0, fill_mode='nearest', cval=0.0, horizontal_flip=False, vertical_flip=False, rescale=None, preprocessing_function=None, data_format=None, validation_split=0.0)
参数:
- featurewise_center: Boolean. 对输入的图片每个通道减去每个通道对应均值。
- samplewise_center: Boolan. 每张图片减去样本均值, 使得每个样本均值为0。
- featurewise_std_normalization(): Boolean()
- samplewise_std_normalization(): Boolean()
- zca_epsilon(): Default 12-6
- zca_whitening: Boolean. 去除样本之间的相关性
- rotation_range():旋转范围
- width_shift_range(): 水平平移范围
- height_shift_range(): 垂直平移范围
- shear_range(): float, 透视变换的范围
- zoom_range(): 缩放范围
- fill_mode: 填充模式,constant, nearest, reflect
- cval: fill_mode == 'constant’的时候填充值
- horizontal_flip(): 水平反转 vertical_flip(): 垂直翻转
- preprocessing_function(): user提供的处理函数
- data_format():channels_first或者channels_last
- validation_split(): 多少数据用于验证集
构造完ImageDataGenerator对象,其中要进行某一些操作是通过在构造函数中的参数指定的;然后通过fit方法对样本数据进行data augmentation处理,需要从fit方法中得到原始图形的统计信息,比如均值、方差等等。
# 使用生成器帮助模型使用更少的数据
# 通道转换对阴影有一些的帮助
datagen = ImageDataGenerator(channel_shift_range=0.2)
# 使用实时数据增益的批数据对模型进行拟合
datagen.fit(X_train)
当数据量很多的时候我们需要使用model.fit_generator()方法,该方法接受的第一个参数就是一个生成器。简单来说就是:ImageDataGenerator()是keras.preprocessing.image模块中的图片生成器,可以每一次给模型“喂”一个batch_size大小的样本数据,同时也可以在每一个批次中对这batch_size个样本数据进行增强,扩充数据集大小,增强模型的泛化能力。比如进行旋转,变形,归一化等等。训练之后最终保存训练好的模型为.h5文件。
# Using a generator to help the model use less data
# Channel shifts help with shadows slightly
datagen = ImageDataGenerator(channel_shift_range=0.2)
datagen.fit(X_train)

# Compiling and training the model
model.compile(optimizer='Adam', loss='mean_squared_error')
# 使用 Python 生成器逐批生成的数据,按批次训练模型。
model.fit_generator(
                datagen.flow(X_train, y_train, batch_size=batch_size),
                steps_per_epoch=len(X_train)/batch_size,
                epochs=epochs, verbose=1, validation_data=(X_val, y_val))

# Freeze layers since training is done
# 编译模型之前冻结所有权重
model.trainable = False
model.compile(optimizer='Adam', loss='mean_squared_error')

# Save model architecture and weights
model.save('full_CNN_model.h5')
四、通过训练好的模型权重检测车道线
在第三部分中,我们已经通过网络训练好一个车道线检测模型为 full_CNN_model.h5 ,通过使用这个权重模型,可以检测视频或者图片中的车道线。
通过以下语句导入训练好的模型文件:
# Load Keras model
model = load_model('full_CNN_model.h5')
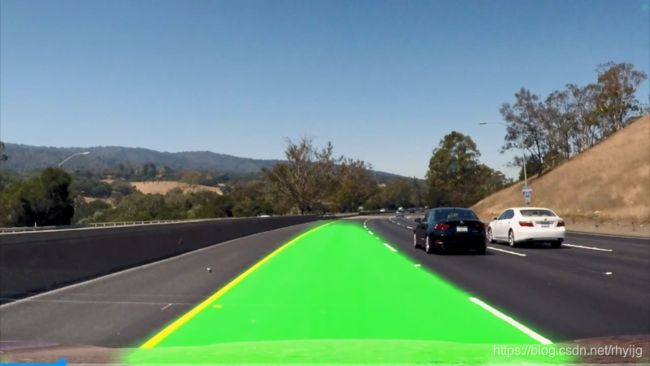
获取道路图像,为模型重新调整大小,预测从模型中绘制的车道为绿色,重新创建一个车道的RGB图像,并与原来的道路图像叠加。输入文件 video_3.mp4 ,输出文件名称设置为 output_video_3.mp4 。


实现代码如下所示:
# Class to average lanes with
class Lanes():
    def __init__(self):
        self.recent_fit = []
        self.avg_fit = []

def road_lines(image):
    """ Takes in a road image, re-sizes for the model,
    predicts the lane to be drawn from the model in G color,
    recreates an RGB image of a lane and merges with the
    original road image.
    """
    # Get image ready for feeding into model
    small_img = imresize(image, (80, 160, 3))
    #small_img = np.array(Image.fromarray(image).resize((3,(80, 160))))
    small_img = np.array(small_img)
    small_img = small_img[None,:,:,:]

    # Make prediction with neural network (un-normalize value by multiplying by 255)
    prediction = model.predict(small_img)[0] * 255

    # Add lane prediction to list for averaging
    lanes.recent_fit.append(prediction)
    # Only using last five for average
    if len(lanes.recent_fit) > 5:
        lanes.recent_fit = lanes.recent_fit[1:]

    # Calculate average detection
    lanes.avg_fit = np.mean(np.array([i for i in lanes.recent_fit]), axis = 0)

    # Generate fake R & B color dimensions, stack with G
    blanks = np.zeros_like(lanes.avg_fit).astype(np.uint8)
    lane_drawn = np.dstack((blanks, lanes.avg_fit, blanks))

    # Re-size to match the original image
    lane_image = imresize(lane_drawn, (720,1280, 3))
    #lane_image = np.array(Image.fromarray(lane_drawn).resize((3,(1080,1920))))
    # Merge the lane drawing onto the original image
    result = cv2.addWeighted(image, 1, lane_image, 1, 0)
    return result

# 运行车道线检测程序
lanes = Lanes()

# Location of the input video
clip1 = VideoFileClip("video_3.mp4")

# Where to save the output video
vid_output = 'output_video_3.mp4'

vid_clip = clip1.fl_image(road_lines)
vid_clip.write_videofile(vid_output, audio=False)
五、项目实例文件及代码
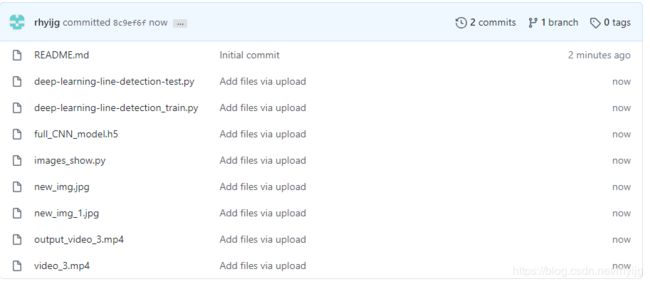
项目程序文件及代码 还有训练数据文件,权重文件,测试视频文件均已上传至Github。
Deep-Learning-Lane-line-detection
https://github.com/rhyijg/Deep-Learning-Lane-line-detection
其中deep-learning-line-detection-train.py 是模型的训练文件;
deep-learning-line-detection-test.py 是模型的车道线检测文件;
images-shpw.py 是读取数据集.p文件的程序文件;
