前言
aiotg 可以通过异步调用telegram api的方式来构建bot,因为决定开发一个爬虫功能的bot,所以网络请求阻塞是比较严重的性能障碍。而asyncio的异步非阻塞特性能够完美的解决这一问题。这篇文章在记录如何使用aiotg进行telegram开发的同时,也会说明一些aiohttp的使用方法,这里是项目源码。如果你觉得不错可以帮忙点一下star
https://t.me/fpicturebot 点击链接可以体验一下这个bot的功能。
如果读者之前对telegram的bot没有了解,可以查看这篇写给开发者的telegram-bots介绍文档
aiotg简单教程
1.一个最简单的bot
你可以先学习如何新建一个机器人
from aiotg import Bot, Chat

config = {
    "api_token": "***********",
    "proxy": "http://127.0.0.1:8118"
}

bot = Bot(**config)

@bot.command(r"/echo (.+)")
def echo(chat: Chat, match):
    return chat.reply(match.group(1))

bot.run()
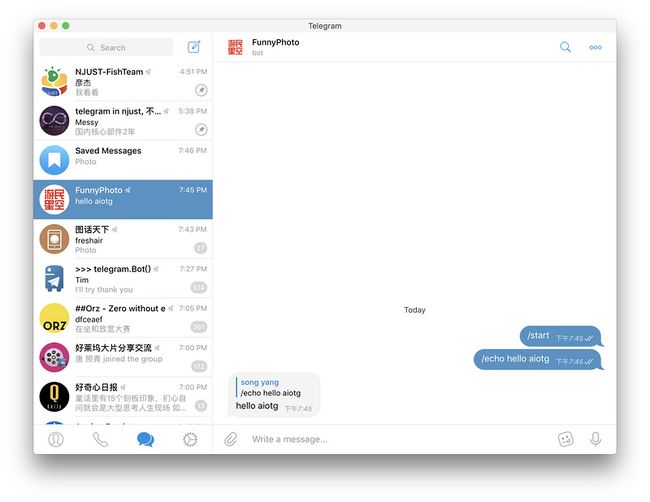
上面是一个简单的回复机器人,当你使用指令 /echo+内容时,机器人会自动回复给你发送的内容。这里要注意一点,在我这里没有采用使用 pipenv ( pip ) 安装aiotg的方法,因为pip平台上安装的是master分支的包,aiotg通过使用aiohttp来调用telegram bot api,在创建一个bot的时候没有提供proxy选项为aiohttp设置代理,在本地开发的时候会因为国内网络抽搐出现网络连接错误,所以在这里我使用了aiotg的prxoy分支,直接从github上下载的代码。在创建Bot对象的时候加入proxy选项就能使用本地代理来进行开发调试了。
后来我在aiotg telegram群里建议作者将proxy合并到主分支,后来作者表示他也有这样的想法,同时他也吐槽了一下俄罗斯的网络也有很多审查和限制,现在在aiotg里已经没有proxy分支了,在aiotg-0.9.9版本中提供proxy选项,所以大家可以继续使用pipenv下载aiotg包。
2.aiotg异步特性
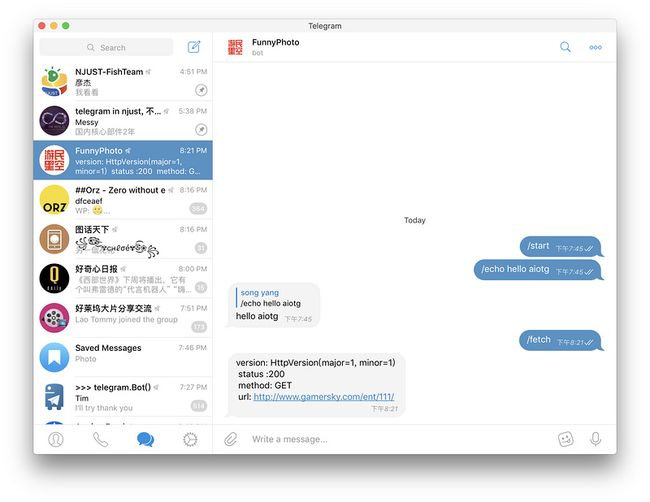
既然用到aiotg来开发就是看中了他的异步特性,下面就列出一个简单的例子
import aiohttp
import json
from aiotg import Bot, Chat

with open('token.conf') as f:
    token = json.loads(f.read())

bot = Bot(**token)

@bot.command("/fetch")
async def async_fecth(chat: Chat, match):
    url = "http://www.gamersky.com/ent/111/"
    async with aiohttp.ClientSession() as sesssion:
        async with sesssion.get(url) as resp:
            info = ' version: {}\n status :{}\n method: {}\n url: {}\n'.format(
                resp.version, resp.status, resp.method, resp.url)
            await chat.send_text(info)

bot.run(debug=True)
3. 自定义键盘
关于自定义键盘的内容可以点击链接查看官方解释,这里是简单的中文描述。
category.json
[
    {
        "name": "dynamic",
        "title": "动态图",
        "url": "http://www.gamersky.com/ent/111/"
    },
    {
        "name": "oops",
        "title": "囧图",
        "url": "http://www.gamersky.com/ent/147/"
    },
    {
        "name": "beauty",
        "title": "福利图",
        "url": "http://tag.gamersky.com/news/66.html"
    },
    {
        "name": "easy-moment",
        "title": "轻松一刻",
        "url": "http://www.gamersky.com/ent/20503/"
    },
    {
        "name": "trivia",
        "title": "冷知识",
        "url": "http://www.gamersky.com/ent/198/"
    },
    {
        "name": "cold-tucao",
        "title": "冷吐槽",
        "url": "http://www.gamersky.com/ent/20108/"
    }
]
main.py
import aiohttp
import json
from aiotg import Bot, Chat

with open('token.json') as t, open('category.json') as c:
    token = json.loads(t.read())
    category = json.loads(c.read())

bot = Bot(**token)

@bot.command("/reply")
async def resply(chat: Chat, match):
    kb = [[item['title']] for item in category]
    keyboard = {
        "keyboard": kb,
        "resize_keyboard": True
    }
    await chat.send_text(text="看看你的键盘", reply_markup=json.dumps(keyboard))

bot.run(debug=True)
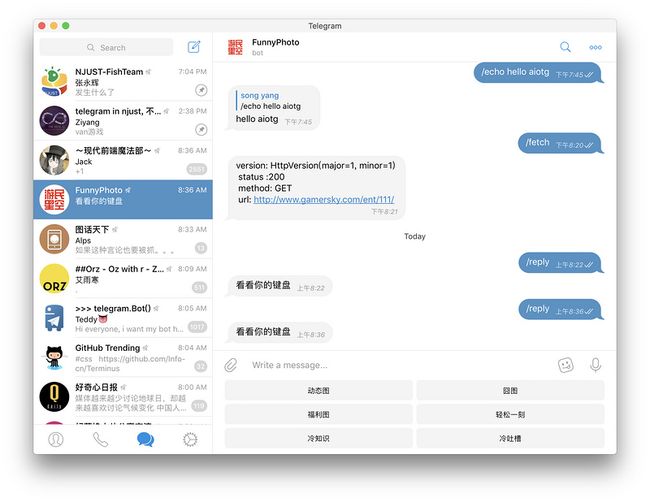
只需要在调用chat的发送消息函数中,指定 reply_markup 参数,你就能个性化的设定用户键盘, reply_markup 参数需要一个json对象,官方指定为ReplyKeyboardMarkup类型,其中keyboard需要传递一个KeyboardButton的数组。
每个keyboard的成员代表着键盘中的行,你可以通过修改每行中KeyboardButton的个数来排列你的键盘,比如我们让键盘每行显示两个KeyboardButton,如下所示
@bot.command("/reply")
async def reply(chat: Chat, match):
    # kb = [[item['title']] for item in category]
    kb, row = [], -1
    for idx, item in enumerate(category):
        if idx % 2 == 0:
            kb.append([])
            row += 1
        kb[row].append(item['title'])
    keyboard = {
        "keyboard": kb,
        "resize_keyboard": True
    }
    await chat.send_text(text="看看你的键盘", reply_markup=json.dumps(keyboard))
4. 内联键盘和消息更新
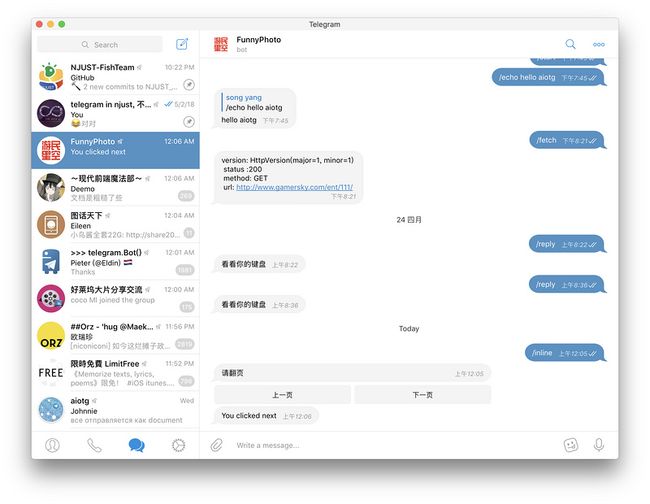
内联键盘的意思就是附着在消息上的键盘,内联键盘由内联按钮组成,每个按钮会附带一个回调数据,每次点击按钮之后会有对应的回调函数处理。
@bot.command("/inline")
async def inlinekeyboard(chat: Chat, match):

    inlinekeyboardmarkup = {
            'type': 'InlineKeyboardMarkup',
            'inline_keyboard': [
                [{'type': 'InlineKeyboardButton',
                  'text': '上一页',
                  'callback_data': 'page-pre'},
                 {'type': 'InlineKeyboardButton',
                  'text': '下一页',
                  'callback_data': 'page-next'}]
                ]
            }

    await chat.send_text('请翻页', reply_markup=json.dumps(inlinekeyboardmarkup))

@bot.callback(r'page-(\w+)')
async def buttonclick(chat, cq, match):
    await chat.send_text('You clicked {}'.format(match.group(1)))
有时候我们想修改之前已经发送过的消息内容,例如当用户点击了内联键盘,而键盘的功能是进行翻页更新消息的内容。这时候我们可以使用 editMessageText 功能。例如点击上面内联键盘中的上一页按钮,你可以看到消息的内容被更改了。
@bot.callback(r'page-(\w+)')
async def buttonclick(chat, cq, match):
    await chat.edit_text(message_id=chat.message['message_id'], text="消息被修改了")
5.内联请求模式
内联请求模式感觉更适合在群组中使用,在讨论组中输入@botname + 特定指令,输入框的上方就会显示查询内容,你可以返回给用户文章类型、图片类型或者其他类型的查询信息。官网有更详细的内容。
@bot.inline
async def inlinemode(iq):
    results = [{
            'type': 'article',
            'id': str(index),
            'title': article['title'],
            'input_message_content': { 'message_text': article['title']},
            'description': f"这里是{article['title']}"
        } for index, article in enumerate(category)]
    await iq.answer(results)
http://ww1.sinaimg.cn/large/0...; style="width: 350px; height: 630px">
我们设定当用户输入内联指令时,bot返回可以选择的图片种类,返回结果的类型是article类型,官方还提供了语音,图片,gif,视频,音频。表情等类型,你可以根据自己的需要进行选择。
爬虫机器人功能实现
我使用aiotg编写的机器人是用来抓取来自游民星空的图片。
1. 爬虫功能
爬虫功能的实现是用aiohttp发送web请求,使用beautifulsoup进行html解析,核心代码如下
import re
import aiohttp
from bs4 import BeautifulSoup


def aioget(url):
    return aiohttp.request('GET', url)


def filter_img(tag):
    if tag.name != 'p':
        return False
    try:
        if tag.attrs['align'] == 'center':
            for child in tag.contents:
                if child.name == 'img' or child.name == 'a':
                    return True
        return False
    except KeyError:
        if 'style' in tag.attrs:
            return True
        else:
            return False


async def fetch_img(url):
    async with aioget(url) as resp:
        resp_text = await resp.text()
        content = BeautifulSoup(resp_text, "lxml")
        imgs = content.find(class_="Mid2L_con").findAll(filter_img)
        results = []
        for img in imgs:
            try:
                results.append({
                    'src':  img.find('img').attrs['src'],
                    'desc': '\n'.join(list(img.stripped_strings))
                })
            except AttributeError:
                continue
        return results
我将aiohttp的get请求稍微包装了一下,简洁一些。html中元素的提取就不在赘述,就是找找html中的规律
2. 指令功能
指令功能实现需要使用aiotg.bot.command装饰器进行命令注册,下面列出 /start的功能实现
@bot.command(r"/start")
async def list_category(chat: Chat, match):
    kb, row = [], -1
    for idx, item in enumerate(category["name"]):
        if idx % 2 == 0:
            kb.append([])
            row += 1
        kb[row].append(item)
    keyboard = {
        "keyboard": kb,
        "resize_keyboard": True
    }
    await chat.send_text(text="请选择你喜欢的图片类型", reply_markup=json.dumps(keyboard))
关于自定义键盘部分在上文中已经讲过,读者可以自己编码实现
3. callback功能
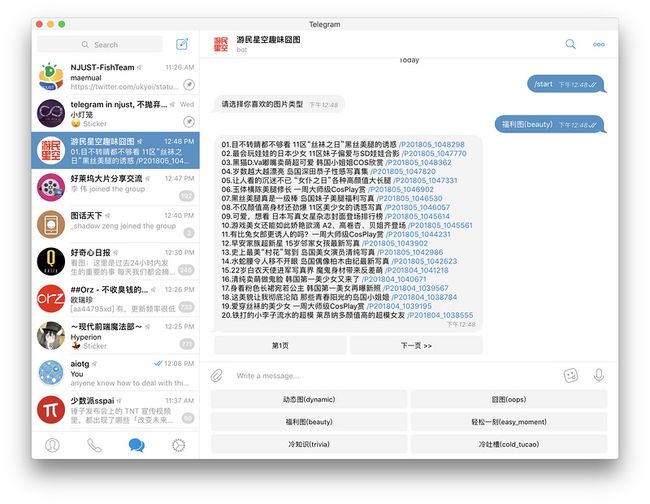
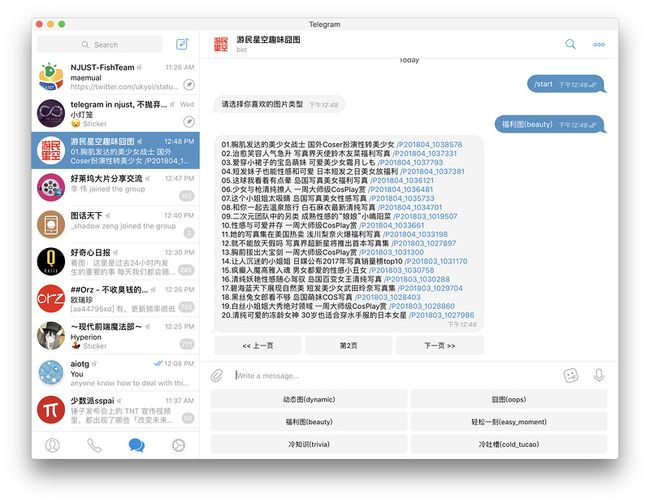
读者可以看到在消息上附有页面切换按钮,每个按钮会带着一个callbackdata,当点击按钮会调用相应的callback函数进行处理,这里点击下一页时会进行翻页。
看页面更新了,关于更新页面的实现在上面也讲到了如何进行消息更新。
@bot.callback(r"page-(?P\w+)-(?P\d+)")
async def change_lists(chat: Chat, cq, match):
    req_name = match.group('name')
    page = match.group('page')
    url = category[req_name]
    text, markup = await format_message(req_name, url, page)
await chat.edit_text(message_id=chat.message['message_id'], text=text, markup=markup) 也是使用装饰器进行回调函数注册,使用chat.edit_text进行消息更新。
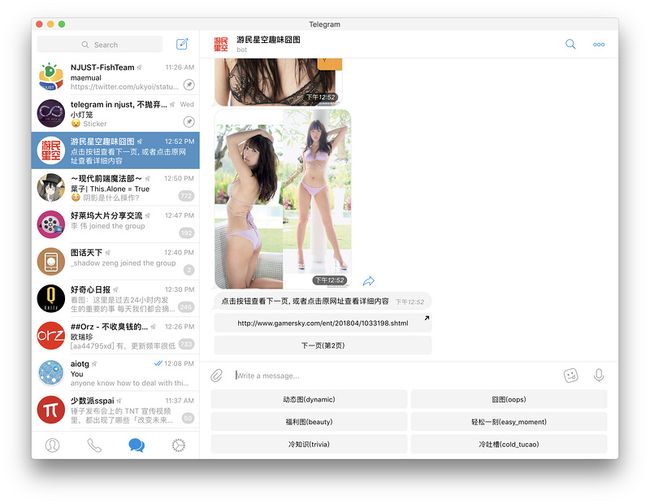
callback功能也用在了图片的更新。点击下一页更新图片。
4.内联请求模式功能
当用户在输入框中输入@botusername+指令时,会在输入框上显示查询内容。
当没有指令时,会显示一些能够查看的图片类型。
当输入对应类型汉字的前几个字时,bot会匹配你想看的图片列表,并罗列出来
@bot.inline(r"([\u4e00-\u9fa5]+)")
async def inline_name(iq, match):
    req = match.group(1)
    req_name = match_category(req.strip(), category['name'])
    ptype = 'G' if req_name == "dynamic" else 'P'
    if req_name is None:
        return
    results, _ = await fetch_lists(category[req_name])
    c_results = [{
            'type': 'article',
            'id': str(index),
            'title': item['title'],
            'input_message_content': {
                'message_text': '/' + ptype + item['date'] + '_' + item['key']
            },
            'description': item['desc']
        } for index, item in enumerate(results)]
    await iq.answer(c_results)
redis缓存
当发送给用户图片时,telegram会返回一个和图片对应的file_id, 当再次发送相同的图片时,只需要在调用send_photo时,将photo参数赋值为file_id即可,所以每次使用爬虫进行抓取图片时,将图片的fild_id存在redis中,用户请求图片时,如果图片之前已经抓取过,这时候只要从redis中取出file_id,再调用send_photo即可。
