android物联网初步,利用手机蓝牙与单片机通信,实现led灯开关和定时
转载请注明出处。
这次是一个课程设计,利用单片机开发一个物联网系统。我们利用了手机蓝牙与单片机板子上的蓝牙通信,通过 控制信号来控制单片机上led灯的亮灭和定时。
网上有很多的搜索蓝牙的例程,大家可以自己去看,由于本次我们是与特定的设备连接,因此直接使用Mac地址连接,不在使用搜索功能,当然如果大家采用搜索到设备后在连接也可以。我们将蓝牙连接和数据收发放在一个service中,由于蓝牙socket读是阻塞的,因此我们新开一个线程专门用于接收板子的信号。
在service的onCreate()方法中,我们连接指定的蓝牙,并获得其io流,在新开一个线程用于socket读。
记得在mk文件中给该service添加intent-filter。
	/**
	 * 服务初始化
	 */
	@Override
	public void onCreate() {
		// TODO 自动生成的方法存根
		initBluetooth();
		super.onCreate();
	}
/**
* 初始化蓝牙适配器
*/
public void initBluetooth(){
bluetoothAdapter=BluetoothAdapter.getDefaultAdapter();
if(bluetoothAdapter==null){//等于null时通知主界面,设备不支持蓝牙
Intent intent = new Intent();
intent.setAction(Constants.ERROR);
sendBroadcast(intent);
}else {
if(!bluetoothAdapter.isEnabled())//蓝牙未开启时,开启蓝牙
{
bluetoothAdapter.enable();
}
connectDevice();
}
}
/**
* 链接设备
*/
private void connectDevice(){
device = bluetoothAdapter.getRemoteDevice(Constants.ADDRESS);//输入要连接的蓝牙的Mac地址,在说明书上可以查到
if(device==null){//为空,连接失败
Intent intent = new Intent();
intent.setAction(Constants.ERROR);
sendBroadcast(intent);
}else {
try {
socket = device.createRfcommSocketToServiceRecord(Constants.MY_UUID);//uuid,一般为00001101-0000-1000-8000-00805F9B34FB
socket.connect();//获得socket接口
inputStream = socket.getInputStream();//获得输入流,另起线程监听输入
receiveThread = new ReceiveThread(inputStream);
new Thread(receiveThread).start();
outputStream = socket.getOutputStream();
Intent intent = new Intent();//发送广播,已连接
intent.setAction(Constants.CONNECTED);
sendBroadcast(intent);
} catch (IOException e) {
// TODO 自动生成的 catch 块
e.printStackTrace();
}
}
}
	/**
	 * 接收反馈信号的线程
* 判断反馈信号,更新主界面ui
* @author qian ren
*
*/
class ReceiveThread implements Runnable{
InputStream in;
int msg;
public ReceiveThread(InputStream in){
this.in=in;
}
@Override
public void run() {
// TODO 自动生成的方法存根
while(true){
try {
msg=in.read();
System.out.println("msg: "+msg);
switch (msg) {
case 1://发送广播,台灯打开
Intent intentOn = new Intent();
intentOn.setAction(Constants.ON);
sendBroadcast(intentOn);
break;
case 2://发送广播,台灯关闭
Intent intentOff = new Intent();
intentOff.setAction(Constants.OFF);
sendBroadcast(intentOff);
break;
case 3://发送广播,定时完成
Intent intentTimer = new Intent();
intentTimer.setAction(Constants.TIMER);
sendBroadcast(intentTimer);
break;
default:
break;
}
} catch (IOException e) {
// TODO 自动生成的 catch 块
e.printStackTrace();
}
}
}
}初始化完成后,在onStartCommond()方法中发送控制信号给板子。
	public int onStartCommand(Intent intent, int flags, int startId) {
		// TODO 自动生成的方法存根

		String control;
	   control = intent.getStringExtra("control");
	   if(control.equals("on")){//打开台灯
		   byte [] buffer = new byte[]{1,25,1,2};
		   try {
			outputStream.write(buffer);
			outputStream.flush();
			System.out.println("on");
		} catch (IOException e) {
			// TODO 自动生成的 catch 块
			e.printStackTrace();
		}
	   }else if (control.equals("off")) {//关闭台灯
		   byte [] buffer = new byte[]{1,26,1,2};
		   try{
		   outputStream.write(buffer);
			outputStream.flush();
			System.out.println("off");
		   }catch(IOException e){
			   e.printStackTrace();
		   }

		}else if (control.equals("timer")) {//定时
			byte hour = (byte) intent.getIntExtra("hour",0);
			byte minute = (byte) intent.getIntExtra("minute",1);
			byte [] buffer =new byte[]{1,hour,minute,2};

			try{

			outputStream.write(buffer);
			outputStream.flush();
			System.out.println("timer");
		}catch(IOException e){
			e.printStackTrace();
		}
		}


		return super.onStartCommand(intent, flags, startId);
	}
下面是关灯开灯的逻辑实现,通过启动service来实现信号的发送。
首先是连接设备:
/**
	 * 链接设备
	 */
	private void connectDevice() {
		// TODO 自动生成的方法存根
	Intent intent = new Intent();
	intent.setAction(Constants.LAMP_SERVICE);
	intent.putExtra("control", "connect");
	startService(intent);
}class SwitchChangedListener implements OnCheckedChangeListener{
@Override
public void onCheckedChanged(CompoundButton buttonView,
boolean isChecked) {
// TODO 自动生成的方法存根
if(isChecked){
Intent intent = new Intent();
intent.setAction(Constants.LAMP_SERVICE);
intent.putExtra("control", "on");
startService(intent);
}else {
Intent intent = new Intent();
intent.setAction(Constants.LAMP_SERVICE);
intent.putExtra("control", "off");
startService(intent);
}
}
}发送消息后必然会接受到反馈,我们用broadcastreceiver来接受service收到的反馈信号。记得在oncreate方法中绑定receiver。
/**
	 * 更新界面的broadcastreceiver
	 * @author qian ren
	 *
	 */
	class UpdateUiReceiver extends BroadcastReceiver{

		@Override
		public void onReceive(Context context, Intent intent) {
			// TODO 自动生成的方法存根
			String action = intent.getAction();
			if(action.equals(Constants.CONNECTED)){
				progressBar.setVisibility(View.INVISIBLE);
				ToastDisplay("台灯已经连接");
				System.out.println("device has been connected");
			}else if (action.equals(Constants.ERROR)) {
				progressBar.setVisibility(View.INVISIBLE);
				ToastDisplay("未连接到台灯,请检查设备");
				System.out.println("device can't connect");
			}else if (action.equals(Constants.ON)) {
				background.setImageResource(R.drawable.lamp_on);
				ToastDisplay("台灯已经打开");
				System.out.println("lamp on");
			}else if (action.equals(Constants.OFF)) {
				background.setImageResource(R.drawable.lamp_off);
				ToastDisplay("台灯已经关闭");
				System.out.println("lamp off");
			}else if (action.equals(Constants.TIMER)) {
				background.setImageResource(R.drawable.lamp_on);
				ToastDisplay("台灯将在"+hour+"小时"+minute+"分后自动关闭  ");
				System.out.println("timing has been finished");
			}
		}

}定时功能比较简单,使用timerpicker。
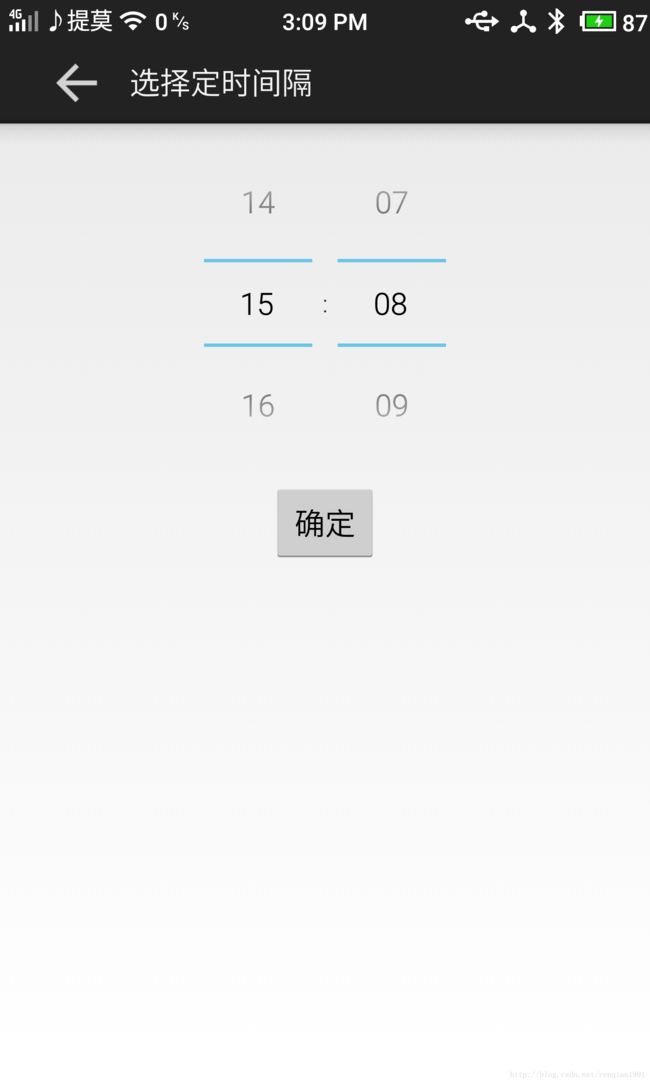
首先监听timechange的回调方法得到定时的时间。
public void onTimeChanged(TimePicker view, int hourOfDay, int minute) {
		// TODO 自动生成的方法存根
		this.hour = hourOfDay;
		this.minute = minute;
}public void onClick(View v) {
// TODO 自动生成的方法存根
if(hour==0){
hour=countDown.getCurrentHour();
}else if (minute==0) {
minute=countDown.getCurrentMinute();
}
Intent intent = new Intent();
intent.setAction(Constants.LAMP_SERVICE);
intent.putExtra("control", "timer");
intent.putExtra("hour", hour);
intent.putExtra("minute", minute);
startService(intent);
Intent intentBack = new Intent();
intentBack.putExtra("hour", hour);
intentBack.putExtra("minute", minute);
TimerActivity.this.setResult(Constants.RESPONSE,intentBack);
this.finish();
}
	protected void onActivityResult(int requestCode, int resultCode, Intent data) {
		// TODO 自动生成的方法存根
		if(requestCode==Constants.REQUEST && resultCode ==Constants.RESPONSE){
			hour = data.getIntExtra("hour", 0);
			minute = data.getIntExtra("minute", 1);
		}
	}