阿里云+python 验证微信接口配置信息
之前看微信公众平台提供的开发者文档看得我迷迷糊糊,网上搜了不少发现并没有符合我需求相关的资料,最后在自己的服务器上一顿操作下来总算是解决了这个问题。
关于服务器上的编辑代码是比较蛋疼的,所以我使用的FileZilla(某度软件中心普通下载就行)把我的python文件上传到服务器上。或者直接在服务器的命令行下vi编写,我不是很习惯命令行vi编辑,所以装了一个CentOS的图形化界面(用惯了windows的通病)
步骤1. 申请一个阿里云服务器,学生价9.9/月对于学生党而言还是很划算的,不像某鹅厂现在已经没有学生价了。。
步骤2. 为你的服务器装上python,我申请的是CentOS7,好像直接pip install python 就可以了
步骤3. 装上web.py , flask等插件 也是pip install web.py pip install flask就行
步骤4. 创建一个main.py 文件,代码如下:
# -*- coding: utf-8 -*-
# filename: main.py
import web

urls = (
    '/wx', 'Handle',
)

class Handle(object):
    def GET(self):
        return "hello, this is a test"

if __name__ == '__main__':
    app = web.application(urls, globals())
    app.run()
步骤5.创建一个handle.py
# -*- coding: utf-8 -*-

import hashlib
import web

class Handle(object):
    def GET(self):
        try:
            data = web.input()
            if len(data) == 0:
                return "hello, this is handle view"
            signature = data.signature
            timestamp = data.timestamp
            nonce = data.nonce
            echostr = data.echostr
            token = "这里写你在微信网页上写的token"
            list = [token, timestamp, nonce]
            list.sort()
            sha1 = hashlib.sha1()
            map(sha1.update, list)
            hashcode = sha1.hexdigest()
            print "handle/GET func: hashcode, signature: ", hashcode, signature
            if hashcode == signature:
                return echostr
            else:
                return ""
        except Exception, Argument:
            return Argument
步骤6 在你的服务器控制台上运行 sudo python main.py 80 (需要cd到文件对应的文件夹)
如果出现
http://0.0.0.0:80/
Traceback (most recent call last):
  File "main.py", line 12, in
    app.run()
  File "/usr/lib/python2.7/site-packages/web/application.py", line 313, in run
root 9768 9593 0 09:27 ? 00:00:00 /usr/bin/python /usr/share/system-config-printer/applet.py
root 18667 9681 0 11:38 ? 00:00:00 /usr/bin/python2.7 /var/www/main.py
root 19984 18966 0 11:55 pts/0 00:00:00 python main.py 80
root 29735 18966 0 14:32 pts/0 00:00:00 grep --color=auto pythonFile "/usr/lib/python2.7/site-packages/web/wsgi.py", line 59, in runwsgi return httpserver.runsimple(func, server_addr) File "/usr/lib/python2.7/site-packages/web/httpserver.py", line 157, in runsimple server.start() File "/usr/lib/python2.7/site-packages/web/wsgiserver/__init__.py", line 1753, in start raise socket.error(msg)socket.error: No socket could be created 这个错误一般是你的80端口被占用了(吐槽一下微信必须要用80端口)解决方法:控制台:
# ps -ef|grep pythonroot 9768 9593 0 09:27 ? 00:00:00 /usr/bin/python /usr/share/system-config-printer/applet.py
root 18667 9681 0 11:38 ? 00:00:00 /usr/bin/python2.7 /var/www/main.py
root 19984 18966 0 11:55 pts/0 00:00:00 python main.py 80
root 29735 18966 0 14:32 pts/0 00:00:00 grep --color=auto python# kill -9 18667
# kill -9 19984
然后再试一次
sudo python main.py 80
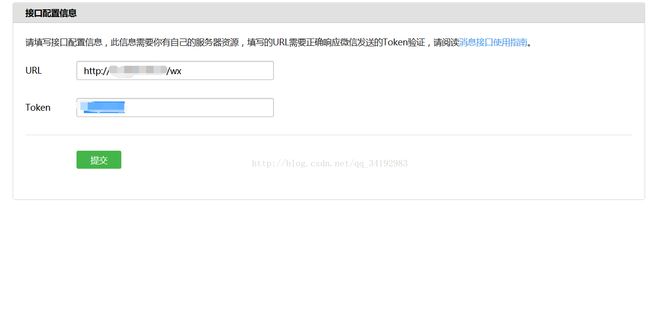
这次应该没问题啦 返回微信公众号 url填写 http://你的阿里云提供的公网IP/wx Token填写handle.py里面的Token
提交就没问题啦

