Material Design: RecyclerView配合CardView创建卡片列表
本文的主要内容为:
利用RecyclerView及CardView来创建卡片列表
先贴出效果图:
RecyclerView相当于一个更强大,更高效的ListView。但是由于RecyclerView姗姗来迟,在程序中应用RecyclerView组件时,必须要先在Android Studio 的build.gradle中添加对库的依赖,以达到兼容旧设备的目的。如下所示:
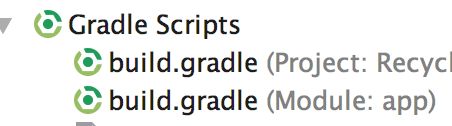
同理,由于CardView也是后来才推出来的,因此应用时也应该添加依赖。这里一并演示,如图2: 
注:很多书上的写法与图2类似,但是“v7:”后面的数值往往不同,如果照做的话出错的概率还是非常大的。其实只要细心一点,观察build.gradle中默认存在的对appcompat进行支持的语句:
compile 'com.android.support:appcompat-v7:26.+'就能推敲出来,其他的支持性语句怎么写。
所以一个简单快捷而又不出错的添加库依赖的方法就是:复制上面那一条语句,然后把最关键的地方改动一下就OK了。
也就是说:“support:”后面的单词就代表了对该组件的支持。
所以要添加对RecyclerView的支持的话,将appcompat改成是recyclerview就可以了。CardView也同理。(注意大小写)
添加了依赖之后,自然就是在布局文件中添加一个RecyclerView:
">http: //schemas.android.com/apk/res/android"
xmlns:tools="http://schemas.android.com/tools"
android:layout_width="match_parent"
android:layout_height="match_parent"
tools:context="com.example.chenlong.recyclerviewpluscardview.MainActivity">
"
android:layout_width=" match_parent"
android:layout_height="match_parent"/>
可以看到,添加的方法与添加系统的其他view如出一辙。
那么接下来就需要在主活动当中获得这个组件:
...
protected void onCreate(Bundle savedInstanceState) {
        super.onCreate(savedInstanceState);
        setContentView(R.layout.activity_main);
//获取RecyclerView的引用,并对其进行设置
        RecyclerView mRecyclerView = (RecyclerView) findViewById(R.id.card_list);
        mRecyclerView.setHasFixedSize(true);

//RecyclerView 需要一个layoutManager,也就是布局管理器
//布局管理器能确定RecyclerView内各个子视图(项目视图)的位置
//并能决定何时重新使用对用户已不可见的项目视图
//安卓为我们预先准备好了三种视图管理器:LinearLayoutManager、
//GridLayoutManager、StaggeredGridLayoutManager(详见文档)

//这里我们选择创建一个LinearLayoutManager
        LinearLayoutManager layoutManager = new LinearLayoutManager(this);
        layoutManager.setOrientation(LinearLayoutManager.VERTICAL);
//为RecyclerView对象指定我们创建得到的layoutManager
        mRecyclerView.setLayoutManager(layoutManager);
...
LinearLayoutManager顾名思义,就是以线性的方式来排列各个列表项。
注意这里我们
layoutManager.setOrientation(LinearLayoutManager.VERTICAL)指定了列表项是纵向排列的,也就是和ListView看起来是一样的。
当然,我们同样可以指定其参数为
layoutManager.setOrientation(LinearLayoutManager.HORIZONTAL)如此一来,RecyclerView的各个子项就会横向排布。
而这一点是ListView所无能为力的。
既然是要以列表的形式来显示项目,自然是少不了对列表项布局的设置了,下面就创建一个card_view.xml布局文件来对列表项的布局进行设置:
“`
可以看到这里我们用到了CardView。顾名思义也就是可以将内容以卡片的方式来呈现。并且可以设置卡片的圆角(cardCornerRadius)和仰角(elevation)参数。
在CardView中有一个相对布局,其中包含了4个TextView。


######有了布局之后,得有与布局相对应的参数传入才可以啊。那么要怎么做呢?我们计划利用List类对泛型的支持来传入数据。
所以我们需要先创建一个ContactInfo类:
public class ContactInfo {
protected String name = “小明”;
protected String surname = “西门”;
protected String email = “[email protected]”;
protected static final String NAME_PREFIX = “Name_”;
protected static final String SURNAME_PREFIX = “Surname_”;
protected static final String EMAIL_PREFIX = “email_”;
public ContactInfo(String name, String surname, String email){
    this.name = name;
    this.surname = surname;
    this.email = email;
}
}
这是个不能再简单的类了,里面只包含了构造方法和成员变量。
现在我们有了数据(dataset),有了内含LinearLayoutManager对象的RecyclerView的对象,要怎样才能将数据传进去呢?答案就是:适配器。

######所以下一步我们就需要创建一个适配器类。而且这个类需要继承自RecyclerView.Adapte:public class MyAdapter extends RecyclerView.Adapter
可以看到,这里MyAdapter需要一个ContactViewHolder对象。
ViewHolder对象的存在,其实就是为了避免大量的findViewById方法浪费资源。
其实写到这里,Android Studio就会提示创建一个ContactViewHolder类了:
class ContactViewHolder extends RecyclerView.ViewHolder {
//create the viewHolder class
protected TextView vName;
protected TextView vSurname;
protected TextView vEmail;
protected TextView vTitle;
    public ContactViewHolder(View itemView) {
        super(itemView);
        vName = itemView.findViewById(R.id.text_name);
        vSurname = itemView.findViewById(R.id.text_surname);
        vEmail = itemView.findViewById(R.id.text_email);
        vTitle = itemView.findViewById(R.id.title);
    }
“`
这里我们在MyAdapter中创建了一个内部类ContactViewHolder
用意也就是创建一个ViewHolder然后hold(拿 | 保存)住所有定义了的view。
接下来贴出整个MyAdapter类的代码:
查看官方文档:

既然是抽象类,我们继承时自然要重写抽象方法:
1. onCreateViewHolder()
2. onBindViewHolder()
3. getItemCount()
public class MyAdapter extends RecyclerView.Adapter
<MyAdapter.ContactViewHolder> { //MyAdapter类 开始

//MyAdapter的成员变量contactInfoList, 这里被我们用作数据的来源
    private List contactInfoList;

//MyAdapter的构造器
    public MyAdapter(List contactInfoList) {
        this.contactInfoList = contactInfoList;
    }
//重写3个抽象方法
//onCreateViewHolder()方法 返回我们自定义的 ContactViewHolder对象
    @Override
    public ContactViewHolder onCreateViewHolder
(ViewGroup parent, int viewType) {
        View itemView = LayoutInflater.from(parent.getContext()).
inflate(R.layout.card_view,parent,false);
        return new ContactViewHolder(itemView);
    }

    @Override
    public void onBindViewHolder
(ContactViewHolder holder, int position) {

//contactInfoList中包含的都是ContactInfo类的对象
//通过其get()方法可以获得其中的对象
        ContactInfo ci = contactInfoList.get(position);

//将viewholder中hold住的各个view与数据源进行绑定(bind)
        holder.vName.setText(NAME_PREFIX+ci.name);
        holder.vSurname.setText(SURNAME_PREFIX+ci.surname);
        holder.vEmail.setText(EMAIL_PREFIX+ci.email);
        holder.vTitle.setText(ci.surname+ "" + ci.name);
    }

//此方法返回列表项的数目
    @Override
    public int getItemCount() {
        return contactInfoList.size();
    }

    class ContactViewHolder extends RecyclerView.ViewHolder {
        //create the viewHolder class

        protected TextView vName;
        protected TextView vSurname;
        protected TextView vEmail;
        protected TextView vTitle;

        public ContactViewHolder(View itemView) {
            super(itemView);
            vName = itemView.findViewById(R.id.text_name);
            vSurname = itemView.findViewById(R.id.text_surname);
            vEmail = itemView.findViewById(R.id.text_email);
            vTitle = itemView.findViewById(R.id.title);
        }

    }
} //结束 类MyAdapter
注:

也就是说get()方法接收一个int类型的index,用于返回该index所指向的列表项。
最后再在主活动中做一点收尾工作就可以了:
public class MainActivity extends AppCompatActivity {

//类成员
    private MyAdapter adapter;
    List mList = new ArrayList<>();

    @Override
    protected void onCreate(Bundle savedInstanceState) {
        super.onCreate(savedInstanceState);
        setContentView(R.layout.activity_main);

        RecyclerView mRecyclerView = (RecyclerView) findViewById(R.id.card_list);
        mRecyclerView.setHasFixedSize(true);
        LinearLayoutManager layoutManager = new LinearLayoutManager(this);
        layoutManager.setOrientation(LinearLayoutManager.VERTICAL);
        mRecyclerView.setLayoutManager(layoutManager);
//初始化mList
        initInfo();
//实例化MyAdapter并传入mList对象
        adapter = new MyAdapter(mList);
//为RecyclerView对象mRecyclerView设置adapter
        mRecyclerView.setAdapter(adapter);

    }

    private void initInfo() {

//        测试数据
        ContactInfo element1 = new ContactInfo("小明", "西门", "[email protected]");
        mList.add(element1);
        ContactInfo element2 = new ContactInfo("小红", "南宫", "[email protected]");
        mList.add(element2);
        ContactInfo element3 = new ContactInfo("小九九", "欧阳", "[email protected]");
        mList.add(element3);
        ContactInfo element4 = new ContactInfo("小九九", "欧阳", "[email protected]");
        mList.add(element4);
        ContactInfo element5 = new ContactInfo("小九九", "欧阳", "[email protected]");
        mList.add(element5);
        ContactInfo element6 = new ContactInfo("小九九", "欧阳", "[email protected]");
        mList.add(element6);
        ContactInfo element7 = new ContactInfo("小明", "西门", "[email protected]");
        mList.add(element7);
        ContactInfo element8 = new ContactInfo("小红", "南宫", "[email protected]");
        mList.add(element8);
        ContactInfo element9 = new ContactInfo("小九九", "欧阳", "[email protected]");
        mList.add(element9);
        ContactInfo element10 = new ContactInfo("小九九", "欧阳", "[email protected]");
        mList.add(element10);
        ContactInfo element11 = new ContactInfo("小九九", "欧阳", "[email protected]");
        mList.add(element11);
        ContactInfo element12 = new ContactInfo("小九九", "欧阳", "[email protected]");
        mList.add(element12);
    }
}
这样我们的小程序就大功告成了
诸君共勉:)