Android布局加载流程分析及布局加载性能优化突破点
最近买了慕课上新出的android性能优化课程,学到了很多干货,适当有输入就要有输出,记录一下关于布局加载性能优化的几个突破点,要想了解布局加载有哪些可以优化的地方我们就先需要了解布局是如何被加载到页面上的,先来分析一下布局加载的流程。
Android布局加载流程源码分析

我们知道在android中我们使用setcontentview来将布局加载到页面上,而setcontentview将我们的布局加载到如图contentviews区域上,所以从setcontentview来开始分析源码(android27为例)。

点进setContentView函数,继续查看getDelegate的setContentView,

发现是抽象方法,没关系点击绿色部分可以找到它对应的实现类,

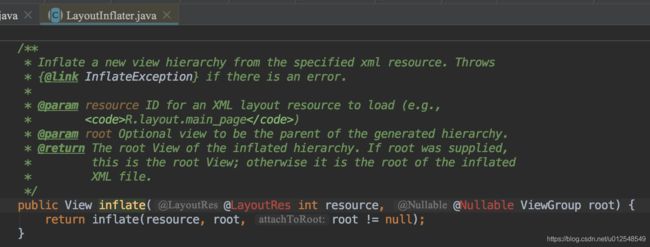
可以看到我们的布局被加载到了一个id为content的地方就是我们开头说的ContentViews区域了,这里有一个我们很熟悉的类LayoutInflater,布局就是通过他来进行加载的,然后我们继续看源码,寻找加载的过程,点进inflate
 这部分主要将资源文件转换成XmlResourceParser,看一下是如何转换的点进getLayout方法

 这段代码还是主要加载资源文件,先判断是否是一个string类型的,然后主要看loadXMLResource
 @NonNull
    XmlResourceParser loadXmlResourceParser(@NonNull String file, @AnyRes int id, int assetCookie,
            @NonNull String type)
            throws NotFoundException {
        if (id != 0) {
            try {
                synchronized (mCachedXmlBlocks) {
                    final int[] cachedXmlBlockCookies = mCachedXmlBlockCookies;
                    final String[] cachedXmlBlockFiles = mCachedXmlBlockFiles;
                    final XmlBlock[] cachedXmlBlocks = mCachedXmlBlocks;
                    // First see if this block is in our cache.
                    final int num = cachedXmlBlockFiles.length;
                    for (int i = 0; i < num; i++) {
                        if (cachedXmlBlockCookies[i] == assetCookie && cachedXmlBlockFiles[i] != null
                                && cachedXmlBlockFiles[i].equals(file)) {
                            return cachedXmlBlocks[i].newParser();
                        }
                    }

                    // Not in the cache, create a new block and put it at
                    // the next slot in the cache.
                    final XmlBlock block = mAssets.openXmlBlockAsset(assetCookie, file);
                    if (block != null) {
                        final int pos = (mLastCachedXmlBlockIndex + 1) % num;
                        mLastCachedXmlBlockIndex = pos;
                        final XmlBlock oldBlock = cachedXmlBlocks[pos];
                        if (oldBlock != null) {
                            oldBlock.close();
                        }
                        cachedXmlBlockCookies[pos] = assetCookie;
                        cachedXmlBlockFiles[pos] = file;
                        cachedXmlBlocks[pos] = block;
                        return block.newParser();
                    }
                }
            } catch (Exception e) {
                final NotFoundException rnf = new NotFoundException("File " + file
                        + " from xml type " + type + " resource ID #0x" + Integer.toHexString(id));
                rnf.initCause(e);
                throw rnf;
            }
        }

        throw new NotFoundException("File " + file + " from xml type " + type + " resource ID #0x"
                + Integer.toHexString(id));
    }
可以看到以上代码就是将我们加载好的xml转换成xmlResourceParse的过程,需要注意我们xml属于一个文件他要被加载到内存中解析,这块应该是一个IO操作,好,然后继续看inflate方法,再点进去就可以看到很长的一段代码.
public View inflate(XmlPullParser parser, @Nullable ViewGroup root, boolean attachToRoot) {
synchronized (mConstructorArgs) {
final Context inflaterContext = mContext;
final AttributeSet attrs = Xml.asAttributeSet(parser);
Context lastContext = (Context) mConstructorArgs[0];
mConstructorArgs[0] = inflaterContext;
View result = root;
try {
// Look for the root node.
int type;
while ((type = parser.next()) != XmlPullParser.START_TAG &&
type != XmlPullParser.END_DOCUMENT) {
// Empty
}
if (type != XmlPullParser.START_TAG) {
throw new InflateException(parser.getPositionDescription()
+ ": No start tag found!");
}
final String name = parser.getName();
if (TAG_MERGE.equals(name)) {
if (root == null || !attachToRoot) {
throw new InflateException("删除了一些无用的log打印,其实可以看到这里就是在根据解析好的xml标签创建view然后add进root中,可以看到通过createViewFromTag来创建View,那么继续跟踪createViewFromTag,
View createViewFromTag(View parent, String name, Context context, AttributeSet attrs,
            boolean ignoreThemeAttr) {
        if (name.equals("view")) {
            name = attrs.getAttributeValue(null, "class");
        }

        // Apply a theme wrapper, if allowed and one is specified.
        if (!ignoreThemeAttr) {
            final TypedArray ta = context.obtainStyledAttributes(attrs, ATTRS_THEME);
            final int themeResId = ta.getResourceId(0, 0);
            if (themeResId != 0) {
                context = new ContextThemeWrapper(context, themeResId);
            }
            ta.recycle();
        }

        if (name.equals(TAG_1995)) {
            // Let's party like it's 1995!
            return new BlinkLayout(context, attrs);
        }

        try {
            View view;
            if (mFactory2 != null) {
                view = mFactory2.onCreateView(parent, name, context, attrs);
            } else if (mFactory != null) {
                view = mFactory.onCreateView(name, context, attrs);
            } else {
                view = null;
            }

            if (view == null && mPrivateFactory != null) {
                view = mPrivateFactory.onCreateView(parent, name, context, attrs);
            }

            if (view == null) {
                final Object lastContext = mConstructorArgs[0];
                mConstructorArgs[0] = context;
                try {
                    if (-1 == name.indexOf('.')) {
                        view = onCreateView(parent, name, attrs);
                    } else {
                        view = createView(name, null, attrs);
                    }
                } finally {
                    mConstructorArgs[0] = lastContext;
                }
            }

            return view;
        } catch (InflateException e) {
            throw e;

        } catch (ClassNotFoundException e) {
            final InflateException ie = new InflateException(attrs.getPositionDescription()
                    + ": Error inflating class " + name, e);
            ie.setStackTrace(EMPTY_STACK_TRACE);
            throw ie;

        } catch (Exception e) {
            final InflateException ie = new InflateException(attrs.getPositionDescription()
                    + ": Error inflating class " + name, e);
            ie.setStackTrace(EMPTY_STACK_TRACE);
            throw ie;
        }
    }
这里就是根据我们xml中的标签来创建view的地方了,但是仔细看发现android源码又将创建view的委托给了工厂去创建,而且这里居然有两个Factory,我们看看他们有什么不同.Factory2比Factory多了一个参数parent,再看一下相关源码的参数注释

大概知道了他们有什么不同了,如果有需要替换父类view的使用factory2,除此之外没有什么不同,那就继续看他们的实现类的onCreateView方法 ,继续查找就可以找到,我们的view的创建,可以看到根据标签name然后去创建对应的View对象,

以TextView为例,我们就可以看到createTextview创建

可以看到创建的并不是Textview对象,而是AppCompatTextView对象,这就是Android为了高版本兼容为我们创建的实际上是一个AppcompatTextView。这是factory2或者factory不为空时的view创建流程,那么如果为空继续回到createViewFromTag,发现了一个mPrivateFactory他是负责创建fragment布局的,再往下可以看到view有调用了onCreateView追踪会发现最后他们都调用了一个函数
public final View createView(String name, String prefix, AttributeSet attrs)
            throws ClassNotFoundException, InflateException {
        Constructor constructor = sConstructorMap.get(name);
        if (constructor != null && !verifyClassLoader(constructor)) {
            constructor = null;
            sConstructorMap.remove(name);
        }
        Class clazz = null;

        try {
            Trace.traceBegin(Trace.TRACE_TAG_VIEW, name);

            if (constructor == null) {
                // Class not found in the cache, see if it's real, and try to add it
                clazz = mContext.getClassLoader().loadClass(
                        prefix != null ? (prefix + name) : name).asSubclass(View.class);

                if (mFilter != null && clazz != null) {
                    boolean allowed = mFilter.onLoadClass(clazz);
                    if (!allowed) {
                        failNotAllowed(name, prefix, attrs);
                    }
                }
                constructor = clazz.getConstructor(mConstructorSignature);
                constructor.setAccessible(true);
                sConstructorMap.put(name, constructor);
            } else {
                // If we have a filter, apply it to cached constructor
                if (mFilter != null) {
                    // Have we seen this name before?
                    Boolean allowedState = mFilterMap.get(name);
                    if (allowedState == null) {
                        // New class -- remember whether it is allowed
                        clazz = mContext.getClassLoader().loadClass(
                                prefix != null ? (prefix + name) : name).asSubclass(View.class);

                        boolean allowed = clazz != null && mFilter.onLoadClass(clazz);
                        mFilterMap.put(name, allowed);
                        if (!allowed) {
                            failNotAllowed(name, prefix, attrs);
                        }
                    } else if (allowedState.equals(Boolean.FALSE)) {
                        failNotAllowed(name, prefix, attrs);
                    }
                }
            }

            Object lastContext = mConstructorArgs[0];
            if (mConstructorArgs[0] == null) {
                // Fill in the context if not already within inflation.
                mConstructorArgs[0] = mContext;
            }
            Object[] args = mConstructorArgs;
            args[1] = attrs;

            final View view = constructor.newInstance(args);
            if (view instanceof ViewStub) {
                // Use the same context when inflating ViewStub later.
                final ViewStub viewStub = (ViewStub) view;
                viewStub.setLayoutInflater(cloneInContext((Context) args[0]));
            }
            mConstructorArgs[0] = lastContext;
            return view;

        } catch (NoSuchMethodException e) {
            final InflateException ie = new InflateException(attrs.getPositionDescription()
                    + ": Error inflating class " + (prefix != null ? (prefix + name) : name), e);
            ie.setStackTrace(EMPTY_STACK_TRACE);
            throw ie;

        } catch (ClassCastException e) {
            // If loaded class is not a View subclass
            final InflateException ie = new InflateException(attrs.getPositionDescription()
                    + ": Class is not a View " + (prefix != null ? (prefix + name) : name), e);
            ie.setStackTrace(EMPTY_STACK_TRACE);
            throw ie;
        } catch (ClassNotFoundException e) {
            // If loadClass fails, we should propagate the exception.
            throw e;
        } catch (Exception e) {
            final InflateException ie = new InflateException(
                    attrs.getPositionDescription() + ": Error inflating class "
                            + (clazz == null ? "" : clazz.getName()), e);
            ie.setStackTrace(EMPTY_STACK_TRACE);
            throw ie;
        } finally {
            Trace.traceEnd(Trace.TRACE_TAG_VIEW);
        }
    }
这段代码我们主要关注一下,当view为空时android系统会通过反射帮我们创建一个view上去,而反射是很耗费性能的,所以这块是一个可以注意的点
总结一下android布局的加载流程,首先调用setContentview ->LayoutInflater.inflate -> getLayout -> createViewFromTag -> Factory2/Factory view创建 -> createView 反射
性能优化点
文件解析:IO过程
创建View:使用反射
-
利用LayoutInflate.Factory2来Hook一些操作
1.替换布局中的view
2.计算布局中view的加载时间
LayoutInflaterCompat.setFactory2(getLayoutInflater(), new LayoutInflater.Factory2() {
            @Override
            public View onCreateView(View parent, String name, Context context, AttributeSet attrs) {

                if (TextUtils.equals(name, "TextView")) {
                    // 生成自定义TextView
                }
                long time = System.currentTimeMillis();
                View view = getDelegate().createView(parent, name, context, attrs);
//                LogUtils.i(name + " cost " + (System.currentTimeMillis() - time));
                return view;
            }

            @Override
            public View onCreateView(String name, Context context, AttributeSet attrs) {
                return null;
            }
        });
此方法要在super.oncreate之前执行
-
使用AsyncLayoutInflate异步加载布局
new AsyncLayoutInflater(MainActivity.this).inflate(R.layout.activity_main, null, new AsyncLayoutInflater.OnInflateFinishedListener() {
            @Override
            public void onInflateFinished(@NonNull View view, int i, @Nullable ViewGroup viewGroup) {
                setContentView(view);
                //加载完成后do something..
            }
        });