Java Web当中使用EasyUI|快速建立漂亮的后台网站(教程+源代码)
项目源代码下载:https://download.csdn.net/download/qq_44757034/12726812
一、EasyUI的概述
1、什么是EasyUI
jQuery EasyUI是一组基于jQuery的UI插件集合体,而jQuery EasyUI的目标就是帮助web开发者更轻松的打造出功能丰富并且美观的UI界面。开发者不需要编写复杂的javascript,也不需要对css样式有深入的了解,开发者需要了解的只有一些简单的html标签。
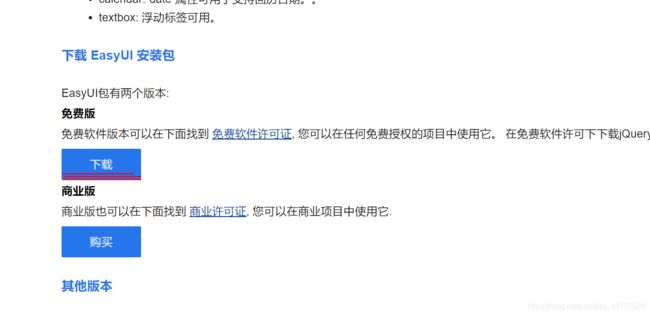
2、下载EasyUI
官网:https://www.jeasyui.cn/index.php

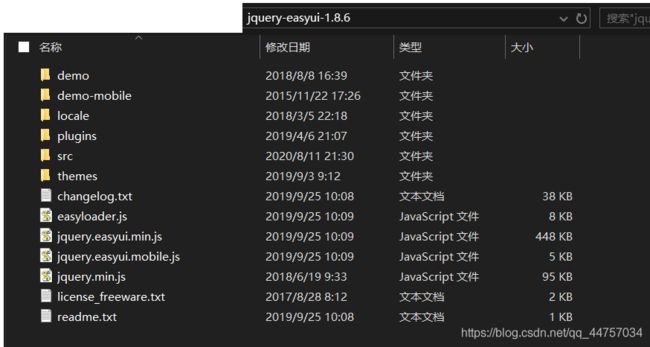
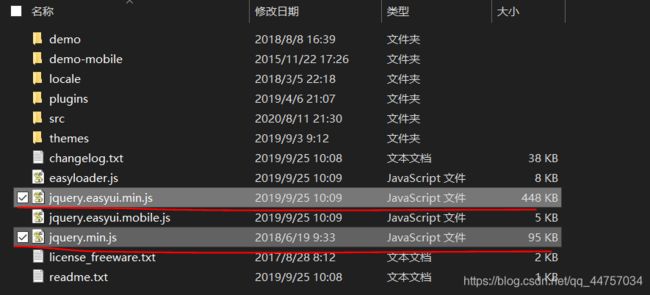
3、解压缩最新版
二、EasyUI的使用
EasyUI的使用有两种方式
1、准备工作
(1)创建web项目

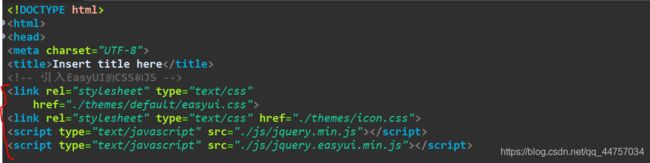
(2)引入EasyUI的一些开发的JS和CSS
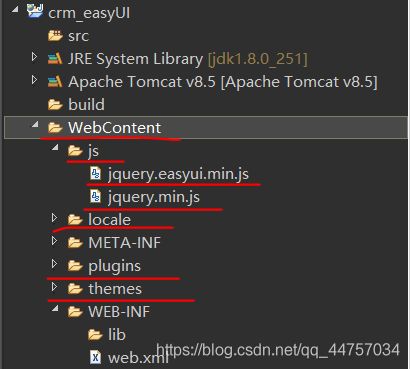
- 在WebContext下新建一个js文件夹

- 将EasyUI当中的这两个文件的引入
- 在WebContext当中引入EasyUI当中文件夹

- 引入完成
(3)EasyUI入门
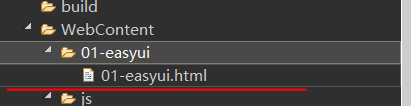
- 在WebContent当中创建文件夹

- 创建01-easyui文件
2、方式一:CSS的方式
(1)在创建的HTML当中引入js和css,并编写超链接的标签
<!DOCTYPE html>
<html>
<head>
<meta charset="UTF-8">
<title>Insert title here</title>
<!-- 引入EasyUI的CSS和JS -->
<link rel="stylesheet" type="text/css" href="../themes/default/easyui.css">
<link rel="stylesheet" type="text/css" href="../themes/icon.css">
<link rel="stylesheet" type="text/css" href="../demo.css">
<script type="text/javascript" src="../js/jquery.min.js"></script>
<script type="text/javascript" src="../js/jquery.easyui.min.js"></script>
</head>
<body>
<!-- EasyUI的入门:方式一,CSS的方式 -->
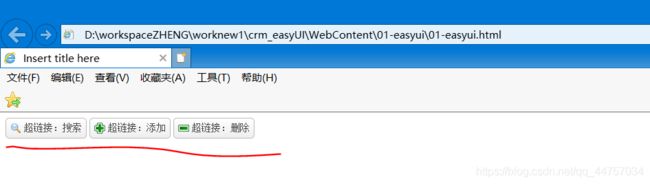
<a href="#" class="easyui-linkbutton" data-options="iconCls:'icon-add'">超链接:添加</a>
<a href="#" class="easyui-linkbutton" data-options="iconCls:'icon-search'">超链接:搜索</a>
<a href="#" class="easyui-linkbutton" data-options="iconCls:'icon-remove'">超链接:删除</a>
</body>
</html>
(2)将超链接变成漂亮的图标
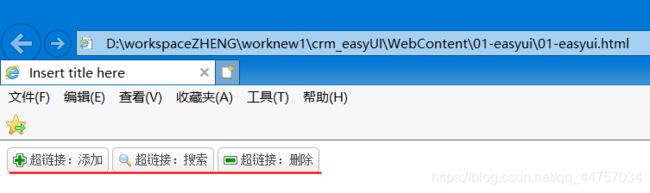
- css的样式名称与js方法名称对应
3、方式二:编写JS的方式
(1)在HTML当中编写超链接标签以及JS代码
<!DOCTYPE html>
<html>
<head>
<meta charset="UTF-8">
<title>Insert title here</title>
<!-- 引入EasyUI的CSS和JS -->
<link rel="stylesheet" type="text/css" href="../themes/default/easyui.css">
<link rel="stylesheet" type="text/css" href="../themes/icon.css">
<link rel="stylesheet" type="text/css" href="../demo.css">
<script type="text/javascript" src="../js/jquery.min.js"></script>
<script type="text/javascript" src="../js/jquery.easyui.min.js"></script>
<script type="text/javascript">
	$(function(){
		$("#btn1").linkbutton({
			"iconCls":"icon-search"
		});
		$("#btn2").linkbutton({
			"iconCls":"icon-add"
		});
		$("#btn3").linkbutton({
			"iconCls":"icon-remove"
		});
	});
</script>
</head>
<body>
<!-- EasyUI的入门:方式二,JS的方式 -->
<a href="#" id="btn1">超链接:搜索</a>
<a href="#" id="btn2">超链接:添加</a>
<a href="#" id="btn3">超链接:删除</a>
</body>
</html>
(2)显示效果
三、EasyUI的布局
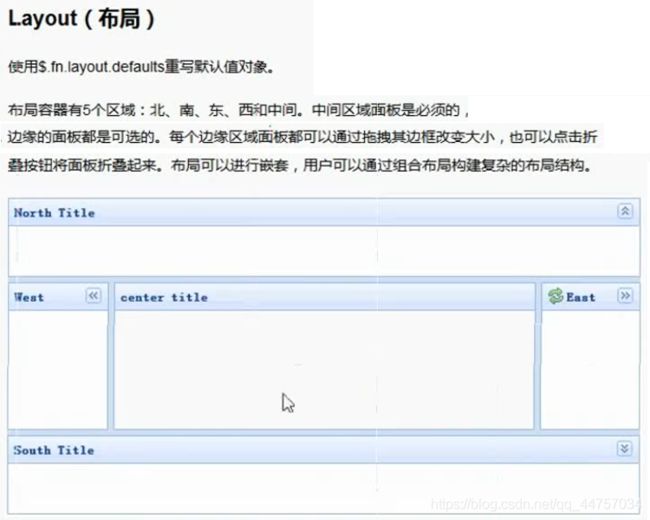
1、EasyUI的布局
2、创建02-layout文件夹,然后创建02-layout
(1)引入css样式以及对应的js样式,以及布局标签
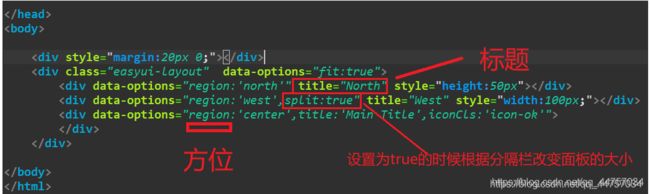
其中对应布局标签的属性data-options
<!DOCTYPE html>
<html>
<head>
<meta charset="UTF-8">
<title>Insert title here</title>
<!-- 引入EasyUI的CSS和JS -->
<link rel="stylesheet" type="text/css" href="../themes/default/easyui.css">
<link rel="stylesheet" type="text/css" href="../themes/icon.css">
<link rel="stylesheet" type="text/css" href="../demo.css">
<script type="text/javascript" src="../js/jquery.min.js"></script>
<script type="text/javascript" src="../js/jquery.easyui.min.js"></script>
</head>
<body>
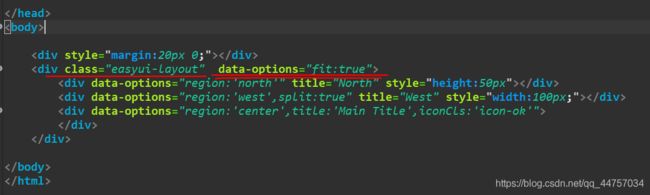
<div style="margin:20px 0;"></div>
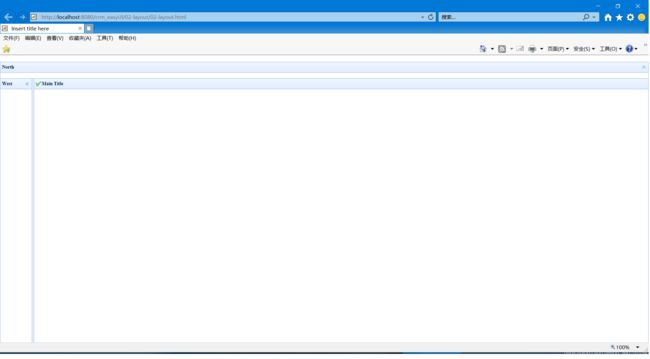
<div class="easyui-layout" style="width:1000px;height:550px;">
<div data-options="region:'north'" title="North" style="height:50px"></div>
<div data-options="region:'west',split:true" title="West" style="width:100px;"></div>
<div data-options="region:'center',title:'Main Title',iconCls:'icon-ok'">
</div>
</div>
</body>
</html>

效果
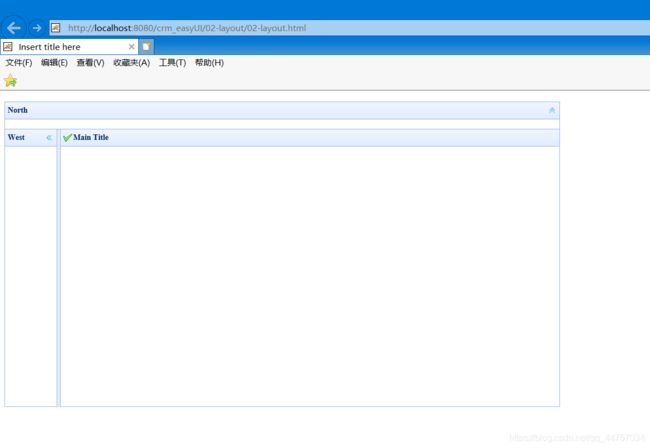
(2)设置自适应容器:data-options=“fit:true”
效果
(3)其他属性
split:true设置为true的时候的时候根据分隔栏改变面板的大小,设置false的时候就会固定大小不可以动
3、CRM页面实战
(1)在WebContext下新建一个index.html
引入EasyUI的CSS和JS,以及对应的页面布局
<!DOCTYPE html>
<html>
<head>
<meta charset="UTF-8">
<title>Insert title here</title>
<!-- 引入EasyUI的CSS和JS -->
<link rel="stylesheet" type="text/css" href="./themes/default/easyui.css">
<link rel="stylesheet" type="text/css" href="./themes/icon.css">
<link rel="stylesheet" type="text/css" href="./demo.css">
<script type="text/javascript" src="./js/jquery.min.js"></script>
<script type="text/javascript" src="./js/jquery.easyui.min.js"></script>
</head>
<body>
<div style="margin:20px 0;"></div>
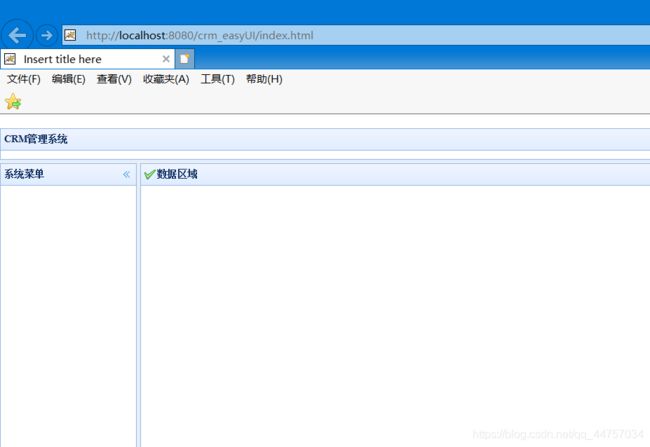
<div class="easyui-layout" data-options="fit:true">
<div data-options="region:'north',split:true" title="CRM管理系统" style="height:50px"></div>
<div data-options="region:'west',split:true" title="系统菜单" style="width:200px;"></div>
<div data-options="region:'center',title:'数据区域',iconCls:'icon-ok'">
</div>
</div>
</body>
</html>
(2)效果
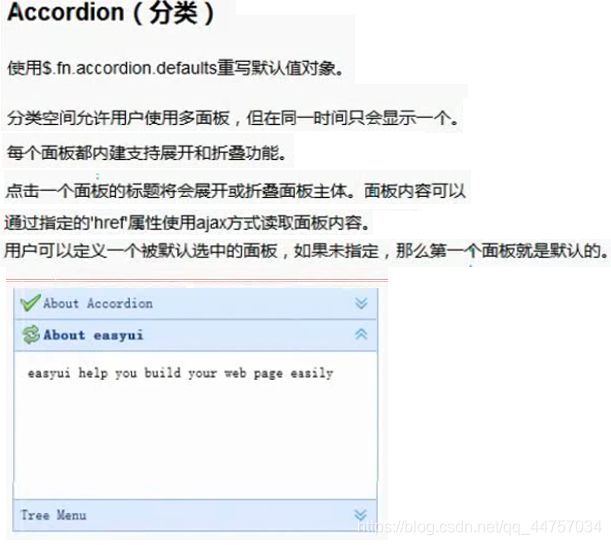
四、EasyUI的分类面板
1、分类介绍
2、创建02-accordion文件夹在其下面创建03-accordion.html
(1)引入引入EasyUI的CSS和JS以及分类菜单页面
<!DOCTYPE html>
<html>
<head>
<meta charset="UTF-8">
<title>Insert title here</title>
<!-- 引入EasyUI的CSS和JS -->
<link rel="stylesheet" type="text/css" href="../themes/default/easyui.css">
<link rel="stylesheet" type="text/css" href="../themes/icon.css">
<link rel="stylesheet" type="text/css" href="../demo.css">
<script type="text/javascript" src="../js/jquery.min.js"></script>
<script type="text/javascript" src="../js/jquery.easyui.min.js"></script>
</head>
<body>
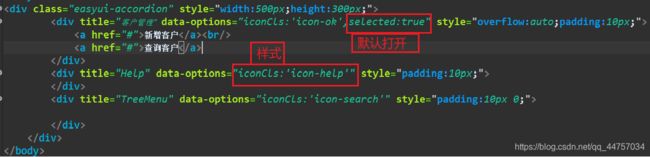
<div class="easyui-accordion" style="width:500px;height:300px;">
<div title="About" data-options="iconCls:'icon-ok'" style="overflow:auto;padding:10px;">
</div>
<div title="Help" data-options="iconCls:'icon-help'" style="padding:10px;">
</div>
<div title="TreeMenu" data-options="iconCls:'icon-search'" style="padding:10px 0;">
</div>
</div>
</body>
</html>
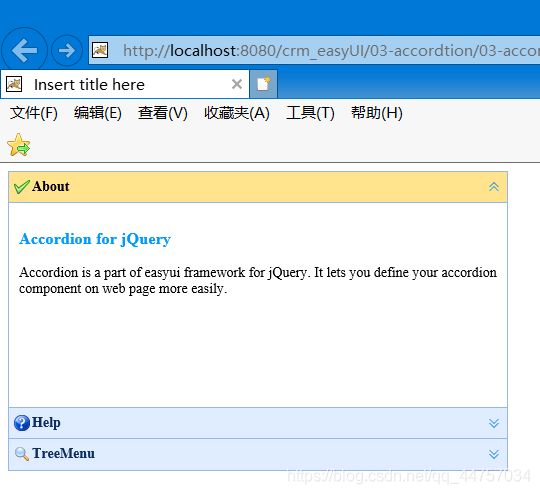
(2)标签介绍
(2)效果
3、布局上方index.html当中菜单的内容
(1)在系统菜单当中添加分类页面
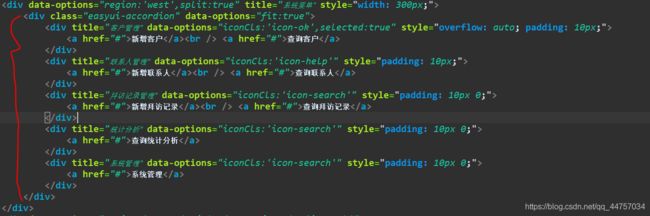
(2)代码
<!DOCTYPE html>
<html>
<head>
<meta charset="UTF-8">
<title>Insert title here</title>
<!-- 引入EasyUI的CSS和JS -->
<link rel="stylesheet" type="text/css"
	href="./themes/default/easyui.css">
<link rel="stylesheet" type="text/css" href="./themes/icon.css">
<link rel="stylesheet" type="text/css" href="./demo.css">
<script type="text/javascript" src="./js/jquery.min.js"></script>
<script type="text/javascript" src="./js/jquery.easyui.min.js"></script>

</head>
<body>
	<div style="margin: 20px 0;"></div>
	<div class="easyui-layout" data-options="fit:true">
		<div data-options="region:'north',split:true" title="CRM管理系统" style="height: 100px"></div>
		<div data-options="region:'west',split:true" title="系统菜单" style="width: 300px;">
			<div class="easyui-accordion" data-options="fit:true">
				<div title="客户管理" data-options="iconCls:'icon-ok',selected:true" style="overflow: auto; padding: 10px;">
					<a href="#">新增客户</a><br /> <a href="#">查询客户</a>
				</div>
				<div title="联系人管理" data-options="iconCls:'icon-help'" style="padding: 10px;">
					<a href="#">新增联系人</a><br /> <a href="#">查询联系人</a>
				</div>
				<div title="拜访记录管理" data-options="iconCls:'icon-search'" style="padding: 10px 0;">
					<a href="#">新增拜访记录</a><br /> <a href="#">查询拜访记录</a>
				</div>
				<div title="统计分析" data-options="iconCls:'icon-search'" style="padding: 10px 0;">
					<a href="#">查询统计分析</a>
				</div>
				<div title="系统管理" data-options="iconCls:'icon-search'" style="padding: 10px 0;">
					<a href="#">系统管理</a>
				</div>
			</div>
		</div>
		<div data-options="region:'center',title:'数据区域',iconCls:'icon-ok'">

		</div>
		<div data-options="region:'south',split:true" title="详情" style="height: 100px"></div>
	</div>
</body>
</html>
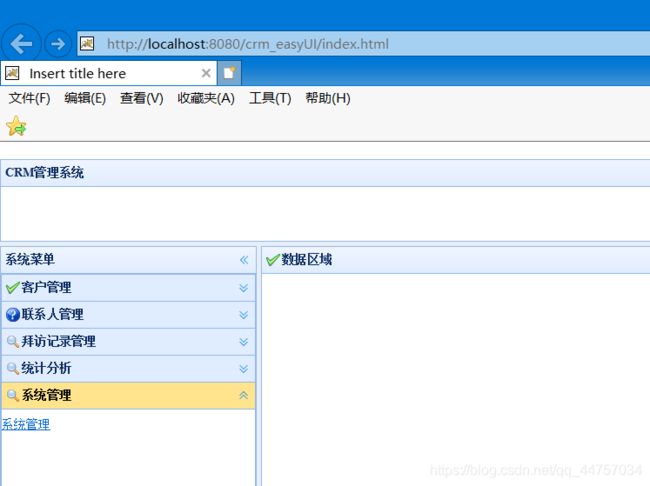
(3)效果
五、EasyUI的选项卡
1、EasyUI的选项卡的介绍
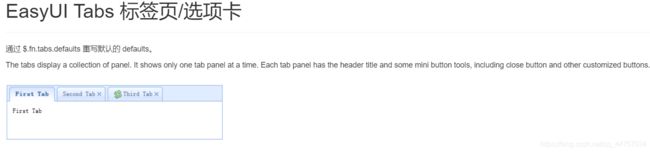
2、EasyUI的选项卡的使用
(1)在WebContent创建04-tabs以及04-tabs.html在页面当中引入选项卡
<!DOCTYPE html>
<html>
<head>
<meta charset="UTF-8">
<title>Insert title here</title>
<!-- 引入EasyUI的CSS和JS -->
<link rel="stylesheet" type="text/css" href="../themes/default/easyui.css">
<link rel="stylesheet" type="text/css" href="../themes/icon.css">
<link rel="stylesheet" type="text/css" href="../demo.css">
<script type="text/javascript" src="../js/jquery.min.js"></script>
<script type="text/javascript" src="../js/jquery.easyui.min.js"></script>
</head>
<body>
	<div id="tt" class="easyui-tabs" style="width:500px;height:250px;">
    <div title="Tab1" style="padding:20px;display:none;">
		tab1
    </div>
    <div title="Tab2" data-options="closable:true" style="overflow:auto;padding:20px;display:none;">
		tab2
    </div>
    <div title="Tab3" data-options="iconCls:'icon-reload',closable:true" style="padding:20px;display:none;">
		tab3
    </div>
</div>
</body>
</html>
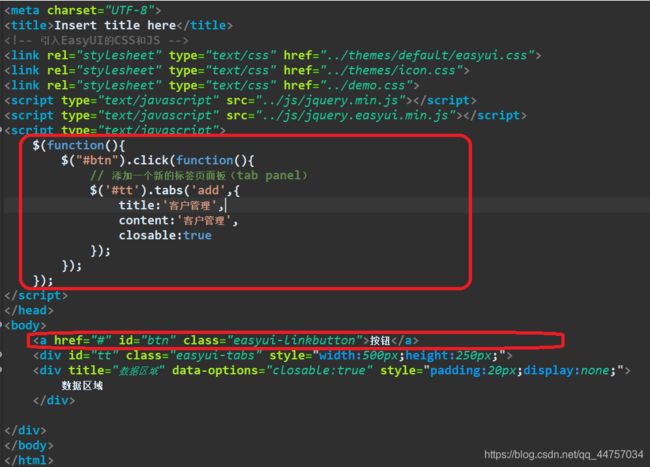
(2)修改页面(通过点击按钮的方式创建选项卡)
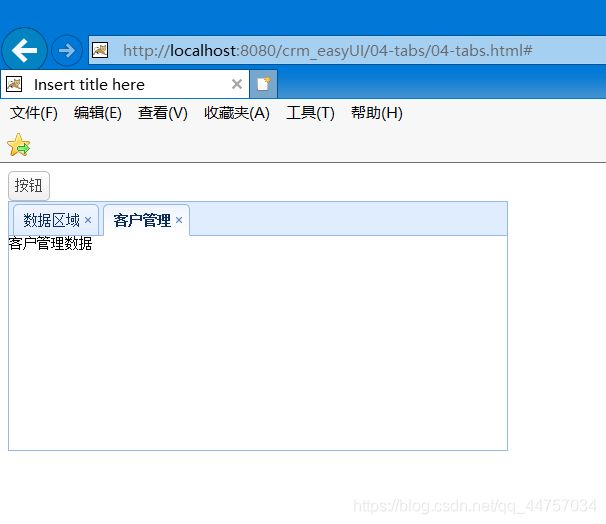
(3)效果

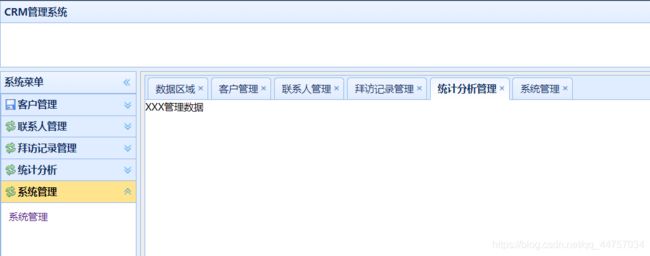
(4)现在可以创建多个,需要限制创建选项卡的个数(当有对应按钮的选项卡面板的时候,不再新创建新选项卡面板,直接选中对应的选项卡面板)

3、在上述创建CRM系统当中数据区域设置选项卡
(1)将选项卡的代码放入到数据区域
<!DOCTYPE html>
<html>
<head>
<meta charset="UTF-8">
<title>Insert title here</title>
<!-- 引入EasyUI的CSS和JS -->
<link rel="stylesheet" type="text/css"
href="./themes/default/easyui.css">
<link rel="stylesheet" type="text/css" href="./themes/icon.css">
<script type="text/javascript" src="./js/jquery.min.js"></script>
<script type="text/javascript" src="./js/jquery.easyui.min.js"></script>
<style type="text/css">
.menuA {
text-decoration: none;
}
</style>
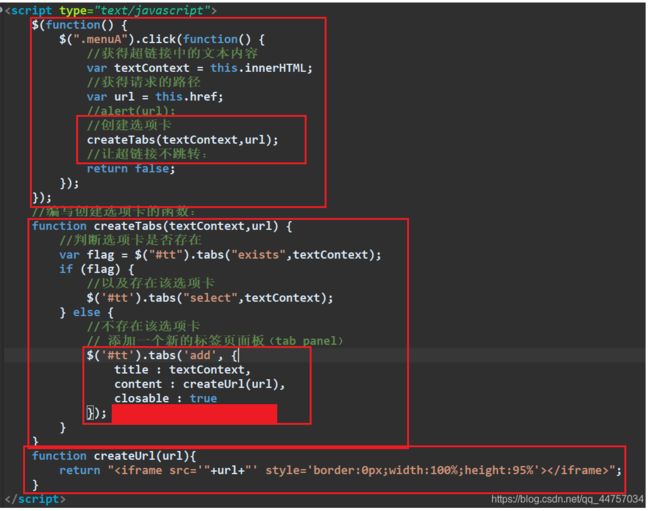
<script type="text/javascript">
$(function() {
$(".menuA").click(function() {
//获得超链接中的文本内容
var textContext = this.innerHTML;
//创建选项卡
createTabs(textContext);
});
});
//编写创建选项卡的函数:
function createTabs(textContext) {
//判断选项卡是否存在
var flag = $("#tt").tabs("exists",textContext);
if (flag) {
//以及存在该选项卡
$('#tt').tabs("select",textContext);
} else {
//不存在该选项卡
// 添加一个新的标签页面板(tab panel)
$('#tt').tabs('add', {
title : textContext,
content : 'XXX管理数据',
closable : true
});
}
}
</script>
</head>
<body>
<div id="cc" class="easyui-layout" data-options="fit:true">
<div data-options="region:'north',title:'CRM管理系统',split:true"
style="height: 100px;"></div>
<div data-options="region:'west',title:'系统菜单',split:true" style="width: 200px;">
<div id="aa" class="easyui-accordion" data-options="fit:true">
<div title="客户管理" data-options="iconCls:'icon-save',selected:true" style="overflow: auto; padding: 10px;">
<a href="#" class="menuA">客户管理</a>
</div>
<div title="联系人管理" data-options="iconCls:'icon-reload'" style="overflow: auto; padding: 10px;">
<a href="#" class="menuA">联系人管理</a>
</div>
<div title="拜访记录管理" data-options="iconCls:'icon-reload'">
<a href="#" class="menuA">拜访记录管理</a>
</div>
<div title="统计分析" data-options="iconCls:'icon-reload'" style="overflow: auto; padding: 10px;">
<a href="#" class="menuA">统计分析管理</a>
</div>
<div title="系统管理" data-options="iconCls:'icon-reload'" style="overflow: auto; padding: 10px;">
<a href="#" class="menuA">系统管理</a>
</div>
</div>
</div>
<div data-options="region:'center',title:''"
style="padding: 5px; background: #eee;">
<div id="tt" class="easyui-tabs" data-options="fit:true">
<div title="数据区域" data-options="closable:true" style="padding: 20px; display: none;">欢迎来到CRM管理系统</div>
</div>
</div>
</div>
</body>
</html>
(2)效果
4、在CRM首页上加载数据
(1)创建customer和linkman的html页面
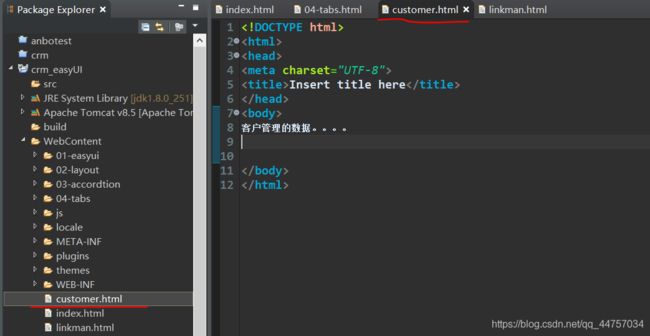
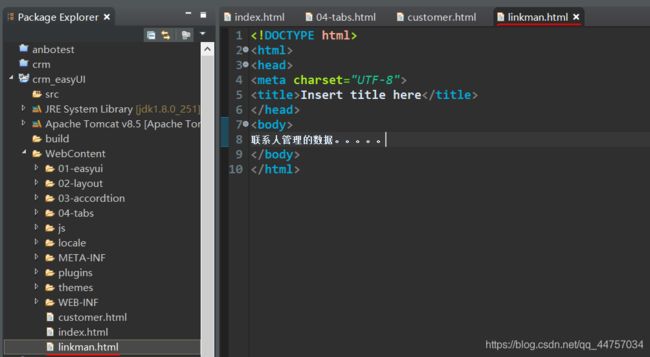
(2)修改index.xml上的jsp代码,引入对应的HTML页面
5、效果

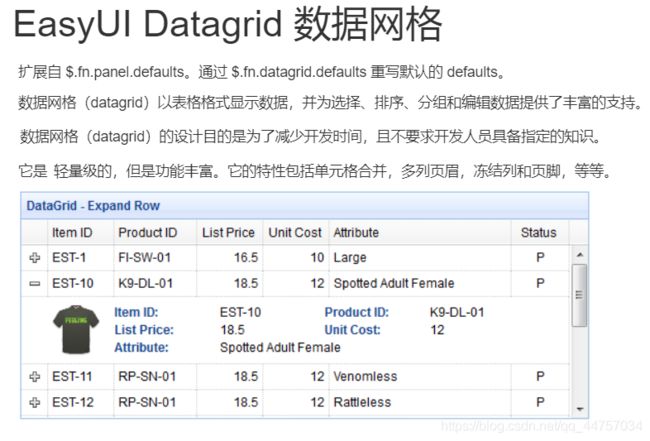
六、EasyUI数据表格
1、EasyUI的数据表格的介绍
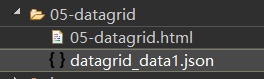
2、创建测试文件夹05-datagrid在其下创建05-datagrid.html
(1)在页面当中引入EasyUI的相关js和css样式
(2)EasyUI的数据表格的使用
- 引入JQuery EasyUI自带的json数据

- 将该文件引入到上面创建好的05-datagrid
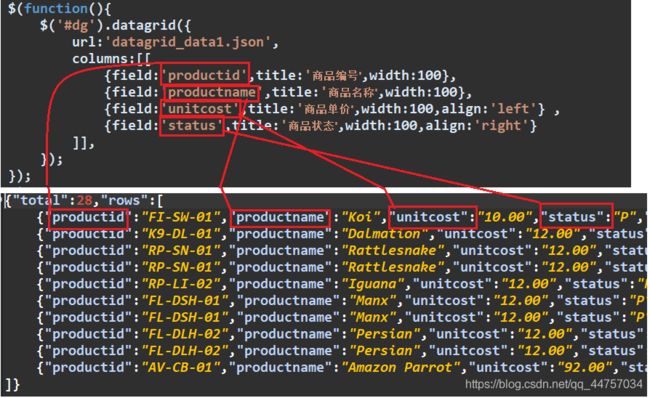
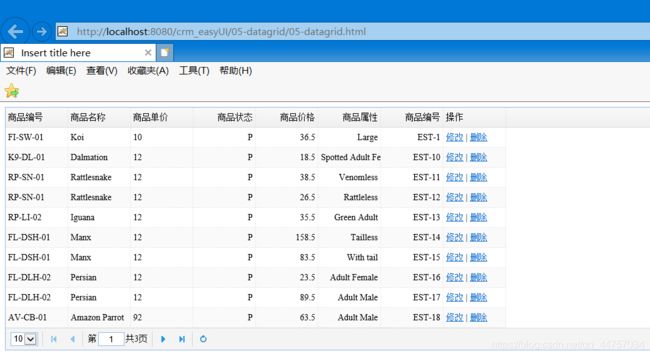
(3)在页面当中加入对应的表单并载入数据
- 设置对应的载入表单的数据要与JSON当中的名称对应
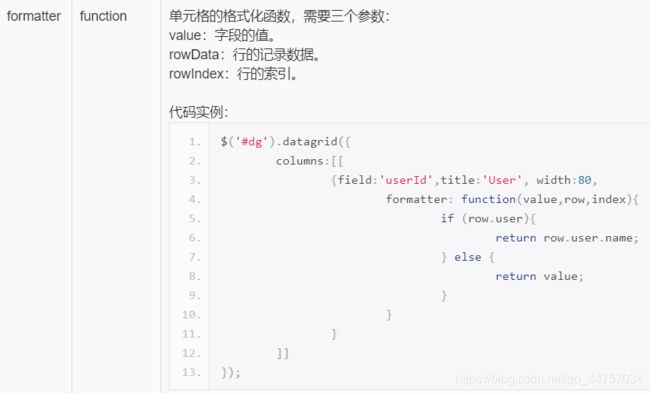
- 设置表单的分页功能、设置语言为中文、设置操作(修改|删除)
<!DOCTYPE html>
<html>
<head>
<meta charset="UTF-8">
<title>Insert title here</title>
<!-- 引入EasyUI的CSS和JS -->
<link rel="stylesheet" type="text/css" href="../themes/default/easyui.css">
<link rel="stylesheet" type="text/css" href="../themes/icon.css">
<script type="text/javascript" src="../js/jquery.min.js"></script>
<script type="text/javascript" src="../js/jquery.easyui.min.js"></script>
<script type="text/javascript" src="../locale/easyui-lang-zh_CN.js"></script>
<script type="text/javascript">
	$(function(){
		$('#dg').datagrid({
		    url:'datagrid_data1.json',
		    columns:[[
		        {field:'productid',title:'商品编号',width:100},
		        {field:'productname',title:'商品名称',width:100},
		        {field:'unitcost',title:'商品单价',width:100,align:'left'} ,
		        {field:'status',title:'商品状态',width:100,align:'right'},
		        {field:'listprice',title:'商品价格',width:100,align:'right'},
		        {field:'attr1',title:'商品属性',width:100,align:'right'},
		        {field:'itemid',title:'商品编号',width:100,align:'right'},
		        {field:'xxxxx',title:'操作',width:100,align:'left',formatter: function(value,row,index){
					return "修改 | 删除";
					}
		        }
		    ]],
		  	//设置斑马线效果
		    striped:true,
		    //显示分页工具栏
		    pagination:true,
		    //设置分页数字
		    pageList:[3,5,10]
		});
	});
</script>
</head>
<body>
	<table id="dg"></table>
</body>
</html>
(4)效果
3、SSH实现,环境的准备
引入jar包,引入配置文件,创建包和类
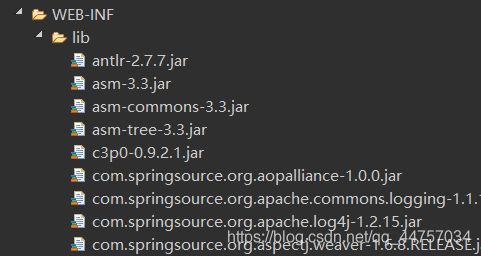
(1)引入jar包
- SSH相关jar
SSH整合jar下载地址:https://download.csdn.net/download/qq_44757034/12609946
(2)设置配置文件,web.xml 和struct.xml和log4j.properties和applicationContext.xml
- web.xml
<?xml version="1.0" encoding="UTF-8"?>
<web-app xmlns:xsi="http://www.w3.org/2001/XMLSchema-instance" xmlns="http://java.sun.com/xml/ns/javaee" xsi:schemaLocation="http://java.sun.com/xml/ns/javaee http://java.sun.com/xml/ns/javaee/web-app_2_5.xsd" id="WebApp_ID" version="2.5">
  <display-name>crm_easyUI</display-name>
  <welcome-file-list>
    <welcome-file>index.html</welcome-file>
    <welcome-file>index.htm</welcome-file>
    <welcome-file>index.jsp</welcome-file>
    <welcome-file>default.html</welcome-file>
    <welcome-file>default.htm</welcome-file>
    <welcome-file>default.jsp</welcome-file>
  </welcome-file-list>

  <!-- 配置Spring的核心监听器 -->
	<listener>
		<listener-class>org.springframework.web.context.ContextLoaderListener</listener-class>
	</listener>
	<!-- 加载Spring的配置文件的路径的,默认加载的/WEB-INF/applicationContext.xml,设置加载classpath:applicationContext.xml -->
	<!-- 全局初始化参数 -->
	<context-param>
		<!-- 参数名称 -->
		<param-name>contextConfigLocation</param-name>
		<!-- 参数的值 -->
		<param-value>classpath:applicationContext.xml</param-value>
	</context-param>
    <!-- Struts2的核心过滤器 -->
  <filter>
  	<filter-name>struts2</filter-name>
  	<filter-class>org.apache.struts2.dispatcher.ng.filter.StrutsPrepareAndExecuteFilter</filter-class>
  </filter>
  <filter-mapping>
  	<filter-name>struts2</filter-name>
  	<url-pattern>/*
- struct.xml
<?xml version="1.0" encoding="UTF-8" ?>
<!DOCTYPE struts PUBLIC
	"-//Apache Software Foundation//DTD Struts Configuration 2.3//EN"
	"http://struts.apache.org/dtds/struts-2.3.dtd">
<struts>
	<!-- 配置Struts2的常量 -->
	<constant name="struts.action.extension" value="action"/>
</struts>
- applicationContext.xml
<?xml version="1.0" encoding="UTF-8"?>
<beans xmlns="http://www.springframework.org/schema/beans"
xmlns:xsi="http://www.w3.org/2001/XMLSchema-instance"
xmlns:context="http://www.springframework.org/schema/context"
xmlns:aop="http://www.springframework.org/schema/aop"
xmlns:tx="http://www.springframework.org/schema/tx"
xsi:schemaLocation="http://www.springframework.org/schema/beans
http://www.springframework.org/schema/beans/spring-beans.xsd
http://www.springframework.org/schema/context
http://www.springframework.org/schema/context/spring-context.xsd
http://www.springframework.org/schema/aop
http://www.springframework.org/schema/aop/spring-aop.xsd
http://www.springframework.org/schema/tx
http://www.springframework.org/schema/tx/spring-tx.xsd">
<!-- 开启属性注入的注解====================在没有扫描的情况下,使用属性注入订单注解 @Resource @Value @Autowired @Qulifier -->
<context:annotation-config/>
<!-- 引入外部属性文件================================== -->
<context:property-placeholder location="classpath:jdbc.properties" />
<!-- 配置C3P0链接池=================== -->
<bean id="dataSource"
class="com.mchange.v2.c3p0.ComboPooledDataSource">
<!-- 注入属性 -->
<property name="driverClass" value="${jdbc.driverClass}"></property>
<property name="jdbcUrl" value="${jdbc.url}"></property>
<property name="user" value="${jdbc.username}"></property>
<property name="password" value="${jdbc.password}"></property>
</bean>
<!-- 配置SessionFactory -->
<bean id="sessionFactory"
class="org.springframework.orm.hibernate5.LocalSessionFactoryBean">
<!-- 注入连接池 -->
<property name="dataSource" ref="dataSource"></property>
<!-- 配置Hibernate的相关的属性 -->
<property name="hibernateProperties">
<!-- 注入复杂数据类型Properties -->
<props>
<prop key="hibernate.dialect">org.hibernate.dialect.MySQLDialect</prop>
<prop key="hibernate.show_sql">true</prop>
<prop key="hibernate.format_sql">true</prop>
<prop key="hibernate.hbm2ddl.auto">update</prop>
</props>
</property>
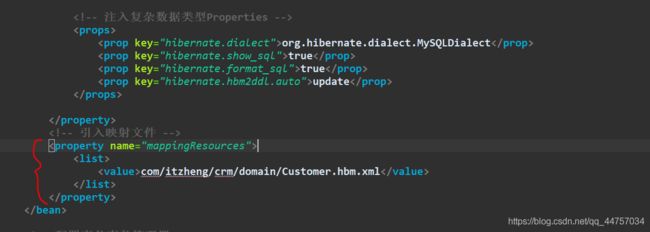
<!-- 引入映射文件 -->
<property name="mappingResources">
<list>
</list>
</property>
</bean>
<!-- 配置事务事务管理器 -->
<bean id="transactionManager"
class="org.springframework.orm.hibernate5.HibernateTransactionManager">
<!-- 可以理解为在transactionManager事务管理器当中注入sessionFactory数据库连接池 -->
<property name="sessionFactory" ref="sessionFactory"></property>
</bean>
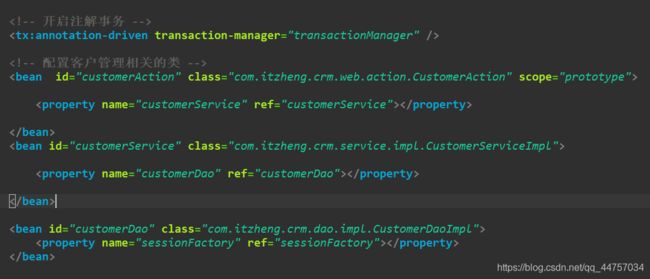
<!-- 开启注解事务 -->
<tx:annotation-driven transaction-manager="transactionManager" />
</beans>
- jdbc.properties
jdbc.driverClass=com.mysql.jdbc.Driver
jdbc.url=jdbc:mysql:///ssh1
jdbc.username=root
jdbc.password=root
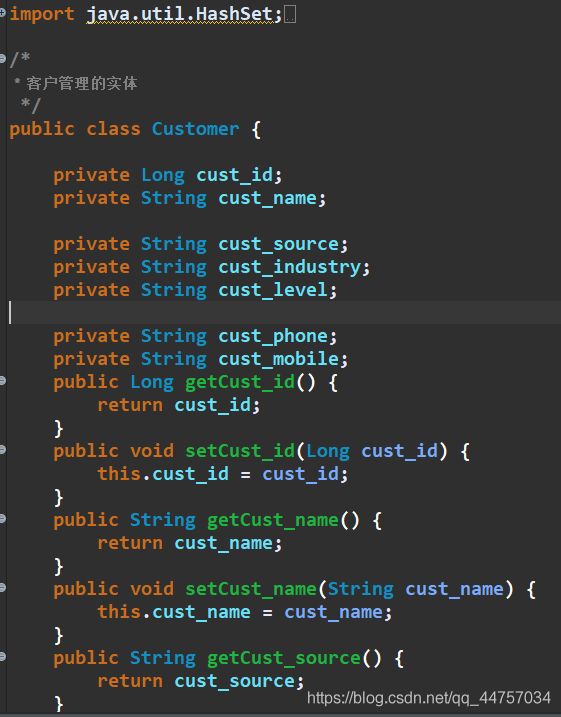
(3)创建包和类
- 创建Customer类
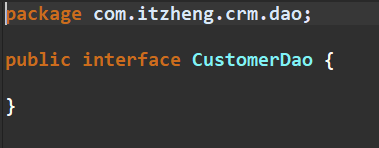
- 创建接口CustomerDao以及实现类CustomerDaoImpl和CustomerService接口和CustomerServiceImpl
- 创建CustomerAction
CustomerAction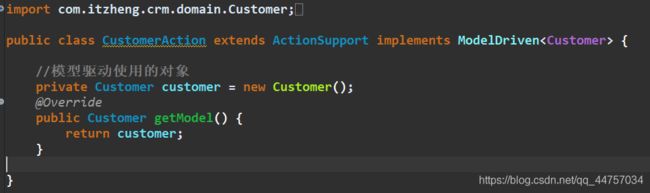
(4)将类配置到Spring的配置文件当中
- 在applicationContext.xml当中设置
引入Customer.hbm.xml映射文件。
- 在applicationContext.xml当中设置
将对应的DAO和Service以及Action交给Spring管理并注入属性。
4、SSH实现,从数据库查询数据显示到数据表格当中
(1)在customer.html中添加数据表格

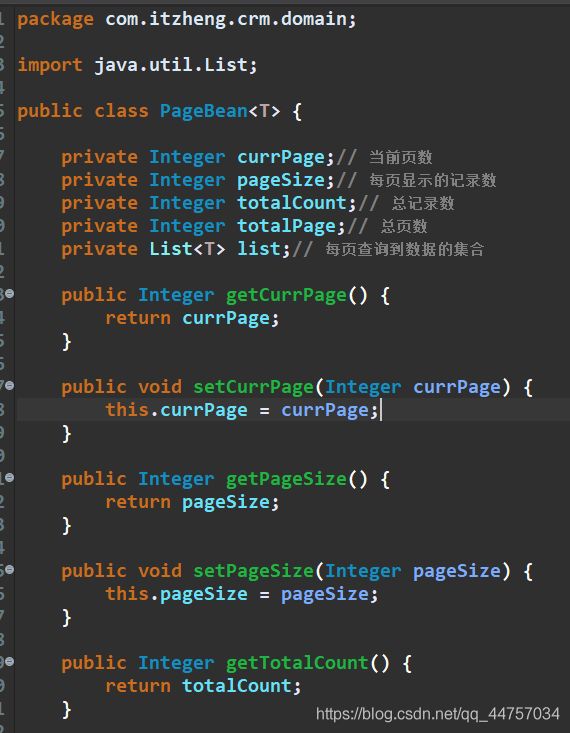
(2)在domain下创建PageBean
(3)编写CustomerAction中的findAll的方法
package com.itzheng.crm.web.action;
import org.hibernate.criterion.DetachedCriteria;
import com.itzheng.crm.domain.Customer;
import com.itzheng.crm.domain.PageBean;
import com.itzheng.crm.service.CustomerService;
import com.opensymphony.xwork2.ActionSupport;
import com.opensymphony.xwork2.ModelDriven;
public class CustomerAction extends ActionSupport implements ModelDriven<Customer> {
	// 模型驱动使用的对象
	private Customer customer = new Customer();
	@Override
	public Customer getModel() {
		return customer;
	}
	// 注入Service
	private CustomerService customerService;
	public void setCustomerService(CustomerService customerService) {
		this.customerService = customerService;
	}
	//接收分页的数据
	//接收当前的页数和每页显示的记录数。 这两个值在easyUI当中以及有规定。page就是当前的页数,rows就是每页显示的记录数
	private Integer page = 1;
	private Integer rows = 3;
	public void setPage(Integer page) {
		this.page = page;
	}
	public void setRows(Integer rows) {
		this.rows = rows;
	}
	public String findAll() {
		DetachedCriteria detachedCriteria = DetachedCriteria.forClass(Customer.class);
		//调用业务层:
		PageBean<Customer> pageBean = customerService.findByPage(detachedCriteria,page,rows);
		return NONE;
	}
}
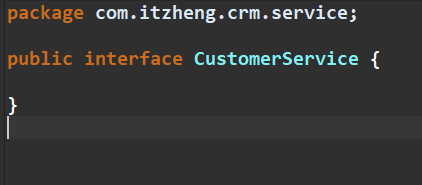
(4)编写CustomerService以及对应的实现类
package com.itzheng.crm.service;
import org.hibernate.criterion.DetachedCriteria;
import com.itzheng.crm.domain.Customer;
import com.itzheng.crm.domain.PageBean;
public interface CustomerService {
	PageBean<Customer> findByPage(DetachedCriteria detachedCriteria, Integer page, Integer rows);
}
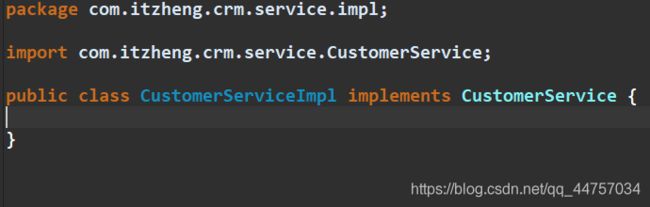
package com.itzheng.crm.service.impl;
import java.util.List;
import org.hibernate.criterion.DetachedCriteria;
import com.itzheng.crm.dao.CustomerDao;
import com.itzheng.crm.domain.Customer;
import com.itzheng.crm.domain.PageBean;
import com.itzheng.crm.service.CustomerService;
public class CustomerServiceImpl implements CustomerService {
	private CustomerDao customerDao;
	public void setCustomerDao(CustomerDao customerDao) {
		this.customerDao = customerDao;
	}
	@Override
	public PageBean<Customer> findByPage(DetachedCriteria detachedCriteria, Integer page, Integer rows) {
		// TODO Auto-generated method stub
		PageBean<Customer> pageBean = new PageBean<Customer>();
		pageBean.setCurrPage(page);
		pageBean.setPageSize(rows);
		Integer totalCount = customerDao.findCount(detachedCriteria);
		pageBean.setTotalCount(totalCount);
		double tc = totalCount;
		Double num = Math.ceil(tc / rows);
		pageBean.setTotalPage(num.intValue());
		Integer begin = (page - 1) * rows;
		List<Customer> list = customerDao.findByPage(detachedCriteria,begin,rows);
		pageBean.setList(list);
		return pageBean ;
	}
}
(5)编写CustomerDao以及对应的实现类
package com.itzheng.crm.dao;
import java.util.List;
import org.hibernate.criterion.DetachedCriteria;
import com.itzheng.crm.domain.Customer;
public interface CustomerDao {
	Integer findCount(DetachedCriteria detachedCriteria);
	List<Customer> findByPage(DetachedCriteria detachedCriteria, Integer begin, Integer rows);
}
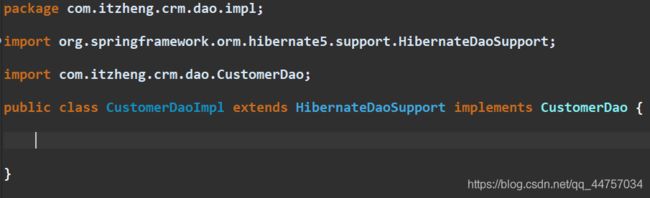
package com.itzheng.crm.dao.impl;
import java.util.List;
import org.hibernate.criterion.DetachedCriteria;
import org.hibernate.criterion.Projections;
import org.springframework.orm.hibernate5.support.HibernateDaoSupport;
import com.itzheng.crm.dao.CustomerDao;
import com.itzheng.crm.domain.Customer;
public class CustomerDaoImpl extends HibernateDaoSupport implements CustomerDao {
	@Override
	public Integer findCount(DetachedCriteria detachedCriteria) {
		detachedCriteria.setProjection(Projections.rowCount());
		List<Long> list = (List<Long>) this.getHibernateTemplate().findByCriteria(detachedCriteria);
		if(list.size() > 0) {
			return list.get(0).intValue();
		}
		return null;
	}
	@Override
	public List<Customer> findByPage(DetachedCriteria detachedCriteria, Integer begin, Integer rows) {
		// TODO Auto-generated method stub
		detachedCriteria.setProjection(null);
		return (List<Customer>) this.getHibernateTemplate().findByCriteria(detachedCriteria,begin,rows);
	}
}
5、将pageBean数据转换为json格式,并放入到值栈当中
(1)引入jsonlib的开发包
知识点:JSONArray(用于转化数组和list集合),JSONObject(对象和map集合)
(2)在页面当中显示数据到数据表格当中
<!DOCTYPE html>
<html>
<head>
<meta charset="UTF-8">
<title>Insert title here</title>
<!-- 引入EasyUI的CSS和JS -->
<link rel="stylesheet" type="text/css"
	href="./themes/default/easyui.css">
<link rel="stylesheet" type="text/css" href="./themes/icon.css">
<script type="text/javascript" src="./js/jquery.min.js"></script>
<script type="text/javascript" src="./js/jquery.easyui.min.js"></script>
<script type="text/javascript" src="./locale/easyui-lang-zh_CN.js"></script>
<script type="text/javascript">
	$(function(){
		$('#dg').datagrid({
		    url:'customer_findAll.action',
		    columns:[[
		        {field:'cust_name',title:'客户名称',width:100},
		        {field:'cust_source',title:'客户来源',width:100},
		        {field:'cust_level',title:'客户级别',width:100},
		        {field:'cust_industry',title:'客户行业',width:100},
		        {field:'cust_phone',title:'客户固定电话',width:100},
		        {field:'cust_mobile',title:'客户移动电话',width:100},
		        {field:'xxx',title:'操作',width:100}
		    ]],
		    striped:true,
		    //显示分页工具
		    pagination:true,
		    //分页条的位置
		    pagePosition:"bottom",
		    //初始化页数
		    pageBumber:1,
		    //每页显示多少条记录
		    pageSize:3,
		    pageList:[3,5,10]
		});
	});
</script>
</head>
<body>
	<table id="dg"></table>
</body>
</html>
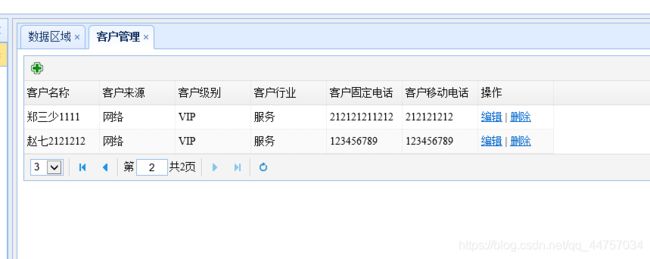
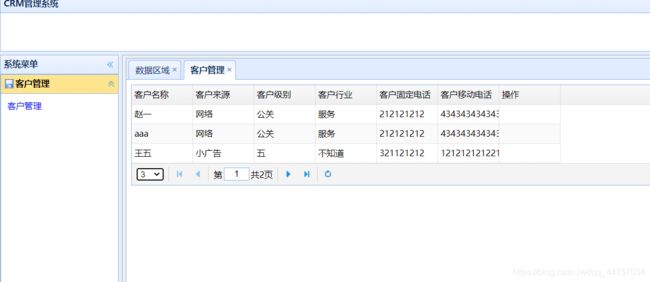
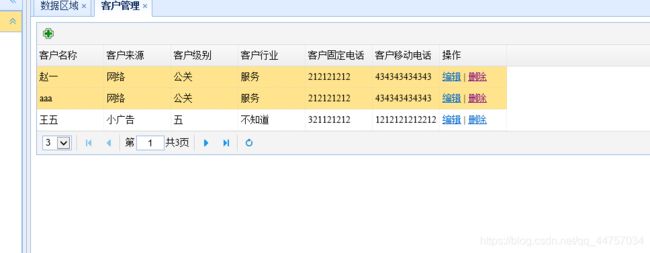
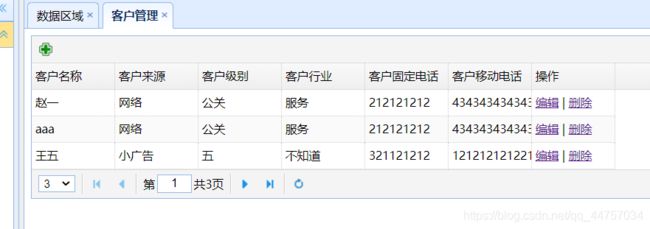
(3)页面效果
七、EasyUI的窗口
1、EasyUI的窗口的介绍
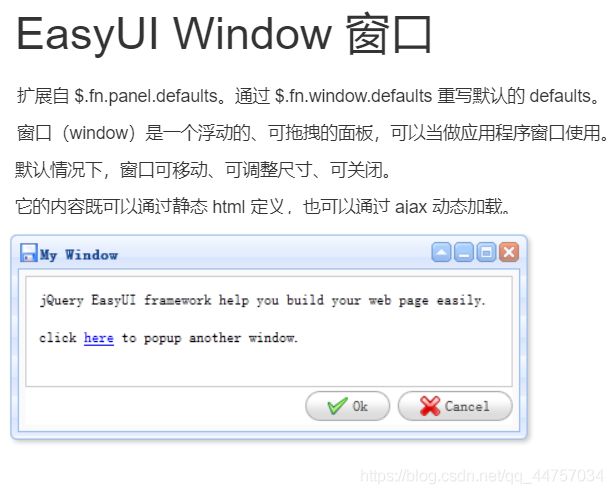
2、EasyUI的窗口的使用
(1)在上面创建好的Customer.html当中引入窗口
<!DOCTYPE html>
<html>
<head>
<meta charset="UTF-8">
<title>Insert title here</title>
<!-- 引入EasyUI的CSS和JS -->
<link rel="stylesheet" type="text/css"
	href="./themes/default/easyui.css">
<link rel="stylesheet" type="text/css" href="./themes/icon.css">
<script type="text/javascript" src="./js/jquery.min.js"></script>
<script type="text/javascript" src="./js/jquery.easyui.min.js"></script>
<script type="text/javascript" src="./locale/easyui-lang-zh_CN.js"></script>
<script type="text/javascript">
	$(function() {
		$('#dg').datagrid({
			url : 'customer_findAll.action',
			columns : [ [ {
				field : 'cust_name',
				title : '客户名称',
				width : 100
			}, {
				field : 'cust_source',
				title : '客户来源',
				width : 100
			}, {
				field : 'cust_level',
				title : '客户级别',
				width : 100
			}, {
				field : 'cust_industry',
				title : '客户行业',
				width : 100
			}, {
				field : 'cust_phone',
				title : '客户固定电话',
				width : 100
			}, {
				field : 'cust_mobile',
				title : '客户移动电话',
				width : 100
			}, {
				field : 'xxx',
				title : '操作',
				width : 100
			} ] ],
			striped : true,
			//显示分页工具
			pagination : true,
			//分页条的位置
			pagePosition : "bottom",
			//初始化页数
			pageBumber : 1,
			//每页显示多少条记录
			pageSize : 3,
			pageList : [ 3, 5, 10 ],
			toolbar : [ {
				iconCls : 'icon-add',
				handler : function() {
					$('#winAdd').window('open');
				}
			} ]
		});
	});
</script>
</head>
<body>
	<table id="dg"></table>
	<!-- 添加客户的表单,默认是隐藏的 -->
	<div id="winAdd" class="easyui-window" title="添加客户" style="width:600px;height:400px"
	        data-options="iconCls:'icon-save',modal:true,closed:true">
	        <form id="formAdd" method="post">
				<TABLE cellSpacing=0 cellPadding=5  border=0>
				<TR>
					<td>客户名称:</td>
					<td>
						<INPUT class=textbox id=sChannel2 style="WIDTH: 180px" maxLength=50 name="cust_name">
					</td>
					<td>客户级别 :</td>
					<td>
						<INPUT class=textbox id=sChannel2 style="WIDTH: 180px" maxLength=50 name="cust_level">
					</td>
				</TR>

				<TR>
					<td>信息来源 :</td>
					<td>
						<INPUT class=textbox id=sChannel2 style="WIDTH: 180px" maxLength=50 name="cust_source">
					</td>
					<td>客户行业:</td>
					<td>
						<INPUT class=textbox id=sChannel2 style="WIDTH: 180px" maxLength=50 name="cust_industry">
					</td>
				</TR>

				<TR>
					<td>固定电话 :</td>
					<td>
						<INPUT class=textbox id=sChannel2 style="WIDTH: 180px" maxLength=50 name="cust_phone">
				</td>
				<td>移动电话 :</td>
				<td>
					<INPUT class=textbox id=sChannel2 style="WIDTH: 180px" maxLength=50 name="cust_mobile">
						</td>
					</TR>
					<tr>
						<td rowspan=2>
							<button id="customerBtn" type="button" onclick="save()">保存</button>
						</td>
					</tr>
				</TABLE>
			</form>
		</div>
</body>
</html>
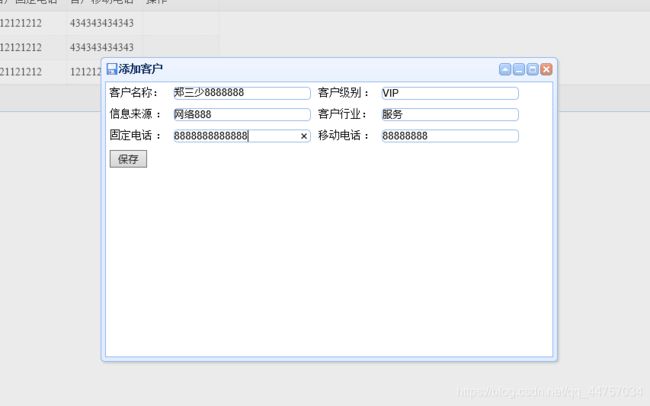
(2)效果
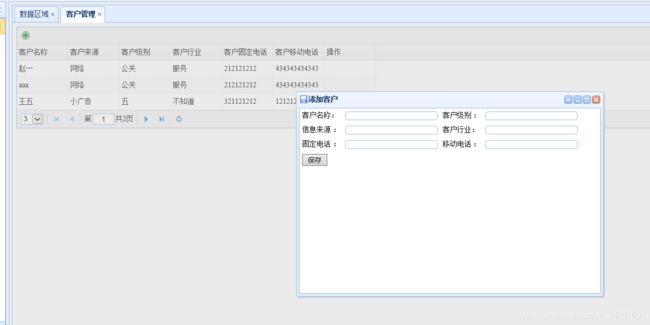
3、将窗口当中的数据提交到Action当中并再次查询对应的联系人列表、
(1)在Customer.html当中编写一个函数向action当中提交数据(实现异步提交数据),并将返回的数据转换为JSON格式
<!DOCTYPE html>
<html>
<head>
<meta charset="UTF-8">
<title>Insert title here</title>
<!-- 引入EasyUI的CSS和JS -->
<link rel="stylesheet" type="text/css"
	href="./themes/default/easyui.css">
<link rel="stylesheet" type="text/css" href="./themes/icon.css">
<script type="text/javascript" src="./js/jquery.min.js"></script>
<script type="text/javascript" src="./js/jquery.easyui.min.js"></script>
<script type="text/javascript" src="./locale/easyui-lang-zh_CN.js"></script>
<script type="text/javascript">
	$(function() {
		$('#dg').datagrid({
			url : 'customer_findAll.action',
			columns : [ [ {
				field : 'cust_name',
				title : '客户名称',
				width : 100
			}, {
				field : 'cust_source',
				title : '客户来源',
				width : 100
			}, {
				field : 'cust_level',
				title : '客户级别',
				width : 100
			}, {
				field : 'cust_industry',
				title : '客户行业',
				width : 100
			}, {
				field : 'cust_phone',
				title : '客户固定电话',
				width : 100
			}, {
				field : 'cust_mobile',
				title : '客户移动电话',
				width : 100
			}, { field : 'xxx', title : '操作', width : 100 ,formatter: function(value,row,index){
				return "编辑 | 删除";
			}


			}


			] ],
			striped : true,
			//显示分页工具
			pagination : true,
			//分页条的位置
			pagePosition : "bottom",
			//初始化页数
			pageBumber : 1,
			//每页显示多少条记录
			pageSize : 3,
			pageList : [ 3, 5, 10 ],
			toolbar : [ {
				iconCls : 'icon-add',
				handler : function() {
					$('#winAdd').window('open');
				}
			} ]
		});
	});


	function save(){
		//提交数据到Action
		$('#formAdd').form('submit',{
			url:"customer_save.action",
			success:function(data){
				//data是字符串
				var jsonData = eval("("+data+")");
				$.messager.show({
					title:'提示消息',
					msg:jsonData.msg,
					timeout:3000,
					showType:'slide'//划出窗口
				});
				//关闭窗口
				$("#winAdd").window("close");
				//表格重新加载
				$("#dg").datagrid("reload");
			}
		});

	}

	function del(id){
		alert(id);
	}

</script>
</head>
<body>
	<table id="dg"></table>
	<!-- 添加客户的表单,默认是隐藏的 -->
	<div id="winAdd" class="easyui-window" title="添加客户" style="width:600px;height:400px"
	        data-options="iconCls:'icon-save',modal:true,closed:true">

	        <form id="formAdd" method="post">
				<TABLE cellSpacing=0 cellPadding=5  border=0>
				<TR>
					<td>客户名称:</td>
					<td>
						<INPUT class=textbox id=sChannel2 style="WIDTH: 180px" maxLength=50 name="cust_name">
					</td>
					<td>客户级别 :</td>
					<td>
						<INPUT class=textbox id=sChannel2 style="WIDTH: 180px" maxLength=50 name="cust_level">
					</td>
				</TR>

				<TR>
					<td>信息来源 :</td>
					<td>
						<INPUT class=textbox id=sChannel2 style="WIDTH: 180px" maxLength=50 name="cust_source">
					</td>
					<td>客户行业:</td>
					<td>
						<INPUT class=textbox id=sChannel2 style="WIDTH: 180px" maxLength=50 name="cust_industry">
					</td>
				</TR>

				<TR>
					<td>固定电话 :</td>
					<td>
						<INPUT class=textbox id=sChannel2 style="WIDTH: 180px" maxLength=50 name="cust_phone">
				</td>
				<td>移动电话 :</td>
				<td>
					<INPUT class=textbox id=sChannel2 style="WIDTH: 180px" maxLength=50 name="cust_mobile">
						</td>
					</TR>

					<tr>
						<td rowspan=2>
							<button id="customerBtn" type="button" onclick="save()">保存</button>
						</td>
					</tr>
				</TABLE>
			</form>
		</div>


</body>
</html>
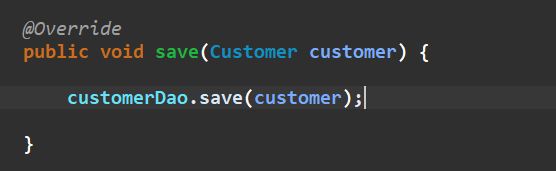
(2)编写Action,在customeeAction当中编写save方法

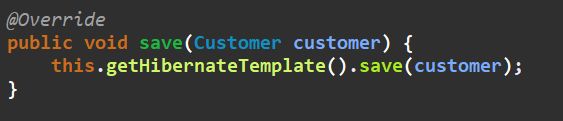
(3)Service和ServiceImpl以及dao和daoImpl当中的方法
CustomerService

CustomerServiceImpl上添加事务

CustomerDao

CustomerDaoImpl
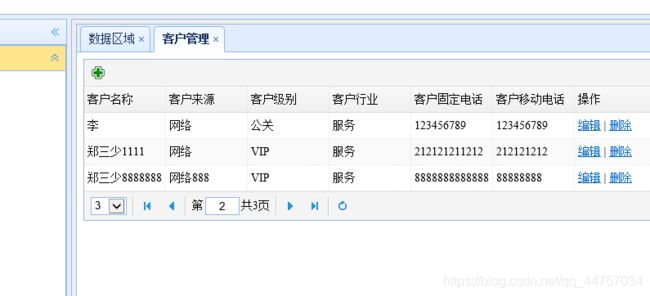
(4)效果
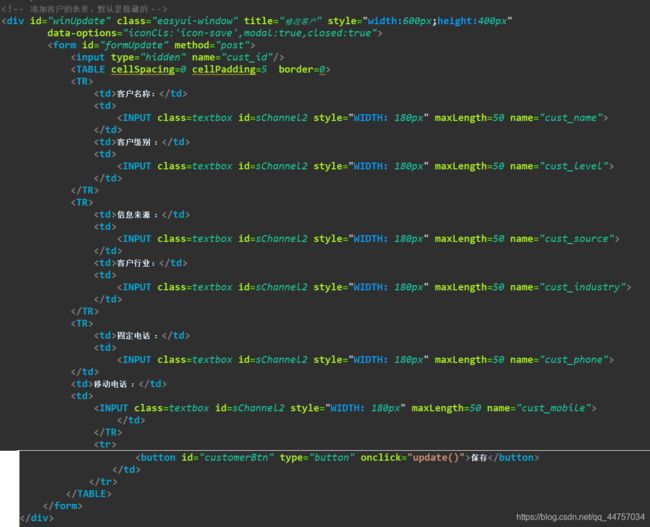
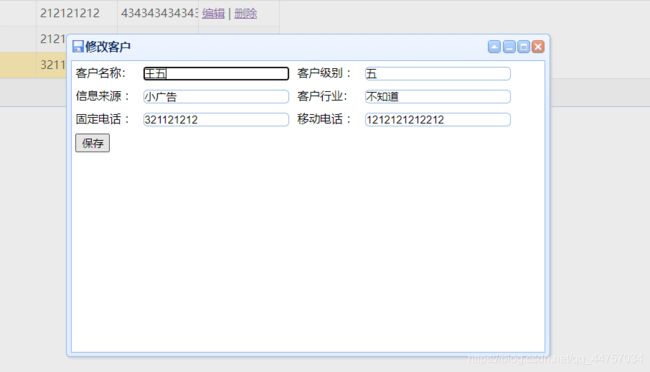
4、修改操作
(1)在customer.html当中增加修改的操作

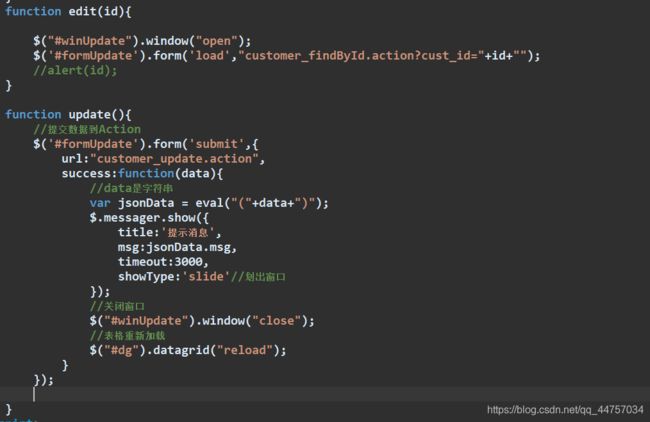
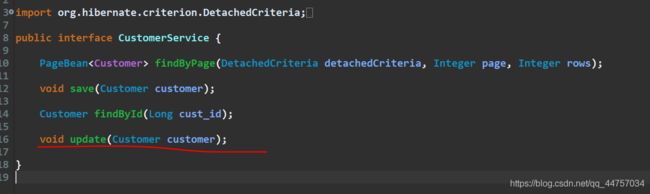
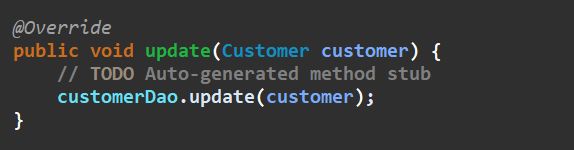
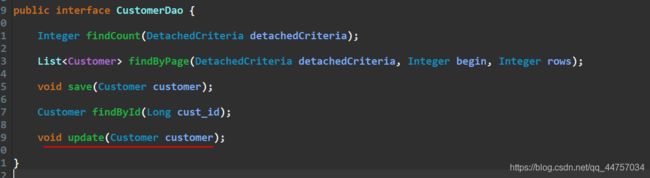
(2)在customerAction当中设置update方法

Service以及dao
CustomerService
CustomerServiceImpl
CustomerDao
CustomerDaoImpl


5、删除操作
(1)在customer.html
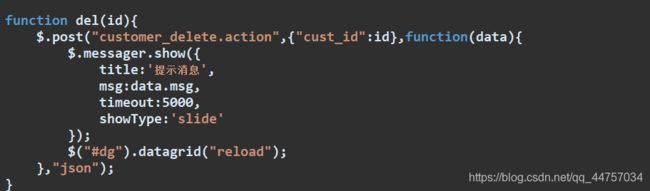
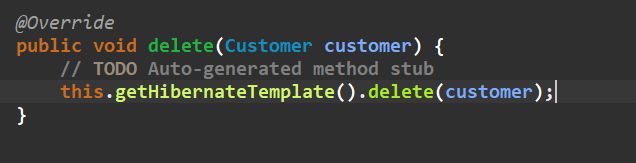
(2)在customerAction创建delete方法
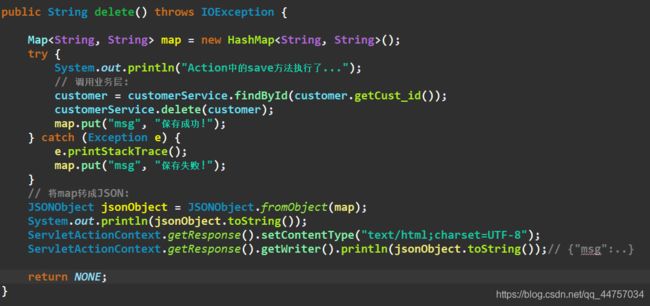
(3)Service和Dao
CustomerService

CustomerServiceImpl

CustomerDao

CustomerDaoImpl
(4)测试
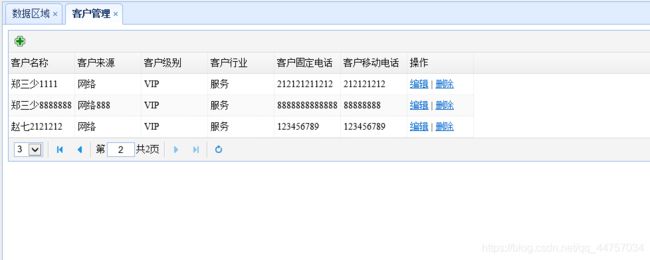
删除成功