Spring Boot 整合Mybatis(步骤讲解) 附源码
转载请标明出处:http://blog.csdn.net/a318199328/article/details/52248552
直接进入正题!!!!
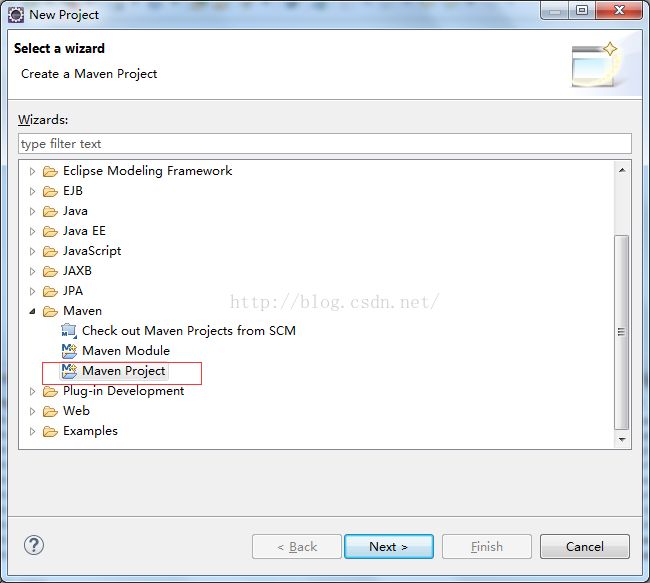
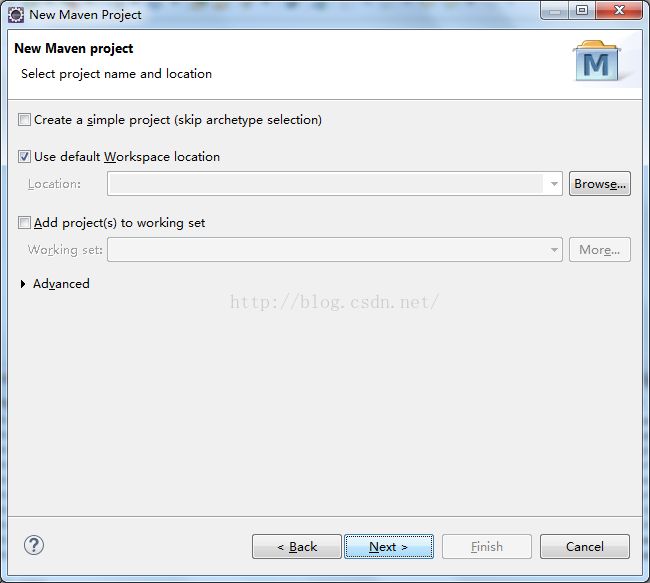
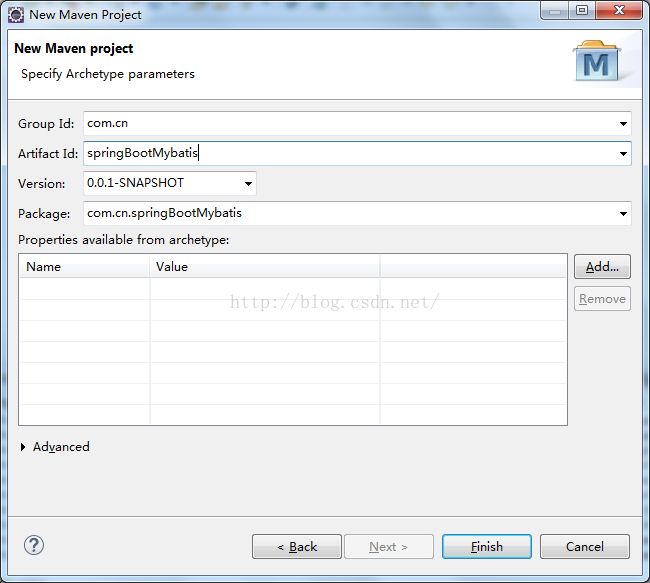
新建Maven项目
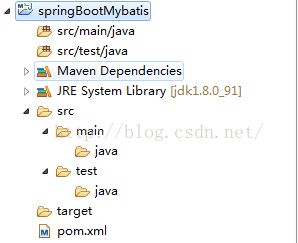
新建项目后目录结构
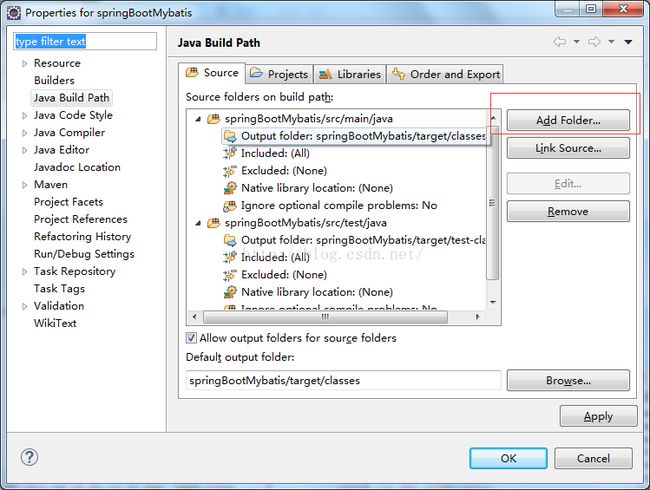
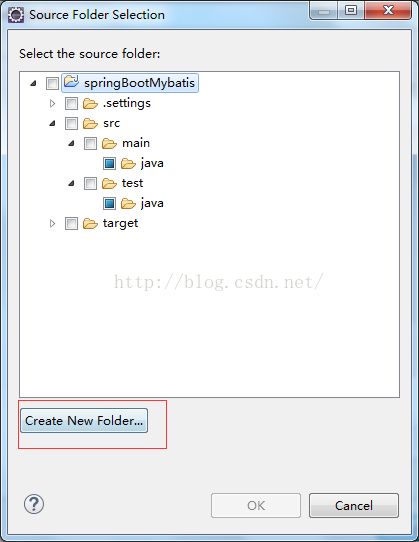
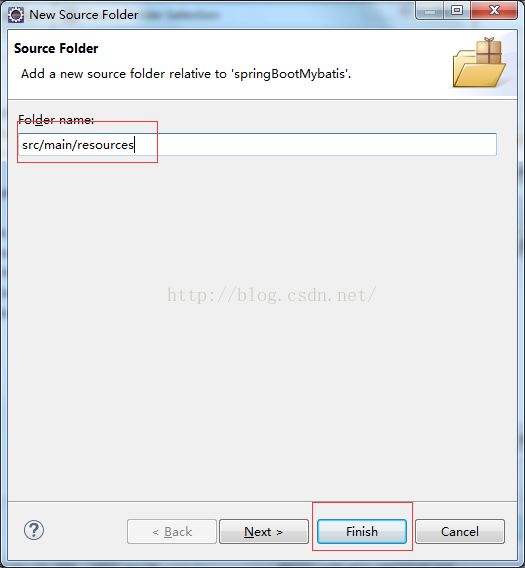
新增目录结构src/main/resources
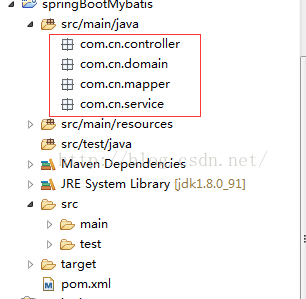
新增目录结构后的结构展示
新增包结构
在原pom.xml添加
UTF-8
3.2.9.RELEASE
2.4.4
1.8


org.springframework.boot
spring-boot-starter-parent
1.2.5.RELEASE


org.springframework.boot
spring-boot-starter-web


org.springframework.boot
spring-boot-starter-thymeleaf


org.springframework.boot
spring-boot-starter-jdbc


org.springframework.boot
spring-boot-starter-actuator


org.mybatis
mybatis-spring
1.2.2


org.mybatis
mybatis
3.2.8


org.apache.tomcat
tomcat-jdbc


mysql
mysql-connector-java


com.alibaba
fastjson
1.1.43


com.mangofactory
swagger-springmvc
0.9.5


com.fasterxml.jackson.core
jackson-annotations


com.fasterxml.jackson.core
jackson-databind


com.fasterxml.jackson.core
jackson-core


org.springframework.boot
spring-boot-maven-plugin
添加编译后有可能出现一下错误
解决方案:右键项目找到Maven选项,然后选择Upate Project
创建java文件
一.在com.cn.domain包中创建User实体类
public class User {
    private String name;
    private Integer age;
    private String password;

    public String getName() {
        return name;
    }

    public void setName(String name) {
        this.name = name;
    }

    public Integer getAge() {
        return age;
    }

    public void setAge(Integer age) {
        this.age = age;
    }

    public String getPassword() {
        return password;
    }

    public void setPassword(String password) {
        this.password = password;
    }
}
二.在com.cn.mapper包中创建UserMapper类
import com.cn.domain.User;

public interface UserMapper {
    public User findUserInfo(String id);
}
三.在src/main/resources包中创建UserMapper.xml
四.在com.cn.service包中创建UserService
import org.springframework.beans.factory.annotation.Autowired;
import org.springframework.stereotype.Service;
import com.cn.domain.User;
import com.cn.mapper.UserMapper;

@Service
public class UserService {

    @Autowired
    private UserMapper userMapper;

    public User getUserInfo(String id){
        User user=userMapper.findUserInfo(id);
        //User user=null;
        return user;
    }

}
五.在com.cn.controller包中创建UserController 类(连接数据库)
import org.apache.log4j.Logger;
import org.springframework.beans.factory.annotation.Autowired;
import org.springframework.stereotype.Controller;
import org.springframework.web.bind.annotation.RequestMapping;
import org.springframework.web.bind.annotation.RequestParam;
import org.springframework.web.bind.annotation.ResponseBody;
import com.cn.domain.User;
import com.cn.service.UserService;

@Controller
public class UserController {

    private Logger logger = Logger.getLogger(UserController.class);

    @Autowired
    private UserService userService;

    @RequestMapping("/getUserInfo")
    @ResponseBody
    public User getUserInfo(@RequestParam("id") String id) {
    	System.out.println(id);
        User user = userService.getUserInfo(id);
        if(user!=null){
            System.out.println("user.getName():"+user.getName());
            logger.info("user.getAge():"+user.getAge());
        }
        return user;
    }
}
六.在com.cn.servoce包中创建HelloController 类
import org.springframework.stereotype.Controller;
import org.springframework.ui.Model;
import org.springframework.web.bind.annotation.RequestMapping;
import org.springframework.web.bind.annotation.RequestParam;

@Controller
public class HelloController {

    @RequestMapping("/hello")
    public String greeting(@RequestParam(value="name", required=false, defaultValue="World") String name, Model model) {
        model.addAttribute("name", name);
        return "hello";
    }

}
七.在com.cn包中创建Application 类(运行类)
import org.apache.ibatis.session.SqlSessionFactory;
import org.apache.log4j.Logger;
import org.mybatis.spring.SqlSessionFactoryBean;
import org.mybatis.spring.annotation.MapperScan;
import org.springframework.boot.SpringApplication;
import org.springframework.boot.autoconfigure.EnableAutoConfiguration;
import org.springframework.boot.autoconfigure.SpringBootApplication;
import org.springframework.boot.context.properties.ConfigurationProperties;
import org.springframework.context.annotation.Bean;
import org.springframework.context.annotation.ComponentScan;
import org.springframework.core.io.support.PathMatchingResourcePatternResolver;
import org.springframework.jdbc.datasource.DataSourceTransactionManager;
import org.springframework.transaction.PlatformTransactionManager;

import javax.sql.DataSource;

@EnableAutoConfiguration
@SpringBootApplication
@ComponentScan
@MapperScan("com.cn.mapper")//扫描mapper包下接口
public class Application {
    private static Logger logger = Logger.getLogger(Application.class);

    @Bean
    @ConfigurationProperties(prefix="spring.datasource")//数据库中的配置前缀
    public DataSource dataSource() {
        return new org.apache.tomcat.jdbc.pool.DataSource();
    }

    @Bean
    public SqlSessionFactory sqlSessionFactoryBean() throws Exception {

        SqlSessionFactoryBean sqlSessionFactoryBean = new SqlSessionFactoryBean();
        sqlSessionFactoryBean.setDataSource(dataSource());

        PathMatchingResourcePatternResolver resolver = new PathMatchingResourcePatternResolver();

        sqlSessionFactoryBean.setMapperLocations(resolver.getResources("classpath:/mybatis/*.xml"));//读取Mapper.xml

        return sqlSessionFactoryBean.getObject();
    }

    @Bean
    public PlatformTransactionManager transactionManager() {
        return new DataSourceTransactionManager(dataSource());
    }


    /**
     * Start
     */
    public static void main(String[] args) {
        SpringApplication.run(Application.class, args);
        logger.info("SpringBoot Start Success");
    }

}
八.在src/main/resources创建application.properties(数据库配置)
spring.datasource.url=jdbc:mysql://127.0.0.1:3306/test?useUnicode=true&characterEncoding=gbk&zeroDateTimeBehavior=convertToNull
spring.datasource.username=root
spring.datasource.password=123123
spring.datasource.driver-class-name=com.mysql.jdbc.Driver
#保证没一行后面都不包含空格,否则报错
九.在src/main/resources创建log4j.properties(根据自己需要配置)
#config root logger
log4j.rootLogger = INFO,system.out
log4j.appender.system.out=org.apache.log4j.ConsoleAppender
log4j.appender.system.out.layout=org.apache.log4j.PatternLayout
log4j.appender.system.out.layout.ConversionPattern=[Log] %5p[%F:%L]:%m%n

#config this Project.file logger
log4j.logger.thisProject.file=INFO,thisProject.file.out
log4j.appender.thisProject.file.out=org.apache.log4j.DailyRollingFileAppender
log4j.appender.thisProject.file.out.File=logContentFile.log
log4j.appender.thisProject.file.out.layout=org.apache.log4j.PatternLayout
十.在src/main/resources创建templates(必须)返回页面目录,并在templates下创建hello.html
Getting Started: Serving Web Content
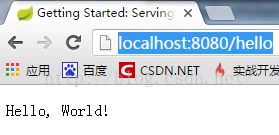
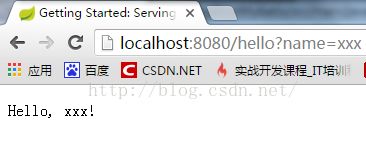
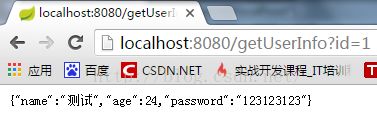
测试:运行Appliaction.java(右键Run As --> Java Appliaction),再不报错的情况下在浏览器输入:
http://localhost:8080/hello
http://localhost:8080/hello?name=xxx
http://localhost:8080/getUserInfo?id=1
实例下载:http://download.csdn.net/detail/a318199328/9607376
注:由于MyBatis属于一种半自动的ORM框架,所以主要的工作就是配置Mapping映射文件,但是由于手写映射文件很容易出错,所以可利用MyBatis生成器自动生成实体类、DAO接口和Mapping映射文件 Eclipse MyBatis Generator插件和使用说明
