SpringBoot+SpringMVC+MybatisPlus框架整合练习之【美女图片】爬虫---图文详细流程
最近浏览很多博客,学习了不少新的知识,收获颇多,就想着能不能将新学的知识整合一下来练练手,提高自己撸代码搭框架的能力,还有就是给大家一个新年福利,爬一爬美女图片网站。上车请刷卡,哈哈。顺便就拿这爬来的数据作为基础数据来整合最近学习的框架。一劳多得。当然,本文还是以框架整合为主,爬取美女图片只是为了获取基础数据而已啦!!
现在我将我的学习成果分享出来,还望各位大神多多指点,有些不规范的地方还望大家指出,多多讨论学习,共同进步。源码我已经托管到我的码云上面,大家可以进我的博客查看,如果想要图片资源的话在评论区留下邮箱吧。
、、、、、、、、、、、、、、、、、、、、、、、、、、、、、、、
个人博客地址:http://z77z.oschina.io/
,,,,,,,,,,,,,,,,,,,,,,,,,,,,,,,,,
先上成果(19禁!!)
爬取的图片,一共爬了一万多张,够大家玩一阵了。。。——–羞涩。。

数据库:
存储每个图片集合的链接,标题等信息。

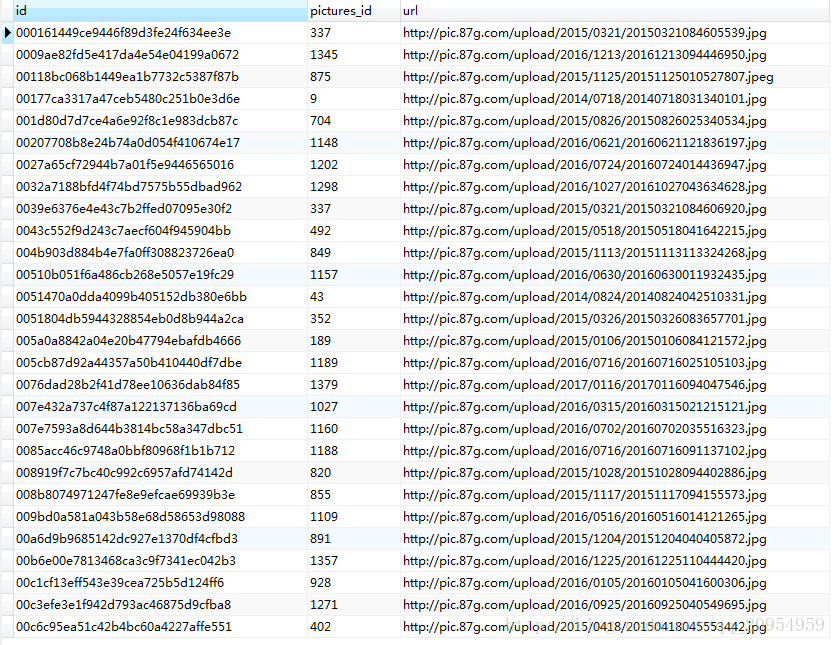
存储每张图片的链接,并且和图片集合表关联。
项目整体搭建出来后的效果

使用工具,框架介绍
这里只介绍下最近学习的框架,其他在后面用到在做介绍。这两个框架都是对现有的spring和mybatis的一个提升,而并不是替代之前的框架,使开发者能够达到敏捷开发的目的。只推荐老司机学习,新手还是建议从基础入手。
- SpringBoot
Spring由于其繁琐的配置,一度被人认为“配置地狱”,各种XML、Annotation配置,让人眼花缭乱,而且如果出错了也很难找出原因。想想之前搭建一个SSM框架,配置文件相当恼火,springboot的出现就大大减少了这些配置,甚至可以零配置文件。这里推荐一个此框架学习的博客链接:http://blog.720ui.com/page/3/
- MybatisPlus:
这个框架是国内的大神编写的,我个人认为这就是一个mybatis的一个增强工具包,好处请大家自行去官方文档查阅,这里就不再赘述了。文档链接:http://mp.baomidou.com/docs/index.html
建立数据库
这里数据来源是爬虫爬取的。这里爬虫本身就不多介绍,我之前已经写过爬虫相关文章,出门左拐,我的个人博客中。
/*
Navicat MySQL Data Transfer

Source Server         : 本地
Source Server Version : 50610
Source Host           : localhost:3306
Source Database       : crawler

Target Server Type    : MYSQL
Target Server Version : 50610
File Encoding         : 65001

Date: 2017-01-22 22:40:13
*/

SET FOREIGN_KEY_CHECKS=0;

-- ----------------------------
-- Table structure for beautiful_pictures
-- ----------------------------
DROP TABLE IF EXISTS `beautiful_pictures`;
CREATE TABLE `beautiful_pictures` (
  `id` varchar(255) NOT NULL COMMENT '美女图片爬取',
  `title` varchar(255) DEFAULT NULL,
  `url` varchar(255) DEFAULT NULL,
  `pictureurls_num` int(11) DEFAULT NULL,
  `zan` int(11) DEFAULT NULL,
  `biaoqian` varchar(255) DEFAULT NULL,
  `keywords` varchar(255) DEFAULT NULL,
  PRIMARY KEY (`id`)
) ENGINE=InnoDB DEFAULT CHARSET=utf8;

-- ----------------------------
-- Table structure for picture
-- ----------------------------
DROP TABLE IF EXISTS `picture`;
CREATE TABLE `picture` (
  `id` varchar(255) NOT NULL COMMENT '每张图片的地址',
  `pictures_id` varchar(255) DEFAULT NULL,
  `url` varchar(255) DEFAULT NULL,
  PRIMARY KEY (`id`)
) ENGINE=InnoDB DEFAULT CHARSET=utf8;
整合框架的搭建
新建项目添加配置文件
我这里使用的IDE工具是Spring Tool Suite,spring开发的首选开发工具
新建一个maven project ,选择maven-archetypr-webapp这个文件结构模版。
配置pom.xml文件和application.properties文件
pom.xml
<project xmlns="http://maven.apache.org/POM/4.0.0" xmlns:xsi="http://www.w3.org/2001/XMLSchema-instance"
    xsi:schemaLocation="http://maven.apache.org/POM/4.0.0 http://maven.apache.org/xsd/maven-4.0.0.xsd">
    <modelVersion>4.0.0modelVersion>
    <groupId>com.baomidougroupId>
    <artifactId>mybatisplus-spring-bootartifactId>
    <packaging>warpackaging>
    <version>1.0version>

    <parent>
        <groupId>org.springframework.bootgroupId>
        <artifactId>spring-boot-starter-parentartifactId>
        <version>1.4.1.RELEASEversion>
    parent>

    <dependencies>
        <dependency>
            <groupId>org.springframework.bootgroupId>
            <artifactId>spring-boot-starter-webartifactId>
        dependency>

        <dependency>
            <groupId>org.apache.tomcat.embedgroupId>
            <artifactId>tomcat-embed-jasperartifactId>
            <scope>providedscope>
        dependency>

        <dependency>
            <groupId>org.mybatis.spring.bootgroupId>
            <artifactId>mybatis-spring-boot-starterartifactId>
            <version>1.1.1version>
        dependency>

        <dependency>
            <groupId>MysqlgroupId>
            <artifactId>mysql-connector-javaartifactId>
            <version>5.1.38version>
        dependency>


        <dependency>
            <groupId>org.apache.velocitygroupId>
            <artifactId>velocityartifactId>
        dependency>


        <dependency>
            <groupId>com.alibabagroupId>
            <artifactId>druidartifactId>
            <version>1.0.26version>
        dependency>

        <dependency>
            <groupId>com.zaxxergroupId>
            <artifactId>HikariCPartifactId>
        dependency>


        <dependency>
            <groupId>com.baomidougroupId>
            <artifactId>mybatis-plusartifactId>
            <version>2.0.1version>
        dependency>


        <dependency>
            <groupId>org.springframework.bootgroupId>
            <artifactId>spring-boot-starter-testartifactId>
        dependency>
        <dependency>
            <groupId>com.jayway.restassuredgroupId>
            <artifactId>rest-assuredartifactId>
            <version>2.3.3version>
            <scope>testscope>
        dependency>

        <dependency>
            <groupId>com.alibabagroupId>
            <artifactId>fastjsonartifactId>
            <version>1.2.13version>
        dependency>

        <dependency>
            <groupId>org.jsoupgroupId>
            <artifactId>jsoupartifactId>
            <version>1.10.2version>
        dependency>
    dependencies>

    <build>
        <plugins>
            <plugin>
                <groupId>org.springframework.bootgroupId>
                <artifactId>spring-boot-maven-pluginartifactId>
            plugin>
        plugins>
    build>
project>
application.properties
#view
spring.mvc.view.prefix=/WEB-INF/view/
spring.mvc.view.suffix=.jsp

# jdbc_config
spring.datasource.url=jdbc:mysql://127.0.0.1:3306/crawler?characterEncoding=utf8
spring.datasource.username=root
spring.datasource.password=
spring.datasource.driver-class-name=com.mysql.jdbc.Driver
spring.datasource.type=com.alibaba.druid.pool.DruidDataSource

#druid_config
spring.datasource.max-active: 20
spring.datasource.initial-size: 1
spring.datasource.min-idle: 3
spring.datasource.max-wait: 60000
spring.datasource.time-between-eviction-runs-millis: 60000
spring.datasource.min-evictable-idle-time-millis: 300000
spring.datasource.test-while-idle: true
spring.datasource.test-on-borrow: false
spring.datasource.test-on-return: false
spring.datasource.poolPreparedStatements: true


# mybatis_config
mybatis.mapper-locations=classpath:io/z77z/mapper/*Mapper.xml
mybatis.typeAliasesPackage=io.z77z.entity

# log_config   DEBUG    ERROR    INFO    WARN
logging.level.root=WARN
logging.file=./logs/spring-boot-logging.log
如果pom.xml报错,大部分原因都是因为jar包没有下载成功,可以手动下载后放到maven本地仓库里面,阿里maven镜像仓库链接:http://maven.aliyun.com/nexus/#welcome
编写MybatisPlusConfig.java
对mybatisplus的一些配置,配置成Bean交给spring容器管理
@Bean
public PaginationInterceptor paginationInterceptor() {
    PaginationInterceptor page = new PaginationInterceptor();
    page.setDialectType("mysql");
    return page;
}
/**
 * 这里全部使用mybatis-autoconfigure 已经自动加载的资源。不手动指定
 * 配置文件和mybatis-boot的配置文件同步
 * @return
 */
@Bean
public MybatisSqlSessionFactoryBean mybatisSqlSessionFactoryBean() {
    MybatisSqlSessionFactoryBean mybatisPlus = new MybatisSqlSessionFactoryBean();
    mybatisPlus.setDataSource(dataSource);
    mybatisPlus.setVfs(SpringBootVFS.class);
    if (StringUtils.hasText(this.properties.getConfigLocation())) {
        mybatisPlus.setConfigLocation(this.resourceLoader.getResource(this.properties.getConfigLocation()));
    }
    mybatisPlus.setConfiguration(properties.getConfiguration());
    if (!ObjectUtils.isEmpty(this.interceptors)) {
        mybatisPlus.setPlugins(this.interceptors);
    }
    // MP 全局配置,更多内容进入类看注释
    GlobalConfiguration globalConfig = new GlobalConfiguration();
    globalConfig.setDbType(DBType.MYSQL.name());
    // ID 策略 AUTO->`0`("数据库ID自增") INPUT->`1`(用户输入ID") ID_WORKER->`2`("全局唯一ID") UUID->`3`("全局唯一ID")
    globalConfig.setIdType(3);
    mybatisPlus.setGlobalConfig(globalConfig);
    MybatisConfiguration mc = new MybatisConfiguration();
    mc.setDefaultScriptingLanguage(MybatisXMLLanguageDriver.class);
    mybatisPlus.setConfiguration(mc);
    if (this.databaseIdProvider != null) {
        mybatisPlus.setDatabaseIdProvider(this.databaseIdProvider);
    }
    if (StringUtils.hasLength(this.properties.getTypeAliasesPackage())) {
        mybatisPlus.setTypeAliasesPackage(this.properties.getTypeAliasesPackage());
    }
    if (StringUtils.hasLength(this.properties.getTypeHandlersPackage())) {
        mybatisPlus.setTypeHandlersPackage(this.properties.getTypeHandlersPackage());
    }
    if (!ObjectUtils.isEmpty(this.properties.resolveMapperLocations())) {
        mybatisPlus.setMapperLocations(this.properties.resolveMapperLocations());
    }
    return mybatisPlus;
}
使用mybatisplus的代码生成插件
MpGenerator.java
/**
 *
 * 代码生成器演示
 *
 */
public class MpGenerator {
    /**
     *
     * MySQL 生成演示
     *
     */
    public static void main(String[] args) {
        AutoGenerator mpg = new AutoGenerator();
        // 全局配置
        GlobalConfig gc = new GlobalConfig();
        gc.setOutputDir("C://");
        gc.setFileOverride(true);
        gc.setActiveRecord(true);
        gc.setEnableCache(false);// XML 二级缓存
        gc.setBaseResultMap(true);// XML ResultMap
        gc.setBaseColumnList(false);// XML columList
        gc.setAuthor("z77z");
        // 自定义文件命名,注意 %s 会自动填充表实体属性!
        // gc.setMapperName("%sDao");
        // gc.setXmlName("%sDao");
        // gc.setServiceName("MP%sService");
        // gc.setServiceImplName("%sServiceDiy");
        // gc.setControllerName("%sAction");
        mpg.setGlobalConfig(gc);
        // 数据源配置
        DataSourceConfig dsc = new DataSourceConfig();
        dsc.setDbType(DbType.MYSQL);
        dsc.setDriverName("com.mysql.jdbc.Driver");
        dsc.setUsername("root");
        dsc.setPassword("");
        dsc.setUrl("jdbc:mysql://127.0.0.1:3306/crawler?characterEncoding=utf8");
        mpg.setDataSource(dsc);
        // 策略配置
        StrategyConfig strategy = new StrategyConfig();
        //strategy.setTablePrefix("beautiful_");// 此处可以修改为您的表前缀
        strategy.setNaming(NamingStrategy.underline_to_camel);// 表名生成策略
        strategy.setInclude(new String[] { "beautiful_pictures" }); // 需要生成的表
        strategy.setInclude(new String[] { "picture" }); // 需要生成的表
        // strategy.setExclude(new String[]{"test"}); // 排除生成的表
        // 字段名生成策略
        strategy.setFieldNaming(NamingStrategy.underline_to_camel);
        // 自定义实体父类
        // strategy.setSuperEntityClass("com.baomidou.demo.TestEntity");
        // 自定义实体,公共字段
        // strategy.setSuperEntityColumns(new String[] { "test_id", "age" });
        // 自定义 mapper 父类
        // strategy.setSuperMapperClass("com.baomidou.demo.TestMapper");
        // 自定义 service 父类
        // strategy.setSuperServiceClass("com.baomidou.demo.TestService");
        // 自定义 service 实现类父类
        // strategy.setSuperServiceImplClass("com.baomidou.demo.TestServiceImpl");
        // 自定义 controller 父类
        // strategy.setSuperControllerClass("com.baomidou.demo.TestController");
        // 【实体】是否生成字段常量(默认 false)
        // public static final String ID = "test_id";
        // strategy.setEntityColumnConstant(true);
        // 【实体】是否为构建者模型(默认 false)
        // public User setName(String name) {this.name = name; return this;}
        // strategy.setEntityBuliderModel(true);
        mpg.setStrategy(strategy);
        // 包配置
        PackageConfig pc = new PackageConfig();
        pc.setParent("io");
        pc.setModuleName("z77z");
        mpg.setPackageInfo(pc);
        // 注入自定义配置,可以在 VM 中使用 cfg.abc 设置的值
        InjectionConfig cfg = new InjectionConfig() {
            @Override
            public void initMap() {
                Map map = new HashMap();
                map.put("abc", this.getConfig().getGlobalConfig().getAuthor() + "-mp");
                this.setMap(map);
            }
        };
        mpg.setCfg(cfg);
        // 自定义模板配置,可以 copy 源码 mybatis-plus/src/main/resources/template 下面内容修改,
        // 放置自己项目的 src/main/resources/template 目录下, 默认名称一下可以不配置,也可以自定义模板名称
        // TemplateConfig tc = new TemplateConfig();
        // tc.setController("...");
        // tc.setEntity("...");
        // tc.setMapper("...");
        // tc.setXml("...");
        // tc.setService("...");
        // tc.setServiceImpl("...");
        // mpg.setTemplate(tc);
        // 执行生成
        mpg.execute();
        // 打印注入设置
        System.err.println(mpg.getCfg().getMap().get("abc"));
    }
}
新建上面java文件,注释已经解释的很清楚了,这里就不多说,配置好后直接运行,就会得到相应模块代码,直接将其稍作修改放到项目中即可。
对插件生成的代码简要分析
就拿生成的mapper文件做说明:

如上图所示生成的mapper继承了一个类,是mybatisplus提供的,查看其源码可以发现,继承的类里面封装了一些常用的通用的增删改查的代码,还有对分页查询的处理。简化了开发的代码量,只需要专注于业务逻辑的编写和实现,源码如下:
/**
*
* Mapper 继承该接口后,无需编写 mapper.xml 文件,即可获得CRUD功能
*
*
* 这个 Mapper 支持 id 泛型
*
*
* @author hubin
* @Date 2016-01-23
*/
public interface BaseMapper<T> {
/**
*
* 插入一条记录
*
*
* @param entity
* 实体对象
* @return int
*/
Integer insert(T entity);
/**
*
* 根据 ID 删除
*
*
* @param id
* 主键ID
* @return int
*/
Integer deleteById(Serializable id);
/**
*
* 根据 columnMap 条件,删除记录
*
*
* @param columnMap
* 表字段 map 对象
* @return int
*/
Integer deleteByMap(@Param("cm") Map columnMap);
/**
*
* 根据 entity 条件,删除记录
*
*
* @param wrapper
* 实体对象封装操作类(可以为 null)
* @return int
*/
Integer delete(@Param("ew") Wrapper wrapper);
/**
*
* 删除(根据ID 批量删除)
*
*
* @param idList
* 主键ID列表
* @return int
*/
Integer deleteBatchIds(List idList);
/**
*
* 根据 ID 修改
*
*
* @param entity
* 实体对象
* @return int
*/
Integer updateById(T entity);
/**
*
* 根据 whereEntity 条件,更新记录
*
*
* @param entity
* 实体对象
* @param wrapper
* 实体对象封装操作类(可以为 null)
* @return
*/
Integer update(@Param("et") T entity, @Param("ew") Wrapper wrapper);
/**
*
* 根据 ID 查询
*
*
* @param id
* 主键ID
* @return T
*/
T selectById(Serializable id);
/**
*
* 查询(根据ID 批量查询)
*
*
* @param idList
* 主键ID列表
* @return List
*/
List selectBatchIds(List idList);
/**
*
* 查询(根据 columnMap 条件)
*
*
* @param columnMap
* 表字段 map 对象
* @return List
*/
List selectByMap(@Param("cm") Map columnMap);
/**
*
* 根据 entity 条件,查询一条记录
*
*
* @param entity
* 实体对象
* @return T
*/
T selectOne(@Param("ew") T entity);
/**
*
* 根据 Wrapper 条件,查询总记录数
*
*
* @param wrapper
* 实体对象
* @return int
*/
Integer selectCount(@Param("ew") Wrapper wrapper);
/**
*
* 根据 entity 条件,查询全部记录
*
*
* @param wrapper
* 实体对象封装操作类(可以为 null)
* @return List
*/
List selectList(@Param("ew") Wrapper wrapper);
/**
*
* 根据 Wrapper 条件,查询全部记录
*
*
* @param wrapper
* 实体对象封装操作类(可以为 null)
* @return List
*/
List> selectMaps(@Param("ew") Wrapper wrapper);
/**
*
* 根据 Wrapper 条件,查询全部记录
*
*
* @param wrapper
* 实体对象封装操作类(可以为 null)
* @return List
List 对于其他的生成文件大家可以依照这个思路去查看其源码,结合之前传统的SSM开发,了解其原理。
创建springboot入口Application.java
需要注意的地方我都写在注释里面了,这里我是把爬虫的启动也写在这个配置文件里面了,项目一启动就会执行爬虫。知道爬取的数据为空就停止爬取。
/**
* springboot
*
* @author z77z
*
*/
// 扫描指定包下面的mapper接口
@MapperScan("io.z77z.dao")
// 该 @SpringBootApplication 注解等价于以默认属性使用:
// @Configuration
// @EnableAutoConfiguration
// @ComponentScan
@SpringBootApplication
public class Application extends SpringBootServletInitializer implements CommandLineRunner {
@Autowired
BeautifulPicturesService beautifulPicturesService;
@Autowired
PictureService pictureService;
//入口
public static void main(String[] args) {
SpringApplication.run(Application.class, args);
}
//Java EE应用服务器配置,
//如果要使用tomcat来加载jsp的话就必须继承SpringBootServletInitializer类并且重写其中configure方法
@Override
protected SpringApplicationBuilder configure (SpringApplicationBuilder application) {
return application.sources(Application.class);
}
//springboot运行后此方法首先被调用
//实现CommandLineRunner抽象类中的run方法
@Override
public void run(String... args) throws Exception {
//返回值
int result = 1;
//访问页码
Integer page = 1;
//启动爬虫
System.out.println("爬虫开始工作!");
while(result==1){
result = crawler(page.toString());
page+=1;
if(result==0){
System.out.println("爬虫运行结束!!");
}
}
}
public int crawler(String page){
//初始化返回值
int result = 1;
//网站首页地址
String homeUrl = "http://www.87g.com/";
//接口地址
String url = "http://www.87g.com/index.php?m=content&c=content_ajax&a=picture_page&siteid=1&catid=35&page="+page;
System.out.println("当前爬取第"+ page +"页数据");
//访问接口,
JSONObject resultjson = CrawlerUtil.getReturnJson(url);
if(resultjson!=null){
//获取其value值
Collection编写测试jsp和controller
<%@ page language="java" contentType="text/html; charset=UTF-8"
    pageEncoding="UTF-8"%>

<html>
<head>
<meta http-equiv="Content-Type" content="text/html; charset=UTF-8">
<title>Insert title heretitle>
head>
<body>
    helloJsp
    <hr>${user}
body>
html>
//如果是要返回jsp页面就必须要使用@Controller而不是@RestController
@Controller
@RequestMapping("/test")
public class TestController {
@Autowired
BeautifulPicturesService beautifulPicturesService;
@RequestMapping("/test1")
public String view(Model model,Page page) {
Page pageList= beautifulPicturesService.selectPage(page);
model.addAttribute("user",JSON.toJSONString(pageList.getRecords()));
return "index";
}
} 运行
直接运行Application.java启动项目,项目会运行在springboot内嵌的web容器中,本项目是使用的内嵌tomcat容器。运行成功后,在浏览器输入http://localhost:8080/test/test1?current=2&size=10(curren代表要获取的页码,size代表要获取的数据条数)就会出现下面效果:

总结
- 使用这套框架来搭建项目,和之前SSM那套比起来简单多咯,不需要过多的考虑配置文件,着重于业务逻辑代码的编写。
- 最开始引入项目pom文件报错,手动下载jar包加入maven仓库,解决。其他地方遇到的坑,我写在代码注释里面。
- 这个整合只是一个最基础的配置,但是绝大部分需求是够用了,直接在此框架基础上横向扩展就是了,如果有复杂的需求,还需要持续学习完善。
- 之后就拿这个集成框架为基础,有什么新框架学习了就在上面练手。javaee全栈方向。