基于CentOS7搭建个人WordPress博客
LNMP环境搭建
本次实验是基于CentOS7.6 64位搭建的Linux+Nginx+MariaDB+PHP环境。
1. 安装Nginx
因为我是腾讯云的服务器,所以选择直接用yum进行安装。
- 安装Nginx
yum install nginx
- 修改配置文件
- 主配置文件
vim /etc/nginx/nginx.conf
将倒数第二个include注释掉,换成自己的配置文件。
#include /etc/nginx/conf.d/*.conf;
include /etc/nginx/conf.d/myNginx.conf;
- 添加配置文件
vim /etc/nginx/conf.d/myNginx.conf
加入以下代码:
server {
	listen       80;
	server_name  localhost;

	#charset koi8-r;
	#access_log  /var/log/nginx/host.access.log  main;

	location / {
		root   /usr/share/nginx/html;
		index  index.php index.html index.htm;
	}

	#error_page  404              /404.html;

	# redirect server error pages to the static page /50x.html
	#
	error_page   500 502 503 504  /50x.html;
	location = /50x.html {
		root   /usr/share/nginx/html;
	}

	# proxy the PHP scripts to Apache listening on 127.0.0.1:80
	#
	#location ~ \.php$ {
	#    proxy_pass   http://127.0.0.1;
	#}

	# pass the PHP scripts to FastCGI server listening on 127.0.0.1:9000

	location ~ \.php$ {
		root           /usr/share/nginx/html;
		fastcgi_pass   127.0.0.1:9000;
		fastcgi_index  index.php;
		#fastcgi_param  SCRIPT_FILENAME  /scripts$fastcgi_script_name;
		fastcgi_param  SCRIPT_FILENAME  $document_root$fastcgi_script_name;
		include        fastcgi_params;
	}

	# deny access to .htaccess files, if Apache's document root
	# concurs with nginx's one
	#
	#location ~ /\.ht {
	#    deny  all;
	#}
}
- 添加启动项
systemctl enable nginx
systemctl restart nginx
- 测试
在浏览器中,输入服务器的IP地址加端口号(如果是默认80端口,可以只输入ip),如果出现welcome to nginx! 的画面,证明Nginx已经配置成功。
2. 安装php
这里选择的是PHP7.3版本,并将扩展一起安装。
- 安装PHP
yum install epel-release
rpm -Uvh http://rpms.famillecollet.com/enterprise/remi-release-7.rpm
yum --enablerepo=remi-php73 install php php-cli php-common php-devel php-embedded php-fpm php-gd php-json php-mbstring php-mysqlnd php-opcache php-pdo php-pecl-mcrypt php-soap php-xml php-xmlrpc
- 修改配置文件
vim /etc/php-fpm.d/www.conf
将user和group修改为nginx
user = nginx
; RPM: Keep a group allowed to write in log dir.
group = nginx
- 添加启动项
systemctl enable php-fpm
systemctl restart php-fpm
- 测试
vim /usr/share/nginx/html/test.php
添加以下代码:
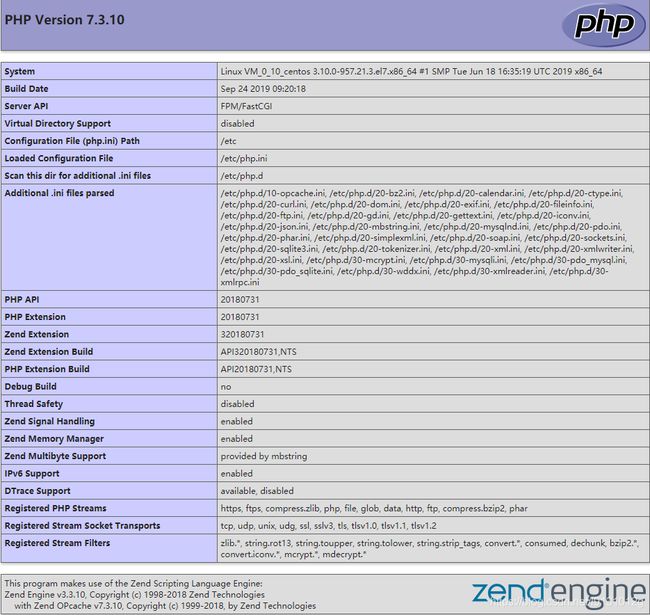
浏览器中输入:ip/test.php,如出现以下图片,证明PHP配置成功。

安装MariaDB
- 安装MariaDB10.3
这里选择的是中科大的源,参考yum配置安装国内源Mariadb数据库
vim /etc/yum.repos.d/MariaDB.repo #配置yum仓库
添加以下代码:
[mariadb]
name = MariaDB
baseurl = https://mirrors.ustc.edu.cn/mariadb/yum/10.3/centos7-amd64/
gpgkey = https://mirrors.ustc.edu.cn/mariadb/yum/RPM-GPG-KEY-MariaDB
gpgcheck=1
yum install MariaDB-server MariaDB-client #安装
- 配置MariaDB
systemctl enable mariadb
systemctl restart mariadb
启动MariaDB安全脚本
mysql_secure_installation
我是全选择的y。
- 创建WordPress数据库
#创建WordPress数据库
CREATE DATABASE wordpress;
# 创建数据库用户和密码
CREATE USER wpuser@localhost IDENTIFIED BY '777';
## 设置wordpressuser访问wordpress数据库权限
GRANT ALL PRIVILEGES ON wordpress.* TO wordpressuser@localhost IDENTIFIED BY '777';
# 刷新数据库设置
FLUSH PRIVILEGES;
安装WordPress
rm -rf /usr/share/nginx/html
wget https://wordpress.org/latest.tar.gz
tar -zxvf latest.tar.gz
mv ./wordpress /usr/share/nginx/html
chown -R nginx:nginx  /usr/share/nginx/html
chmod 0755  /usr/share/nginx/html
大功告成
接下来只需要在浏览器中输入ip地址,就可以看到WordPress选择语言的界面,然后按着步骤安装即可.