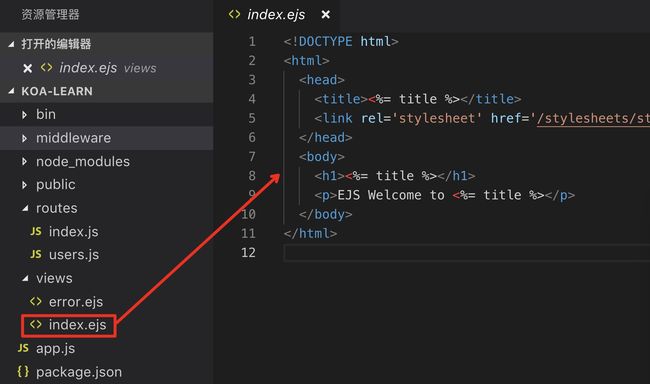
1. 安装koa脚手架的时候 执行命令 koa2 -e koa-learn
注意要使用-e的方式,才会生成ejs的模板
2. async await的使用方法:存在的意义:提高promise的可读性
async是异步函数,写成来同步的形式,如:
async()=>{
    const a = await A;
    const b = await B;
    const c = await C
}
而 Promise 是以then形式,级连往下走的:
new Promise(function(resolve,reject){   //实例一个promise对象
      if(true){
        resolve("aaaa");  //promise的第一个参数,表示成功,接下来会执行then()
      }else{
        reject("bbbbb");  //同上,表示失败,接下来会执行catch()
      }
  })      //执行函数
.then(function(result){console.log(result)})
.then(...)
具体用法区别详见: ES6学习笔记---Promise和异步函数
3.
router.get('/testAsync',async(ctx) =>{
  console.log('start');
  const a = await new Promise((resolve,reject)=>{//有了 await,先执行完异步操作之后再执行 下面的代码
    setTimeout(()=>{       //否则的话,需要用回调或者then
      console.log('async');
      resolve('a'); //相当于返回a
    },1000)
    })
  ctx.body = {  //该代码执行结果: 先在服务器端显示 start 然后 一秒之后 显示 async 最后在页面上显示a的值
    a
  }
})
4. exports、module.exports和export、export default到底是咋回事
module.exports与exports,export与export default之间的关系和区别
主要思想:
require: node 和 es6 都支持的引入export : 只有es6 支持的导出引入/ export default/ importmodule.exports / exports :只有 node 支持的导出
5. 编辑中间件:
function pv(ctx){
    console.log('pv',ctx.path);
}
module.exports = function(){//由于调用 使用的是 app.use(pv()),即抛出的需要是个函数
    return async function (ctx,next){
        pv(ctx)
        await next();//使用异步函数,执行完该中间件之后,再执行下一个中间件的代码
    }
}
并且在app.js中,调用:
const pv = require('./middleware/koa-pv');
app.use(pv())
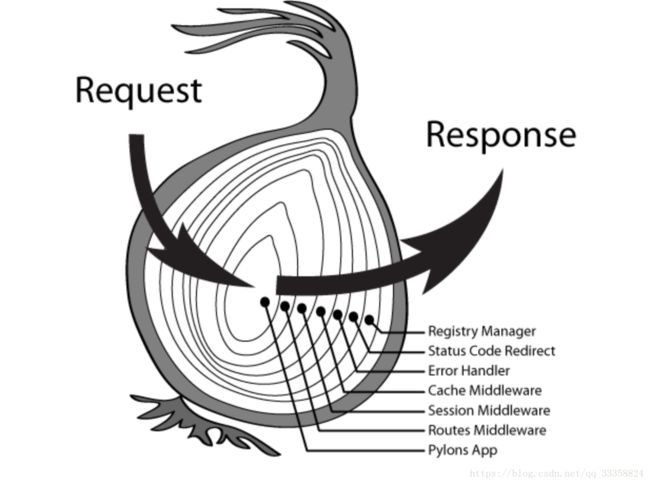
6. 中间件的洋葱结构:
执行下面的中间件,改为m1 m2 m3
function m1(ctx){
    console.log('m1');
}
module.exports = function(){
    return async function (ctx,next){
        console.log('m1 start')
        m1(ctx)
        await next();
        console.log('m1 end');
    }
}
执行顺序为:
app.use(m1());
app.use(m2());
app.use(m3());
最终结果为:
m1 start
m1
m2 start
m2
m3 start
m3
----
m3 end
m2 end
m1 end
注意 end的命令在 await next() 后面
7. koa-router 路由;
router.prefix('/users) //给路由加前缀
router.get('/', async (ctx, next) => {
  await ctx.render('index', {//渲染页面
    title: 'Hello Koa 2!'
  })
})
router.get('/string', async (ctx, next) => {
  ctx.body = 'koa2 string'//渲染接口
})
调用路由:
app.use(users.routes(), users.allowedMethods())
注意,这里是固定用法,将路由注册到全局上,users是引入的路由,如 const users = require('./routes/users') 后面注意是 routes()
8.服务器端的cookie和session;
访问某个接口的时候,设置cookie
router.get('/', async (ctx, next) => {
  ctx.cookies.set('pvid',Math.random()) //设置cookie的值
  await ctx.render('index', { //这里的index 指的是view中的模板文件的路径
    title: 'Hello Koa 2!'
  })
})

