游戏角色动画:从入门到商用(一)
2D游戏中的角色由两种方案,第一种是骨骼动画,骨骼动画的好处是节省资源,减少空间占用;但是缺点是表现力差,一般只做侧面2方向,主要用于横板过关类的游戏。
第二种是逐帧动画,逐帧动画理论上来将可以做任意多个方向,但每1个方向就是1套序列帧,会占用大量的内存,因此一般是采用1方向,4方向和8方向。其中1方向的一般是npc,只是正面朝向玩家,4方向和8方向的一般位普通角色,细节要求不高的话,可以利用翻转节省对称方向的资源。传统的经典2D游戏,梦幻,大话,神武,传奇等都是采用这种方式实现的。
一 动画资源设计
- 方向(5方向模拟8方向)
- 上:0
- 右上:1
- 右:2
- 右下:3
- 下:4
- 左下(右上1翻转):5
- 左(右2翻转):6
- 左上(右下3翻转):7
- 换装
- 身体
- 武器
- 翅膀
- 其他
- 动作:
- idle 空闲
- war 战斗状态
- run 跑步
- die 死亡
- struck 受击
- spell 持续施法
- appear 出现
- disappear 消失
- sneak 潜行
- attack 普攻
- skill0、skill1、skill2、… 技能动作
- 输出资源命名:
- 目录命名:角色编号,角色编号由6位组成,包括:
- 类型2位,如:
- 10 表示角色
- 20 小怪
- 30 boss
- 40 npc
- 职业2位
- 01 战士
- 02 法师
- 03 道士
- 序号2位:从00开始递增,表示该角色的资源数
- 类型2位,如:
- 图片资源命名:部位_角色编号_动作名_方向_帧序号
- 部位:
- 身体:body
- 武器:weapon
- 翅膀:wing
- 角色编号:即目录名
- 动作名,idle、run 等
- 方向:1位,0-7
- 帧序号:2位,从00开始,按播放顺序递增
- 部位:
- 目录命名:角色编号,角色编号由6位组成,包括:
二 编辑器实现帧动画
介绍下 demo 环境:
- 系统 win10
- 游戏引擎 cocos creator 2.4
- 脚本语言 typescript
首先入门版,使用 cocos creator 动画编辑器,做一个帧动画,为了节省时间,只做下角色身体 body 空闲动作 idle 下方向 4 的动画。cocos create 帧动画制作参考文档,通过以下步骤:
- 导入帧动画资源
- 添加一个 Sprite 节点
- 在 Sprite 节点添加 Animation 组件
- 创建动画剪辑 idle,添加 cc.Sprite.spriteFrame 属性
- 设置每个关键帧的纹理
- WrapMode 改为 Loop
- 将新建的 Clip 设为 Default Clip
- 勾选 Play On Load
- 运行场景
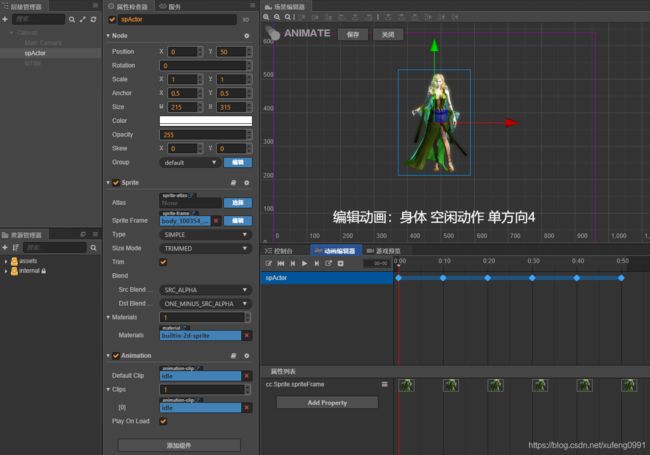
这样不需要任何代码,就可以快速在场景中制作一个角色的帧动画。
三 动态创建动画
一般游戏角色都会有很多动作,如果每个动作的动画都需要在编辑器中编辑实现,会耗费大量时间。因此需要使用代码创建帧动画,参考文档,动态添加动画组件,创建动画剪辑。
- 在脚本中声明一个 Sprite 变量 spPlayer,保存玩家节点
- 声明一个 cc.SpriteFrame 变量 spPlayerFrames,保存帧动画每帧的纹理
- 在编辑器中创建一个精灵,对上述两个变量赋值
- 使用代码创建动画剪辑,然后循环播放动画
    @property(cc.Node)
    ndActor: cc.Node = null;// 角色节点

    @property([cc.SpriteFrame])
    spPlayerFrames: cc.SpriteFrame[] = [];

    animation: cc.Animation = null;

    onLoad() {
        let clipName: string = "idle"; // 动画剪辑名字,播放动画时使用
        let sample: number = 6; // 帧率,即一秒钟播放多少帧

        this.ceateAnimation(clipName, sample, this.spPlayerFrames);
        this.playAnimation(clipName, cc.WrapMode.Loop);
    }

    ceateAnimation(clipName: string, sample: number, spriteFrames: cc.SpriteFrame[]) {
        // 创建动画剪辑
        let animation = this.ndActor.addComponent(cc.Animation);
        let clip: cc.AnimationClip = cc.AnimationClip.createWithSpriteFrames(spriteFrames, sample);
        animation.addClip(clip, clipName);
    }

    playAnimation(clipName: string, mode: cc.WrapMode) {
        // 播放动画
        let aniState: cc.AnimationState = this.ndActor.getComponent(cc.Animation).play(clipName);// 播放动画
        aniState.wrapMode = mode;// 循环播放
    }
代码中,动态创建了动画剪辑,然后播放动态创建的动画剪辑。修改之后,将动画创建从编辑器移到了代码中,此时需要运行之后才能看到效果。
四 动态加载资源
上述过程中动画虽然动态创建了,但是精灵帧还是手动从编辑器中拖,将精灵帧也改为动态加载。
- 删除关联的中的 spPlayer 节点和 spPlayerFrames 序列帧
- 动态创建角色节点 ndPlayer
- 动态加载序列帧动画资源到 spPlayerFrames 中
- 使用代码创建动画剪辑
- 循环播放动画
    ndActor: cc.Node = null; // 角色节点
    spPlayerFrames: cc.SpriteFrame[] = []; // 保存加载的帧动画资源
    loadIndex: number = 0; // 已加载下标
    loadTotalCnt: number = 6; // 动画帧数
    animation: cc.Animation = null; // 角色动画组件

    onLoad() {
        this.ndActor = this.createActorNode();
        this.loadSpriteFrames();
    }

    loadSpriteFrames() {
        // 加载帧动画资源
        if (this.loadIndex >= this.loadTotalCnt) {
            this.ceateAnimation();
            return;
        }
        let url = "demo/piece/100354/body_100354_idle_4_0" + this.loadIndex;
        cc.resources.load(url, cc.SpriteFrame, (error: Error, spriteFrame: cc.SpriteFrame) => {
            if (error) {
                console.error(error.message || error);
            }
            this.loadIndex += 1;
            this.spPlayerFrames.push(spriteFrame);
            this.loadSpriteFrames();
        });
    }

    ceateAnimation() {
        // 资源加载完成,播放动画
        let clipName = "idle"; // 动画剪辑名字,播放动画时使用
        let sample = 6; // 帧率,即一秒钟播放多少帧
        this.createAnimationClip(clipName, sample, this.spPlayerFrames);
        this.playAnimation(clipName, cc.WrapMode.Loop);
    }

    createActorNode() {
        // 创建角色节点
        let node = new cc.Node();
        node.parent = this.node;
        node.addComponent(cc.Sprite);
        node.addComponent(cc.Animation);
        return node;
    }
代码中新增了方法 loadSpriteFrames,动态的从图片中加载动画纹理。经过这两步,将动画创建完全从编辑器移到了代码中。
五 将资源打成图集
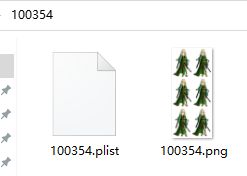
一般游戏中将会有很多帧动画资源,为了降低 Draw Call,优化 IO,需要将帧动画得资源打成一个图集,打图集一般使用得是 TexurePacker,然后在代码中动态加载图集,获取其中的精灵帧创建动画。步骤如下:
- 使用 TexturePacker 将动画序列帧打包成图集
- 动态创建角色节点 ndPlayer
- 动态加载图集
- 用图集中的精灵帧创建动画剪辑
- 循环播放动画
    loadSpriteFrames() {
        let url = "demo/sheet/simple/100354";
        cc.resources.load(url, cc.SpriteAtlas, (error: Error, spriteAtlas: cc.SpriteAtlas) => {
            if (error) {
                console.error(error.message || error);
                return;
            }

            this.spPlayerFrames = spriteAtlas.getSpriteFrames();
            this.spPlayerFrames.sort();
            this.ceateAnimation();
        });
    }
代码跟上一节的差不多,只改了 loadSpriteFrames 这个方法,精灵帧由从图片一张一张加载,改到从图集中一次性加载。
六 加载多图集资源
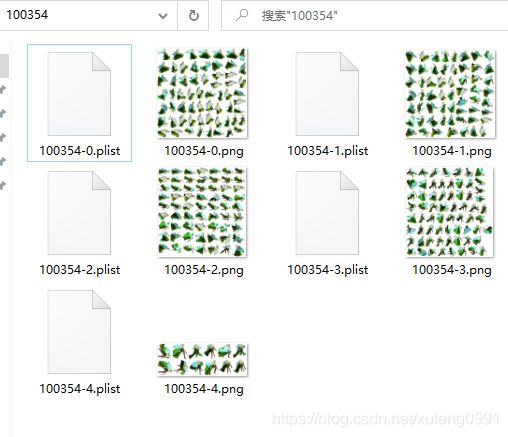
一个角色有多个动作,每个动作又有不同方向。在打图集时,为了兼容性,一般最大尺寸都设置成 1024 * 1024,因此一个角色就会产生多张图集。之前的都只加载了 idle 动作方向 4 的资源,本节把角色身体的全部动作和方向的动画都加载进游戏。
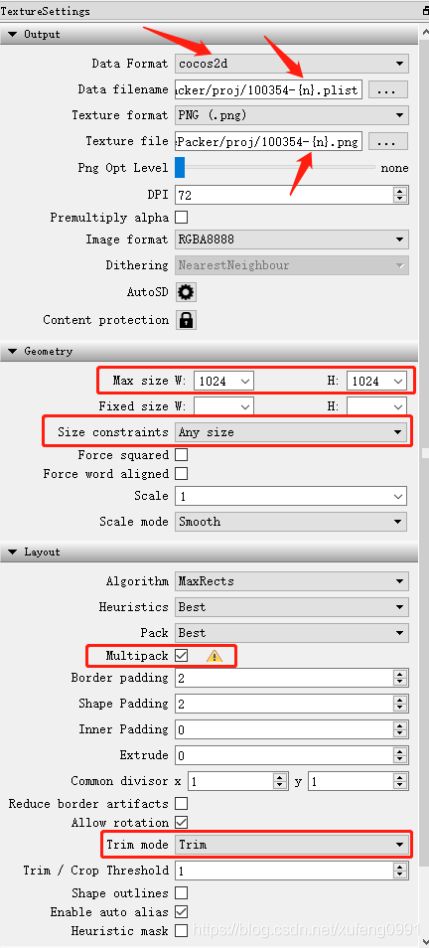
- 打包多图集资源:
- 在 TexturePacker 中勾选
Multipack - 最大尺寸
Max-size设为1024,尺寸限制Size Constraints改为AnySize - 修改导出 png 和 plist,在后缀前加上
-{n},例如player-{n}.png、player-{n}.plist - 生成图集,可以看到命名是 player-0.png、player-0.plist, player-1.png、player-1.plist等
- 在 TexturePacker 中勾选
- 动态创建角色节点 ndPlayer
- 动态加载多个图集
- 根据动作和方向,缓存图集中的精灵帧
- 创建动画剪辑
- 循环播放动画
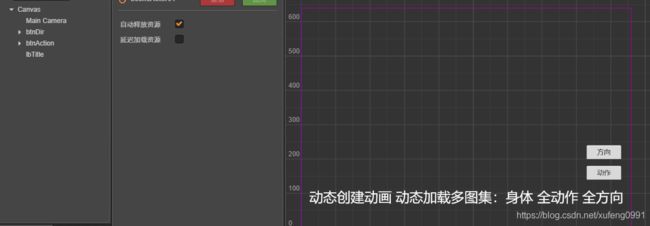
- 载界面上添加两个按钮
- 在按钮的响应事件中,分别切换动画方向和动作
    ndActor: cc.Node = null; // 角色节点
    spPlayerFrameMap: {[actionName: string]: {[actionName_dir: string]: cc.SpriteFrame[]}} = {}; // 保存加载的帧动画资源
    loadIndex: number = 0; // 已加载下标
    loadTotalCnt: number = 5; // 图集数量
    dir: number = 4; // 方向
    actions: string[] = [];// 动作列表
    actionIndex: number = 0;// 动作下标

    onLoad() {
        this.ndActor = this.createActorNode();
        this.loadSpriteFrames();
    }

    loadSpriteFrames() {
        // 加载帧动画资源
        if (this.loadIndex >= this.loadTotalCnt) {
            // 排序以保证帧序列顺序
            for (let actionName in this.spPlayerFrameMap) {
                if (this.actions.indexOf(actionName) < 0) {
                    this.actions.push(actionName);
                }
                for (let dir in this.spPlayerFrameMap[actionName]) {
                    this.spPlayerFrameMap[actionName][dir].sort();
                    let frames = this.spPlayerFrameMap[actionName][dir]
                    this.createAnimationClip(actionName, parseInt(dir), frames.length, frames);
                }
            }
            let actionName = "idle";
            this.actionIndex = this.actions.indexOf(actionName);
            this.playAnimation(actionName, this.dir, cc.WrapMode.Loop);
            return;
        }
        let url = "demo/sheet/plist/100354-" + this.loadIndex;
        cc.resources.load(url, cc.SpriteAtlas, (error: Error, spriteAtlas: cc.SpriteAtlas) => {
            if (error) {
                console.error(error.message || error);
                return;
            }

            this.onLoadAtlas(spriteAtlas);

            this.loadIndex += 1;
            this.loadSpriteFrames();
        });
    }

    onLoadAtlas(spriteAtlas: cc.SpriteAtlas) {
        let frames = spriteAtlas.getSpriteFrames();
        let name, actionName, dir;
        for (let i = 0; i < frames.length; i++) {
            name = frames[i].name.split("_");
            actionName = name[2]
            if (!this.spPlayerFrameMap[actionName]) {
                this.spPlayerFrameMap[actionName] = {};
            }
            dir = name[3]
            if (!this.spPlayerFrameMap[actionName][dir]) {
                this.spPlayerFrameMap[actionName][dir] = [];
            }
            this.spPlayerFrameMap[actionName][dir].push(frames[i]);
        }
    }

    createActorNode() {
        // 创建角色节点
        let node = new cc.Node();
        node.parent = this.node;
        node.addComponent(cc.Sprite);
        node.addComponent(cc.Animation);
        return node;
    }

    createAnimationClip(actionName: string, dir: number, sample: number, spriteFrames: cc.SpriteFrame[]) {
        // 创建动画剪辑
        let clipName = actionName + "_" + dir;
        let clip = cc.AnimationClip.createWithSpriteFrames(spriteFrames, sample);
        this.ndActor.getComponent(cc.Animation).addClip(clip, clipName);
    }

    playAnimation(actionName, dir, mode) {
        let real_dir = this.getRealDir(dir);
        let clipName = actionName + "_" + real_dir;
        this.ndActor.scaleX = dir < 5 ? 1 : -1;

        // 播放动画
        let aniState = this.ndActor.getComponent(cc.Animation).play(clipName);// 播放动画
        aniState.wrapMode = mode;// 循环播放
    }

    getRealDir(dir) {
        if (dir < 5) {
            return dir;
        } else if (dir === 5) {
            return 3;
        } else if (dir === 6) {
            return 2;
        } else if (dir === 7) {
            return 1;
        } else {
            return this.getRealDir(dir % 8);
        }
    }

    onClickDir() {
        this.dir = (this.dir + 1) % 8;
        this.playAnimation(this.actions[this.actionIndex], this.dir, cc.WrapMode.Loop);
    }

    onClickAction() {
        this.actionIndex = (this.actionIndex + 1) % this.actions.length;
        this.playAnimation(this.actions[this.actionIndex], this.dir, cc.WrapMode.Loop);
    }
图集的加载,从上一节中的1张,变成了多张。因为这一节新增了多个动作和方向,加载过程中将所有精灵帧通过动作和方向,存在spPlayerFrameMap中,加载完成之后创建动画剪辑。因为是5方向模拟8方向,新增了翻转。

回顾以下,每一小节都做了什么:
- 编辑器中创建了帧动画
- 动画创建帧动画
- 动态加载每帧资源
- 将动画资源打成单图集
- 加载多图集
一般小游戏到这一步就差不多了,后面自己进一步封装一些功能就可以了。如果游戏比较重度,那么还需要进一步的优化,且看游戏角色动画:从入门到商用(二)。

