ios自定义中间凸出 UITabBar,so easy……

IOS 自定义UITabBar ,中间按钮凸出

很多项目中都有中间凸出的UI设计,这个不规则的设计才坑爹,必须要自定义。在安卓上 做这个也是坑,现在只说ios的实现。


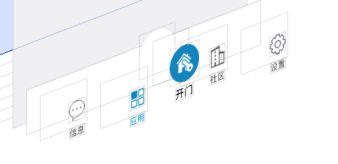
示意图:
ios自定义中间凸出 UITabBar,so easy……_第1张图片

问题和难点:

  1. 横线,凸出部分上的黑色半圆线;
  2. 超出UITabbr部分的点击事件;
  3. UITabBar 隐藏后,上面自定义的凸出按钮隐藏。
  4. 按钮点击事件传递。

方案:

  1. 自定义UITabBar;
  2. 重写UITabBar的layoutSubviews,重新排列底部的UITabBarButton,并在中间加入自定义的按钮,添加点击监听,处理点击事件。
  3. 自定义UITabBarController ,通过kvc 替换自己的UITabBar;

解决:

ios自定义中间凸出 UITabBar,so easy……_第2张图片

我的解决方法:
1、中间的是一个圆形图片按钮,下面是一个UIlabel,组成了中间的按钮。
2、在自定义的UITab 上自己画一条横线,流出中间部分不画。
3、在中间加入一个自定义的UIView,在UIView中画半圆,设置UIView 的masksToBounds为YES;设置layer的cornerRadius 为他的宽高的一半,这样他就是一个白色的半圆,并有一个黑色半圆。

1.自定义半圆UIView

//H 文件:

#define SINGLE_LINE_WIDTH           (1 / [UIScreen mainScreen].scale)
#define SINGLE_LINE_ADJUST_OFFSET   ((1 / [UIScreen mainScreen].scale) / 2)

@interface GBArcView : UIView

@end

//M 文件:
#import "GBArcView.h"
#import "UIView+Extension.h"// 用了其他代码,这个大家自己找一下

@implementation GBArcView


//绘制半圆
- (void)drawRect:(CGRect)rect {


    CGContextRef context = UIGraphicsGetCurrentContext();

    CGContextSetStrokeColorWithColor(context, RGB_COLOR(200, 200, 200).CGColor);


    CGContextSetLineWidth(context, SINGLE_LINE_WIDTH);
    CGContextBeginPath(context);
    CGFloat lineMargin =self.width*0.5f;

    //1px线,偏移像素点
    CGFloat pixelAdjustOffset = 0;
    if (((int)(1 * [UIScreen mainScreen].scale) + 1) % 2 == 0) {
        pixelAdjustOffset = SINGLE_LINE_ADJUST_OFFSET;
    }


    CGFloat yPos = self.width*0.5f - pixelAdjustOffset;

     CGFloat xPos = self.width*0.5f - pixelAdjustOffset;

    CGContextAddArc(context, xPos, yPos, self.width*0.5f, M_PI, 0, 0);


    CGContextStrokePath(context);


}

2、自定义UITabbar

//H 文件
#import 

@class GBTabBar;

//自定义按钮点击事件代理
@protocol GBTabBarViewDelegate <NSObject>

- (void) mainTabBarViewDidClick : (GBTabBar *)hBTabBarView;


@end

@interface GBTabBar : UITabBar

@property(nonatomic,weak) id tabbarDelegate;

@end


//M 文件


#import "GBTabBar.h"
#import 
#import "UIView+Extension.h"
#import "GBArcView.h"


@interface GBTabBar()

@property (nonatomic,strong) UIButton *addButton;//自定义圆形图片按钮

@property (nonatomic,strong) UILabel *titleLabel;//中间自定义文本
@property (nonatomic,strong) GBArcView *view; //半圆View

@property(assign,nonatomic)int index;//UITabBar子view的索引
@end

@implementation GBTabBar


//绘制横线
- (void)drawRect:(CGRect)rect {


    //中间的按钮宽度是UItabBar的高度,其他按钮的宽度就是,(self.width-self.height)/4.0

    CGFloat buttonW = (self.width-self.height)/4.0;


    CGContextRef context = UIGraphicsGetCurrentContext();

    CGContextSetStrokeColorWithColor(context, RGB_COLOR(200, 200, 200).CGColor);


    CGContextSetLineWidth(context, SINGLE_LINE_WIDTH);
    CGContextBeginPath(context);
    CGFloat lineMargin =0;

  //1PX线,像素偏移
    CGFloat pixelAdjustOffset = 0;
    if (((int)(1 * [UIScreen mainScreen].scale) + 1) % 2 == 0) {
        pixelAdjustOffset = SINGLE_LINE_ADJUST_OFFSET;
    }


    CGFloat yPos = lineMargin - pixelAdjustOffset;

    //第一段线
    CGContextMoveToPoint(context, 0, yPos);
    CGContextAddLineToPoint(context, buttonW*2+SINGLE_LINE_WIDTH*2, yPos);
    CGContextStrokePath(context);

    //第二段线

    CGContextMoveToPoint(context, buttonW*2+self.height-SINGLE_LINE_WIDTH*2, yPos);
    CGContextAddLineToPoint(context, self.bounds.size.width, yPos);

    CGContextSetStrokeColorWithColor(context, RGB_COLOR(200, 200, 200).CGColor);
    CGContextStrokePath(context);


}

//自定义的按钮点击事件处理,如果点击的点在自定义的按钮中,就返回自定义按钮处理事件。如果不处理,那么按钮只有在UITabrBar 中的 一半可以被点击,有点击事件响应。
-(UIView *)hitTest:(CGPoint)point withEvent:(UIEvent *)event{

    //判断点是否在按钮上,如果是就让按钮处理事件
    if(CGRectContainsPoint(self.addButton.frame, point)){
        return self.addButton ;
    }


   return  [super hitTest:point withEvent:event];

}


- (instancetype)initWithFrame:(CGRect)frame
{
    self = [super initWithFrame:frame];
    if (self) {


    }
    return self;
}

//重新初始化方法,从stroyboard 中加载,会调用
-(instancetype)initWithCoder:(NSCoder *)aDecoder{


    if (self = [super initWithCoder:aDecoder]) {

        self.backgroundColor=[UIColor whiteColor];
        self.clipsToBounds=NO;//不裁剪子控件
        self.index=0;//初始化索引

        //设置tabBaritem 的文字颜色
        [[UITabBarItem appearance] setTitleTextAttributes:[NSDictionary dictionaryWithObjectsAndKeys:RGB_COLOR(74, 74, 74), UITextAttributeTextColor, nil] forState:UIControlStateNormal];

        [[UITabBarItem appearance] setTitleTextAttributes:                                                         [NSDictionary dictionaryWithObjectsAndKeys:RGB_COLOR(0, 147, 197),UITextAttributeTextColor, nil]forState:UIControlStateSelected];

    }
    return self;
}
//自定义按钮的懒加载
-(UIButton *)addButton{


    if(!_addButton){


        UIButton *button=[[UIButton alloc] init];
        self.addButton = button;
        [self.addButton setImage:[UIImage imageNamed:@"tab_open"] forState:UIControlStateNormal];
        [self.addButton addTarget:self action:@selector(addClick) forControlEvents:UIControlEventTouchUpInside];
        [self addSubview:self.addButton];
    }


    return _addButton;
}


//自定义半圆View的懒加载
-(UIView *)view{


    if(!_view){

       CGFloat buttonW = (self.width-self.height)/4.0;


        GBArcView *view = [[GBArcView alloc]initWithFrame:CGRectMake(buttonW*2, -self.height*0.5f, self.height, self.height)];


        view.backgroundColor=[UIColor whiteColor];

        view.layer.masksToBounds=YES;
        view.layer.cornerRadius=self.height*0.5f;


        _view=view;

        [self addSubview:view];


    }


    return _view;

}


-(UILabel *)titleLabel{

    if(!_titleLabel){


        UILabel *titleLabel=[[UILabel alloc] init];

        titleLabel.text=@"开门";
        titleLabel.textColor=[UIColor blackColor];

        titleLabel.font=[UIFont systemFontOfSize:12.0];
        [titleLabel sizeToFit];

       _titleLabel = titleLabel;

        [self addSubview:titleLabel];
    }


    return _titleLabel;
}


//重写layoutSubviews,重新排布子View

-(void)layoutSubviews{

    self.index=0;
    [super layoutSubviews];


    CGFloat buttonW = SCREEN_WIDTH * 0.2 ;//SCREEN_WIDTH * 0.2

    for (int i = 0; i < self.subviews.count; i ++) {
        UIView *view = self.subviews[i];


        if ([view isKindOfClass:NSClassFromString(@"UITabBarButton")]) {

            CGRect rect=view.frame;
            rect.size.width=buttonW;

            rect.size.height=self.frame.size.height;
            rect.origin.y=0;

            view.frame =rect;

            if(self.index<2){
             view.x=self.index*buttonW;

            }else if(self.index>=2){

                view.x=self.index*buttonW +buttonW;

            }
            self.index++;

        }
    }


    //懒加载 等所有控件排布后,然后 设置自定义的view,这里注意顺序,先设置背景的半圆view的Frame,然后设置按钮的Frame,否则半圆view会挡住按钮。
    self.view.x=2 * (self.width-self.height)/4.0;
    self.addButton.width = self.height;
    self.addButton.height = self.height;
    self.addButton.y = -self.height*0.5f;
    self.addButton.x = 2 * (self.width-self.height)/4.0;

    self.titleLabel.center=CGPointMake(self.width*0.5f, CGRectGetMaxY(self.addButton.frame)+self.titleLabel.bounds.size.height*0.5f);

}


-(void)setHidden:(BOOL)hidden{


    [super setHidden:hidden];


    //手动设置UITabBar 隐藏时,我们要将自定义的按钮和背景隐藏
    [self.view setHidden:hidden];

    [self.addButton setHidden:hidden];


}
//******核心部分******
//当配置  hidesBottomBarWhenPushed 的viewController ,隐藏UITabBar时,会改变其frame,就是将UITabBar 的Y值设为屏幕最大的y值,就不可见。我们重写这个方法,判断当frame的y小于屏幕的高度 ,那么UITabBar就是被隐藏了,这时候我们将自定的控件隐藏。相反的,我们就显示我们的自定义控件。
-(void)setFrame:(CGRect)frame{
     [super setFrame:frame];

    if(frame.origin.y>=[UIScreen mainScreen].bounds.size.height){

        [self.view setHidden:YES];

        [self.addButton setHidden:YES];
    }else{
        [self.view setHidden:NO];
        [self.addButton setHidden:NO];

    }
}


- (void)addClick
{

//代理点击事件
    if ([self.tabbarDelegate respondsToSelector:@selector(mainTabBarViewDidClick:)]) {
        [self.tabbarDelegate mainTabBarViewDidClick:self];
    }
}


补一个图,这个是UITabbar隐藏的时候,截取的,可以看出被移动到屏幕最下方。

ios自定义中间凸出 UITabBar,so easy……_第3张图片


3、自定义UITabBarController

这里比较简单了,就是替换系统的UItabbr 为自己的UItabbar;
由于我的项目是stroyboard 写的,替换比较简单。


@interface HomeTabBarController ()<GBTabBarViewDelegate>

@property (nonatomic, strong) NSArray *items;
@end

@implementation HomeTabBarController


- (void)viewDidLoad {
    [super viewDidLoad];

   //tabBar是UITabBarController的只读成员变量(属性),是不让修改的
   //kvc 替换系统的tabbar
  //  GBTabBar *tabBar = [[GBTabBar alloc] init];
  //  [self setValue:tabBar forKeyPath:@"tabBar"];


   //已经替换的UItabbar 设置代理为当前控制器
    [self.tabBar setValue:self forKey:@"tabbarDelegate"];


}


//代理方法 ,自定义按钮点击
-(void)mainTabBarViewDidClick:(GBTabBar *)hBTabBarView{


}

你可能感兴趣的:(ios)