k8s集群部署nfs+gitlab
1.为什么搭建nfs服务器?
因为我们要使用nfs作为持久化存储,创建的pv后端存储时需要nfs,所以需要搭建nfs服务。
2.安装nfs服务
选择自己的任意一台机器,我选择k8s的master1节点,对应的机器ip是192.168.0.6,在192.168.0.6上执行如下步骤,大家在自己环境找一台k8s节点的机器安装就可以了~
(1) 安装nfs
yum install nfs-utils -y
systemctl start nfs
chkconfig nfs on
(2)在master1上创建一个nfs共享目录
mkdir  /data/v3   -p
mkdir  /data/v4
mkdir  /data/v5

vim  /etc/exports
/data/v3     192.168.1.0/24(rw,no_root_squash)
/data/v4     192.168.1.0/24(rw,no_root_squash)
/data/v5     192.168.1.0/24(rw,no_root_squash)

exportfs -arv   #使配置文件生效
systemctl restart nfs
(3)k8s的各个node节点也需要安装nfs
yum install nfs-utils -y
systemctl start nfs
chkconfig nfs on
创建安装gitlab需要的pv和pvc
1.创建一个名称空间
kubectl create ns kube-ops
2.创建gitlab需要的pv和pvc
vim pv_pvc_gitlab.yaml

apiVersion: v1
kind: PersistentVolume
metadata:
  name: gitlabt
spec:
  capacity:
    storage: 10Gi
  accessModes:
  - ReadWriteMany
  persistentVolumeReclaimPolicy: Delete
  nfs:
    server: 192.168.1.251  #这个就是nfs服务端的机器ip,也就是k8s的master1节点ip
    path: /data/v5
---
kind: PersistentVolumeClaim
apiVersion: v1
metadata:
  name: gitlabt
  namespace: kube-ops
spec:
  accessModes:
    - ReadWriteMany
  resources:
    requests:
      storage: 10Gi
通过kubectl apply更新yaml文件
kubectl apply -f pv_pvc_gitlab.yaml
查看pv和pvc是否绑定
kubectl get pvc -n kube-ops
显示如下,说明绑定成功了
NAME      STATUS   VOLUME    CAPACITY   ACCESS MODES   STORAGECLASS   AGE
data      Bound    data      20Gi       RWX                           4h14m
3.创建postsql的pv和pvc
vim pv_pvc_postsql.yaml

apiVersion: v1
kind: PersistentVolume
metadata:
  name: postsql
spec:
  capacity:
    storage: 10Gi
  accessModes:
  - ReadWriteMany
  persistentVolumeReclaimPolicy: Delete
  nfs:
    server: 192.168.1.251
    path: /data/v4
---
kind: PersistentVolumeClaim
apiVersion: v1
metadata:
  name: postsql
  namespace: kube-ops
spec:
  accessModes:
    - ReadWriteMany
  resources:
    requests:
      storage: 10Gi
通过kubectl apply更新yaml文件
kubectl apply -f pv_pvc_postsql.yaml
查看pv和pvc是否绑定
kubectl get pvc -n kube-ops
显示如下,说明postsql的pvc和pv绑定成功了
NAME      STATUS   VOLUME    CAPACITY   ACCESS MODES   STORAGECLASS   AGE
gitlabt   Bound    gitlabt     10Gi         RWX                      4h17m
postsql   Bound    postsql     10Gi         RWX                      4h15m
4.创建redis的pv和pvc
vim  pv_pvc_redis.yaml

apiVersion: v1
kind: PersistentVolume
metadata:
  name: data
spec:
  capacity:
    storage: 20Gi
  accessModes:
  - ReadWriteMany
  persistentVolumeReclaimPolicy: Delete
  nfs:
    server: 192.168.1.251
    path: /data/v3
---
kind: PersistentVolumeClaim
apiVersion: v1
metadata:
  name: data
  namespace: kube-ops
spec:
  accessModes:
    - ReadWriteMany
  resources:
    requests:
      storage: 20Gi
通过kubectl apply更新yaml文件
kubectl apply -f pv_pvc_redis.yaml
查看pv和pvc是否绑定
kubectl get pvc -n kube-ops
显示如下,说明gitlab的pvc和pv绑定成功了
NAME      STATUS   VOLUME    CAPACITY   ACCESS MODES   STORAGECLASS   AGE
data      Bound    data      20Gi       RWX                           4h14m
gitlabt   Bound    gitlabt   10Gi       RWX                           4h17m
postsql   Bound    postsql   10Gi       RWX                           4h15m
安装postgresql服务
vim  gitlab-postgresql.yaml

apiVersion: apps/v1
kind: Deployment
metadata:
  name: postgresql
  namespace: kube-ops
  labels:
    name: postgresql
spec:
  selector:
    matchLabels:
       name: postgresql
  template:
    metadata:
      name: postgresql
      labels:
        name: postgresql
    spec:
      containers:
      - name: postgresql
        image: sameersbn/postgresql:10
        imagePullPolicy: IfNotPresent
        env:
        - name: DB_USER
          value: gitlab
        - name: DB_PASS
          value: passw0rd
        - name: DB_NAME
          value: gitlab_production
        - name: DB_EXTENSION
          value: pg_trgm
        ports:
        - name: postgres
          containerPort: 5432
        volumeMounts:
        - mountPath: /var/lib/postgresql
          name: data
        livenessProbe:
          exec:
            command:
            - pg_isready
            - -h
            - localhost
            - -U
            - postgres
          initialDelaySeconds: 30
          timeoutSeconds: 5
        readinessProbe:
          exec:
            command:
            - pg_isready
            - -h
            - localhost
            - -U
            - postgres
          initialDelaySeconds: 5
          timeoutSeconds: 1
      volumes:
      - name: data
        persistentVolumeClaim:
          claimName: postsql
---
apiVersion: v1
kind: Service
metadata:
  name: postgresql
  namespace: kube-ops
  labels:
    name: postgresql
spec:
  ports:
    - name: postgres
      port: 5432
      targetPort: postgres
  selector:
    name: postgresql
通过kubectl apply更新yaml文件
kubectl apply -f gitlab-postgresql.yaml
查看postgresql是否部署成功
kubectl get pods -n kube-ops
显示如下,说明postgresql部署成功
NAME                          READY   STATUS    RESTARTS   AGE
postgresql-79f85cdfb4-klfb7   1/1     Running   0          4h20m
安装gitlab需要的redis服务
vim  gitlab-redis.yaml

apiVersion: apps/v1
kind: Deployment
metadata:
  name: redis
  namespace: kube-ops
  labels:
    name: redis
spec:
  selector:
    matchLabels:
      name: redis
  template:
    metadata:
      name: redis
      labels:
        name: redis
    spec:
      containers:
      - name: redis
        image: sameersbn/redis
        imagePullPolicy: IfNotPresent
        ports:
        - name: redis
          containerPort: 6379
        volumeMounts:
        - mountPath: /var/lib/redis
          name: data
        livenessProbe:
          exec:
            command:
            - redis-cli
            - ping
          initialDelaySeconds: 30
          timeoutSeconds: 5
        readinessProbe:
          exec:
            command:
            - redis-cli
            - ping
          initialDelaySeconds: 5
          timeoutSeconds: 1
      volumes:
      - name: data
        persistentVolumeClaim:
          claimName: data
---
apiVersion: v1
kind: Service
metadata:
  name: redis
  namespace: kube-ops
  labels:
    name: redis
spec:
  ports:
    - name: redis
      port: 6379
      targetPort: redis
  selector:
    name: redis
通过kubectl apply更新yaml文件
kubectl apply -f gitlab-redis.yaml
查看postgresql是否部署成功
kubectl get pods -n kube-ops
显示如下,说明redis部署成功
NAME                          READY   STATUS    RESTARTS   AGE
postgresql-79f85cdfb4-klfb7   1/1     Running   0          4h20m
redis-56c8dc76cd-pr22g        1/1     Running   0          4h17m
安装gitlab服务
vim  gitlab.yaml

apiVersion: apps/v1
kind: Deployment
metadata:
  name: gitlab
  namespace: kube-ops
  labels:
    name: gitlab
spec:
  selector:
    matchLabels:
        name: gitlab
  template:
    metadata:
      name: gitlab
      labels:
        name: gitlab
    spec:
      containers:
      - name: gitlab
        image: sameersbn/gitlab:11.8.1
        imagePullPolicy: IfNotPresent
        env:
        - name: TZ
          value: Asia/Shanghai
        - name: GITLAB_TIMEZONE
          value: Beijing
        - name: GITLAB_SECRETS_DB_KEY_BASE
          value: long-and-random-alpha-numeric-string
        - name: GITLAB_SECRETS_SECRET_KEY_BASE
          value: long-and-RANDOM-ALPHA-NUMERIc-string
        - name: GITLAB_SECRETS_OTP_KEY_BASE
          value: long-and-random-alpha-numeric-string
        - name: GITLAB_ROOT_PASSWORD
          value: admin321
        - name: GITLAB_ROOT_EMAIL
          value: [email protected]
        - name: GITLAB_HOST
          value: 192.168.0.6
        - name: GITLAB_PORT
          value: "30852"
        - name: GITLAB_SSH_PORT
          value: "32353"
        - name: GITLAB_NOTIFY_ON_BROKEN_BUILDS
          value: "true"
        - name: GITLAB_NOTIFY_PUSHER
          value: "false"
        - name: GITLAB_BACKUP_SCHEDULE
          value: daily
        - name: GITLAB_BACKUP_TIME
          value: 01:00
        - name: DB_TYPE
          value: postgres
        - name: DB_HOST
          value: postgresql
        - name: DB_PORT
          value: "5432"
        - name: DB_USER
          value: gitlab
        - name: DB_PASS
          value: passw0rd
        - name: DB_NAME
          value: gitlab_production
        - name: REDIS_HOST
          value: redis
        - name: REDIS_PORT
          value: "6379"
        ports:
        - name: http
          containerPort: 80
        - name: ssh
          containerPort: 22
        volumeMounts:
        - mountPath: /home/git/data
          name: data
        livenessProbe:
          httpGet:
            path: /
            port: 80
          initialDelaySeconds: 180
          timeoutSeconds: 5
        readinessProbe:
          httpGet:
            path: /
            port: 80
          initialDelaySeconds: 5
          timeoutSeconds: 1
      volumes:
      - name: data
        persistentVolumeClaim:
          claimName: gitlabt
---
apiVersion: v1
kind: Service
metadata:
  name: gitlab
  namespace: kube-ops
  labels:
    name: gitlab
spec:
  ports:
    - name: http
      port: 80
      targetPort: http
      nodePort: 30852
    - name: ssh
      port: 22
      nodePort: 32353
      targetPort: ssh
  selector:
    name: gitlab
  type: NodePort
通过kubectl apply更新yaml文件
kubectl apply -f gitlab.yaml
查看postgresql是否部署成功
NAME                          READY   STATUS    RESTARTS   AGE
gitlab-7d5f6bb557-bdkf9       1/1     Running   0          37m
postgresql-79f85cdfb4-klfb7   1/1     Running   0          4h20m
redis-56c8dc76cd-pr22g        1/1     Running   0          4h17m
查看gitlab在宿主机暴露的端口
kubectl get svc -n kube-ops
显示如下:
NAME         TYPE        CLUSTER-IP   EXTERNAL-IP   PORT(S)                     AGE
gitlab       NodePort    10.0.0.130   <none>        80:30852/TCP,22:32353/TCP   4h3m
postgresql   ClusterIP   10.0.0.119   <none>        5432/TCP                    4h24m
redis        ClusterIP   10.0.0.20    <none>        6379/TCP                    4h21m
我们在浏览器访问k8s的master1节点的IP:30852即可访问到gitlab web界面

第一次登陆,我们需要点击注册Registry
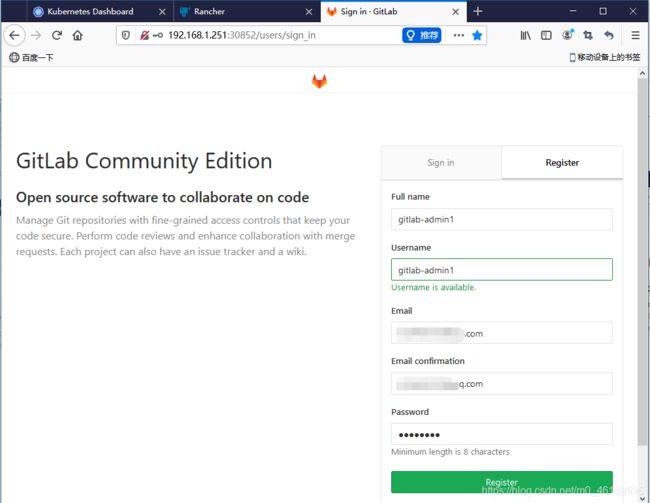
完成注册并登陆显示如下:
