Hadoop3.2.1 【 HDFS 】源码分析 : FileSystem 解析
一.前言
FileSystem这个类是最常用的类,因为只要是我们想连接HDFS进行一些操作,程序的入口必定是它.接下来,我们通过FileSystem来分析一下,本地代码是如何通过FileSystem连接上hadoop并且读取数据的.
二.代码示例
由于我要连接的集群是一个配置HA的hadoop集群,所有我需要把core-site.xml 和 hdfs-site.xml 文件放到resources目录中.
java代码:
   public static void main(String[] args) throws IOException {

        //构建配置 , 默认加载core-site.xml hdfs-site.xml
        Configuration conf = new Configuration();

        //构建FileSystem   [核心]
        FileSystem  fs = FileSystem.get(conf);

        //读取根目录上有哪些文件.
        FileStatus[] list = fs.listStatus(new Path("/"));
        for (FileStatus file:list ) {
            System.out.println(file.getPath().getName());
        }

    }
pom.xml
            org.apache.hadoop
            hadoop-client
            3.2.1
三.解析
代码很简单,其实最核心的一句就是
FileSystem fs = FileSystem.get(conf);
我们来看他干了啥.
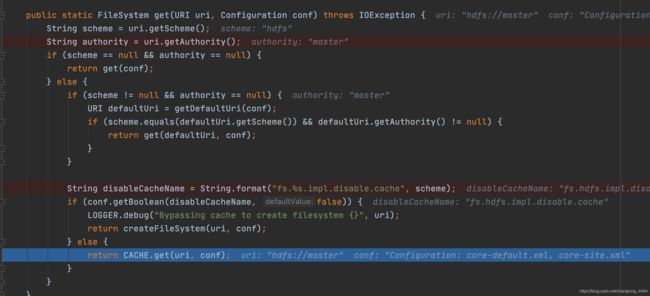
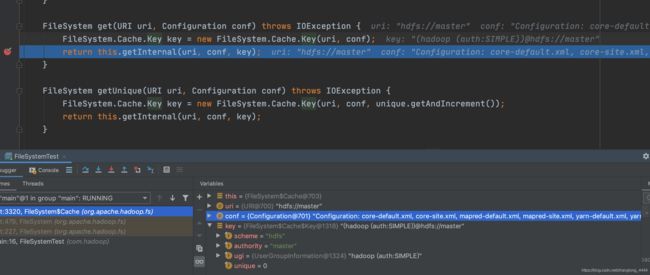
到这里我们我们继续看 FileSystem get(URI uri, Configuration conf)这个方法. 这里没啥好说的,就是通过CACHE.get(uri, conf);
获取对应的FileSystem. [ 默认配置走的缓存,如果设置不走缓存则自动创建一个走的就是: createFileSystem 方法 ]
缓存里面的方法我们就不细看了,就是根据uri和conf生成的key , 在缓存中查询是否有已经创建的FileSystem , 有就复用,没有的话就创建.并将创建的FileSystem加入缓存. 不墨迹,我们直接看FileSystem创建方法 : createFileSystem(uri, conf)
    private static FileSystem createFileSystem(URI uri, Configuration conf) throws IOException {
        Tracer tracer = FsTracer.get(conf);
        TraceScope scope = tracer.newScope("FileSystem#createFileSystem");
        Throwable var4 = null;

        FileSystem var7;
        try {
            scope.addKVAnnotation("scheme", uri.getScheme());
            //根据配置获取需要加载的FileSystem实现类
            Class clazz = getFileSystemClass(uri.getScheme(), conf);
            //实例化配置 FileSystem
            FileSystem fs = (FileSystem)ReflectionUtils.newInstance(clazz, conf);
            // 对FileSystem 进行初始化
            fs.initialize(uri, conf);
            var7 = fs;
        } catch (Throwable var16) {
            var4 = var16;
            throw var16;
        } finally {
            if (scope != null) {
                if (var4 != null) {
                    try {
                        scope.close();
                    } catch (Throwable var15) {
                        var4.addSuppressed(var15);
                    }
                } else {
                    scope.close();
                }
            }

        }

        return var7;
    }
这里其实就是通过配置获取到 FileSystem的实现类, 通过反射进行实例化, 然后执行initialize方法进行初始化, 然后返回FileSystem对象就行了. [其实到这里 FileSystem fs = FileSystem.get(conf); 这样代码的执行就可以结束了 ] .
我们细看一下,如何通过 配置获取到对应的FileSystem的实现类.也就是下面这行代码:
Class clazz = getFileSystemClass(uri.getScheme(), conf);
    public static Class getFileSystemClass(String scheme, Configuration conf) throws IOException {
        if (!FILE_SYSTEMS_LOADED) {
            loadFileSystems();
        }

        LOGGER.debug("Looking for FS supporting {}", scheme);
        Class clazz = null;
        if (conf != null) {
            // 这里的 property 为:   "fs.hdfs.impl"
            String property = "fs." + scheme + ".impl";
            LOGGER.debug("looking for configuration option {}", property);
            clazz = conf.getClass(property, (Class)null);
        } else {
            LOGGER.debug("No configuration: skipping check for fs.{}.impl", scheme);
        }

        if (clazz == null) {
            LOGGER.debug("Looking in service filesystems for implementation class");
            clazz = (Class)SERVICE_FILE_SYSTEMS.get(scheme);
        } else {
            LOGGER.debug("Filesystem {} defined in configuration option", scheme);
        }

        if (clazz == null) {
            throw new UnsupportedFileSystemException("No FileSystem for scheme \"" + scheme + "\"");
        } else {
            LOGGER.debug("FS for {} is {}", scheme, clazz);
            return clazz;
        }
    }
上面代码是获取FileSystem的实现类,首先去配置文件中查找,是否配置了 "fs.hdfs.impl"的实现类.如果配置了直接返回,如果没有的话,会查询系统自己自带的实现.也就是SERVICE_FILE_SYSTEMS 这里系统默认的配置.
一共八种,截图如下:
我整理了一个表格,方便以后查找:
| 序号 | scheme |
实现类 | fs.defaultFS |
|---|---|---|---|
| 1 | file | org.apache.hadoop.fs.LocalFileSystem | file:/// |
| 2 | hdfs | org.apache.hadoop.hdfs.DistributedFileSystem | hdfs://master |
| 3 | http | org.apache.hadoop.fs.http.HttpFileSystem | |
| 4 | https | org.apache.hadoop.fs.http.HttpsFileSystem | |
| 5 | webhdfs | org.apache.hadoop.hdfs.web.WebHdfsFileSystem | |
| 6 | har | org.apache.hadoop.fs.HarFileSystem | |
| 7 | swebhdfs | org.apache.hadoop.hdfs.web.SWebHdfsFileSystem | |
| 8 | viewfs | org.apache.hadoop.fs.viewfs.ViewFileSystem |
好了,通过表格,我们就可以知道 hdfs 对应的实现类为: org.apache.hadoop.hdfs.DistributedFileSystem
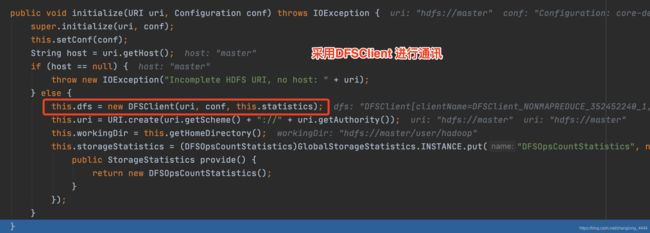
接下来我们看一下初始化的代码 initialize(URI uri, Configuration conf)

DFSClient 主要是负责与hadoop 通讯的客户端类.
粗略看一下初始化代码:
public DFSClient(URI nameNodeUri, ClientProtocol rpcNamenode, Configuration conf, Statistics stats) throws IOException {
        this.clientRunning = true;
        this.r = new Random();
        this.filesBeingWritten = new HashMap();
        this.tracer = FsTracer.get(conf);
        this.dfsClientConf = new DfsClientConf(conf);
        this.conf = conf;
        this.stats = stats;

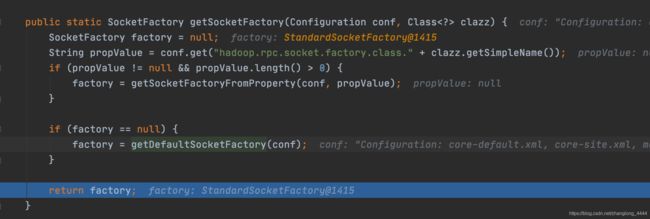
        // 构建socket通讯工厂类:  StandardSocketFactory
        this.socketFactory = NetUtils.getSocketFactory(conf, ClientProtocol.class);


        this.dtpReplaceDatanodeOnFailure = ReplaceDatanodeOnFailure.get(conf);
        this.smallBufferSize = DFSUtilClient.getSmallBufferSize(conf);
        this.dtpReplaceDatanodeOnFailureReplication = (short)conf.getInt("dfs.client.block.write.replace-datanode-on-failure.min-replication", 0);
        if (LOG.isDebugEnabled()) {
            LOG.debug("Sets dfs.client.block.write.replace-datanode-on-failure.min-replication to " + this.dtpReplaceDatanodeOnFailureReplication);
        }

        this.ugi = UserGroupInformation.getCurrentUser();
        this.namenodeUri = nameNodeUri;


        // 客户端的名字
        this.clientName = "DFSClient_" + this.dfsClientConf.getTaskId() + "_" + ThreadLocalRandom.current().nextInt() + "_" + Thread.currentThread().getId();


        int numResponseToDrop = conf.getInt("dfs.client.test.drop.namenode.response.number", 0);


        //通讯协议  ClientProtocol : NameNodeProxiesClient
        ProxyAndInfo proxyInfo = null;
        AtomicBoolean nnFallbackToSimpleAuth = new AtomicBoolean(false);
        if (numResponseToDrop > 0) {
            LOG.warn("dfs.client.test.drop.namenode.response.number is set to " + numResponseToDrop + ", this hacked client will proactively drop responses");
            proxyInfo = NameNodeProxiesClient.createProxyWithLossyRetryHandler(conf, nameNodeUri, ClientProtocol.class, numResponseToDrop, nnFallbackToSimpleAuth);
        }

        if (proxyInfo != null) {
            this.dtService = proxyInfo.getDelegationTokenService();
            this.namenode = (ClientProtocol)proxyInfo.getProxy();
        } else if (rpcNamenode != null) {
            Preconditions.checkArgument(nameNodeUri == null);
            this.namenode = rpcNamenode;
            this.dtService = null;
        } else {
            Preconditions.checkArgument(nameNodeUri != null, "null URI");
            proxyInfo = NameNodeProxiesClient.createProxyWithClientProtocol(conf, nameNodeUri, nnFallbackToSimpleAuth);
            this.dtService = proxyInfo.getDelegationTokenService();
            this.namenode = (ClientProtocol)proxyInfo.getProxy();
        }

        String[] localInterfaces = conf.getTrimmedStrings("dfs.client.local.interfaces");
        this.localInterfaceAddrs = getLocalInterfaceAddrs(localInterfaces);
        if (LOG.isDebugEnabled() && 0 != localInterfaces.length) {
            LOG.debug("Using local interfaces [" + Joiner.on(',').join(localInterfaces) + "] with addresses [" + Joiner.on(',').join(this.localInterfaceAddrs) + "]");
        }

        Boolean readDropBehind = conf.get("dfs.client.cache.drop.behind.reads") == null ? null : conf.getBoolean("dfs.client.cache.drop.behind.reads", false);
        Long readahead = conf.get("dfs.client.cache.readahead") == null ? null : conf.getLong("dfs.client.cache.readahead", 0L);
        this.serverDefaultsValidityPeriod = conf.getLong("dfs.client.server-defaults.validity.period.ms", HdfsClientConfigKeys.DFS_CLIENT_SERVER_DEFAULTS_VALIDITY_PERIOD_MS_DEFAULT);
        Boolean writeDropBehind = conf.get("dfs.client.cache.drop.behind.writes") == null ? null : conf.getBoolean("dfs.client.cache.drop.behind.writes", false);
        this.defaultReadCachingStrategy = new CachingStrategy(readDropBehind, readahead);
        this.defaultWriteCachingStrategy = new CachingStrategy(writeDropBehind, readahead);
        this.clientContext = ClientContext.get(conf.get("dfs.client.context", "default"), this.dfsClientConf, conf);
        if (this.dfsClientConf.getHedgedReadThreadpoolSize() > 0) {
            initThreadsNumForHedgedReads(this.dfsClientConf.getHedgedReadThreadpoolSize());
        }

        this.initThreadsNumForStripedReads(this.dfsClientConf.getStripedReadThreadpoolSize());
        this.saslClient = new SaslDataTransferClient(conf, DataTransferSaslUtil.getSaslPropertiesResolver(conf), TrustedChannelResolver.getInstance(conf), nnFallbackToSimpleAuth);
    }
DFSClient 是采用socket进行通讯.
默认的通讯工厂类为: org.apache.hadoop.net.StandardSocketFactory
四.总结
FileSystem 类是通过配置参数匹配到fs.defaultFS 对应的FileSystem实现类. 然后由实现类来进行操作.
举例 : "hdfs://master"匹配的DistributedFileSystem实现类.然后DistributedFileSystem的实现类里面封装了 DFSClient 类. 然后后面的操作都是通过DFSClient与hadoop进行通讯.


