第一章:SpringBoot2.3.0 HelloWorld实例
一)SpringBoot简介
Spring Boot是一个轻量级应用框架,其设计目的是用来简化Spring应用的初始搭建以及开发过程。另外SpringBoot通过集成大量的框架使得依赖包的版本冲突,以及引用的不稳定性等问题得到了很好的解决。
特征:
1、可以创建独立的Spring应用程序,并且基于其Maven或Gradle插件,可以创建可执行的JARs和WARs。
2、内嵌Tomcat或Jetty等Servlet容器。
3、提供自动配置的“starter”项目对象模型(POMS)以简化Maven配置。
4、自动配置Spring容器,不需要XML配置
二)HelloWorld实例
第一步:创建一个Maven项目,在pom.xml中增加SpringBoot的jar配置
项目结构图:

pom.xml文件:
    4.0.0

    com.oysept
    first_springboot
    1.0-SNAPSHOT
    first_springboot


        org.springframework.boot
        spring-boot-starter-parent
        2.3.0.RELEASE


        UTF-8


            org.springframework.boot
            spring-boot-starter-web
第二步:增加SpringBoot的main方法启动类
注解说明:
@SpringBootConfiguration:指定该类属于配置类
@EnableAutoConfiguration:这个注释告诉Spring Boot根据所添加的jar依赖关系“猜测”您如何配置Spring。就是相当于自动根据配置来启动Spring。
@ComponentScan:应用程序启动时,指定需要扫描的包,默认是扫描当前包和其子包。
@SpringBootApplication:默认通用的注解,上面三个注解替换注解,当默认配置是,可使用该注解。
package com.oysept;

import org.springframework.boot.SpringApplication;
import org.springframework.boot.autoconfigure.EnableAutoConfiguration;
import org.springframework.boot.autoconfigure.SpringBootApplication;
import org.springframework.context.annotation.ComponentScan;

@SpringBootConfiguration
@EnableAutoConfiguration
@ComponentScan(basePackages = "com.oysept")
public class FirstSpringBootApplication {

    public static void main(String args[]) {
        SpringApplication.run(FirstSpringBootApplication.class, args);
    }
}
启动步骤:
通过run方法,先获取到main方法作为启动入口,读取配置文件,然后注册相应的bean,比如需扫描的包,需要加载的Servlet,再加载需要启动的应用服务器,如tomcat等,然后发布应用程序。
第三步:添加一个SpringBoot配置文件,该配置文件有多种格式
注:在启动相应的服务器时,会有默认的端口,如tomcat是8080,如需要指定端口,通过下面的配置文件指定。
application.properties格式:以key=value的方式存储
server.port=8081
application.yml格式:体现了层次感,可减少代码量(当相同前缀情况较多时),中间需有一个空格
server:
  port: 8081

first:
  second:
    three: 1
    four: 2
  five:
    six: 3
#first.second.three=1
#first.second.four=2
#first.five.six=3
第四步:创建一个web测试Controller类
注解说明:
@Controller:标明该类是一个控制器,属于@Component注解的一个分支,更加体现类的作用范围。
@RequestMapping:该注释提供“路由”的信息。它告诉Spring任何具有“/”路径的HTTP请求都应映射到该方法。
@ResponseBody:该注解告诉Spring使得到的字符串直接返回给调用者。
@RestController:该注解是@Controller和@ResponseBody的结合注解,可替换该两个注解。但在某些场景下,不能之间使用该注解,比如某一个方法需要做重定向跳转时。多用于第三方系统跳转。
package com.oysept.controller;

import org.springframework.stereotype.Controller;
import org.springframework.web.bind.annotation.RequestMapping;
import org.springframework.web.bind.annotation.ResponseBody;

@Controller
public class HelloController {

    /**
     * 返回响应内容
      * http://localhost:8081/rest/hello
     * @return
     */
    @RequestMapping("/rest/hello")
    @ResponseBody
    public String hello () {
        return "Hello SpringBoot";
    }

    /**
     * 测试重定向
     * http://localhost:8081/rest/testRedirect
     * @return
     */
    @RequestMapping("/rest/testRedirect")
    public String testRedirect () {
        // 重定向指定的地址,地址之间不能有空格
        // return "forward:/rest/hello";
        return "redirect:/rest/hello";
    }
}
第五步:启动main方法,然后在控制台输入具体的地址,查看打印的效果图
在浏览器输入:http://localhost:8081/rest/hello
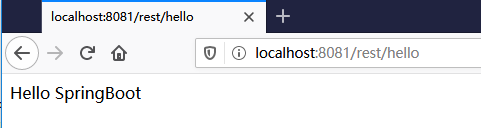
在浏览器输入:http://localhost:8081/rest/testRedirect

会重定向到/rest/hello接口,然后在浏览器打印返回的字符串信息。
三)创建一个可执行的Jar
在pom.xml文件中,添加一段maven插件配置,运行Jar使用
            org.springframework.boot
            spring-boot-maven-plugin
打开cmd命令窗口,切换到项目文件夹下,然后执行mvn install命令,会把项目自动打包成一个可执行的Jar

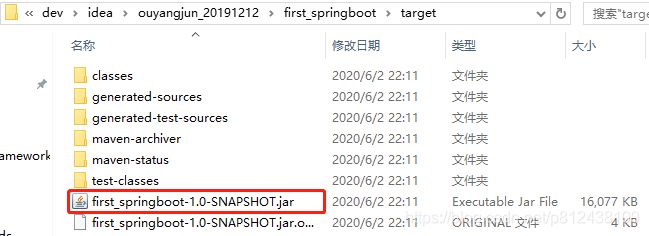
然后切换的target目录下,通过java -jar Jar名称启动应用程序

然后可以直接在浏览器输入具体的地址,进行访问应用程序了。
如需要退出该应用程序,请按Ctrl+C
识别二维码关注个人微信公众号

本章完结,待续,欢迎转载!
本文说明:该文章属于原创,如需转载,请标明文章转载来源!