CentOS 下安装 mysql-5.7.31
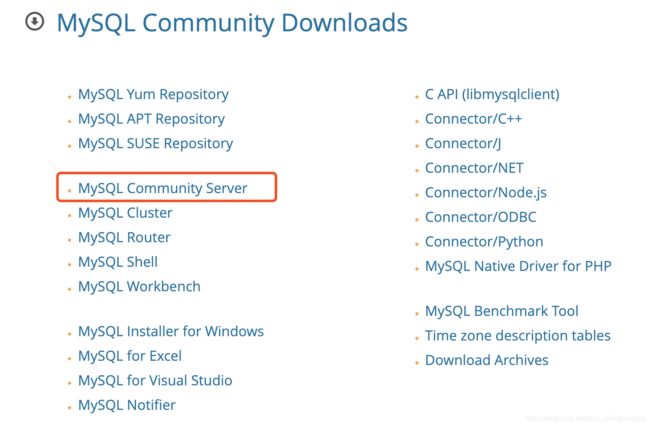
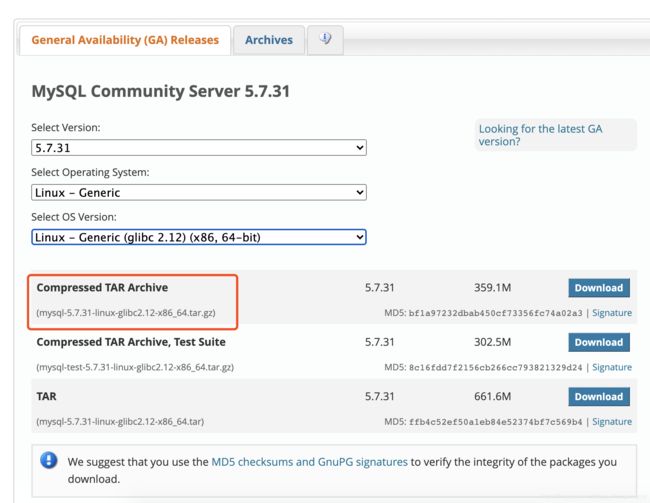
1. 下载tar.gz 格式的安装文件
官网下载地址:https://dev.mysql.com/downloads/
2. 上传安装文件到linux安装目录
# cd /usr/local
# tar -zxvf mysql-5.7.31-linux-glibc2.5-x86_64.tar.gz
3. 更改解压后的文件夹名称
# mv /usr/local/mysql-5.7.31-linux-glibc2.5-x86_64 /usr/local/mysql
4. 创建数据文件目录
# cd /usr/local/mysql
# mkdir data
5. 创建mysql 用户组和mysql用户
# groupadd mysql
# useradd -r -g mysql mysql
6. 更改安装目录所属用户及用户组
# chown -R mysql:mysql /usr/local/mysql
7. 初始化mysql命令
# cd /usr/local/mysql/bin
# ./mysqld --user=mysql --basedir=/usr/local/mysql --datadir=/usr/local/mysql/data --tmpdir=/tmp --initialize
第一次可能会报下面的错,根据提示知道没有安装libaio依赖包
./mysqld: error while loading shared libraries: libaio.so.1: cannot open shared object file: No such file or directory
然后yum安装即可,如下
yum install libaio
8. 再次初始化,成功后会生成临时密码,记下来用来在后面修改密码
[root@10-255-1-99 bin]# ./mysqld --user=mysql --basedir=/usr/local/mysql --datadir=/usr/local/mysql/data --tmpdir=/tmp --initialize
2020-09-11T10:58:42.348843Z 0 [Warning] TIMESTAMP with implicit DEFAULT value is deprecated. Please use --explicit_defaults_for_timestamp server option (see documentation for more details).
2020-09-11T10:58:43.544073Z 0 [Warning] InnoDB: New log files created, LSN=45790
2020-09-11T10:58:43.697076Z 0 [Warning] InnoDB: Creating foreign key constraint system tables.
2020-09-11T10:58:43.765658Z 0 [Warning] No existing UUID has been found, so we assume that this is the first time that this server has been started. Generating a new UUID: c234473c-f41d-11ea-a883-00505662daf6.
2020-09-11T10:58:43.769275Z 0 [Warning] Gtid table is not ready to be used. Table 'mysql.gtid_executed' cannot be opened.
2020-09-11T10:58:43.769970Z 1 [Note] A temporary password is generated for root@localhost: 1._s(+xt<C9y
9. 修改mysql配置文件, 启动之前可以看下启动脚本是怎么写的
# cd /usr/local/mysql/support-files
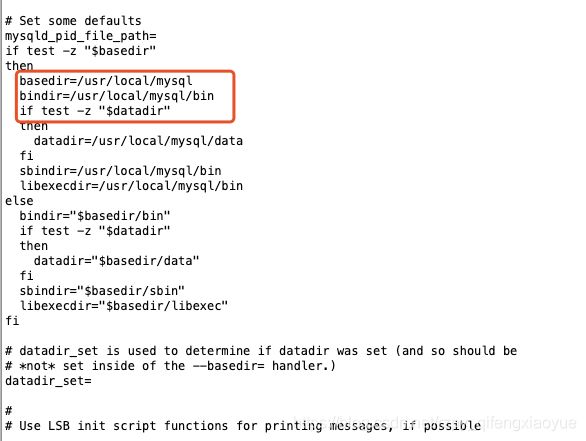
# cat mysql.server


从启动脚本可以看出默认安装路径是/usr/local/mysql,所以最好安装在这个目录,
设置开机自启
# cp /usr/local/mysql/support-files/mysql.server /etc/init.d/mysqld
# chmod 755 /etc/init.d/mysql.d
启动命令:sh /usr/local/mysql/support-files/mysql.server start
10. 第一次可能启动失败,修改my.conf文件
[root@10-255-1-99 bin]# cat /etc/my.cnf
[mysqld]
datadir=/var/lib/mysql
socket=/var/lib/mysql/mysql.sock
# Disabling symbolic-links is recommended to prevent assorted security risks
symbolic-links=0
# Settings user and group are ignored when systemd is used.
# If you need to run mysqld under a different user or group,
# customize your systemd unit file for mariadb according to the
# instructions in http://fedoraproject.org/wiki/Systemd

[mysqld_safe]
log-error=/var/log/mariadb/mariadb.log
pid-file=/var/run/mariadb/mariadb.pid

#
# include all files from the config directory
#
!includedir /etc/my.cnf.d
从上面可以看出my.conf 中默认的datadir目录不对,修改配置文件,以下为更多配置信息
[client]

no-beep

socket =/usr/local/mysql/mysql.sock

# pipe

# socket=0.0

port=3306

[mysql]

default-character-set=utf8

[mysqld]

basedir=/usr/local/mysql

datadir=/usr/local/mysql/data

port=3306

pid-file=/usr/local/mysql/mysqld.pid

#skip-grant-tables

skip-name-resolve

socket = /usr/local/mysql/mysql.sock

character-set-server=utf8

default-storage-engine=INNODB

explicit_defaults_for_timestamp = true

# Server Id.

server-id=1

max_connections=2000

query_cache_size=0

table_open_cache=2000

tmp_table_size=246M

thread_cache_size=300

thread_stack = 192k

key_buffer_size=512M

read_buffer_size=4M

read_rnd_buffer_size=32M

innodb_data_home_dir = /usr/local/mysql/data

innodb_flush_log_at_trx_commit=0

innodb_log_buffer_size=16M

innodb_buffer_pool_size=256M

innodb_log_file_size=128M

innodb_thread_concurrency=128

innodb_autoextend_increment=1000

innodb_buffer_pool_instances=8

innodb_concurrency_tickets=5000

innodb_old_blocks_time=1000

innodb_open_files=300

innodb_stats_on_metadata=0

innodb_file_per_table=1

innodb_checksum_algorithm=0

back_log=80

flush_time=0

join_buffer_size=128M

max_allowed_packet=1024M

max_connect_errors=2000

open_files_limit=4161

query_cache_type=0

sort_buffer_size=32M

table_definition_cache=1400

binlog_row_event_max_size=8K

sync_master_info=10000

sync_relay_log=10000

sync_relay_log_info=10000

bulk_insert_buffer_size = 64M

interactive_timeout = 120

wait_timeout = 120

log-bin-trust-function-creators=1

sql_mode=NO_ENGINE_SUBSTITUTION,STRICT_TRANS_TABLES


# include all files from the config directory

!includedir /etc/my.cnf.d
11. 启动mysql
[root@10-255-1-99 bin]# /etc/init.d/mysqld start
Starting MySQL. SUCCESS!
12. 登陆mysql
# cd /usr/local/mysql/bin
# ./mysql -u root -p
然后输入之前保存的临时密码
13. 修改密码并查询数据库验证
[root@10-255-1-99 bin]# ./mysql -u root -p
Enter password:
Welcome to the MySQL monitor.  Commands end with ; or \g.
Your MySQL connection id is 6
Server version: 5.7.31

Copyright (c) 2000, 2016, Oracle and/or its affiliates. All rights reserved.

Oracle is a registered trademark of Oracle Corporation and/or its
affiliates. Other names may be trademarks of their respective
owners.

Type 'help;' or '\h' for help. Type '\c' to clear the current input statement.

mysql> set password=password('xxxxx');
Query OK, 0 rows affected, 1 warning (0.00 sec)

mysql> grant all privileges on *.* to root@'%' identified by 'xxxxx';
Query OK, 0 rows affected, 1 warning (0.00 sec)

mysql> flush privileges;
Query OK, 0 rows affected (0.00 sec)

mysql> show databases;
+--------------------+
| Database           |
+--------------------+
| information_schema |
| mysql              |
| performance_schema |
| sys                |
+--------------------+
4 rows in set (0.00 sec)

mysql> exit
Bye
[root@10-255-1-99 bin]#


