《CSS揭秘》-总结47个Css技巧(一):常用的背景与边框技巧
注:本文案例来源于《CSS揭秘》这本书。
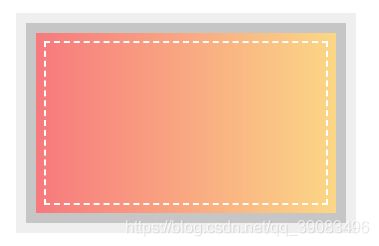
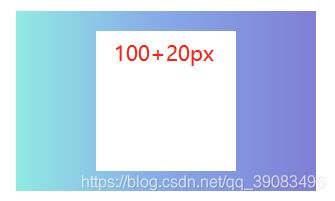
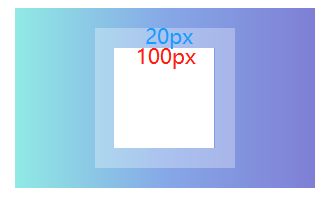
1. 设置半透明边框无效?
使用 background-clip padding-box 解决。
background white
background-clip padding-box // 通过background-clip属性来调整,初始值是border-box,意味着背景会被元素的border  box(边框的外沿框)裁切掉
border 20px solid rgba(255,255,255, 0.3)
height 100px
width 100px
2. 用多个元素来模拟多重边框?
No,使用box-shadow解决。
box-shadow 0 0 0 10px rgba(102,102,102, .3),
           0 0 0 20px rgba(102,102,102, .1)
- 还可以通过outline设置虚线类型
outline 2px dashed white
outline-offset -10px
3. 如何做灵活的背景定位?
background: url(../common/images/arrow-right.png) no-repeat bottom right #FFFDE4 // bottom right是background-position的回退方案
background-position: calc(100% - 20px) calc(100% - 10px) // 更加灵活定位
padding 10px
background-origin: content-box // 使图片跟着内容层走
4. 边框内圆角,外直角?
使用 border-radius+box-shadow+outline。
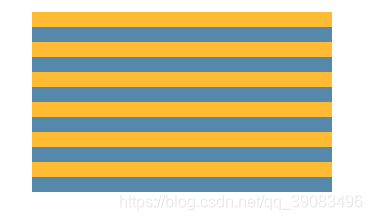
5. 条纹图案背景?
.linear1
  background linear-gradient(to bottom, #fb3 50%, #58a 50%)
  background-size 100% 30px
.linear2
  background: repeating-linear-gradient(60deg, #fb3, #fb3 15px, #58a 0, #58a 30px) // 第二个色标的位置值设置为0,那它的位置就总是会被浏览器调整为前一个色标的位置值
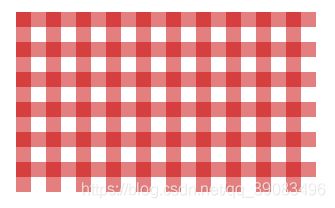
网格
background: white
background-image: linear-gradient(90deg, rgba(200,0,0,.5) 50%, transparent 0),
                  linear-gradient(rgba(200,0,0,.5) 50%, transparent 0)
background-size: 30px 30px
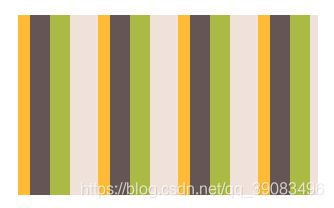
7. 伪随机背景
background: hsl(20, 40%, 90%)
background-image: linear-gradient(90deg, #fb3 10px, transparent 0),
                  linear-gradient(90deg, #ab4 20px, transparent 0),
                  linear-gradient(90deg, #655 20px, transparent 0)
background-size: 80px 100%, 60px 100%, 40px 100%;
8. 如何让图片作为边框?
padding: 10px
border: 10px solid transparent
background: linear-gradient(white, white) padding-box,url(https://img3.mukewang.com/szimg/5df8852609e0762d12000676-360-202.png) border-box 0 / cover
注:本文案例来源于《CSS揭秘》这本书。
自适应的椭圆
用 border-radius 50% 就可以实现一个宽高自适应的椭圆。那如果想要实现半椭圆呢?
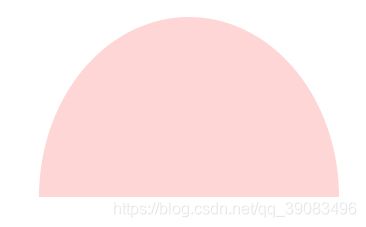
border-radius 50% / 100% 100% 0 0
上面等同于
border-radius 50% 50% 50% 50% / 100% 100% 0 0 // 横轴方向是50%的缩放,纵轴的左上,右上为100%,右下,左下为0。
平行四边形
用 transform: skewX(-10deg) 来实现~
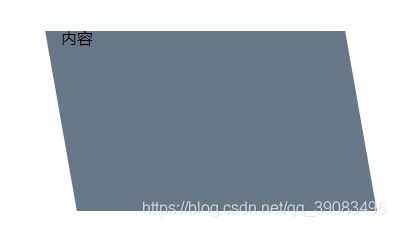
.box
  position relative
  height 180px
  width 300px
  margin 40px auto
  &::before                     // 在伪元素中设置倾斜,不会使得元素变形。
    content: ''
    position: absolute
    top: 0
    right: 0
    bottom: 0
    left: 0
    z-index: -1                // 不会影响到内容
    background: #678
    transform: skew(10deg)     // 设置变形
菱形图片
使用 clip-path属性。该属性可以生成多种形状。网上还找到了一个 https://bennettfeely.com/clippy/ 可以拖拽边线生成css。

clip-path: polygon(50% 0, 100% 50%, 50% 100%, 0 50%);
切角效果
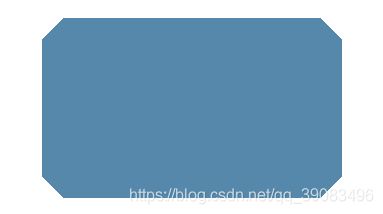
mixin.styl中定义:beveled-corners()。
beveled-corners($bg, $tl:0, $tr=$tl, $br=$tl, $bl=$tr) // 切角效果,传入背景颜色,左上、右上、右下、左下切割长度
  background: $bg
  background: linear-gradient(135deg, transparent $tl,$bg 0) top left,
              linear-gradient(225deg, transparent $tr,$bg 0) top right,
              linear-gradient(-45deg, transparent $br,$bg 0) bottom right,
              linear-gradient(45deg, transparent $bl,$bg 0)  bottom left;
  background-size: 50% 50%
  background-repeat: no-repeat
使用:
beveled-corners(#58a, 15px)
梯形标签页
使用 transform perspective(50) rotateX(5deg)。

// 梯形标签页
.trapezoid
  height 100px
  width 200px
  margin 40px auto
  padding 50px
  color #fff
  position relative
  display inline-block
  &::before
    content: ''
    position: absolute
    top 0
    right 0
    bottom 0
    left 0
    z-index -1
    background #58a
    transform perspective(50) rotateX(5deg)
简单的饼图
height 180px
width 180px
border-radius 50%
background: conic-gradient(#eea2a2 20%, #bbc1bf  0, #bbc1bf  30%, #57c6e1 0);
注:本文案例转载于《CSS揭秘》这本书。
单侧投影
box-shadow 0 8px 3px -3px rgba(0,0,0,.5)// 扩张半径的-3px刚好抵消左右两边的3px模糊半径
不规则投影
使用 filter的新属性 ~
如果直接使用box-shadow属性,在透明的边框处也会有阴影,比较难看。

border dashed 10px orange
filter drop-shadow(0 5px 3px #678)
染色效果
这里选取了书中最后一种染色效果的方法。需要固定元素的长宽。鼠标覆盖后无染色效果。
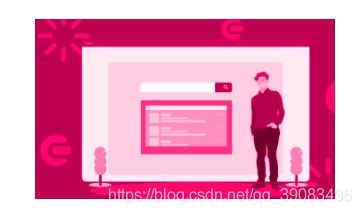
.dye
  height: 180px
  width: 300px
  margin 40px auto
  background-image url(https://img1.mukewang.com/szimg/5d9c62fb0907ccf012000676-360-202.png)
  background-size: cover
  background-color: hsl(335, 100%, 50%)
  background-blend-mode: luminosity
  transition: .5s background-color
  &:hover
    background-color: transparent
毛玻璃效果
<div class="glass">
    <div class="main">ABCDEFG</div>
</div>
.glass
  height: 180px
  width: 300px
  margin 40px auto
  position relative
  font-size 50px
  text-align center
  background-size cover
  background-image url(https://timgsa.baidu.com/timg?image&quality=80&size=b9999_10000&sec=1583310555581&di=17d19c3f990900846ab8cdba69d2aed8&imgtype=0&src=http%3A%2F%2Fphoto.16pic.com%2F00%2F30%2F48%2F16pic_3048628_b.jpg)
  .main
    position absolute
    height 120px
    width 240px
    top 30px
    left 30px
    border-radius 7px
    box-shadow 0 0 5px #666
    background hsla(0,0%,100%,.3)
    overflow hidden
    z-index 100
    &:before
      content ''
      position absolute
      top 0
      bottom 0
      left 0
      right 0
      background-image url(https://timgsa.baidu.com/timg?image&quality=80&size=b9999_10000&sec=1583310555581&di=17d19c3f990900846ab8cdba69d2aed8&imgtype=0&src=http%3A%2F%2Fphoto.16pic.com%2F00%2F30%2F48%2F16pic_3048628_b.jpg)
      filter blur(20px)
      z-index -1
      background-attachment: fixed
      margin -30px  // 防止边缘效果减弱
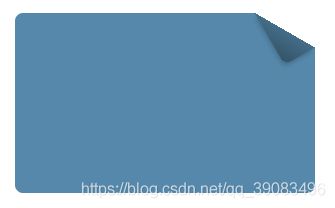
折角效果
folded-corner($background, $size, $angle=30deg)
  position: relative
  background:$background; /* 回退样式 */
  background: linear-gradient($angle - 180deg, transparent $size, $background 0)
  border-radius: .5em;
  $x=$size/ sin($angle)
  $y=$size / cos($angle)
  &::before
    content: ''
    position: absolute
    top: 0
    right: 0
    background: linear-gradient(to left bottom, transparent 50%, rgba(0,0,0,.2) 0, rgba(0,0,0,.4)) 100% 0 no-repeat
    width: $y
    height: $x
    transform: translateY($y - $x) rotate(2*$angle - 90deg)
    transform-origin: bottom right
    border-bottom-left-radius: inherit
    box-shadow: -.2em .2em .3em -.1em rgba(0,0,0,.2)
使用:
.fold-angle
  height: 180px
  width: 300px
  margin 40px auto
  folded-corner(#58a, 30px, 30deg)
css太难了。。看不懂= =直接用倒是很方便了。
注:本案例来自《css揭秘》这本书。
连字符断行
使用 hyphens: auto属性就可以在英文单词占满一行且换行时使用连字符,兼具阅读和美观。
注:在chrom、IE11上还不支持这个属性,在fiiefox上支持。

.break-line
  height: 180px
  width: 300px
  margin 40px auto
  border solid 1px #666
  hyphens auto
插入换行
书中使用dl dt dd来展示如下效果,现在flex布局可以完成的更好,就不介绍了。

文本行的斑马条纹
之前都是对表格进行斑马纹的处理,通常使用:nth-child(even)给偶数行加上样式。但是对于文本来说不能给每行加个单独的div吧。因此使用条纹背景实现。
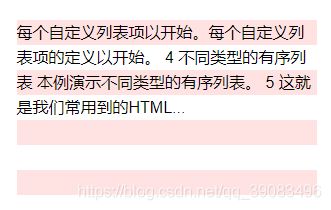
line-height 25px
background-image linear-gradient(to bottom, #f222 50%, #fff 0)
background-size auto 50px
调整tab的宽度
使用 tab-size:4 来调整缩进。一个tab表示4个空格。
PS:vscode使用eslint自动保存时可能会变成space,这样样式就不会生效了。改回Tab Size即可。
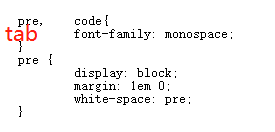
.tab
  tab-size 4
连字
使用 font-variant-ligatures 消除连字。例如常见的Difficult waffles中fi和fl容易形成连字。
font-variant-ligatures: no-common-ligatures;
华丽的&符号
暂时略过。
自定义下划线
.underline
	background: linear-gradient(to right, red, blue) no-repeat // 颜色
	background-size: 100% 1px // 下划线长度和宽度
	background-position: 0 15px // 下划线未知
	text-shadow: 1px 0 white, -1px 0 white // 设置g,y这种下划线不会穿过字母
现实中的文字效果
// 凸版印刷效果
.print
	background hsl(210, 13%, 40%)
	color hsl(210, 13%, 75%)
	text-shadow 0 -1px 1px black

// 空心字效果
.hollow
	background: deeppink
	color: white
	text-shadow: 1px 1px black, -1px -1px black, 1px -1px black, -1px 1px black

// 文字外发光效果
.light
	background: #203
	color: #ffc
	text-shadow: 0 0 2px, 0 0 3px

// 文字凸起效果:主要思路就是使用一长串累加的投影,不设模糊并以1px的跨度逐渐错开,使颜色逐渐变暗,然后在底部加一层强烈模糊的暗投影,从而模拟完整的立体效果
.bulge
	background: #58a
	color: white
	text-shadow: 0 1px hsl(0,0%,85%),
		0 2px hsl(0,0%,80%),
		0 3px hsl(0,0%,75%),
		0 4px hsl(0,0%,70%),
		0 5px hsl(0,0%,65%),
		0 5px 10px black // 底部加一层阴影
环形文字
viewBox:0,0(一般都写0,0),width:宽度,height:高度
M:起始位置
a: elliptical Arc(椭圆弧)
Z:在起点处闭合路径
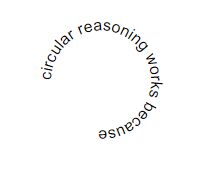
<div class="circular">
	<svg viewBox="0 0 300 300">
		<path d="M 100,100 a 50,50 0 1,1 0,1 z" id="circle" />
		<text>
			<textPath xlink:href="#circle">circular reasoning works because</textPath> // 文字链接到path上
		</text>
	</svg>
</div>
.circular
	width 300px
	height 300px
	margin 3px auto 0
	path
		fill none // 去掉填充颜色
.circular svg
	display block
	overflow visible
虽然这一章例子应用了一遍,但是好多看不懂= =
注:本案例来源于《CSS揭秘》这本书。CSS代码说明部分使用Stylus预编译。
选择合适的鼠标光标
使用 cursor 属性增强光标友好性提示~
- default:默认光标(通常是一个箭头)
- crosshair:指示选中光标呈现为(十字线)。
- pointer:光标呈现为指示链接的指针(一只手)
- move:此光标指示某对象可被移动。(十字线+箭头)
- e-resize:此光标指示可被向右移动(东)。
- w-resize:此光标指示可被向左移动(西)。(在chrom和Firefox中表现与e-resize相同)
- n-resize:此光标指示可被向上(北)移动。
- s-resize:此光标的边缘可被向下移动(南)。(在chrom和Firefox中表现与n-resize相同)
- ne-resize:此光标指示可被向上及向右移动(北/东)。
- sw-resize:此光标指示可被向下及向左移动(南/西)。(在chrom和Firefox中表现与ne-resize相同)
- nw-resize:此光标指示可被向上及向左移动(北/西)。
- se-resize:此光标指示可被向下及向右移动(南/东)。(在chrom和Firefox中表现与se-resize相同)
- text:此光标指示文本(I状光标)。
- wait:此光标指示程序正忙(通常是一只表或沙漏)。
- help:此光标指示可用的帮助(通常是一个问号或一个气球)。
<div style="cursor: help"> 此光标指示可用的帮助(通常是一个问号或一个气球)。</div>
PS: 经测试,在chrom和FireFox中
- e/w-resize 左右指向箭头
- s/n-resize 上下指向箭头
- ne/sw-resize 左下右上指向箭头
- nw/se-resize 左上右下指向箭头
PS:由于这边一截图光标就会消失,只好用语言描述~
扩大可点击区域
- 使用他的好处是可以为元素扩大点击范围的同时而不用担心边框也会被撑大。
- 推荐使用mixin的方法,后面直接调用就好~
.button
	position relative
	&:before
		content:''
		position absolute
		top -10px
		left -10px
		right -10px
		bottom -10px
		cursor pointer
自定义复选框
设置复选框的样式一直让人头疼。首先来看复选框有几种状态:
<input type="checkbox" id="box">
<label for="box">复选框~</label>
input[type="checkbox"]+label::before // label前添加自定义的复选框,+是后代元素选择器
	content: '\a0'/* 不换行空格 */
	display: inline-block
	vertical-align middle // 与label垂直居中
	width 16px
	height 16px
	margin-right 5px
	border-radius 3px
	background: #fff
	border solid 1px #ccc
	text-indent: 3px // 将段落的第一行缩进3px,\2713图标向右偏移3px
	line-height: 16px
input[type="checkbox"]:checked+label::before // 勾选状态
	content:'\2713'
	background: #1296db
	color #fff
input[type="checkbox"]:focus+label::before // 被点击状态
	box-shadow: 0 0 1px 1px #58a
input[type="checkbox"]:disabled+ label::before // 禁用状态
	background: gray
	box-shadow: none
	color: #555
input[type="checkbox"] // 隐藏原有复选框
	position: absolute
	clip: rect(0,0,0,0) // clip 属性剪裁绝对定位元素。
通过遮罩Mask来弱化背景
文章中推荐了4中能够增加dialog背景的方法,4种方法各有利弊。

- 增加一个html元素包裹,使用fix定位
缺点是可能增加一个额外的html元素;优点是好控制,便于加点击事件,便于控制。
.overlay{
      /* 用于遮挡背景 */
	position fixed
	top 0
	right 0
	bottom 0
	left 0
	background rgba(0,0,0,.8)
	.lightbox /* 需要吸引用户注意的元素 */
		position absolute
		z-index 1
- before伪元素方案
缺点是伪元素无法绑定独立的JavaScript事件处理函数。意味着无法增加点击事件了。
.dimmed::before
	position fixed
	top 0
	right 0
	bottom 0
	left 0
	z-index 1
	background rgba(0,0,0,.8)
- box-shadow方案
1vmax相当于1vw和1vh两者中的较大值。100vw等于整个视口的宽度,100vh就是视口的高度。因此,满足我们需求的最小值就是50vmax。由于投影是同时向四个方向扩展的,这个遮罩层的最终尺寸将是100vmax加上元素本身的尺寸。
缺点是滚动页面时,遮罩层的边缘就可能露出。也无法增加点击事件。
box-shadow 0 0 0 50vmax rgba(0,0,0,.8)
- backdrop方案
缺点是兼容性差。
dialog::backdrop
	background rgba(0, 0, 0, .8)
PS:在我自己实现的dialog对话框还是使用第一种方法。如果想要dialog功能更全的话,第一种方法可以增加更多事件交互。但会牺牲一些浏览器性能。让浏览器进行重排重绘。
通过模糊来弱化背景
还是通过blur属性实现。现在实现模糊背景都是增加html元素实现的吧。之前写了一个dialog组件,可看:基于Vue实现dialog对话框组件
- 相比较于直接加上遮罩层,虚化背景个人觉得更好看一些,更适合用在PC端。
- 还可以利用scale属性对元素进行缩放,使得对话框更加贴近用户。
- 还可利用transition增加渐变效果。
<div class="blur-bg">
	<div class="main">内容内容内容内容内容内容内容内容内容内容内容内容内容内容内容内容内容内容内容内容内容内容内容内容内容内容内容</div>
	<div class="dialog">对话框~</div>
</div>
.blur-bg
	width 300px
	height 180px
	margin 3px auto 0
	position relative
	.main
		filter blur(2px)
	.dialog
		position absolute
		top 50%
		left 50%
		transform translate(-50%, -50%)
		background #f2f2f2
		padding 10px
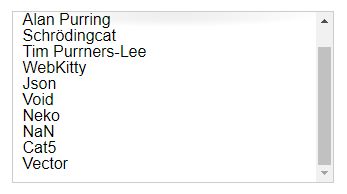
滚动提示
使用 background-attachment local, scroll 属性来优化滚动。
overflow auto
	width 300px
	height 150px
	padding 10px
	border solid 1px #ccc
	background linear-gradient(white 15px, hsla(0,0%,100%,0)) 0 0 / 100% 50px,
			radial-gradient(at top, rgba(0,0,0,.2), transparent 70%) 0 0 / 100% 15px,
      		linear-gradient(to top, white 15px, hsla(0,0%,100%,0)) bottom / 100% 50px,
		    radial-gradient(at bottom, rgba(0,0,0,.2), transparent 70%) bottom / 100% 15px
	background-repeat no-repeat
	background-attachment local, scroll,local, scroll // local:会随着内容向下而向下,白色遮住阴影;scroll:随着页面滚动
交互式的图片对比控件
使用 resize: horizontal 属性即可完成图片分割。不需要用到js控制就可以来回拖动分界线分割图片显示比例。

.image-slider
	position relative
	display inline-block
	margin-left 50%
	transform translate(-50%)
.image-slider > div
	position absolute
	top 0
	bottom 0
	left 0
	width 50% /* 初始宽度 */
	max-width 100%
	overflow hidden /* 让它可以裁切图片 */
	resize horizontal
	&::before // 三角形箭头
		content ''
		position absolute
		bottom 0
		right 0
		width 12px
		height 12px
		background white
		cursor pointer
		padding 5px
		background linear-gradient(-45deg, white 50%, transparent 0)
		background-clip content-box
.image-slider img
	display block
自适应内部元素
如果不给元素一个height,它就会自适应其内部的高度,但是对于width不会。那么宽度怎么样才能让它和内部元素的宽度自适应呢?
这里就需要 width: min-content到达 以下效果。
<div class="adaptive-ele">
    <img src="https://img3.mukewang.com/szimg/5df8852609e0762d12000676-360-202.png" alt="Before"/>
    <div>我们需要做到让父元素能够自适应图片的宽度,而不会被文字撑开宽度。</div>
  </div>
- stylus
.adaptive-ele
  padding 5px
  text-align center
  border solid 1px #666
  width min-content
精确控制表格列宽
当我们要用到表格去展示数据时,我们希望单元格的宽度是自适应内容的宽度呢?还是希望固定列宽?
- 当采用自适应内容宽度,可能会造成意外的布局。通常情况下例如ant-deisgn-vue用的是固定宽度。那么我们需要用 table-layout:fixed属性。
介绍一下table-layout。
-
固定表格布局table-layout:fixed
– 在固定表格布局中,水平布局仅取决于表格宽度、列宽度、表格边框宽度、单元格间距,而与单元格的内容无关。
– 通过使用固定表格布局,用户代理在接收到第一行后就可以显示表格。 -
自动表格布局table-layout:auto
– 在自动表格布局中,列的宽度是由列单元格中没有折行的最宽的内容设定的。
– 此算法有时会较慢,这是由于它需要在确定最终的布局之前访问表格中所有的内容。
- html
  <table class="one" width="100%">  <!--自动表格布局-->
    <tr>
      <td width="20%">1000000000000000000000000000</td>
      <td width="40%">10000000</td>
      <td width="40%">100</td>
    </tr>
  </table>
  <br />
  <table class="two" width="100%">  <!--固定表格布局-->
    <tr>
      <td width="20%">1000000000000000000000000000</td>
      <td width="40%">10000000</td>
      <td width="40%">100</td>
    </tr>
  </table>
- stylus
// 自动表格布局
.one
  table-layout: automatic
  td
    border solid 1px #666

// 固定表格布局
.two
  table-layout: fixed
  td
    word-break: break-all
    border solid 1px #666
根据兄弟元素的数量来设置样式
当有这样一个场景的需求:计划列表中逐渐增加计划数,每增加一项计划,每一项计划的样式就会发生变化,该怎么实现呢?
- 对于只有一个列表项的特殊场景来说,解决方案显然就是:only-child,这个伪类选择符就是为这种情况而设计。
当li元素个数大于1时,only-child样式不会生效。

当li只有一个元素时,样式会加上

li:only-child
  color red
li:first-child:nth-last-child(7),
li:first-child:nth-last-child(7) ~ li
  color red
满幅的背景,定宽的内容
.wrapper
	padding 10px calc(50% - 450px)
垂直居中
- 绝对定位方法
.main
	position absolute
	top 50%
	left 50%
	transform translate(-50%, -50%)
- flex布局方法
.main
	display flex
	justify-content center // 主轴居中
	align-items center  // 交叉轴居中
PS:主轴,交叉轴并不是固定的横轴纵轴,而是相对于flex-direction确定的。若设为column则主轴为竖轴。
紧贴底部的页脚 (Sticky Footer布局)
这章概括的内容在现在我们常称为 Sticky Footer,是一个较常见的方法。
<div class="stickey">
    <div class="main">内容</div>
    <div class="footer">页脚</div>
  </div>
.stickey
  height 160px
  width 300px
  overflow auto
  .main
    min-height calc(100% - 60px)
  .footer
    height 60px
