一、概述
在上一篇文章中,简单在浏览器测试了websocket,链接如下:https://www.cnblogs.com/xiao987334176/p/13615170.html
但是,我们最终的效果是web页面上,能够实时输出结果,比如执行一个shell脚本。
以母鸡下蛋的例子,来演示一下,先来看效果:
二、代码实现
环境说明
操作系统:windows 10
python版本:3.7.9
操作系统:centos 7.6
ip地址:192.168.31.196
说明:windows10用来运行django项目,centos系统用来执行shell脚本。脚本路径为:/opt/test.sh,内容如下:
#!/bin/bash

for i in {
     1..10}
do
    sleep 0.5
    echo 母鸡生了$i个鸡蛋;
done
新建项目
这里,我在上篇文章中的项目基础上,进行修改。项目:django3_websocket,应用名称:web
安装paramiko模块
pip3 install paramiko
修改urls.py,增加首页
from django.contrib import admin
from django.urls import path
from web import views

urlpatterns = [
    path('admin/', admin.site.urls),
    path('index/', views.index),
]
修改web目录下的views.py,内容如下:
from django.shortcuts import render

# Create your views here.
def index(request):
    return render(request,'index.html')
修改web目录下的websocket.py,内容如下:


# !/usr/bin/python3
# -*- coding: utf-8 -*-
import paramiko


async def websocket_application(scope, receive, send):
    while True:
        event = await receive()

        if event['type'] == 'websocket.connect':
            await send({
                'type': 'websocket.accept'
            })

        if event['type'] == 'websocket.disconnect':
            break

        if event['type'] == 'websocket.receive':
            if event['text'] == 'ping':
                await send({
                    'type': 'websocket.send',
                    'text': 'pong!'
                })

            # 这里根据web页面获取的值进行对应的操作
            if event['text'] == 'laying_eggs':
                print("要执行脚本了")
                # 执行的命令或者脚本
                command = 'bash /opt/test.sh'

                # 远程连接服务器
                hostname = '192.168.31.196'
                username = 'root'
                password = 'root'

                ssh = paramiko.SSHClient()
                ssh.set_missing_host_key_policy(paramiko.AutoAddPolicy())
                ssh.connect(hostname=hostname, username=username, password=password)
                # 务必要加上get_pty=True,否则执行命令会没有权限
                stdin, stdout, stderr = ssh.exec_command(command, get_pty=True)
                # result = stdout.read()
                # 循环发送消息给前端页面
                while True:
                    nextline = stdout.readline().strip()  # 读取脚本输出内容
                    # print(nextline.strip())
                    # 发送消息到客户端
                    await send({
                        'type': 'websocket.send',
                        'text': nextline
                    })
                    # 判断消息为空时,退出循环
                    if not nextline:
                        break

                ssh.close()  # 关闭ssh连接
                # 关闭websocket连接
                await send({
                    'type': 'websocket.close',
                })
注意:这里面的服务器ip,用户名,密码,脚本路径。请根据实际情况修改!
在templates目录下,新建文件index.html,内容如下:
测试demo
脚本执行结果:
使用uvicorn启动项目
uvicorn web.asgi:application
访问首页
http://127.0.0.1:8000/index/
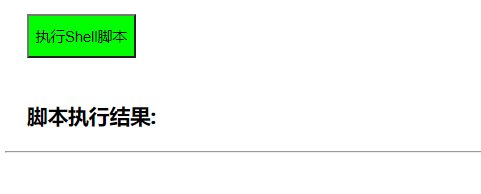
点击执行脚本,效果就是文章开头部分的动态效果了。
完整代码在github中,地址:
https://github.com/py3study/django3_websocket