【深度学习图像识别课程】自编码器系列:(2)卷积自编码器
一、卷积自编码器
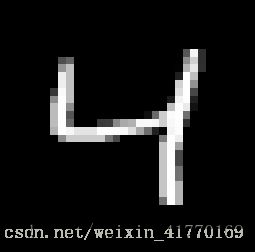
1、读入图像,并可视化
%matplotlib inline

import numpy as np
import tensorflow as tf
import matplotlib.pyplot as plt
from tensorflow.examples.tutorials.mnist import input_data
mnist = input_data.read_data_sets('MNIST_data', validation_size=0)img = mnist.train.images[2]
plt.imshow(img.reshape((28, 28)), cmap='Greys_r')2、构建模型
inputs_ = tf.placeholder(tf.float32, (None, 28, 28, 1), name='inputs')
targets_ = tf.placeholder(tf.float32, (None, 28, 28, 1), name='targets')

### Encoder
conv1 = tf.layers.conv2d(inputs_, 16, (3,3), padding='same', activation=tf.nn.relu)
# Now 28x28x16
maxpool1 = tf.layers.max_pooling2d(conv1, (2,2), (2,2), padding='same')
# Now 14x14x16
conv2 = tf.layers.conv2d(maxpool1, 8, (3,3), padding='same', activation=tf.nn.relu)
# Now 14x14x8
maxpool2 = tf.layers.max_pooling2d(conv2, (2,2), (2,2), padding='same')
# Now 7x7x8
conv3 = tf.layers.conv2d(maxpool2, 8, (3,3), padding='same', activation=tf.nn.relu)
# Now 7x7x8
encoded = tf.layers.max_pooling2d(conv3, (2,2), (2,2), padding='same')
# Now 4x4x8

### Decoder
upsample1 = tf.image.resize_nearest_neighbor(encoded, (7,7))
# Now 7x7x8
conv4 = tf.layers.conv2d(upsample1, 8, (3,3), padding='same', activation=tf.nn.relu)
# Now 7x7x8
upsample2 = tf.image.resize_nearest_neighbor(conv4, (14,14))
# Now 14x14x8
conv5 = tf.layers.conv2d(upsample2, 8, (3,3), padding='same', activation=tf.nn.relu)
# Now 14x14x8
upsample3 = tf.image.resize_nearest_neighbor(conv5, (28,28))
# Now 28x28x8
conv6 = tf.layers.conv2d(upsample3, 16, (3,3), padding='same', activation=tf.nn.relu)
# Now 28x28x16

logits = tf.layers.conv2d(conv6, 1, (3,3), padding='same', activation=None)
#Now 28x28x1

decoded = tf.nn.sigmoid(logits, name='decoded')

loss = tf.nn.sigmoid_cross_entropy_with_logits(labels=targets_, logits=logits)
cost = tf.reduce_mean(loss)
opt = tf.train.AdamOptimizer(0.001).minimize(cost)
Encoder:卷积;
Decoder:去卷积,也有文章推荐进行上采样(https://distill.pub/2016/deconv-checkerboard/)
3、训练
sess = tf.Session()epochs = 20
batch_size = 200
sess.run(tf.global_variables_initializer())
for e in range(epochs):
for ii in range(mnist.train.num_examples//batch_size):
batch = mnist.train.next_batch(batch_size)
imgs = batch[0].reshape((-1, 28, 28, 1))
batch_cost, _ = sess.run([cost, opt], feed_dict={inputs_: imgs,
targets_: imgs})
print("Epoch: {}/{}...".format(e+1, epochs),
"Training loss: {:.4f}".format(batch_cost))
4、测试
fig, axes = plt.subplots(nrows=2, ncols=10, sharex=True, sharey=True, figsize=(20,4))
in_imgs = mnist.test.images[:10]
reconstructed = sess.run(decoded, feed_dict={inputs_: in_imgs.reshape((10, 28, 28, 1))})

for images, row in zip([in_imgs, reconstructed], axes):
    for img, ax in zip(images, row):
        ax.imshow(img.reshape((28, 28)), cmap='Greys_r')
        ax.get_xaxis().set_visible(False)
        ax.get_yaxis().set_visible(False)


fig.tight_layout(pad=0.1)
sess.close()
二、自编码器应用:降噪
降噪跟前面的区别就在于,选择的卷积深度一开始为32。
1、自编码器构建
inputs_ = tf.placeholder(tf.float32, (None, 28, 28, 1), name='inputs')
targets_ = tf.placeholder(tf.float32, (None, 28, 28, 1), name='targets')

### Encoder
conv1 = tf.layers.conv2d(inputs_, 32, (3,3), padding='same', activation=tf.nn.relu)
# Now 28x28x32
maxpool1 = tf.layers.max_pooling2d(conv1, (2,2), (2,2), padding='same')
# Now 14x14x32
conv2 = tf.layers.conv2d(maxpool1, 32, (3,3), padding='same', activation=tf.nn.relu)
# Now 14x14x32
maxpool2 = tf.layers.max_pooling2d(conv2, (2,2), (2,2), padding='same')
# Now 7x7x32
conv3 = tf.layers.conv2d(maxpool2, 16, (3,3), padding='same', activation=tf.nn.relu)
# Now 7x7x16
encoded = tf.layers.max_pooling2d(conv3, (2,2), (2,2), padding='same')
# Now 4x4x16

### Decoder
upsample1 = tf.image.resize_nearest_neighbor(encoded, (7,7))
# Now 7x7x16
conv4 = tf.layers.conv2d(upsample1, 16, (3,3), padding='same', activation=tf.nn.relu)
# Now 7x7x16
upsample2 = tf.image.resize_nearest_neighbor(conv4, (14,14))
# Now 14x14x16
conv5 = tf.layers.conv2d(upsample2, 32, (3,3), padding='same', activation=tf.nn.relu)
# Now 14x14x32
upsample3 = tf.image.resize_nearest_neighbor(conv5, (28,28))
# Now 28x28x32
conv6 = tf.layers.conv2d(upsample3, 32, (3,3), padding='same', activation=tf.nn.relu)
# Now 28x28x32

logits = tf.layers.conv2d(conv6, 1, (3,3), padding='same', activation=None)
#Now 28x28x1

decoded = tf.nn.sigmoid(logits, name='decoded')

loss = tf.nn.sigmoid_cross_entropy_with_logits(labels=targets_, logits=logits)
cost = tf.reduce_mean(loss)
opt = tf.train.AdamOptimizer(0.001).minimize(cost)
2、训练
sess = tf.Session()epochs = 100
batch_size = 200
# Set's how much noise we're adding to the MNIST images
noise_factor = 0.5
sess.run(tf.global_variables_initializer())
for e in range(epochs):
for ii in range(mnist.train.num_examples//batch_size):
batch = mnist.train.next_batch(batch_size)
# Get images from the batch
imgs = batch[0].reshape((-1, 28, 28, 1))
# Add random noise to the input images
noisy_imgs = imgs + noise_factor * np.random.randn(*imgs.shape)
# Clip the images to be between 0 and 1
noisy_imgs = np.clip(noisy_imgs, 0., 1.)
# Noisy images as inputs, original images as targets
batch_cost, _ = sess.run([cost, opt], feed_dict={inputs_: noisy_imgs,
targets_: imgs})
print("Epoch: {}/{}...".format(e+1, epochs),
"Training loss: {:.4f}".format(batch_cost))3、测试
fig, axes = plt.subplots(nrows=2, ncols=10, sharex=True, sharey=True, figsize=(20,4))
in_imgs = mnist.test.images[:10]
noisy_imgs = in_imgs + noise_factor * np.random.randn(*in_imgs.shape)
noisy_imgs = np.clip(noisy_imgs, 0., 1.)

reconstructed = sess.run(decoded, feed_dict={inputs_: noisy_imgs.reshape((10, 28, 28, 1))})

for images, row in zip([noisy_imgs, reconstructed], axes):
    for img, ax in zip(images, row):
        ax.imshow(img.reshape((28, 28)), cmap='Greys_r')
        ax.get_xaxis().set_visible(False)
        ax.get_yaxis().set_visible(False)

fig.tight_layout(pad=0.1)


