计算机视觉OpenCV停车场车位识别
本文借鉴大佬的(跪求不要举报我 Orz Orz )
https://www.jianshu.com/p/9b9112e79ed5
停车场车位识别
要做的步骤
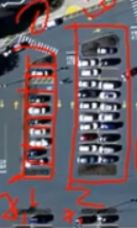
1、计算有几个车
2、计算还剩几个车位
3、哪个停车位被占用了,哪个停车位没有被占用。
def select_rgb_white_yellow(self,image):
    #过滤掉背景
    lower = np.uint8([120, 120, 120])
    upper = np.uint8([255, 255, 255])
    # lower_red和高于upper_red的部分分别变成0,lower_red~upper_red之间的值变成255,相当于过滤背景
    white_mask = cv2.inRange(image, lower, upper)
    self.cv_show('white_mask',white_mask)
    masked = cv2.bitwise_and(image, image, mask = white_mask)
    self.cv_show('masked',masked)
    return masked
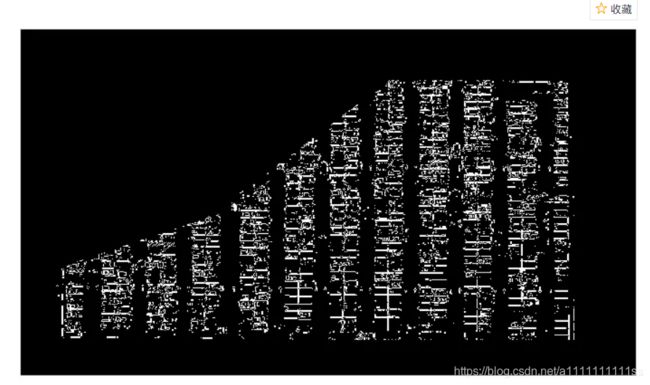
拿到图像之后,我们需要将其预处理,低于120,或者高于255的都处理为0。
一个是rgb转hsv的函数
hsv = cv2.cvtColor(rgb_image, cv2.COLOR_BGR2HSV)
利用cv2.inRange函数设阈值,去除背景部分
mask = cv2.inRange(hsv, lower_red, upper_red) #lower20===>0,upper200==>0,
函数很简单,参数有三个
第一个参数:hsv指的是原图
第二个参数:lower_red指的是图像中低于这个lower_red的值,图像值变为0
第三个参数:upper_red指的是图像中高于这个upper_red的值,图像值变为0
而在lower_red~upper_red之间的值变成255
bitwise_and是对二进制数据进行“与”操作,即对图像(灰度图像或彩色图像均可)每个像素值进行二进制“与”操作,1&1=1,1&0=0,0&1=0,0&0=0
bitwise_or是对二进制数据进行“或”操作,即对图像(灰度图像或彩色图像均可)每个像素值进行二进制“或”操作,1|1=1,1|0=0,0|1=0,0|0=0
bitwise_xor是对二进制数据进行“异或”操作,即对图像(灰度图像或彩色图像均可)每个像素值进行二进制“异或”操作,11=0,10=1,01=1,00=0
bitwise_not是对二进制数据进行“非”操作,即对图像(灰度图像或彩色图像均可)每个像素值进行二进制“非”操作,1=0,0=1
然后再将其与原始图像做与操作,这样的话,只有原始图像是255的像素点留下来了
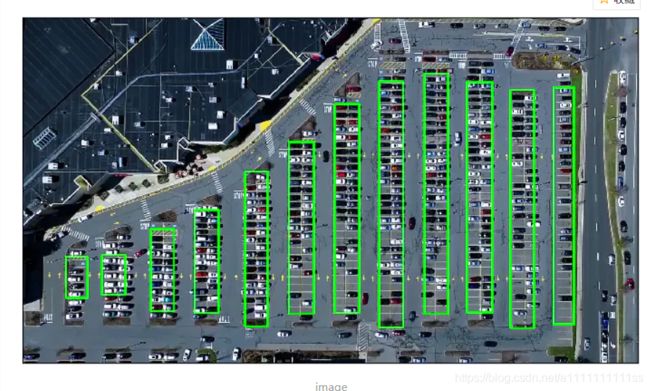
选择他的停车场的边缘目的是通过这几个点,把停车的的框起来
手动选择有效区域:
def select_region(self,image):
    """
            手动选择区域
    """
    # first, define the polygon by vertices
    rows, cols = image.shape[:2]
    pt_1  = [cols*0.05, rows*0.90]
    pt_2 = [cols*0.05, rows*0.70]
    pt_3 = [cols*0.30, rows*0.55]
    pt_4 = [cols*0.6, rows*0.15]
    pt_5 = [cols*0.90, rows*0.15]
    pt_6 = [cols*0.90, rows*0.90]
    vertices = np.array([[pt_1, pt_2, pt_3, pt_4, pt_5, pt_6]], dtype=np.int32)
    point_img = image.copy()
    point_img = cv2.cvtColor(point_img, cv2.COLOR_GRAY2RGB)
    for point in vertices[0]:
        cv2.circle(point_img, (point[0],point[1]), 10, (0,0,255), 4)
    self.cv_show('point_img',point_img)
    return self.filter_region(image, vertices)
cv2.circle(img, center, radius, color[, thickness[, lineType[, shift]]])
作用
根据给定的圆心和半径等画圆
参数说明
img:输入的图片data
center:圆心位置
radius:圆的半径
color:圆的颜色
thickness:圆形轮廓的粗细(如果为正)。负厚度表示要绘制实心圆。
lineType: 圆边界的类型。
shift:中心坐标和半径值中的小数位数。
之后做一个mask填充,然后将其分割出来:
def filter_region(self,image, vertices):
    """
            剔除掉不需要的地方
    """
    mask = np.zeros_like(image)
    if len(mask.shape)==2:
        cv2.fillPoly(mask, vertices, 255)
        self.cv_show('mask', mask)
    return cv2.bitwise_and(image, mask)
np.zeros_like 这个函数的意思就是生成一个和你所给数组相同形状的全0数组
操作完了之后就开始识别各个停车位
进行直线识别
利用霍夫变换检测直线
def hough_lines(self,image):
    #输入的图像需要是边缘检测后的结果
    #minLineLengh(线的最短长度,比这个短的都被忽略)
    #MaxLineCap(两条直线之间的最大间隔,小于此值,认为是一条直线)
    #rho距离精度,theta角度精度,threshod超过设定阈值才被检测出线段
    return cv2.HoughLinesP(image, rho=0.1, theta=np.pi/10, threshold=15, minLineLength=9, maxLineGap=4)
过滤一下选出来的直线
def draw_lines(self,image, lines, color=[255, 0, 0], thickness=2, make_copy=True):
    # 过滤霍夫变换检测到直线
    if make_copy:
        image = np.copy(image)
    cleaned = []
    for line in lines:
        for x1,y1,x2,y2 in line:
            if abs(y2-y1) <=1 and abs(x2-x1) >=25 and abs(x2-x1) <= 55:
                cleaned.append((x1,y1,x2,y2))
                cv2.line(image, (x1, y1), (x2, y2), color, thickness)
    print(" No lines detected: ", len(cleaned))
    return image
def identify_blocks(self,image, lines, make_copy=True):
    if make_copy:
        new_image = np.copy(image)
    #Step 1: 过滤部分直线
    cleaned = []
    for line in lines:
        for x1,y1,x2,y2 in line:
            if abs(y2-y1) <=1 and abs(x2-x1) >=25 and abs(x2-x1) <= 55:
                cleaned.append((x1,y1,x2,y2))

    #Step 2: 对直线按照x1进行排序
    import operator
    list1 = sorted(cleaned, key=operator.itemgetter(0, 1))

    #Step 3: 找到多个列,相当于每列是一排车
    clusters = {
     }
    dIndex = 0
    clus_dist = 10

    for i in range(len(list1) - 1):
        distance = abs(list1[i+1][0] - list1[i][0])
        if distance <= clus_dist:
        #y1y2的x是一样的他们是一个簇一共12个
            if not dIndex in clusters.keys(): clusters[dIndex] = []
            clusters[dIndex].append(list1[i])
            clusters[dIndex].append(list1[i + 1])

        else:
            dIndex += 1

    #Step 4: 得到坐标
    rects = {
     }
    i = 0
    for key in clusters:
        all_list = clusters[key]
        cleaned = list(set(all_list))
        #每一个簇至少五个y
        if len(cleaned) > 5:
            cleaned = sorted(cleaned, key=lambda tup: tup[1])
            avg_y1 = cleaned[0][1]
            avg_y2 = cleaned[-1][1]
            avg_x1 = 0
            avg_x2 = 0
            for tup in cleaned:
                avg_x1 += tup[0]
                avg_x2 += tup[2]
            avg_x1 = avg_x1/len(cleaned)
            avg_x2 = avg_x2/len(cleaned)
            rects[i] = (avg_x1, avg_y1, avg_x2, avg_y2)
            i += 1

    print("Num Parking Lanes: ", len(rects))
    #Step 5: 把列矩形画出来
    buff = 7
    for key in rects:
        tup_topLeft = (int(rects[key][0] - buff), int(rects[key][1]))
        tup_botRight = (int(rects[key][2] + buff), int(rects[key][3]))
        cv2.rectangle(new_image, tup_topLeft,tup_botRight,(0,255,0),3)
    return new_image, rects
    def draw_parking(self,image, rects, make_copy = True, color=[255, 0, 0], thickness=2, save = True):
        if make_copy:
            new_image = np.copy(image)
        gap = 15.5
        spot_dict = {
     } # 字典:一个车位对应一个位置
        tot_spots = 0
        #微调
        adj_y1 = {
     0: 20, 1:-10, 2:0, 3:-11, 4:28, 5:5, 6:-15, 7:-15, 8:-10, 9:-30, 10:9, 11:-32}
        adj_y2 = {
     0: 30, 1: 50, 2:15, 3:10, 4:-15, 5:15, 6:15, 7:-20, 8:15, 9:15, 10:0, 11:30}

        adj_x1 = {
     0: -8, 1:-15, 2:-15, 3:-15, 4:-15, 5:-15, 6:-15, 7:-15, 8:-10, 9:-10, 10:-10, 11:0}
        adj_x2 = {
     0: 0, 1: 15, 2:15, 3:15, 4:15, 5:15, 6:15, 7:15, 8:10, 9:10, 10:10, 11:0}
        for key in rects:
            tup = rects[key]
            x1 = int(tup[0]+ adj_x1[key])
            x2 = int(tup[2]+ adj_x2[key])
            y1 = int(tup[1] + adj_y1[key])
            y2 = int(tup[3] + adj_y2[key])
            cv2.rectangle(new_image, (x1, y1),(x2,y2),(0,255,0),2)
            num_splits = int(abs(y2-y1)//gap)  # 计算一簇有几个
            for i in range(0, num_splits+1):
                y = int(y1 + i*gap)
                cv2.line(new_image, (x1, y), (x2, y), color, thickness)
            if key > 0 and key < len(rects) -1 :
                # 竖直线
                x = int((x1 + x2)/2)
                cv2.line(new_image, (x, y1), (x, y2), color, thickness)
            # 计算数量

            if key == 0 or key == (len(rects)-1):  # 第一个跟最后一个的单排
                tot_spots += num_splits +1
            else:
                tot_spots += 2*(num_splits +1)

            # 字典对应好
            if key == 0 or key == (len(rects) -1):
                for i in range(0, num_splits+1):
                    cur_len = len(spot_dict)
                    y = int(y1 + i*gap)
                    spot_dict[(x1, y, x2, y+gap)] = cur_len +1
            else:
                for i in range(0, num_splits+1):
                    cur_len = len(spot_dict)
                    y = int(y1 + i*gap)
                    x = int((x1 + x2)/2)
                    spot_dict[(x1, y, x, y+gap)] = cur_len +1
                    spot_dict[(x, y, x2, y+gap)] = cur_len +2

        print("total parking spaces: ", tot_spots, cur_len)
        if save:
            filename = 'with_parking.jpg'
            cv2.imwrite(filename, new_image)
        return new_image, spot_dict
  #
  #分配车位
  def assign_spots_map(self,image, spot_dict, make_copy = True, color=[255, 0, 0], thickness=2):
        if make_copy:
            new_image = np.copy(image)
        for spot in spot_dict.keys():
            (x1, y1, x2, y2) = spot
            cv2.rectangle(new_image, (int(x1),int(y1)), (int(x2),int(y2)), color, thickness)
        return new_image
    保存图片
    def save_images_for_cnn(self,image, spot_dict, folder_name ='cnn_data'):
        for spot in spot_dict.keys():
            (x1, y1, x2, y2) = spot
            (x1, y1, x2, y2) = (int(x1), int(y1), int(x2), int(y2))
            # 裁剪
            spot_img = image[y1:y2, x1:x2]
            spot_img = cv2.resize(spot_img, (0,0), fx=2.0, fy=2.0)
            spot_id = spot_dict[spot]
            # 保存名字和地址
            filename = 'spot' + str(spot_id) +'.jpg'
            print(spot_img.shape, filename, (x1,x2,y1,y2))

            cv2.imwrite(os.path.join(folder_name, filename), spot_img)
            #预测
    def make_prediction(self,image,model,class_dictionary):
        #预处理
        img = image/255.

        #转换成4D tensor
        image = np.expand_dims(img, axis=0)

        # 用训练好的模型进行训练
        class_predicted = model.predict(image)
        inID = np.argmax(class_predicted[0])#假设第一个是最大的然后依次比较
        label = class_dictionary[inID]
        return label

    def predict_on_image(self,image, spot_dict , model,class_dictionary,make_copy=True, color = [0, 255, 0], alpha=0.5):
    #初始化
        if make_copy:
            new_image = np.copy(image)
            overlay = np.copy(image)
        self.cv_show('new_image',new_image)
        cnt_empty = 0
        all_spots = 0
        for spot in spot_dict.keys():  # 预测准备图片
            all_spots += 1
            (x1, y1, x2, y2) = spot
            (x1, y1, x2, y2) = (int(x1), int(y1), int(x2), int(y2))
            spot_img = image[y1:y2, x1:x2]
            spot_img = cv2.resize(spot_img, (48, 48))

            label = self.make_prediction(spot_img,model,class_dictionary)
            if label == 'empty':
                cv2.rectangle(overlay, (int(x1),int(y1)), (int(x2),int(y2)), color, -1)
                cnt_empty += 1

        cv2.addWeighted(overlay, alpha, new_image, 1 - alpha, 0, new_image)

        cv2.putText(new_image, "Available: %d spots" %cnt_empty, (30, 95),
        cv2.FONT_HERSHEY_SIMPLEX,
        0.7, (255, 255, 255), 2)

        cv2.putText(new_image, "Total: %d spots" %all_spots, (30, 125),
        cv2.FONT_HERSHEY_SIMPLEX,
        0.7, (255, 255, 255), 2)
        save = False

        if save:
            filename = 'with_marking.jpg'
            cv2.imwrite(filename, new_image)
        self.cv_show('new_image',new_image)

        return new_image

    def predict_on_video(self,video_name,final_spot_dict, model,class_dictionary,ret=True):
        cap = cv2.VideoCapture(video_name)
        count = 0
        while ret:
            ret, image = cap.read()
            count += 1
            if count == 5:
                count = 0

                new_image = np.copy(image)
                overlay = np.copy(image)
                cnt_empty = 0
                all_spots = 0
                color = [0, 255, 0]
                alpha=0.5
                for spot in final_spot_dict.keys():  # 循环每个车位
                    all_spots += 1
                    (x1, y1, x2, y2) = spot
                    (x1, y1, x2, y2) = (int(x1), int(y1), int(x2), int(y2))
                    spot_img = image[y1:y2, x1:x2]  # 截取图片
                    spot_img = cv2.resize(spot_img, (48,48))  # 改个大小

                    label = self.make_prediction(spot_img,model,class_dictionary)  # 预测这个车位
                    if label == 'empty':
                        cv2.rectangle(overlay, (int(x1),int(y1)), (int(x2),int(y2)), color, -1)
                        cnt_empty += 1

                cv2.addWeighted(overlay, alpha, new_image, 1 - alpha, 0, new_image)

                cv2.putText(new_image, "Available: %d spots" %cnt_empty, (30, 95),
                cv2.FONT_HERSHEY_SIMPLEX,
                0.7, (255, 255, 255), 2)

                cv2.putText(new_image, "Total: %d spots" %all_spots, (30, 125),
                cv2.FONT_HERSHEY_SIMPLEX,
                0.7, (255, 255, 255), 2)
                cv2.imshow('frame', new_image)
                if cv2.waitKey(10) & 0xFF == ord('q'):
                    break

        cv2.destroyAllWindows()
        cap.release()
代码链接
https://pan.baidu.com/s/16HNAskZtrOXZerR4xvS9MA
提取码c3p6


