从源码分析 Fragment 的生命周期,如何展示到屏幕
从源码分析 Fragment 的生命周期,如何展示到屏幕
这篇文章的重点主要是下面两点:
- 从源码分析 Fragment 的生命周期,如何展示到屏幕
- 从源码解析 commit, commitAllowingStateLoss, commitNow, commitNowAllowingStateLoss 的区别
从源码分析 Fragment 的生命周期,如何展示到屏幕
把一个 Fragment 添加到屏幕上一共有四步:
- getSupportFragmentManager
- beginTransaction
- add
- commit
getSupportFragmentManager().beginTransaction().add(R.id.ll_layout, fragment).commit();
1. 看下第一步 getSupportFragmentManager 拿到的是什么吧
我这里用的是 API 28 的源码,所以采用的都是 androidx, support v4.0 中的源码也是类似
androidx.fragment.app.FragmentActivity
final FragmentController mFragments = FragmentController.createController(new HostCallbacks());

public FragmentManager getSupportFragmentManager() {
    return mFragments.getSupportFragmentManager();
}
具体实现在 FragmentController 里面,进入看到 具体实现还在 FragmentHostCallback 里面
androidx.fragment.app.FragmentController
private final FragmentHostCallback mHost;

public FragmentManager getSupportFragmentManager() {
    return mHost.mFragmentManager;
}
FragmentHostCallback 里面的 mFragmentManager 其实就是 FragmentManagerImpl, 所以 getSupportFragmentManager() 方法拿到的就是 FragmentManagerImpl 的实例
androidx.fragment.app.FragmentHostCallback
final FragmentManagerImpl mFragmentManager = new FragmentManagerImpl();
2. 知道了 getSupportFragmentManager 获取到的是 FragmentManagerImpl, 再看下 beginTransaction 是怎么实现的
FragmentManager 是一个抽象类, beginTransaction 也是一个抽象的实现
androidx.fragment.app.FragmentManager
public abstract FragmentTransaction beginTransaction();
前面也说了我们 getSupportFragmentManager 获取到的是 FragmentManagerImpl, 到 FragmentManagerImpl 看下 beginTransaction 获取的具体是什么
只是创建了一个 BackStackRecord 实例,返回而已
androidx.fragment.app.FragmentManagerImpl
public FragmentTransaction beginTransaction() {
    return new BackStackRecord(this);
}
3. 第三步是 add 操作,也来看下具体实现
第二步的操作可以看到 beginTransaction 返回的实例虽然是 BackStackRecord, 但是他的父类是 FragmentTransaction
add 操作也是由 FragmentTransaction 实现的
看到最后,可以看到 add 方法,只是把 add 操作加入到 mOps 集合当中而已,具体什么时候操作,我们估计是在 commit 之后。
androidx.fragment.app.FragmentTransaction
public FragmentTransaction add(@IdRes int containerViewId, @NonNull Fragment fragment,
        @Nullable String tag) {
    doAddOp(containerViewId, fragment, tag, OP_ADD);
    return this;
}

void doAddOp(int containerViewId, Fragment fragment, @Nullable String tag, int opcmd) {
    ...

    if (containerViewId != 0) {
        if (containerViewId == View.NO_ID) {
            throw new IllegalArgumentException("Can't add fragment "
                    + fragment + " with tag " + tag + " to container view with no id");
        }
        if (fragment.mFragmentId != 0 && fragment.mFragmentId != containerViewId) {
            throw new IllegalStateException("Can't change container ID of fragment "
                    + fragment + ": was " + fragment.mFragmentId
                    + " now " + containerViewId);
        }
        fragment.mContainerId = fragment.mFragmentId = containerViewId;
    }

    addOp(new Op(opcmd, fragment));
}

ArrayList mOps = new ArrayList<>();

void addOp(Op op) {
    mOps.add(op);
    op.mEnterAnim = mEnterAnim;
    op.mExitAnim = mExitAnim;
    op.mPopEnterAnim = mPopEnterAnim;
    op.mPopExitAnim = mPopExitAnim;
}
4. commit 之后,Fragment 是怎么显示到屏幕上的呢?
commit 在 FragmentTransaction 是一个抽象的实现
androidx.fragment.app.FragmentTransaction
public abstract int commit();
既然前面我们获取到的 FragmentTransaction 具体是 BackStackRecord 实例,就进入 BackStackRecord 看看 commit 的具体实现
androidx.fragment.app.BackStackRecord
public int commit() {
    return commitInternal(false);
}

int commitInternal(boolean allowStateLoss) {
    ...

    mCommitted = true;
    if (mAddToBackStack) {
        mIndex = mManager.allocBackStackIndex(this);
    } else {
        mIndex = -1;
    }
    mManager.enqueueAction(this, allowStateLoss);
    return mIndex;
}
FragmentManagerImpl 把 BackStackRecord 的 action enqueue 进队列里,方法 mPendingActions 集合当中,然后按顺序执行 scheduleCommit
androidx.fragment.app.FragmentManagerImpl
public void enqueueAction(OpGenerator action, boolean allowStateLoss) {
    if (!allowStateLoss) {
        checkStateLoss();
    }
    synchronized (this) {
        if (mDestroyed || mHost == null) {
            if (allowStateLoss) {
                // This FragmentManager isn't attached, so drop the entire transaction.
                return;
            }
            throw new IllegalStateException("Activity has been destroyed");
        }
        if (mPendingActions == null) {
            mPendingActions = new ArrayList<>();
        }
        mPendingActions.add(action);
        scheduleCommit();
    }
}
看下 scheduleCommit 是如何按顺序执行的
scheduleCommit 只是在 handler 中 post 一条 mExecCommit 消息而已,所以 commit 方法相当于没有立马执行,而是在 hander 中 post 出去,按照系统的排序执行,再下一刻执行,不占用 commit 的时间,相当于是异步操作
androidx.fragment.app.FragmentManagerImpl
void scheduleCommit() {
    synchronized (this) {
        boolean postponeReady =
                mPostponedTransactions != null && !mPostponedTransactions.isEmpty();
        boolean pendingReady = mPendingActions != null && mPendingActions.size() == 1;
        if (postponeReady || pendingReady) {
            mHost.getHandler().removeCallbacks(mExecCommit);
            mHost.getHandler().post(mExecCommit);
            updateOnBackPressedCallbackEnabled();
        }
    }
}
来看下 mExecCommit 具体做了什么吧
mExecCommit 其实只是执行了 execPendingActions 方法,相当于运行 mPendingActions 集合中的方法
androidx.fragment.app.FragmentManagerImpl
Runnable mExecCommit = new Runnable() {
    @Override
    public void run() {
        execPendingActions();
    }
};
首先通过 generateOpsForPendingActions 方法判断是否有要执行的 action
androidx.fragment.app.FragmentManagerImpl
public boolean execPendingActions() {
    ensureExecReady(true);

    boolean didSomething = false;
    while (generateOpsForPendingActions(mTmpRecords, mTmpIsPop)) {
        mExecutingActions = true;
        try {
            removeRedundantOperationsAndExecute(mTmpRecords, mTmpIsPop);
        } finally {
            cleanupExec();
        }
        didSomething = true;
    }

    ...

    return didSomething;
}
具体看下 generateOpsForPendingActions 如何判断有没有 action 的
其实就是判断前面我们加入 action 操作的 mPendingActions 集合,判断是否有需要执行的 action
androidx.fragment.app.FragmentManagerImpl
private boolean generateOpsForPendingActions(ArrayList records,
                                             ArrayList isPop) {
    boolean didSomething = false;
    synchronized (this) {
        if (mPendingActions == null || mPendingActions.size() == 0) {
            return false;
        }

        final int numActions = mPendingActions.size();
        for (int i = 0; i < numActions; i++) {
        	// 获取加入的 action, 并通过 generateOps 方法来判断是否要执行某些操作
            didSomething |= mPendingActions.get(i).generateOps(records, isPop);
        }
        mPendingActions.clear();
        mHost.getHandler().removeCallbacks(mExecCommit);
    }
    return didSomething;
}
这里加入的 Action 就是 BackStackRecord 实例,进去看看 generateOps 的实现和返回值
generateOps 方法只是把一些操作记录一下,而且返回值永远是 true,表示需要执行操作
androidx.fragment.app.BackStackRecord
public boolean generateOps(ArrayList records, ArrayList isRecordPop) {
    if (FragmentManagerImpl.DEBUG) {
        Log.v(TAG, "Run: " + this);
    }

    records.add(this);
    isRecordPop.add(false);
    if (mAddToBackStack) {
        mManager.addBackStackState(this);
    }
    return true;
}
具体看下 mManager.addBackStackState 方法是做了啥?
其实一样,就是在 mBackStack 集合中加入了当前状态而已
androidx.fragment.app.FragmentManagerImpl
void addBackStackState(BackStackRecord state) {
    if (mBackStack == null) {
        mBackStack = new ArrayList();
    }
    mBackStack.add(state);
}
现在有 action 就要执行相应的操作了,根据 BackStackRecord 方法里面的 generateOps 操作,我们知道 records 和 isRecordPop 加入了 BackStackRecord 的实例
所以 removeRedundantOperationsAndExecute 里面的 records 和 isRecordPop 就是 BackStackRecord 的实例个数
androidx.fragment.app.FragmentManagerImpl
private void removeRedundantOperationsAndExecute(ArrayList records,
                                                 ArrayList isRecordPop) {
    ...

    final int numRecords = records.size();
    int startIndex = 0;
    for (int recordNum = 0; recordNum < numRecords; recordNum++) {
        ...
            executeOpsTogether(records, isRecordPop, recordNum, reorderingEnd);
            startIndex = reorderingEnd;
            recordNum = reorderingEnd - 1;
    }
    if (startIndex != numRecords) {
        executeOpsTogether(records, isRecordPop, startIndex, numRecords);
    }
}
executeOpsTogether 方法就是要一起执行 records 里面的方法,具体执行交给了 executeOps 方法
androidx.fragment.app.FragmentManagerImpl
private void executeOpsTogether(ArrayList records,
                                ArrayList isRecordPop, int startIndex, int endIndex) {
    ...
    executeOps(records, isRecordPop, startIndex, endIndex);
    ...
}
一起看下 executeOps 方法做了什么操作
看到 executeOps 方法,最后还是交给了 record 来执行 executeOps 方法
androidx.fragment.app.FragmentManagerImpl
private static void executeOps(ArrayList records,
                               ArrayList isRecordPop, int startIndex, int endIndex) {
    for (int i = startIndex; i < endIndex; i++) {
        final BackStackRecord record = records.get(i);
        final boolean isPop = isRecordPop.get(i);
        if (isPop) {
            record.bumpBackStackNesting(-1);
            // Only execute the add operations at the end of
            // all transactions.
            boolean moveToState = i == (endIndex - 1);
            record.executePopOps(moveToState);
        } else {
            record.bumpBackStackNesting(1);
            // 执行 record 里面的 executeOps 方法
            record.executeOps();
        }
    }
}
通过前面我们知道 record 其实就是 BackStackRecord 实例,具体看看 BackStackRecord 里面的 executeOps 方法怎么做的吧
- 首先进入 switch 逻辑,这里的操作是 OP_ADD, 所以就是执行 mManager.addFragment, 其实里面就是把当前的 Fragment 记录下,标记为激活的状态,后面 Activity 生命周期变化,可以及时发送到记录过的 Fragment
- 执行 Fragment 的生命周期,其中 mManager.mCurState = 4,表明当前 Activity 的状态是 RESUMED
androidx.fragment.app.BackStackRecord
void executeOps() {
    final int numOps = mOps.size();
    for (int opNum = 0; opNum < numOps; opNum++) {
        final Op op = mOps.get(opNum);
        final Fragment f = op.mFragment;
        if (f != null) {
            f.setNextTransition(mTransition, mTransitionStyle);
        }
        switch (op.mCmd) {
            case OP_ADD:
                f.setNextAnim(op.mEnterAnim);
                mManager.addFragment(f, false);
                break;
            case OP_REMOVE:

            ...
        }
        if (!mReorderingAllowed && op.mCmd != OP_ADD && f != null) {
            mManager.moveFragmentToExpectedState(f);
        }
    }
    if (!mReorderingAllowed) {
        // Added fragments are added at the end to comply with prior behavior.
        mManager.moveToState(mManager.mCurState, true);
    }
}
先看下 addFragment 做了什么操作吧
androidx.fragment.app.FragmentManagerImpl
public void addFragment(Fragment fragment, boolean moveToStateNow) {
    if (DEBUG) Log.v(TAG, "add: " + fragment);
    // 记录下当前的 fragment
    makeActive(fragment);
    if (!fragment.mDetached) {
        if (mAdded.contains(fragment)) {
            throw new IllegalStateException("Fragment already added: " + fragment);
        }
        // 如果没有 Detached,记录下来,接下去要操作
        synchronized (mAdded) {
            mAdded.add(fragment);
        }
        fragment.mAdded = true;
        fragment.mRemoving = false;
        if (fragment.mView == null) {
            fragment.mHiddenChanged = false;
        }
        if (isMenuAvailable(fragment)) {
            mNeedMenuInvalidate = true;
        }
        if (moveToStateNow) {
            moveToState(fragment);
        }
    }
}


void makeActive(Fragment f) {
    if (mActive.get(f.mWho) != null) {
        return;
    }

    // 标记为激活的状态,后面 Activity 生命周期变化,可以及时发送到记录过的 Fragment
    mActive.put(f.mWho, f);
    if (f.mRetainInstanceChangedWhileDetached) {
        if (f.mRetainInstance) {
            addRetainedFragment(f);
        } else {
            removeRetainedFragment(f);
        }
        f.mRetainInstanceChangedWhileDetached = false;
    }
    if (DEBUG) Log.v(TAG, "Added fragment to active set " + f);
}
接下来看看第二步 Fragment 是如何执行生命周期的
androidx.fragment.app.FragmentManagerImpl
void moveToState(int newState, boolean always) {
    ...
    for (int i = 0; i < numAdded; i++) {
    	// mAdded 这里的就是第一步中记录的 fragment
        Fragment f = mAdded.get(i);
        moveFragmentToExpectedState(f);
    }
    ...
}

void moveFragmentToExpectedState(Fragment f) {
    ...
    moveToState(f, nextState, f.getNextTransition(), f.getNextTransitionStyle(), false);
    ....
}
真正执行生命周期的地方
主要分析 Fragment.CREATED 方法,因为他解释了 Fragment 是如何展示到屏幕上的,其实就是通过 container.addView(f.mView); 方法把 Fragment 的 View 加入到 rootView 中
其中 container 就是 getSupportFragmentManager().beginTransaction().add(R.id.ll_layout, fragment).commit() 里面的 add 操作里面的 id 表示的 View
那他又是怎么执行 Fragment 的所有生命周期的呢?
newState 根据上面的传参可以知道是 newState = mManager.mCurState = 4,表明当前 Activity 的状态是 RESUMED
f.mState 又是 0,所以就会从 Fragment.INITIALIZING 开始执行直到 Fragment.STARTED(因为 switch-case 里面每个 case 都没有 break 方法,所以就会一直执行到底为止)
androidx.fragment.app.FragmentManagerImpl
void moveToState(Fragment f, int newState, int transit, int transitionStyle,
                 boolean keepActive) {
    ...
        switch (f.mState) {
                ...
            case Fragment.CREATED:
                // We want to unconditionally run this anytime we do a moveToState that
                // moves the Fragment above INITIALIZING, including cases such as when
                // we move from CREATED => CREATED as part of the case fall through above.
                if (newState > Fragment.INITIALIZING) {
                    ensureInflatedFragmentView(f);
                }

                if (newState > Fragment.CREATED) {
                    if (DEBUG) Log.v(TAG, "moveto ACTIVITY_CREATED: " + f);
                    if (!f.mFromLayout) {
                        ViewGroup container = null;
                        // 这里的 f.mContainerId 就是 getSupportFragmentManager().beginTransaction().add(R.id.ll_layout, fragment).commit() 里面的 add 里面的 id
                        if (f.mContainerId != 0) {
                            if (f.mContainerId == View.NO_ID) {
                                throwException(new IllegalArgumentException(
                                        "Cannot create fragment "
                                                + f
                                                + " for a container view with no id"));
                            }
                            container = (ViewGroup) mContainer.onFindViewById(f.mContainerId);
                            if (container == null && !f.mRestored) {
                                String resName;
                                try {
                                    resName = f.getResources().getResourceName(f.mContainerId);
                                } catch (Resources.NotFoundException e) {
                                    resName = "unknown";
                                }
                                throwException(new IllegalArgumentException(
                                        "No view found for id 0x"
                                                + Integer.toHexString(f.mContainerId) + " ("
                                                + resName
                                                + ") for fragment " + f));
                            }
                        }
                        f.mContainer = container;
                        f.performCreateView(f.performGetLayoutInflater(
                                f.mSavedFragmentState), container, f.mSavedFragmentState);
                        if (f.mView != null) {
                            f.mInnerView = f.mView;
                            f.mView.setSaveFromParentEnabled(false);
                            if (container != null) {
                            	// 在当前的 root 中加入 Fragment 的 View
                                container.addView(f.mView);
                            }
                            if (f.mHidden) {
                                f.mView.setVisibility(View.GONE);
                            }
                            f.onViewCreated(f.mView, f.mSavedFragmentState);
                            dispatchOnFragmentViewCreated(f, f.mView, f.mSavedFragmentState,
                                    false);
                            // Only animate the view if it is visible. This is done after
                            // dispatchOnFragmentViewCreated in case visibility is changed
                            f.mIsNewlyAdded = (f.mView.getVisibility() == View.VISIBLE)
                                    && f.mContainer != null;
                        } else {
                            f.mInnerView = null;
                        }
                    }

                    f.performActivityCreated(f.mSavedFragmentState);
                    dispatchOnFragmentActivityCreated(f, f.mSavedFragmentState, false);
                    if (f.mView != null) {
                        f.restoreViewState(f.mSavedFragmentState);
                    }
                    f.mSavedFragmentState = null;
                }
                // fall through
                ...
}
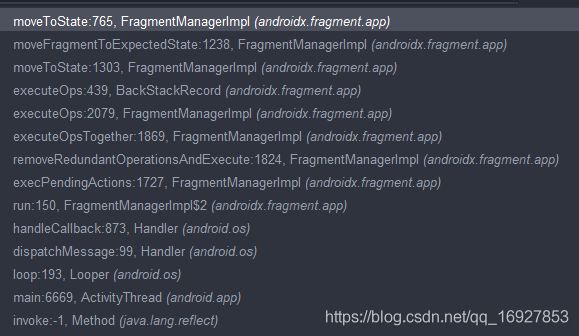
下面是执行方法的调用链
从源码解析 commit, commitAllowingStateLoss, commitNow, commitNowAllowingStateLoss 的区别
1. commit 就是采用异步方法,把当前的 action 加入到队列里,post 出去,后面执行
androidx.fragment.app.BackStackRecord
public int commit() {
    return commitInternal(false);
}

int commitInternal(boolean allowStateLoss) {
    ...

    mCommitted = true;
    if (mAddToBackStack) {
        mIndex = mManager.allocBackStackIndex(this);
    } else {
        mIndex = -1;
    }
    mManager.enqueueAction(this, allowStateLoss);
    return mIndex;
}
androidx.fragment.app.FragmentManagerImpl
public void enqueueAction(OpGenerator action, boolean allowStateLoss) {
    if (!allowStateLoss) {
        checkStateLoss();
    }
    synchronized (this) {
        if (mDestroyed || mHost == null) {
            if (allowStateLoss) {
                // This FragmentManager isn't attached, so drop the entire transaction.
                return;
            }
            throw new IllegalStateException("Activity has been destroyed");
        }
        if (mPendingActions == null) {
            mPendingActions = new ArrayList<>();
        }
        mPendingActions.add(action);
        scheduleCommit();
    }
}

void scheduleCommit() {
    synchronized (this) {
        boolean postponeReady =
                mPostponedTransactions != null && !mPostponedTransactions.isEmpty();
        boolean pendingReady = mPendingActions != null && mPendingActions.size() == 1;
        if (postponeReady || pendingReady) {
            mHost.getHandler().removeCallbacks(mExecCommit);
            mHost.getHandler().post(mExecCommit);
            updateOnBackPressedCallbackEnabled();
        }
    }
}
2. commitAllowingStateLoss
commit 和 commitAllowingStateLoss 的主要区别在与 enqueueAction 方法,如果是 activity destroyed 或者宿主为空,直接返回
就不会产生错误,所以一般推荐使用 commitAllowingStateLoss
public void enqueueAction(OpGenerator action, boolean allowStateLoss) {
    if (!allowStateLoss) {
        checkStateLoss();
    }
    synchronized (this) {
        if (mDestroyed || mHost == null) {
        	// commitAllowingStateLoss
            if (allowStateLoss) {
                // This FragmentManager isn't attached, so drop the entire transaction.
                return;
            }
            throw new IllegalStateException("Activity has been destroyed");
        }
        if (mPendingActions == null) {
            mPendingActions = new ArrayList<>();
        }
        mPendingActions.add(action);
        scheduleCommit();
    }
}
3. commitNow 与 commit 区别,commitNow 直接执行 FragmentTransaction 操作,相同于是同步操作;commit 是异步操作
public void commitNow() {
    disallowAddToBackStack();
    mManager.execSingleAction(this, false);
}