Rsync远程访问案例
推荐步骤:
安装rsync,添加主配置文件、启动服务监听服务
同步本地mnt目录的所有数据到当前位置的centos7目录中显示详细信息 挂载光盘,创建目录
将源accp目录中数据同步到目标xsh目录xsh目录删除xsh目录中的历史数据,创建两个目录
往accp目录中写入1.txt数据、xsh目录写入2.txt数据,将源accp目录中数据同步到目标xsh目录,xsh目录删除xsh目录中的历史数据
将本地xsh目录中的数据,同步到远程主机192.168.100.20的根目录中
配置同步身份验证的rsync、安装inotify,解压
配置一次性监控,监控bdqn目录发生的变化
编写触发式同步脚本
安装rsync
[root@centos01 ~]# yum -y install rsync
添加主配置文件
[root@centos01 ~]# vim /etc/rsyncd.conf

启动服务
[root@centos01 ~]# rsync --daemon
监听rsync服务
[root@centos01 ~]# netstat -anptu | grep rsync

设置开机启动添加执行权限
[root@centos01 ~]# vim /etc/rc.d/rc.local
/usr/bin/rsync –daemon
[root@centos01 ~]# chmod +x /etc/rc.d/rc.local
同步本地mnt目录的所有数据到当前位置的centos7目录中显示详细信息
挂载光盘,创建目录
[root@centos01 ~]# mount /dev/cdrom /mnt/
[root@centos01 ~]# mkdir centos7
[root@centos01 ~]# rsync -alv /mnt/* ./centos7/
将源accp目录中数据同步到目标xsh目录xsh目录删除xsh目录中的历史数据
创建两个目录
[root@centos01 ~]# mkdir accp
[root@centos01 ~]# mkdir xsh
往accp目录中写入1.txt数据、xsh目录写入2.txt数据,将源accp目录中数据同步到目标xsh目录,xsh目录删除xsh目录中的历史数据
[root@centos01 ~]# echo “22222” > ./accp/1.txt
[root@centos01 ~]# echo “22222” > ./xsh/2.txt
[root@centos01 ~]# rsync -av --delete ./accp/ ./xsh/

将本地xsh目录中的数据,同步到远程主机192.168.100.20的根目录中
[root@centos01 ~]# rsync -av ./xsh/ [email protected]:/

192.168.100.20主机验证

配置同步身份验证的rsync
- 创建rsync验证数据库,账户是bob密码是pwd@123
[root@centos01 ~]# vim /etc/rsync_user.db
bob:pwd@123
- 修改rsync主配置文件创建共享
[root@centos01 ~]# vim /etc/rsyncd.conf
[bdqn]
path = /bdqn
comment = test
auth users bob
secrets file = /etc/rsync_user.db
read only = yes
- 创建同步物理目录
[root@centos01 ~]# mkdir /bdqn
[root@centos01 ~]# echo “aaaa” > /bdqn/aaa.txt
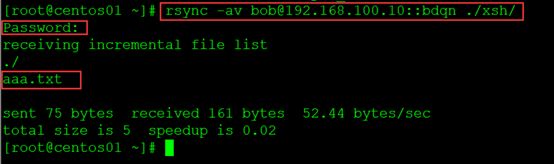
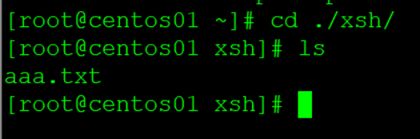
- 客户端同步数据,将远程服务器192.168.100.10的bdqn数据同步到当前位置的xsh目录
添加权限
[root@centos01 ~]# chmod 600 /etc/rsync_user.db
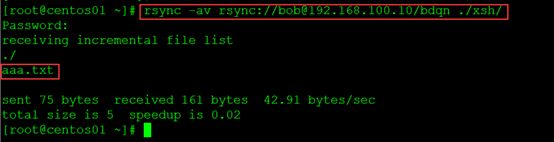
5.客户端同步数据
[root@centos01 ~]# rsync -av rsync://[email protected]/bdqn ./xsh/
安装inotify,解压
[root@centos01 mnt]# tar zxvf inotify-tools-3.14.tar.gz -C /usr/src/
[root@centos01 inotify-tools-3.14]#./configure
[root@centos01 inotify-tools-3.14]# make && make install/
修改内核参数更新内核
[root@centos01 ~]# vim /etc/sysctl.conf
fs.inotify.max_queued_events = 16384
fs.inotify.max_user_instances = 128
fs.inotify.max_user_watches = 8192

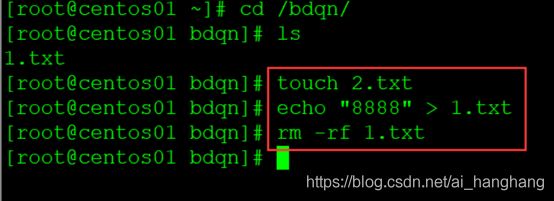
配置一次性监控,监控bdqn目录发生的变化
[root@centos01 ~]# inotifywait -mrq -e modify,create,delete,move,attrib /bdqn/

编写触发式同步脚本
[root@centos01 ~]# vim rsync.sh
#!/bin/bash
INW=“inotifywait -mrq -e modify,create,delete,move,attrib /bdqn/”
RSYNC=“rsync -avzH /bdqn / [email protected]:/benet/ --delete”
$INW | while read DIRECTORY EVENT FILE;do
$RSYNC &> /dev/null
done
添加执行权限
[root@centos01 ~]# chmod +x rsync.sh
运行测试
创建benet目录
[root@centos02 /]# mkdir benet
创建验证数据
[root@centos01 bdqn]# echo “2222” > 3.txt
[root@centos02 benet]# ls
3.txt
设置服务的开机自启
vim /etc/rc.d/rc.local
/root/rsync.sh &
配置ssh
[root@centos01 ~]# cd .ssh/
[root@centos01 .ssh]# ssh-keygen -t rsa
[root@centos01 .ssh]# ssh-copy-id -i id_rsa.pub [email protected]