使用Intellij idea搭建SSM 框架
此篇文章是我在网易云课堂上学习《SSM在线学生管理系统》的笔记,如有侵权,请联系我删掉文章
1.创建intellij idea项目


之后点finish即可。
这是生成的项目样子【若发现自己生成的项目少了src文件等文件,稍等一下便是】

2.集成Spring和SpringMVC
因为spring和springmvc的集成比较好测试,我们先从这两个的集成开始
1.导入jar包
pom.xml
  4.0.0

  zxl.lab.web
  LabWeb_SSM
  1.0-SNAPSHOT
  war

  LabWeb_SSM Maven Webapp

  http://www.example.com


    UTF-8
    1.7
    1.7


      junit
      junit
      4.11
      test


      javax
      javaee-api
      7.0
      provided


      org.glassfish.web
      javax.servlet.jsp.jstl
      1.2.2


      org.springframework
      spring-core
      4.2.6.RELEASE


      org.springframework
      spring-beans
      4.2.6.RELEASE


      org.springframework
      spring-context
      4.2.6.RELEASE


      org.springframework
      spring-context-support
      4.2.6.RELEASE


      org.springframework
      spring-web
      4.2.6.RELEASE


      org.springframework
      spring-webmvc
      4.2.6.RELEASE


      org.springframework
      spring-aop
      4.2.6.RELEASE


      org.springframework
      spring-expression
      4.2.6.RELEASE


      commons-logging
      commons-logging
      1.2


      org.springframework
      spring-aspects
      4.2.6.RELEASE


      org.springframework
      spring-orm
      4.2.6.RELEASE


      org.springframework
      spring-jdbc
      4.2.6.RELEASE


      org.springframework
      spring-tx
      4.2.6.RELEASE


          org.springframework
          spring-test
          4.2.6.RELEASE


      org.springframework.batch
      spring-batch-infrastructure
      3.0.7.RELEASE


      commons-dbcp
      commons-dbcp
      1.4


       commons-io
       commons-io
       2.2


          commons-fileupload
          commons-fileupload
          1.3.1


          commons-pool
          commons-pool
          1.5.3


      mysql
      mysql-connector-java
      5.1.8


      log4j
      log4j
      1.2.17


      org.slf4j
      slf4j-log4j12
      1.7.12


      org.slf4j
      slf4j-api
      1.7.12


      asm
      asm
      3.3.1


      cglib
      cglib
      2.2.2


      org.javassist
      javassist
      3.18.1-GA


      com.fasterxml.jackson.core
      jackson-core
      2.8.0


      com.fasterxml.jackson.core
      jackson-databind
      2.8.0


      junit
      junit
      4.10
      test


      org.mybatis
      mybatis
      3.4.2


      org.mybatis
      mybatis-spring
      1.3.0


      org.mybatis.generator
      mybatis-generator-core
      1.3.5


          org.aspectj
          aspectjweaver
          1.6.8


          aopalliance
          aopalliance
          1.0


          org.junit.jupiter
          junit-jupiter-api
          RELEASE
          compile


      org.junit.jupiter
      junit-jupiter-api
      RELEASE
      compile


          junit
          junit
          4.12
          compile


    LabWeb_SSM


          maven-clean-plugin
          3.1.0


          maven-resources-plugin
          3.0.2


          maven-compiler-plugin
          3.8.0


          maven-surefire-plugin
          2.22.1


          maven-war-plugin
          3.2.2


          maven-install-plugin
          2.5.2


          maven-deploy-plugin
          2.8.2
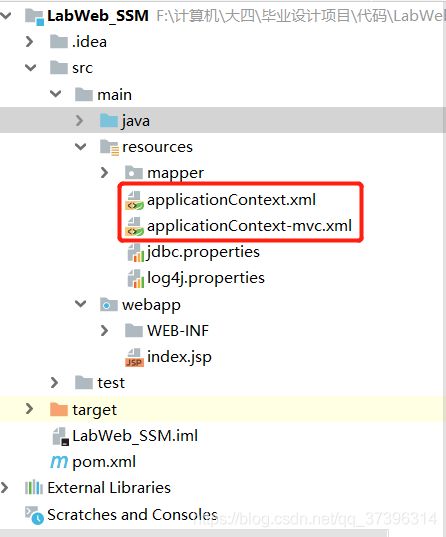
2.Spring配置文件
Spring配置文件和SpringMVC配置文件是分开的。在resources文件夹中添加applicationContext.xml文件【注意:在自己添加resources等包的时候右键文件夹->Mark Directory as->resources。若是java文件夹则是sources,test文件夹下的java和resourses在选择的时候要选前面有test字样的】
3.SpringMVC配置文件
在resources文件夹中添加applicationContext-mvc.xml
            /WEB-INF/views/


            .jsp


            200000
controller直接在选择显示在浏览器上的页面,因此base-package的地址应该为所建立包下controller类所在的包名
视图解析器配置我们要找的jsp文件的位置,我在webapp->WEB-INF->views中放需要的jsp页面,.jsp为要找的文件后缀
文件具体存放位置如下
3.配置web.xml
web.xml文件在webapp->WEB-INF->web.xml下
web.xml配置目的
1)解决编码问题
2)springmvc核心控制器
3)spring的监听器
4)spring文件扫描路径
  LabWeb

    index.jsp
    index.html


    CharacterEncodingFilter
    org.springframework.web.filter.CharacterEncodingFilter


      encoding
      UTF-8


    CharacterEncodingFilter
    /*


    contextConfigLocation
    classpath:applicationContext.xml


        log4jConfigLocation
        classpath:resources/log4j.properties


    org.springframework.web.context.ContextLoaderListener


    springmvc
    org.springframework.web.servlet.DispatcherServlet

      contextConfigLocation
      classpath:applicationContext-mvc.xml

    1


    springmvc
    /
注意:用intellij idea直接生成的web.xml文件开头是这样的
Archetype Created Web Application
无法识别el表达示,在后面使用MODEL的时候${student}会在页面上直接生成${student}而不是student所代表的数值,将其替换如下
4.创建Controller类
位置
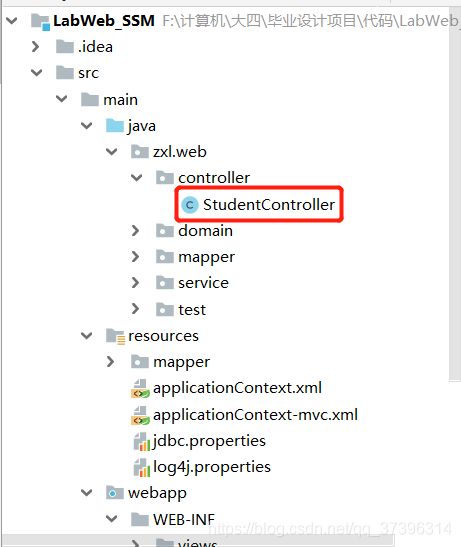
@Controller
@RequestMapping("/student")
public class StudentController {

	@RequestMapping("/index")
	public String index() {
		return " student/index";
	}

}
5.对Springmvc进行测试
我们在student/index页面上随便输入点东西
<%@ page contentType="text/html;charset=UTF-8" language="java" %>


    Title


Spring和SpringMVC整合完毕
运行->在浏览器中输入student/index
界面显示“Spring和SpringMVC整合完毕” 则成功
3.集成Spring和MyBatis
因为Spring是项目管理专家,可以和各个框架进行整合
1.导入jar包【这步已经实现】
2.在spring中中配置mybatis内容
顺序为
Jdbc.properties(资源文件)->dataSource(数据源)->sql SessionFactory-->mapper->service-->action
1.jdbc配置文件
在resources中添加jdbc.properties
jdbc.driverClassName=com.mysql.jdbc.Driver
jdbc.url=jdbc:mysql:///yourdatabase
jdbc.username=root
jdbc.password=yourpassword
在配置jdbc.properties
username即电脑安装mysql的时候的username,一般都是root,也可以添加其他user信息,但是权限不同,最大的就是root。此处的password则是安装Mysql的时候设置的root的password,只有一致才能连接mysql数据库,用什么软件都一样,不论是Intellij idea还是navicat。
2.配置数据源
applicationContext.xml
3.SqlSessionFactoryBean
applicationContext.xml
intellij idea中java文件下是不会识别除类以外的文件的,将*Mapper.xml放到resources下面
别名为domain下的即实体对应的类
4.StudentMapper接口
package zxl.web.mapper;

import zxl.web.domain.Student;

import java.util.List;

public interface StudentMapper {

   public ListqueryAll();//返回全体学生
}
5.StudentMapper文件
在resources下建立一个mapper包
StudentMapper.xml
6.配置扫描Mapper的接口
applicationContext.xml
7. 对MyBatis进行测试

package zxl.web.test;

import org.junit.Test;
import org.junit.runner.RunWith;
import org.springframework.beans.factory.annotation.Autowired;
import org.springframework.test.context.ContextConfiguration;
import org.springframework.test.context.junit4.SpringJUnit4ClassRunner;
import zxl.web.domain.Student;
import zxl.web.mapper.StudentMapper;

import java.util.List;

@RunWith(SpringJUnit4ClassRunner.class)
@ContextConfiguration("classpath:applicationContext.xml")
public class TestMyBatis {
    @Autowired
    StudentMapper mapper;

    @Test
    public void testMyBatis()throws Exception{
        Listlists=mapper.queryAll();
        for(Student student:lists){
            System.out.println(student);
        }
    }

}
右键运行TestMyBatis,可以看到输出student的内容
![]()
8.配置service层
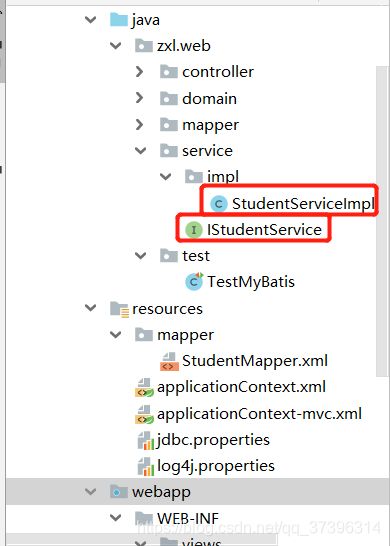
IStudentService
package zxl.web.service;

import zxl.web.domain.Student;

import java.util.List;

public interface IStudentService {
    public List queryAll();//返回全体学生
}
StudentServiceImpl
package zxl.web.service.impl;

import org.springframework.beans.factory.annotation.Autowired;
import org.springframework.stereotype.Service;
import zxl.web.domain.Student;
import zxl.web.mapper.StudentMapper;
import zxl.web.service.IStudentService;

import java.util.List;

@Service
public class StudentServiceImpl implements IStudentService {
    @Autowired
    StudentMapper mapper;

    @Override
    public List queryAll() {
        return mapper.queryAll();
    }
}
配置Service的扫描路径
applicationContext.xml
9.对Service进行测试
更改Controller
package zxl.web.controller;

import org.springframework.beans.factory.annotation.Autowired;
import org.springframework.stereotype.Controller;
import org.springframework.ui.Model;
import org.springframework.web.bind.annotation.RequestMapping;
import zxl.web.domain.Student;
import zxl.web.service.IStudentService;


import java.util.List;

@Controller
@RequestMapping("/student")//路径
public class StudentController {
    //注入service层
    @Autowired
    private IStudentService studentService;

    @RequestMapping("/index")
    public String index(Model model)
    {
        System.out.println("SpringMVC配置成功");
        //WEB-INF/views/student/index.jsp
        Listlists=studentService.queryAll();
        model.addAttribute("students",lists);//存到model里面,页面可以取出来
        System.out.println(lists);
        return "student/index";
    }

}
4.Log4j集成
在resources下面创建log4j.properties文件
log4j.rootLogger=ERROR, stdout

log4j.zxl.web=TRACE

#输出信息到控制台
log4j.appender.stdout=org.apache.log4j.ConsoleAppender
log4j.appender.stdout.layout=org.apache.log4j.PatternLayout
log4j.appender.stdout.layout.ConversionPattern=%d %p [%c] - %m%n