入门Spring-MVC——Hello
入门Spring-MVC——Hello
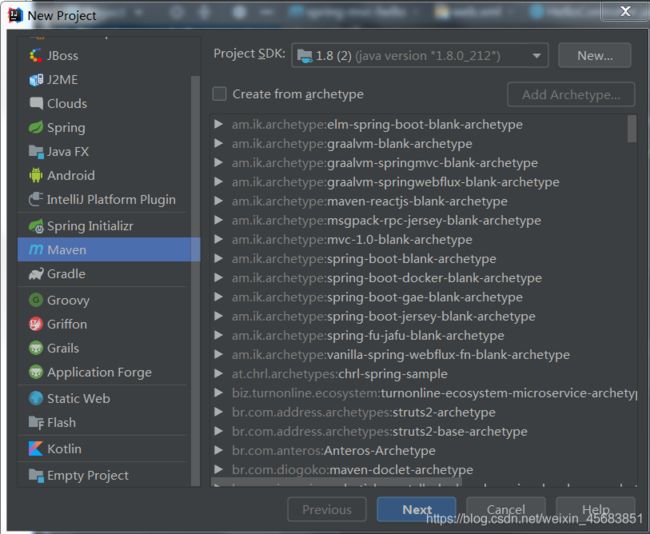
1.新建一个普通的maven项目
2.添加web的支持
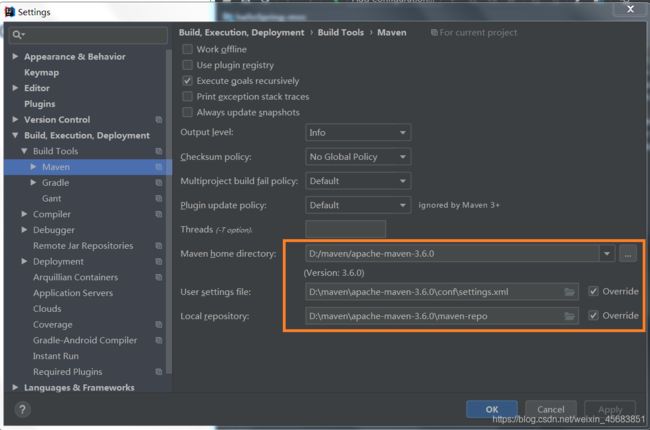
3.配置maven路径为自己下载的maven路径
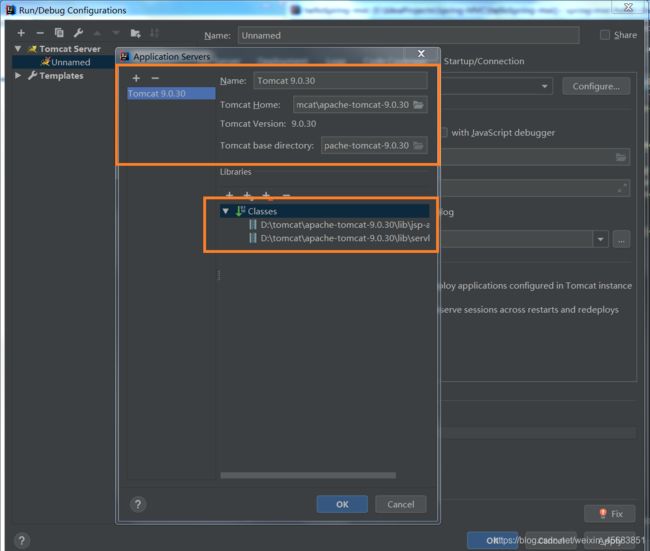
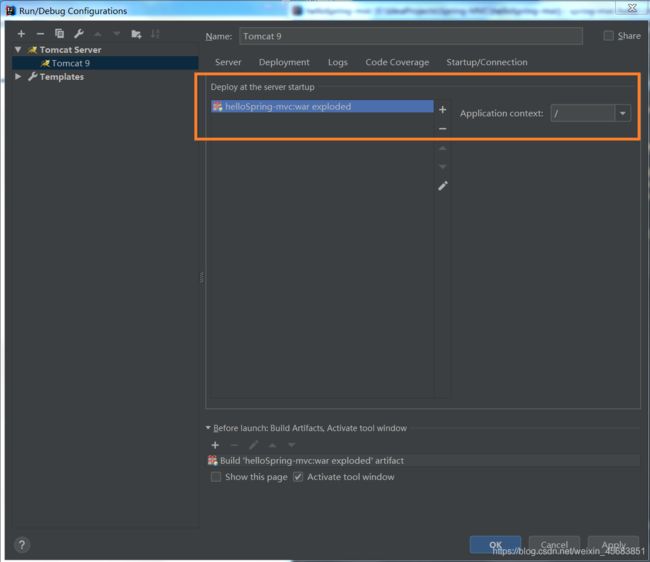
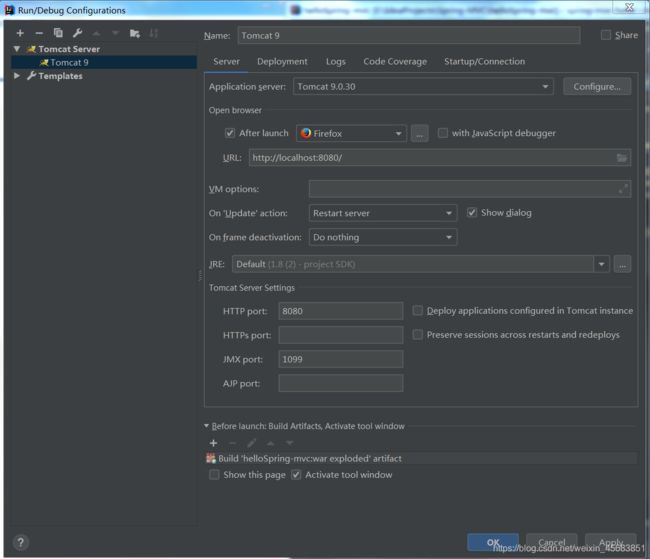
4.配置Tomcat
导入spring-webmvc包
<dependencies>
    <dependency>
        <groupId>org.springframeworkgroupId>
        <artifactId>spring-webmvcartifactId>
        <version>5.1.9.RELEASEversion>
    dependency>
dependencies>
在resources下新建一个springmvc-servlet.xml
先置空
SpringMVC 给我们提供了一个 DispatcherServlet,我们只需要将这个Serlevt注册到web.xml即可!
web.xml
<web-app xmlns="http://xmlns.jcp.org/xml/ns/javaee"
         xmlns:xsi="http://www.w3.org/2001/XMLSchema-instance"
         xsi:schemaLocation="http://xmlns.jcp.org/xml/ns/javaee http://xmlns.jcp.org/xml/ns/javaee/web-app_4_0.xsd"
         version="4.0">


        <servlet>
            <servlet-name>DispatcherServletservlet-name>
            <servlet-class>org.springframework.web.servlet.DispatcherServletservlet-class>


            <init-param>
                <param-name>contextConfigLocationparam-name>
                <param-value>classpath:springmvc-servlet.xmlparam-value>
            init-param>


            <load-on-startup>1load-on-startup>

        servlet>


        <servlet-mapping>
            <servlet-name>DispatcherServletservlet-name>
            <url-pattern>/url-pattern>
        servlet-mapping>

web-app>
在WEB-INF目录下新建一个views目录,并在其下建立一个hello.jsp文件
<%@ page contentType="text/html;charset=UTF-8" language="java" %>


    hello


    Hello!
在main目录下建立一个controller包,并在该层创建一个HelloController类,先为空。
编写springmvc-servlet.xml配置文件
<beans xmlns="http://www.springframework.org/schema/beans"
       xmlns:context="http://www.springframework.org/schema/context"
       xmlns:mvc="http://www.springframework.org/schema/mvc"
       xmlns:xsi="http://www.w3.org/2001/XMLSchema-instance"
       xsi:schemaLocation="http://www.springframework.org/schema/beans
        https://www.springframework.org/schema/beans/spring-beans.xsd
        http://www.springframework.org/schema/context
        https://www.springframework.org/schema/context/spring-context.xsd
        http://www.springframework.org/schema/mvc
        https://www.springframework.org/schema/mvc/spring-mvc.xsd">


    <context:component-scan base-package="com.cm.controller"/>


    <mvc:annotation-driven/>


    <mvc:default-servlet-handler/>


    <bean id="internalResourceViewResolver" class="org.springframework.web.servlet.view.InternalResourceViewResolver">
        <property name="prefix" value="/WEB-INF/views/"/>
        <property name="suffix" value=".jsp"/>
    bean>

beans>
填写HelloController类
import org.springframework.stereotype.Controller;
import org.springframework.web.bind.annotation.RequestMapping;

@Controller
public class HelloController {


    @RequestMapping("/hello")
    public String hello() {


        System.out.println("控制台打印Hello!");
        return "hello";
    }
}
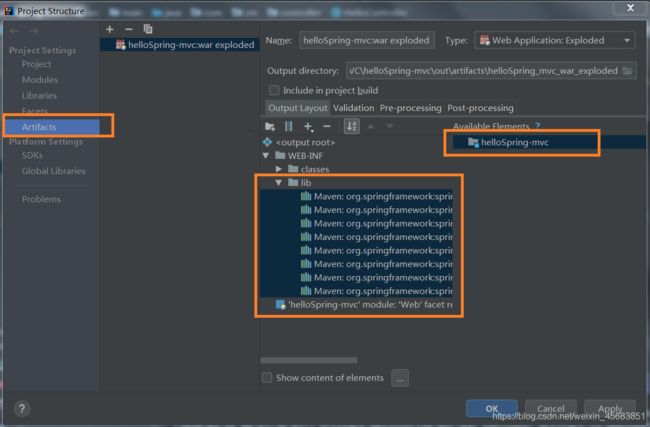
运行服务器后,一开始一般都不会成功,因为没有导出spring依赖:
这个时候需要检查项目的结构,建立一个lib目录,把需要的包加进去。如图:
成功运行后,就会出现Hello!了。
它的特别之处
一个网站核心交互:
-
前端传值
-
后台处理数据,返回数据给前端
-
页面跳转控制 url 对应后台的请求
更改HelloController类
运用Model给前端传递参数
import org.springframework.stereotype.Controller;
import org.springframework.ui.Model;
import org.springframework.web.bind.annotation.RequestMapping;

@Controller
public class HelloController {


    @RequestMapping("/hello")
    public String hello(Model model) {


        System.out.println("控制台打印Hello!");

        model.addAttribute("msg", "Hello! Spring-MVC");
        return "hello";
    }
}
运用EL表达式
将后端的数据被前端读取
<%@ page contentType="text/html;charset=UTF-8" language="java" %>


    hello


        ${msg}
运行结果
在类上使用@RequestMapping
@Controller
@RequestMapping("user")/*新增一个URL路径*/
public class HelloController {


    @RequestMapping("/hello")
    public String hello(Model model) {

        System.out.println("控制台打印Hello!");
        model.addAttribute("msg", "Hello,SpringMVC");
        return "hello";
    }

    @RequestMapping("/hello1")
    public String hello1(Model model) {

        System.out.println("控制台打印Hello!");
        model.addAttribute("msg", "Hello,SpringMVC1");
        return "hello";
    }

    @RequestMapping("/hello2")/*url响应设置*/
    public String hello2(Model model) {

        System.out.println("控制台打印Hello!");
        model.addAttribute("msg", "Hello,SpringMVC2");
        return "hello";
    }
}
运行结果
一个登录小例子
方式一:数据在URL上传递
@Controller
public class LoginController {


    @RequestMapping("/login")
    public String login(String username, String password, Model model) {


        System.out.println("username : " + username);
        System.out.println("password : " + password);
        String str = "username : " + username + "password : " + password;
        model.addAttribute("msg", str);

        return "hello";
    }
}
注意:URL的参数名称要和这个方法中的参数名称相同。
方式二:通过一个jsp页面获取数据信息
1.在web目录下新建一个login.jsp文件
<%@ page contentType="text/html;charset=UTF-8" language="java" %>


    登录
2.controller层不变
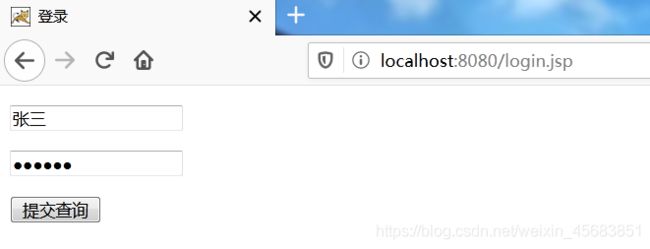
运行结果
提交后
参数为一个对象的情况
实体类
public class User {

    private int id;
    private String name;
    private String password;

    public User() {

    }

    public User(int id, String name, String password) {

        this.id = id;
        this.name = name;
        this.password = password;
    }

    public int getId() {

        return id;
    }

    public void setId(int id) {

        this.id = id;
    }

    public String getName() {

        return name;
    }

    public void setName(String name) {

        this.name = name;
    }

    public String getPassword() {

        return password;
    }

    public void setPassword(String password) {

        this.password = password;
    }

    @Override
    public String toString() {

        return "User{" +
                "id=" + id +
                ", name='" + name + '\'' +
                ", password='" + password + '\'' +
                '}';
    }
}
控制层
@Controller
public class LoginController {


    @RequestMapping("/login2")
    public String login2(User user, Model model) {

        System.out.println(user.getName());
        System.out.println(user.getPassword());
        model.addAttribute("msg", user.getId());
        return "hello";
    }
}
