SpringSecurity入门3---过滤器实现图形验证码
代码地址
思路
后端生成验证码保存在Session中(Redis也可以),当前端输入验证码进行登录时,在校验用户名密码之前校验验证码是否正确,不正确就抛出异常,由失败处理器进行处理
实现
使用Kaptcha进行验证码以及图片的生成,先引入依赖
            com.github.penggle
            kaptcha
            2.3.2
在WebSecurityConfig文件中注入我们的验证码生成器
	@Bean
    // 配置验证码工具
    public Producer captcha(){

        Properties properties = new Properties();
        properties.setProperty("kaptcha.image.width","150");
        properties.setProperty("kaptcha.image.height","50");
        // 字符集
        properties.setProperty("kaptcha.textproducer.char.string","0123456789");
        // 字符长度
        properties.setProperty("kaptcha.textproducer.char.length","4");
        Config config = new Config(properties);
        // 使用默认图形验证码
        DefaultKaptcha defaultKaptcha = new DefaultKaptcha();
        defaultKaptcha.setConfig(config);
        return defaultKaptcha;
    }
接下来我们创建一个Controller用于生成验证码图片,生成验证码并将其放入Session中
@Controller
public class KaptchaController {


    @Autowired
    private Producer captcha;

    @GetMapping("/captcha.jpg")
    public void getCaptcha(HttpServletRequest request,
                           HttpServletResponse response){

        response.setContentType("image/jpeg");
        String text = captcha.createText();
        // 将生成的验证码放入session中
        request.getSession().setAttribute("captcha",text);
        BufferedImage bi = captcha.createImage(text);
        ServletOutputStream outputStream = null;
        try {

            outputStream = response.getOutputStream();
            ImageIO.write(bi,"jpg",outputStream);
            outputStream.flush();
        } catch (IOException e) {

            e.printStackTrace();
        }finally {

            if(outputStream != null){

                try {

                    outputStream.close();
                } catch (IOException e) {

                    e.printStackTrace();
                }
            }
        }
    }
}
记得在配置文件中对生成验证码图片的路径放行
httpp.authorizeRequests()
                .antMatchers("/css/**", "/img/**", "/js/**", "/bootstrap/**","/captcha.jpg").permitAll()
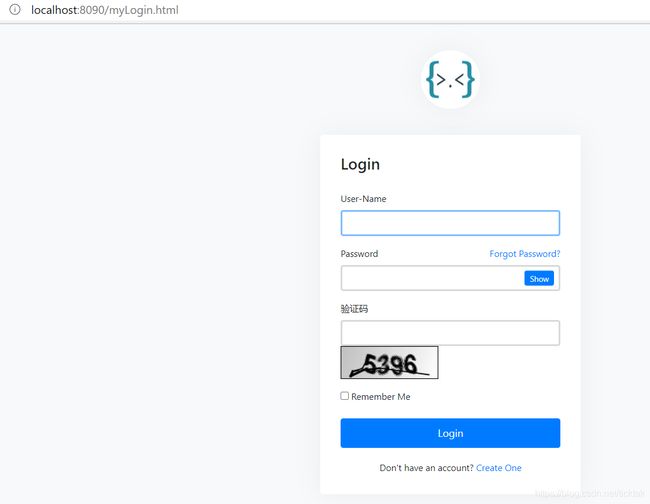
修改前端代码使用img标签获取验证码图片,并添加用于输入验证码的输入框
						<form action="/login" method="POST">
                            <div class="form-group">
                                <label for="username">User-Namelabel>

                                <input id="username" class="form-control" name="username" value="" required autofocus>
                            div>
                            <div class="form-group">
                                <label for="password">Password
                                    <a href="forgot.html" class="float-right">
                                        Forgot Password?
                                    a>
                                label>
                                <input id="password" type="password" class="form-control" name="password" required
                                       data-eye>
                            div>
                            <div class="form-group">
                                <label for="captcha">验证码
                                label>
                                <input id="captcha" type="text" class="form-control" name="captcha" required>
                                <img src="/captcha.jpg" alt="captcha" height="50px" width="150px">
                            div>
                            <div class="form-group">
                                <label>
                                    <input type="checkbox" name="remember"> Remember Me
                                label>
                            div>
                            <div class="form-group no-margin">
                                <button type="submit" class="btn btn-primary btn-block">
                                    Login
                                button>
                            div>
                            <div class="margin-top20 text-center">
                                Don't have an account? <a href="register.html">Create Onea>
                            div>
                        form>
在我们配置的入参为HttpSecurity的configure中,查看http的方法可以看到有addFilterAfter,addFilterBefore,addFilter,addFilterAt用于添加过滤器,其实SpringSecurity的原理就是过滤器链,之前我们一系列的操作就是基于过滤器链完成的,接下来我们创建自己的拦截器用于验证验证验证码是否正确,事项Filter接口即可,这里实现的是OncePerRequestFilter,它可以保证一次请求只会经过一次该过滤器
public class VerificationCodeFilter extends OncePerRequestFilter {


    private AuthenticationFailureHandler failureHandler = new MyFailureHandler();

    @Override
    protected void doFilterInternal(HttpServletRequest httpServletRequest,
                                    HttpServletResponse httpServletResponse,
                                    FilterChain filterChain) throws ServletException, IOException {

        if(!"/login".equals(httpServletRequest.getRequestURI())){

            // 非登陆请求就不验证验证码
            filterChain.doFilter(httpServletRequest, httpServletResponse);
        }else {

            try{

                verificationCode(httpServletRequest);
                filterChain.doFilter(httpServletRequest, httpServletResponse);
            }catch (VerificationCodeException e){

                failureHandler.onAuthenticationFailure(httpServletRequest,httpServletResponse,e);
            }
        }
    }

    private void verificationCode(HttpServletRequest httpServletRequest) throws VerificationCodeException {

        String requestCode = httpServletRequest.getParameter("captcha");
        HttpSession session = httpServletRequest.getSession();
        String vertificationCode = (String) session.getAttribute("captcha");
        // 不论校验成功还是失败,要保证session的验证码被删除
        session.removeAttribute("captcha");
        if(StringUtils.isEmpty(requestCode) || StringUtils.isEmpty(vertificationCode)
                || !requestCode.equals(vertificationCode)){

            throw new VerificationCodeException();
        }
    }
}
这里我将之前的失败处理器单独的放在了一个类里面,没有像之前使用内部类了。还创建了一个自定义的异常,用于验证码校验失败
public class VerificationCodeException extends AuthenticationException {

    public VerificationCodeException() {

        super("验证码校验失败");
    }
}
再在配置文件中将我们的拦截器添加进去即可
@EnableWebSecurity
@EnableGlobalMethodSecurity(prePostEnabled = true) // 开启注解
public class WebSecurityConfig extends WebSecurityConfigurerAdapter {


    @Autowired
    private MySuccessHandler successHandler;

    @Autowired
    private MyFailureHandler failureHandler;

    @Override
    protected void configure(HttpSecurity http) throws Exception {

        http.authorizeRequests()
                .antMatchers("/css/**", "/img/**", "/js/**", "/bootstrap/**","/captcha.jpg").permitAll()
                .antMatchers("/app/api/**").permitAll()
                .anyRequest().authenticated()
                .and()
                .formLogin().loginPage("/myLogin.html")
                .loginProcessingUrl("/login")
                .successHandler(successHandler)
                .failureHandler(failureHandler)
                .authenticationDetailsSource(myWebAuthenticationDetailsSource)
                .permitAll()
                // 使登录页不受限
                .and()
                .csrf().disable()
                // 在验证用户名密码之前验证验证码信息
                .addFilterBefore(new VerificationCodeFilter(),
                UsernamePasswordAuthenticationFilter.class);
    }

    @Autowired
    private DataSource dataSource;

    @Autowired
    private MyUserDetailService userDetailService;

    @Autowired
    private PasswordEncoder passwordEncoder;

    @Override
    protected void configure(AuthenticationManagerBuilder auth) throws Exception {

        auth.userDetailsService(userDetailService).passwordEncoder(passwordEncoder);
    }

	@Bean
    public PasswordEncoder passwordEncoder() {

        return new BCryptPasswordEncoder();
    }

    @Bean
    // 配置验证码工具
    public Producer captcha(){

        Properties properties = new Properties();
        properties.setProperty("kaptcha.image.width","150");
        properties.setProperty("kaptcha.image.height","50");
        // 字符集
        properties.setProperty("kaptcha.textproducer.char.string","0123456789");
        // 字符长度
        properties.setProperty("kaptcha.textproducer.char.length","4");
        Config config = new Config(properties);
        // 使用默认图形验证码
        DefaultKaptcha defaultKaptcha = new DefaultKaptcha();
        defaultKaptcha.setConfig(config);
        return defaultKaptcha;
    }
接下来访问登录页测试即可