Java 中调用 Apache API 实现图片文件的 压缩 与 解压 实例
《 Java 中调用 Apache API 实现图片文件的 压缩 与 解压 》
为什么不直接使用 Java JDK 中自带的 API 呢?必须使用 Apache API 实现文件的压缩与解压吗?
这个不是必然的,考虑到在实际的项目开发的过程中,可能会涉及到文件的路径为中文路径,这时如果使用 Java 原生的 JDK 则无法处理乱码问题,使用 Apache API 就可以在压缩与解压时设置编码格式;
当然,如果能保证项目中的路径为全英文的,可以使用 Java 的原生 API 实现,代码都不变,只需要修改一下引入的包即可。
我以前使用的是 Java 的原生 API ,但是在压缩与解压的过程中会导致 图片失帧的问题。
本实例中加入了 Quartz 任务调度框架,如果不需要任务调度,可以直接跳过,直接进入到 compressByZipFile (压缩)、unZipByFile(解压)段代码中。
Job :
package com.etc.clear.img.job;

import java.io.BufferedInputStream;
import java.io.BufferedOutputStream;
import java.io.File;
import java.io.FileInputStream;
import java.io.FileOutputStream;
import java.io.InputStream;
import java.io.OutputStream;
import java.text.SimpleDateFormat;
import java.util.Calendar;
import java.util.Date;
import java.util.Enumeration;
import java.util.zip.CRC32;
import java.util.zip.CheckedInputStream;
import java.util.zip.CheckedOutputStream;

import org.apache.tools.zip.ZipEntry;
import org.apache.tools.zip.ZipFile;
import org.apache.tools.zip.ZipOutputStream;
import org.quartz.Job;
import org.quartz.JobExecutionContext;
import org.quartz.JobExecutionException;
import org.slf4j.Logger;
import org.slf4j.LoggerFactory;

/**
 * 压缩服务器图片任务
 *
 *
 * @ClassName : UnzipImgJob
 *
 *
 * @Description : TODO
 *
 *
 * @Author : HuaZai
 *
 *
 * @ContactInformation : [email protected]/[email protected]
 *
 *
 * @Date : 2018年1月3日 下午1:16:30
 *
 * @Version : V1.0.0
 *
 */
public class CompressImgJob implements Job {

	// 定义常量
	private static final Logger log = LoggerFactory.getLogger(CompressImgJob.class);
	private static final String filePath = "D:/zipfile/"; // 需要压缩文件的根路径
	private static final String fileName = "zip"; // 文件夹名
	private static final String inputPath = "D:/zipfile/"; // 压缩完成后,保存保存的文件
	private static final String UnZipPath = "D:/zipfile/"; // 解压完成后,保存保存的文件

	/**
	 * 压缩图片任务
	 */
	@SuppressWarnings("static-access")
	@Override
	public void execute(JobExecutionContext context) throws JobExecutionException {

		log.info(" = = = = = = = = = 进入图片《压缩》阶段 ...." + context.getTrigger().getKey());
		// 初始化压缩组件
		this.InitCompress();

		// 初始化解压组件
		// this.unZipByFile();
	}

	/**
	 * 初始化压缩文件
	 *
	 *
	 * @Title : InitCompress
	 *
	 *
	 * @Description : TODO
	 *
	 *
	 * @Author : HuaZai
	 *
	 *
	 * @Date : 2018年1月15日 下午2:21:31
	 */
	public static void InitCompress() {
		try {
			log.info(" = = = = = = = = = 初始化压缩组件");
			// 创建文件输出流
			OutputStream oStream = new FileOutputStream(inputPath + getNextDate() + ".zip");
			// 传出到输出流,使用CRC32,确保文件的一致性
			CheckedOutputStream cStream = new CheckedOutputStream(oStream, new CRC32());
			// 创建压缩文件的输出流
			ZipOutputStream zStream = new ZipOutputStream(cStream);
			// 设置为 GBK 的编码格式
			zStream.setEncoding("GBK");
			// 需要压缩的文件夹
			File file = new File(filePath + getNextDate());
			// 调用压缩工具类
			compressByZipFile(zStream, file);

			// 注意关闭流
			zStream.close();
			cStream.close();
			oStream.close();

			log.info(" = = = = = = = = = 文件压缩结束,请前往该目录进行查看:" + filePath + getNextDate());
		} catch (Exception e) {
			e.printStackTrace();
		}
	}

	/**
	 * 使用递归获取指定文件夹下所有的子文件夹,并对其进行压缩
	 *
	 *
	 * @throws Exception
	 *
	 * @Title : CompressByZipFile
	 *
	 *
	 * @Description : TODO
	 *
	 *
	 * @Author : HuaZai
	 *
	 *
	 * @Date : 2018年1月15日 上午11:25:42
	 */
	public static void compressByZipFile(ZipOutputStream stream, File file) throws Exception {

		if (file.isDirectory()) {
			// 创建压缩文件的目录结构
			stream.putNextEntry(
					new ZipEntry(file.getPath().substring(file.getPath().indexOf(fileName)) + File.separator));

			// 使用递归实现文件的压缩
			for (File dfiles : file.listFiles()) {
				compressByZipFile(stream, dfiles);
			}
		} else {
			// 正在压缩的文件名称
			log.info(" = = = = = = = = = 当前正在压缩的文件名:" + file.getName());
			// 创建压缩文件
			stream.putNextEntry(new ZipEntry(file.getPath().substring(file.getPath().indexOf(fileName))));

			// 以流的方式创建文件流
			InputStream iStream = new FileInputStream(file.getPath());
			// 创建流缓冲区
			BufferedInputStream bStream = new BufferedInputStream(iStream);
			// 创建字节数组
			byte[] bt = new byte[1024];

			// 将流写入到压缩文件
			while (bStream.read(bt) != -1) {
				stream.write(bt);
			}

			// 注意关闭流
			bStream.close();
			iStream.close();
		}
	}

	/**
	 * 调用 Apache API 解压文件夹
	 *
	 *
	 * @Title : unZipByFile
	 *
	 *
	 * @Description : TODO
	 *
	 *
	 * @Author : HuaZai
	 *
	 *
	 * @Date : 2018年1月16日 上午10:10:17
	 */
	@SuppressWarnings("unchecked")
	public static void unZipByFile() {

		try {

			// 构建压缩文件实例
			ZipFile zFile = new ZipFile(filePath + getNextDate() + ".zip", "GBK");
			// 获取压缩文件中的项
			for (Enumeration enumeration = zFile.getEntries(); enumeration.hasMoreElements();) {
				// 获取元素
				ZipEntry zipEntry = enumeration.nextElement();

				if (!zipEntry.getName().endsWith(File.separator)) { // 排除空文件夹

					log.info(" = = = = = = = = = 正在解压文件:" + zipEntry.getName());
					// 创建解压文件夹目录
					File file = new File(UnZipPath
							+ zipEntry.getName().substring(0, zipEntry.getName().lastIndexOf(File.separator)));
					// 判断当前当前解压文件夹是否存在
					if (!file.exists()) { // 不存在则创建

						file.mkdirs();
					}
					// 创建解压输出流
					OutputStream oStream = new FileOutputStream(UnZipPath + zipEntry.getName());
					// 构建输出缓存流
					BufferedOutputStream bOutputStream = new BufferedOutputStream(oStream);
					// 将元素读取到输入流
					InputStream iStream = zFile.getInputStream(zipEntry);
					// 构建输入缓存流,并写入元素输入流
					BufferedInputStream bInputStream = new BufferedInputStream(iStream);
					// 为了保证元素的一致性,使用 CRC32 算法检查输入流
					CheckedInputStream cInputStream = new CheckedInputStream(bInputStream, new CRC32());

					// 读取文件
					byte[] bt = new byte[1024];
					while (cInputStream.read(bt) != -1) {
						bOutputStream.write(bt);
					}

					// 注意操作结束后,需要关闭所有流
					cInputStream.close();
					bInputStream.close();
					iStream.close();
					bOutputStream.close();
					oStream.close();

				} else { // 如果为空文件,则创建该文件夹

					new File(UnZipPath + zipEntry.getName()).mkdirs();
				}
			}

			log.info(" = = = = = = = = = 解压完成,请前往该目录进行查看:" + UnZipPath + getNextDate());
			zFile.close();
		} catch (Exception e) {
			e.printStackTrace();
		}
	}

	/**
	 * 获取指定日期
	 *
	 *
	 * @Title : getNextDate
	 *
	 *
	 * @Description : TODO
	 *
	 *
	 * @Author : HuaZai
	 *
	 *
	 * @Date : 2018年1月16日 上午9:37:43
	 */
	public static String getNextDate() {

		Calendar cd = Calendar.getInstance();
		cd.add(Calendar.DATE, -30); // 获取后30天的日期
		Date dt = cd.getTime();
		SimpleDateFormat df = new SimpleDateFormat("yyyyMMdd");// 设置日期格式
		String str = df.format(dt);
		log.info(" = = = = = = = = = 本次选择压缩的文件夹为:" + str);
		return str;
	}

}
Utils :
package com.etc.clear.img.utils;

import org.quartz.CronScheduleBuilder;
import org.quartz.Job;
import org.quartz.JobBuilder;
import org.quartz.JobDetail;
import org.quartz.Scheduler;
import org.quartz.SchedulerFactory;
import org.quartz.SimpleScheduleBuilder;
import org.quartz.Trigger;
import org.quartz.TriggerBuilder;
import org.quartz.impl.StdSchedulerFactory;
import org.slf4j.Logger;
import org.slf4j.LoggerFactory;

/**
 * 任务调度工具类
 *
 *
 * @ClassName : QuartzUtils
 *
 *
 * @Description : TODO
 *
 *
 * @Author : HuaZai
 *
 *
 * @ContactInformation : [email protected]/[email protected]
 *
 *
 * @Date : 2018年1月3日 下午1:21:13
 *
 * @Version : V1.0.0
 *
 */
public class ImgQuartzUtils {

	// 定义变量
	private static final String JOB_GROUP_NAME = "JOB_IMGJOBGROUP_NAME"; // 任务组
	private static final String TRIGGER_GROUP_NAME = "TRIGGER_IMGTRIGGERGROUP_NAME"; // 触发器组
	private static final Logger log = LoggerFactory.getLogger(ImgQuartzUtils.class);// 日志打印

	/**
	 * 创建 SimpleTrigger
	 *
	 *
	 * @Title : addJob
	 *
	 *
	 * @Description : TODO
	 *
	 *
	 * @Author : HuaZai
	 *
	 *
	 * @Date : 2017年12月29日 下午4:49:52
	 *
	 *
	 * @throws Exception
	 */
	public static void addJobBySimple(String jobName, String triggerName, Class jobClass, int seconds)
			throws Exception {
		log.info(" = = = = = = = = = 初始化开始 ");

		// 创建一个SchedulerFactory工厂实例
		SchedulerFactory factory = new StdSchedulerFactory();

		// 通过SchedulerFactory工厂构建Scheduler容器对象
		Scheduler scheduler = factory.getScheduler();

		log.info(" = = = = = = = = = 初始化完成 ");

		log.info(" = = = = = = = = = 将作业添加到任务作业调度中");

		// 构建一个jobDetail 作业实例
		JobDetail detail = JobBuilder.newJob(jobClass) // 构建一个新任务
				.withIdentity(jobName, JOB_GROUP_NAME) // 给新任务起名和分组
				.build(); // 绑定作业

		// 构建一个SimpleTrigger的触发器
		Trigger trigger = TriggerBuilder.newTrigger()// 创建一个新的TriggerBuilder
				.withIdentity(triggerName, TRIGGER_GROUP_NAME)// 给触发器起名和分组
				.startNow()// 立即执行
				.withSchedule(
						// 定义触发规则
						SimpleScheduleBuilder.simpleSchedule().withIntervalInSeconds(seconds) // 时间间隔
								.repeatForever() // 一直执行
				)
				.build();// 绑定触发规则

		// 将job任务和trigger触发器添加到Scheduler容器中
		scheduler.scheduleJob(detail, trigger);

		// 启动Quartz任务调度
		scheduler.start();

	}

	/**
	 * 创建 CronTrigger
	 *
	 *
	 * @Title : addJob
	 *
	 *
	 * @Description : TODO
	 *
	 *
	 * @Author : HuaZai
	 *
	 *
	 * @Date : 2017年12月29日 下午4:49:52
	 *
	 *
	 * @throws Exception
	 */
	public static void addJobByCron(String jobName, String triggerName, Class jobClass, String cron)
			throws Exception {
		log.info(" = = = = = = = = = 初始化开始");

		// 创建一个SchedulerFactory工厂实例
		SchedulerFactory factory = new StdSchedulerFactory();

		// 通过SchedulerFactory工厂构建Scheduler容器对象
		Scheduler scheduler = factory.getScheduler();

		log.info(" = = = = = = = = = 初始化完成");

		log.info(" = = = = = = = = = 将作业添加到任务作业调度中");

		// 构建一个jobDetail 作业实例
		JobDetail detail = JobBuilder.newJob(jobClass) // 构建一个新任务
				.withIdentity(jobName, JOB_GROUP_NAME) // 给新任务起名和分组
				.build(); // 绑定作业

		// 构建一个 CronSchedule 的触发器
		Trigger trigger = TriggerBuilder.newTrigger()// 创建一个新的TriggerBuilder
				.withIdentity(triggerName, TRIGGER_GROUP_NAME)// 给触发器起名和分组
				.startNow()// 立即执行
				.withSchedule(CronScheduleBuilder.cronSchedule(cron)// 定义触发规则
				).build();// 绑定出发规则

		// 将job任务和trigger触发器添加到Scheduler容器中
		scheduler.scheduleJob(detail, trigger);

		// 启动Quartz任务调度
		scheduler.start();

	}

}
package com.etc.clear.img.common;

import com.etc.clear.img.job.CompressImgJob;
import com.etc.clear.img.utils.ImgQuartzUtils;

/**
 * 初始化图片清理任务
 *
 *
 * @ClassName : ClsImgUtils
 *
 *
 * @Description : TODO
 *
 *
 * @Author : HuaZai
 *
 *
 * @ContactInformation : [email protected]/[email protected]
 *
 *
 * @Date : 2017年12月20日 下午4:38:52
 *
 *
 *
 * @Version : V1.0.0
 *
 *
 */
public class InitImgQuartzCommon {

	/**
	 * 初始化图片清除任务
	 *
	 *
	 * @Title : initClearImg
	 *
	 *
	 * @Description : TODO
	 *
	 *
	 * @Author : HuaZai
	 *
	 *
	 * @Date : 2018年1月2日 下午2:28:08
	 *
	 */
	public void startClearImg() {
		try {

			// 使用 CronTrigger 进行图片处理
			// 压缩文件
			ImgQuartzUtils.addJobByCron("compressJob", "CompressTrigger", CompressImgJob.class, "0 */1 * * * ?");

		} catch (Exception e) {
			e.printStackTrace();
			System.out.println(e.toString());
		}
	}

}
package com.etc.clear;

import com.etc.clear.img.common.InitImgQuartzCommon;

/**
 * 程序启动入口/调用任务的类
 *
 *
 * @ClassName : ClsMain
 *
 *
 * @Description : TODO
 *
 *
 * @Author : HuaZai
 *
 *
 * @ContactInformation : [email protected]/[email protected]
 *
 *
 * @Date : 2018年1月3日 下午1:21:56
 *
 * @Version : V1.0.0
 *
 */
public class ApplicationMain {

	public static void main(String[] args) {
		// 初始化清理图片任务
		InitImgQuartzCommon imgQuartzCommon = new InitImgQuartzCommon();
		// 启动图片清理任务
		imgQuartzCommon.startClearImg();
	}

}
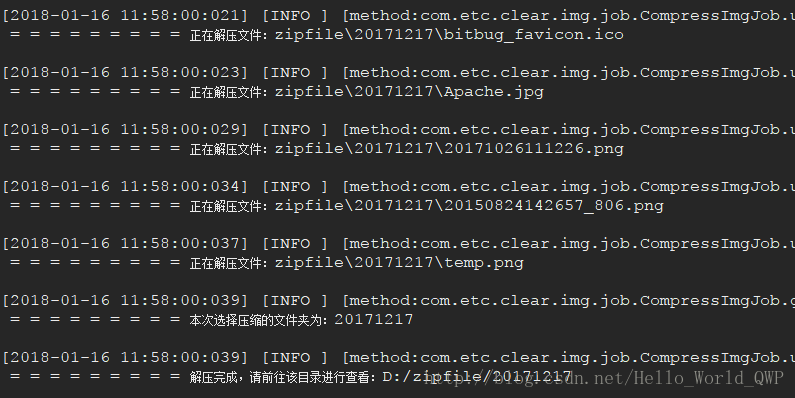
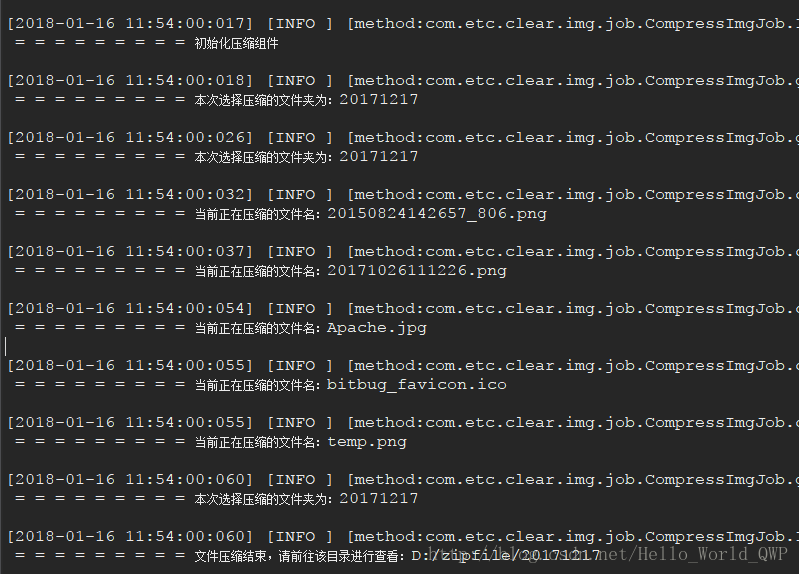
注:日志较多,只截取了其中重要的部分。
文件压缩如下图:文件解压如下图:

Java 中调用 Apache API 实现图片文件的 压缩 与 解压 的 Demo 下载:
http://download.csdn.net/download/hello_world_qwp/10207836
本实例使用的相关 API
java.util 相关 API
CRC32 压缩算法,用于保证文件的一致性,与CheckedOutputStream配合使用
CheckedOutputStream 文件压缩的检查输出流,该类与CRC32配合使用,用于保证压缩文件与源文件的一致性
CheckedInputStream 文件读取检查流,作用与CheckedOutputStream一样,只不过这里是读取
java.io 相关 API
OutputStream 写出流(字节流)
FileOutputStream 文件的写出流(字节流),OutputStream的子类,用于内存到硬盘的写出
InputStream 读取流(字节流)
FileInputStream 文件的读取流(字节流),InputStream的子类,用于读取文件到内存
另外,还需要java.util.Enumeration这个类,用于列举zip压缩包的所有项
apache 相关 API
ZipEntry 压缩文件的子文件对象,用于保存压缩文件中文件及其文件夹的一个实列
ZipFile 压缩文件的实列,用于zip的解压操作
ZipOutputStream 文件压缩的输出流
其中涉及的核心函数:
ZipOutputStream 类,该类主要用于压缩文件:
该类的构造函数需要至少需要一个参数,通常为 OutputStream 输出流;
setEncoding():该函数用于设置编码,解决中文乱码问题,一般设置为GBK或UTF-8,需要的注意的是,该函数只存在与org.apache.tools.zip这个包里,原生java.util.zip里面是没有这个函数;
putNextEntry(ZipEntry e):该函数用于添加一个压缩子文件或子文件夹;
putNextEntry(new ZipEntry("fileName/")):该语句就会在压缩文中,添加一个 fileName 文件夹,注意,如果没有"/",那么将创建一个Test文件;
write(byte [] b):该函数用于把源文件的数据写入到压缩文件中;
ZipFile 类,该类用于解压文件:
该类的构造函数需要至少一个参数,用于指定需要解压的ZIP文件,通常我们会指定两个参数,一个是ZIP文件,一个是编码GBK或UTF-8;
getEntries():该函数获取压缩文件项,如果用JDK原生的ZipFile,那么就不存在该函数,原生 JDK 为 entries() 函数;
getInputStream(ZipEntry zip):获取压缩文件的读取流,该函数需要一个参数,该参数为ZipEntry,压缩项对象;
Enumeration类:该类用于保存压缩文件的项(目录结构);
hasMoreElements():该函数返回boolean类型,判断是否有子项可读取;
