1.实现用户模块的跳转
1.1需求说明
说明:当用户点击登陆/注册按钮时,需要跳转到指定的页面中.
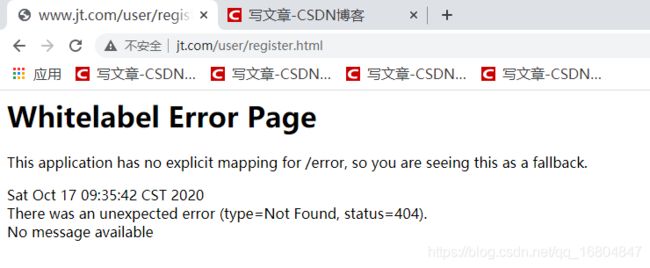
1.2编辑UseController
package com.jt.controller;

import org.springframework.stereotype.Controller;
import org.springframework.web.bind.annotation.PathVariable;
import org.springframework.web.bind.annotation.RequestMapping;
import org.springframework.web.bind.annotation.RestController;

@Controller     //需要进行页面跳转
@RequestMapping("/user")
public class UserController {

    /**
     * 实现用户模块页面跳转
     * url1: http://www.jt.com/user/login.html     页面:login.jsp
     * url2: http://www.jt.com/user/register.html  页面:register.jsp
     * 要求:实现通用页面跳转
     * restFul方式: 1.动态获取url中的参数,之后实现通用的跳转.
     */
    @RequestMapping("/{moduleName}")
    public String module(@PathVariable String moduleName){

        return moduleName;
    }

}
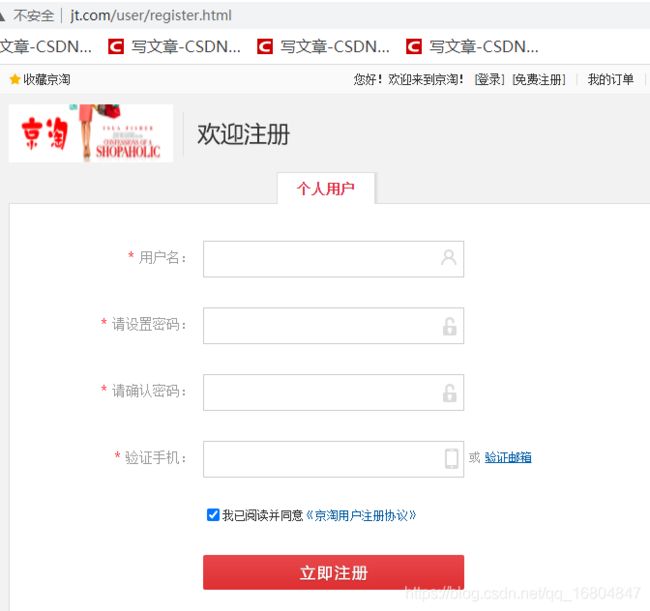
1.3页面效果展现
2.创建JT-SSO项目创建
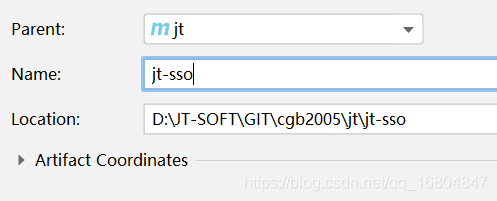
2.1创建项目
2.2添加继/依赖/插件
    4.0.0
    jt-sso

    jar


        jt
        com.jt
        1.0-SNAPSHOT


            com.jt
            jt-common
            1.0-SNAPSHOT


                org.springframework.boot
                spring-boot-maven-plugin
2.3编辑User的POJO对象
@TableName("tb_user")
@Data
@Accessors(chain = true)
public class User extends BasePojo{

    @TableId(type = IdType.AUTO)//设定主键自增
    private Long id;            //用户ID号
    private String username;    //用户名
    private String password;    //密码 需要md5加密
    private String phone;       //电话号码
    private String email;       //暂时使用电话代替邮箱

}
2.4测试JT-SSO项目
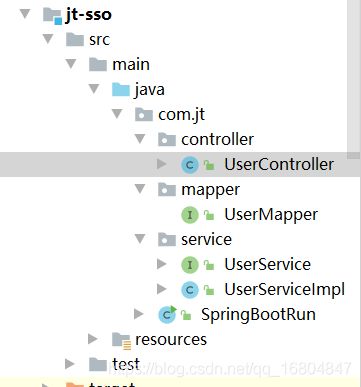
用户通过sso.jt.com/findUserAll获取User表中的信息json返回.
代码结构如下
2.4.1编辑UserController
package com.jt.controller;

import com.jt.pojo.User;
import com.jt.service.UserService;
import org.springframework.beans.factory.annotation.Autowired;
import org.springframework.web.bind.annotation.RequestMapping;
import org.springframework.web.bind.annotation.RestController;

import java.util.List;

@RestController
public class UserController {

    @Autowired
    private UserService userService;

    /**
     * 完成测试按钮
     * 1.url地址 :findUserAll
     * 2.参数信息: null
     * 3.返回值结果: List
     *
     */
    @RequestMapping("/findUserAll")
    public List findUserAll(){

        return userService.findUserAll();
    }
}
2.4.2编辑UserService
package com.jt.service;

import com.jt.mapper.UserMapper;
import com.jt.pojo.User;
import org.springframework.beans.factory.annotation.Autowired;
import org.springframework.stereotype.Service;

import java.util.List;

@Service
public class UserServiceImpl implements UserService{

    @Autowired
    private UserMapper userMapper;

    @Override
    public List findUserAll() {

        return userMapper.selectList(null);
    }
}
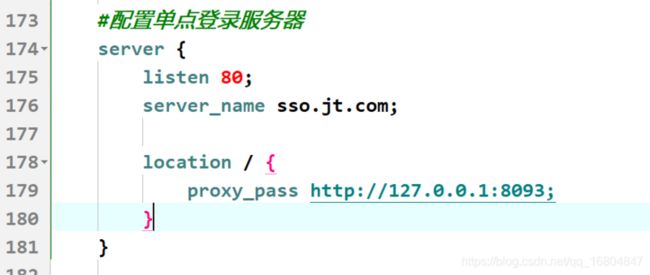
2.4.3修改nginx配置
3.跨域的实现(重要)
3.1跨域访问测试
3.1.1同域测试
分析:
结论:
当浏览器地址与ajax请求的地址(协议://域名:端口)相同时可以实现正常的业务调用.

3.1.2跨域测试
分析:
结论:
如果请求地址(协议://域名:端口)不相同则导致请求调用失败
3.2浏览器-同源策略说明
说明:浏览器规定,发起ajax时如果请求协议/端口号如果3者有一个与当前的浏览器的地址不相同时,则违反了同源策略的规定,则浏览器不予解析返回值.
跨域问题:违反同源策略得的规定就是跨域请求.
3.3跨域1-JSONP
3.3.1JSONP跨域原理
1.利用javascript中的src属性实现跨域请求.
2.自定义回调函数function callback(xxxx).
3.将返回值结果进行特殊的格式封装callback(json)
4.由于利用src属性进行调用 所以只能支持get请求类型
封装返回值
hello({"id":"1","name":"tom"})
页面JS编辑
测试JSON跨域问题
JS跨域问题

3.3.2JSONP
JSONP(JSON with Padding)是JSON的一种“使用模式”,可用于解决主流浏览器的跨域数据访问的问题。由于同源策略,一般来说位于 server1.example.com 的网页无法与不是 server1.example.com的服务器沟通,而 HTML 的
3.3.3JSONP优化
JSONP测试
JSON跨域请求测试
3.3.4编辑后端Controller
package com.jt.web.controller;

import com.jt.pojo.ItemDesc;
import com.jt.util.ObjectMapperUtil;
import jdk.nashorn.internal.runtime.regexp.JoniRegExp;
import org.springframework.web.bind.annotation.RequestMapping;
import org.springframework.web.bind.annotation.RestController;

@RestController
public class JSONPController {

    /**
     * 实现JSONP跨域请求
     * url地址: http://manage.jt.com/web/testJSONP?callback=xxxxxx
     * 参数:    暂时没有可以不接
     * 返回值:  callback(JSON);
     */
     @RequestMapping("/web/testJSONP")
     public String testJSONP(String callback){
         ItemDesc itemDesc = new ItemDesc();
         itemDesc.setItemId(1000L).setItemDesc("JSONP测试!!!");
         String json = ObjectMapperUtil.toJSON(itemDesc);
         return callback+"("+json+")";
     }

}
3.3.5后端控制台输出

3.3.6JSONObject说明
 @RequestMapping("/web/testJSONP")
    public JSONPObject testJSONP(String callback){
        ItemDesc itemDesc = new ItemDesc();
        itemDesc.setItemId(1000L).setItemDesc("JSONP测试!!!");
        return new JSONPObject(callback, itemDesc);
    }
3.4cors跨域方式
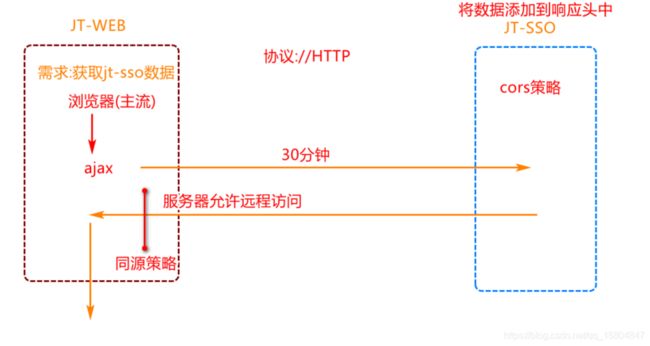
3.4.1cors调用原理
3.4.2实现cors调用
package com.jt.config;

import org.springframework.context.annotation.Configuration;
import org.springframework.web.servlet.config.annotation.CorsRegistry;
import org.springframework.web.servlet.config.annotation.WebMvcConfigurer;
@Configuration  //标识我是一个配置类
public class CorsConfig implements WebMvcConfigurer {

    //在后端 配置cors允许访问的策略
    @Override
    public void addCorsMappings(CorsRegistry registry) {
        registry.addMapping("/**")
                .allowedMethods("GET","POST") //定义允许跨域的请求类型
                .allowedOrigins("*")           //任意网址都可以访问
                .allowCredentials(true) //是否允许携带cookie
                .maxAge(1800);                 //设定请求长链接超时时间.
    }
}
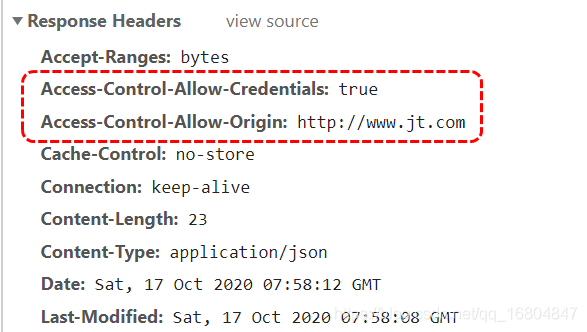
3.4.3cors调用响应头解析
3.4.4cors跨域测试
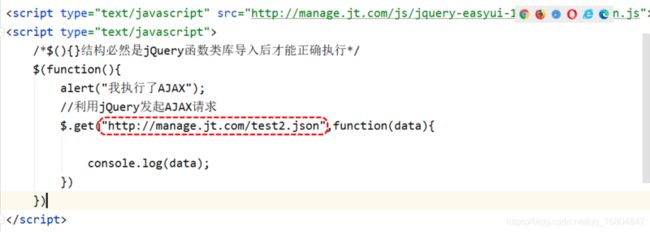
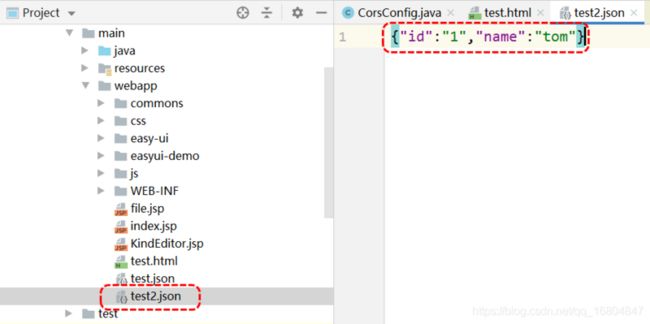
json数据格式
3.5关于跨域总结
1.jsonp
jsonp本质是利用JavaScript中的src属性的get请求实现跨域 返回值必须经过特殊格式封装.
2.cors
添加在响应头中的信息.指定哪些服务器允许访问.
实现用户数据校验
4.1业务需求
当用户注册时,如果输入用户名,则应向jt-sso单点登录系统发起请求,校验用户数据是否存在.如果存在则提示用户.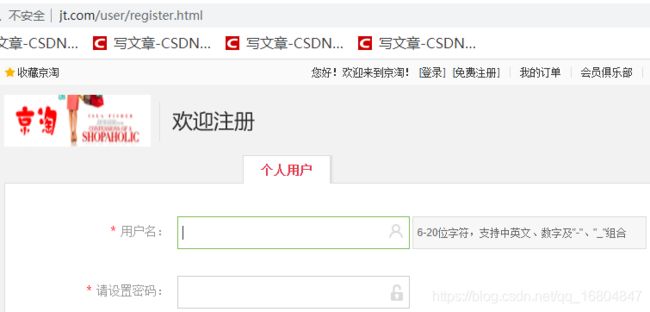
4.2业务接口文档说明
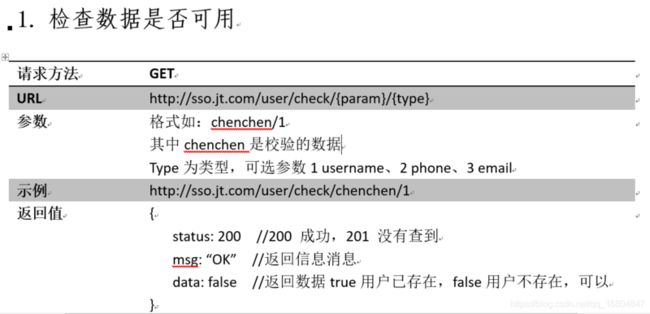
4.3前端JS分析
1.url分析

2.检索JS代码
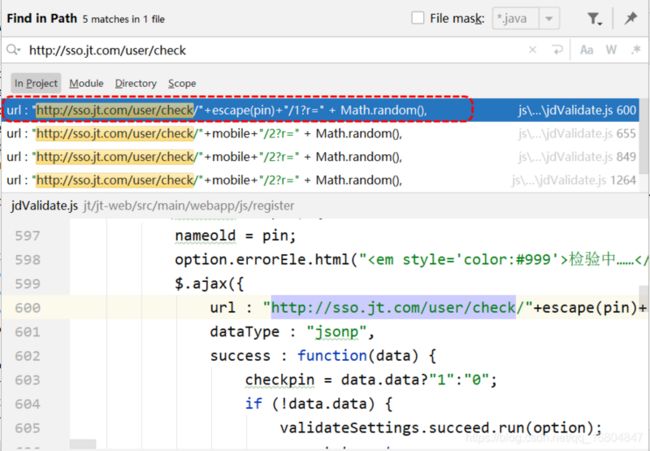
3.JS分析
 $.ajax({
                url : "http://sso.jt.com/user/check/"+escape(pin)+"/1?r=" + Math.random(),
                dataType : "jsonp",
                success : function(data) {
                    checkpin = data.data?"1":"0";
                    if(data.status == 200){
                         if (!data.data) {
                            validateSettings.succeed.run(option);
                            namestate = true;
                         }else {
                            validateSettings.error.run(option, "该用户名已占用!");
                            namestate = false;
                         }
                    }else{
                          validateSettings.error.run(option, "服务器正忙,请稍后!");
                          namestate = false;
                    }

                }
            });
4.4编辑JT-SSO UserController
  /**
     * 业务说明: jt-web服务器获取jt-sso数据 JSONP跨域请求
     * url地址: http://sso.jt.com/user/check/{param}/{type}
     * 参数:    param: 需要校验的数据   type:校验的类型
     * 返回值:  SysResult对象
     * 真实的返回值: callback(SysResult的JSON)
     */
    @RequestMapping("/check/{param}/{type}")
    public JSONPObject checkUser(@PathVariable String param,
                                 @PathVariable Integer type,
                                 String callback){
        //true 表示数据存在     false 表示数据可以使用
        boolean flag = userService.checkUser(param,type);
        SysResult.success(flag);
        return new JSONPObject(callback, SysResult.success(flag));
    }
4.5 编辑JT-SSO UserService
 /**
     * 判断依据:  根据用户名查询 如果结果>0 用户已存在.
     * @param param
     * @param type
     * @return
     */
    @Override
    public boolean checkUser(String param, Integer type) {
        //1.需要将type类型转化为 具体字段信息  1=username  2=phone  3=email
        String column = columnMap.get(type);
        QueryWrapper queryWrapper = new QueryWrapper<>();
        queryWrapper.eq(column, param);
        Integer count = userMapper.selectCount(queryWrapper);
        return  count > 0 ? true :false;
    }
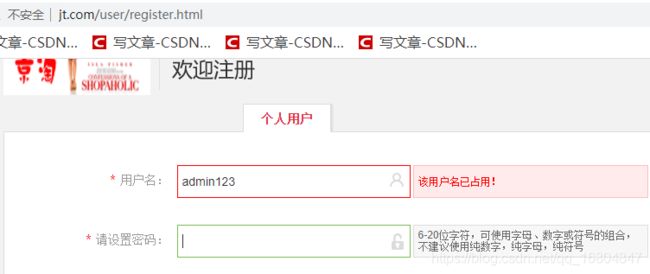
4.6页面效果展现
![]()
![]()
![]()
![]()
![]()


