TreeSaver 图片的定位
Treesaver 是浏览器大小尺寸敏感(size-sensitive)的,会就着当前的浏览器尺寸(browser size),选用不同的分栏表格(grid)做排版。不同排版效果下,图片出现的位置有啥规律,这就是本文要分析的内容:
一些典型的图片出现的规律:
首先我们看一些图片出现的规律:
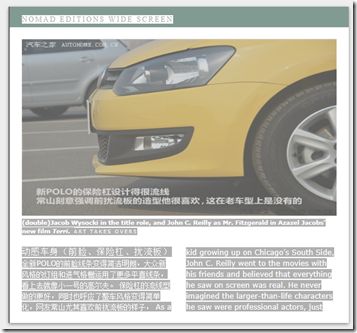
一、当显示的区域只有两栏时,显示另外一个能贯穿两栏的图片,而不是之前贯穿三栏的图片。
这时候的图片相关CSS定义如下(使用Firefox的firebug监控到的解析后的html):
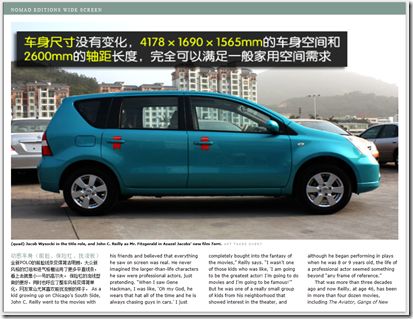
<div data-sizes="double-16x9 double-4x3 double-1x1 double-3x4"class="container col-1 img w6col overflow double-16x9 zoomable"style="bottom: auto;" data-figureindex="3"><div data-minwidth="518" data-sizes="double-16x9" data-minheight="363" class=""><img width="518" height="291" data-src="../img/10_395.jpg" src="../img/10_395.jpg"><p class="caption">(double)Jacob Wysocki in the title role, and John C. Reilly as Mr.Fitzgerald in Azazel Jacobs’ new film <em>Terri</em>. <span class="credit">Art Takes Over5</span></p></div></div>
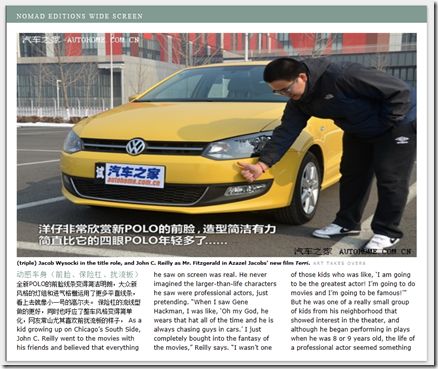
二、三栏,图片在最上面,贯穿三栏:
这时候的图片相关CSS定义如下(使用Firefox的firebug监控到的解析后的html):
<div data-sizes="triple-16x9 triple-4x3 triple-1x1 triple-3x4"class="container col-1 img w9col overflow triple-16x9 zoomable"style="bottom: auto;" data-figureindex="3"><div data-minwidth="788" data-sizes="triple-16x9" data-minheight="515" class=""><img width="788" height="443" data-src="../img/10_394.jpg"src="../img/10_394.jpg"><p class="caption">(triple) Jacob Wysocki in the title role, and John C. Reilly as Mr.Fitzgerald in Azazel Jacobs’ new film <em>Terri</em>. <span class="credit">Art Takes Over6</span></p></div></div>
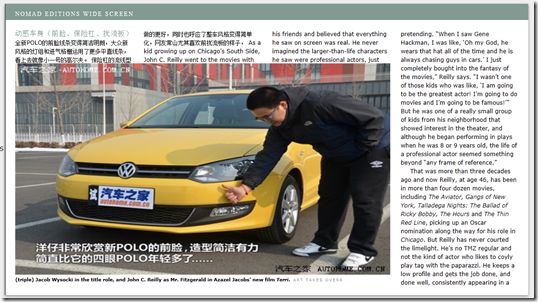
三、四栏时图片出现在左下角,图片仍然是三栏
这时候的图片相关CSS定义如下(使用Firefox的firebug监控到的解析后的html):
<div><div data-sizes="triple-16x9 triple-3x4 triple-1x1 triple-4x3"class="container col-1 w9col img bottom triple-16x9 zoomable" style="top: auto;"data-figureindex="3"><div data-minwidth="788" data-sizes="triple-16x9" data-minheight="515" class=""><img width="788" height="443" data-src="../img/10_394.jpg" src="../img/10_394.jpg"><p class="caption">(triple) Jacob Wysocki in the title role, and John C. Reilly as Mr.Fitzgerald in Azazel Jacobs’ new film <em>Terri</em>. <span class="credit">Art Takes Over6</span></p></div></div><div class="column col-1 flexed" style="min-height: 0px; bottom: 486px; height: 72px;"><h5 style="margin-top: 0px;">动感车身(前脸、保险杠、扰流板)</h5><p class="first">一些混排文字</p></div><div class="column col-4 flexed" style="min-height: 0px; bottom: 486px; height: 72px;"><p class="first" style="margin-top: -54px;">一些混排文字</p></div><div class="column col-7 flexed" style="min-height: 0px; bottom: 486px; height: 72px;"><p class="first" style="margin-top: -126px;">一些混排文字</p></div></div>
四、三栏,刚好可以放下一个图
这时候的图片相关CSS定义如下(使用Firefox的firebug监控到的解析后的html):
<div><div data-sizes="triple-16x9 triple-3x4 triple-1x1 triple-4x3"class="container col-1 w9col img bottom triple-16x9 zoomable" style="top: auto;" data-figureindex="3"><div data-minwidth="788" data-sizes="triple-16x9" data-minheight="515" class=""><img width="788" height="443" data-src="../img/10_394.jpg" src="../img/10_394.jpg"><p class="caption">(triple) Jacob Wysocki in the title role, and John C. Reilly as Mr.Fitzgerald in Azazel Jacobs’ new film <em>Terri</em>. <span class="credit">Art Takes Over6</span></p></div></div><div class="column col-1 flexed" style="min-height: 0px; bottom: 486px;"></div><div class="column col-4 flexed" style="min-height: 0px; bottom: 486px;"></div><div class="column col-7 flexed" style="min-height: 0px; bottom: 486px;"></div></div>
二、三这两个情况其实产生的html是一样的,只不过三产生的html中,填充图片空白位置的文字是空的,二产生的空白位置的文字是有的。
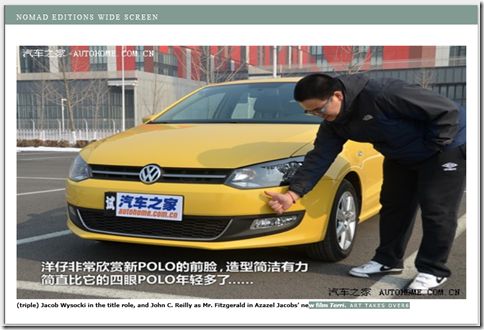
五、四栏图片,出现在最上面
这时候的图片相关CSS定义如下(使用Firefox的firebug监控到的解析后的html):
<div data-sizes="quad-16x9 quad-4x3 quad-1x1 quad-3x4"class="container col-1 img w12col overflow quad-16x9 zoomable"style="bottom: auto;" data-figureindex="3"><div data-minwidth="1058" data-sizes="quad-16x9" data-minheight="667" class=""><img width="1058" height="595" data-src="../img/325_16813.jpg" src="../img/325_16813.jpg"><p class="caption">(quad) Jacob Wysocki in the title role, and John C. Reilly as Mr.Fitzgerald in Azazel Jacobs’ new film <em>Terri</em>. <span class="credit">Art Takes Over7</span></p></div></div>
在页面文件中我们可以看到下面的Html代码,显然我们可以在这里看到,同一个图片,我们预先定义了一些适合于不同设备的图片
<!--同一张图片 预先定义一些适用于不同设备的图片 --><figure class="zoomable"><!-- 移动设备大小 --><div data-minHeight="229" data-sizes="mobile-16x9"data-minWidth="280"><!-- 演示效果中没有这部分,就省略它 //--></div><!--小单栏 --><div data-minHeight="160" data-sizes="small-single-16x9"data-minWidth="158"><!-- 演示效果中没有这部分,就省略它 //--></div><!-- 单栏 (single) --><div data-minHeight="211" data-sizes="single-16x9"data-minWidth="248"><!-- 演示效果中没有这部分,就省略它 //--></div><!-- 小双栏 --><div data-minHeight="262" data-sizes="small-double-16x9"data-minWidth="338"><!-- 演示效果中没有这部分,就省略它 //--></div><!-- 双栏(double) --><div data-minHeight="363" data-sizes="double-16x9"data-minWidth="518"><img width="518"data-src="../img/10_395.jpg"height="291" /><p class="caption">(double)Jacob Wysocki in the title role, and John C. Reilly as Mr.Fitzgerald in Azazel Jacobs’ new film <em>Terri</em>. <spanclass="credit">Art Takes Over5</span></p></div><!-- 19 显示器 16x9 三栏(triple)--><div data-minHeight="515" data-sizes="triple-16x9"data-minWidth="788"><img width="788"data-src="../img/10_394.jpg"height="443" /><p class="caption">(triple) Jacob Wysocki in the title role, and John C. Reilly as Mr.Fitzgerald in Azazel Jacobs’ new film <em>Terri</em>. <spanclass="credit">Art Takes Over6</span></p></div><!-- 四栏(quad) --><div data-minHeight="667" data-sizes="quad-16x9" data-minWidth="1058"><img width="1058"data-src="../img/325_16813.jpg"height="595" /><p class="caption">(quad) Jacob Wysocki in the title role, and John C. Reilly as Mr.Fitzgerald in Azazel Jacobs’ new film <em>Terri</em>. <spanclass="credit">Art Takes Over7</span></p></div><!-- fallback (备用) --><div class="img fallback keeptogether" data-sizes="fallback"><img src="../img/test1.jpg"data-sizes="fallback" width="40" itemprop="thumb" height="40" /><p class="caption">(fallback) Jacob Wysocki in the title role, and John C. Reilly as Mr.Fitzgerald in Azazel Jacobs’ new film <em>Terri</em>. <spanclass="credit">Art Takes Over8</span></p></div></figure>
同一个图片位置,我们上面看到预先定义了一些适合不同设备的不同大小的图片,每个图片的设置中描述了这个图片适合的大小,以及适合的分栏情况:
比如这个:<div data-minHeight="363" data-sizes="double-16x9" data-minWidth="518">
就描述了适合于双栏:data-sizes="double-16x9",最小高度要求:data-minHeight="363",最小宽度要求:data-minWidth="518"
TreeSaver 在运算出适合用几栏来显示后, 根据这里定义的适合的栏数,以及最小长宽,选择合适的图来显示。
图片的位置从上面分析来看,只有两种:
overflow 和 bottom 。 对应的样式: style="top: auto;" 和 style="bottom: auto;"
TreeSaver的源代码中有下面代码:
/*** @param {!Element} container* @param {!treesaver.layout.Figure} figure* @param {!treesaver.layout.Grid.ContainerMap} map* @param {?number} lineHeight* @return {boolean} True if the figure fit within the container.*/treesaver.layout.Page.fillContainer = function(container, figure, map,lineHeight) {var size, figureSize,containerHeight, sibling,maxContainerHeight,anchoredTop = true;size = map.size;figureSize = map.figureSize;if (goog.DEBUG) {if (!size) {treesaver.debug.error('Empty size!');}if (!figureSize) {treesaver.debug.error('Empty figureSize!');}}maxContainerHeight = treesaver.dimensions.getOffsetHeight(container);// Do any content switching that needs to happenfigureSize.applySize(container, size);// If the container is fixed, then we are done no matter whatif (!map.flexible) {return true;}// Adjust flexible containers// Unhinge from a side before measuringif (treesaver.dom.hasClass(container, 'bottom')) {anchoredTop = false;container.style.top = 'auto';}else {container.style.bottom = 'auto';}containerHeight = treesaver.dimensions.getOffsetHeight(container);// Did not fit :(// TODO: Use something better than parent heightif (containerHeight > maxContainerHeight) {treesaver.debug.info('Container failure: ' + containerHeight + ':' + maxContainerHeight);if (goog.DEBUG) {container.setAttribute('data-containerHeight', containerHeight);container.setAttribute('data-maxHeight', maxContainerHeight);container.setAttribute('data-attemptedSize', size);}// Revert after failurefigureSize.revertSize(container, size);// TODO: Return style.bottom & style.top to originals?return false;}// Round to nearest for column adjustment to maintain gridif (lineHeight && containerHeight % lineHeight) {containerHeight = treesaver.dimensions.roundUp(containerHeight, lineHeight);}// Go through this containers siblings, adjusting their sizessibling = container;while ((sibling = sibling.nextSibling)) {if (sibling.nodeType !== 1) {// Ignore non-elementscontinue;}// Cast for compilersibling = /** @type {!Element} */ (sibling);// Don't touch fixed itemsif (treesaver.dom.hasClass(sibling, 'fixed')) {continue;}if (treesaver.dom.hasClass(sibling, 'column') ||treesaver.dom.hasClass(sibling, 'container') ||treesaver.dom.hasClass(sibling, 'group')) {// Add a flag for debugging / later detectiontreesaver.dom.addClass(sibling, 'flexed');// Make sure we don't go negativeif (treesaver.dimensions.getOffsetHeight(sibling) <= containerHeight) {treesaver.debug.info('Sibling shrunk to zero height: ' + sibling);// TODO: Remove from tree?treesaver.dimensions.setCssPx(sibling, 'height', 0);}else {// Since items are always absolutely positioned, we can// adjust the position of the column directly based on it's// offsetsif (anchoredTop) {treesaver.dimensions.setCssPx(sibling, 'top',treesaver.dimensions.getOffsetTop(sibling) + containerHeight);}else {// Compute the current 'bottom' value by using the parent's offsetHeighttreesaver.dimensions.setCssPx(sibling, 'bottom',treesaver.dimensions.getOffsetHeight(sibling.offsetParent) -(treesaver.dimensions.getOffsetTop(sibling) + treesaver.dimensions.getOffsetHeight(sibling)) + containerHeight);}}}}return true;};
注意其中的这一段:
if (treesaver.dom.hasClass(container, 'bottom')) {anchoredTop = false;container.style.top = 'auto';}else {container.style.bottom = 'auto';}
这意味着,默认情况下,我们是把图片显示在上面。 只有在 treesaver.dom.hasClass(container, 'bottom') 时才会显示图片在左下角。
treesaver.dom.hasClass 函数如下:
/*** Check if an element has the given class* Hat Tip: Dean Edwards http://dean.edwards.name/IE7/caveats/** @param {!Element|!HTMLDocument} el* @param {!string} className* @return {boolean} True if the element has that class.*/treesaver.dom.hasClass = function(el, className) {var regexp = new RegExp('(^|\\s)' + className + '(\\s|$)');return !!(el.className && regexp.test(el.className));};
即,我们通过判断元素的class 中是否存在 'bottom' 这个样式定义来决定是否该如何显示的。
我们对上面代码加断点,并监控 container.className 的值,会看到它的值是:类似如下的:"container col-7 w6col img double-4x3"
我们在资源文件中搜索container col-7 w6col img,会看到两个Grid中有如下定义:
<!-- 非第一页的奇数页 //--><div class="grid w12col feature1 odd no-page-1"><div class="runningtitle"><span>Nomad Editions</span><span data-bind="vertical">vertical</span></div><div><div class="container col-1 w3col pullquote bottom" data-sizes="pullquote"></div><div class="column col-1"></div></div><div class="column col-4"></div><div><div class="container col-7 w6col img" data-sizes="double-16x9 double-3x4 double-1x1 double-4x3"></div><div class="column col-7 bottom"></div><div class="column col-10 bottom"></div></div></div><!-- 非第一页的偶数页 //--><div class="grid w12col feature2 even no-page-1"><div class="runningtitle"><span>Nomad Editions</span><span data-bind="vertical">vertical</span></div><div><div class="container col-1 w3col pullquote bottom" data-sizes="pullquote"></div><div class="column col-1"></div></div><div class="column col-4"></div><div><div class="container col-7 w6col img" data-sizes="double-16x9 double-3x4 double-1x1 double-4x3"></div><div class="column col-7"></div><div class="column col-10"></div></div></div>
从这里我的猜测整个处理流程是
根据Grid的适用场景,我们选择合适的Grid,
在Grid内部,我们会根据我们的配置来显示这个Grid。
所以理解Grid内部工作原理,如何选择Grid会是理解TreeSaver的一个关键。
