迁移学习VGG16实现猫狗大战
本文主要讲述如何使用keras来微调VGG16模型在kaggle的猫狗大战的数据集上实现迁移学习,精度达到了97%,在多训练几个epoch会更高,如果本文有错误的地方欢迎大家斧正,有什么问题也欢迎大家与我交流讨论。
一、对数据集进行预处理
首先在kaggle的官网下载猫狗的数据集https://www.kaggle.com/c/dogs-vs-cats-redux-kernels-edition/data
读取图像数据存储到数组中,然后归一化到0-1之间,将图像大小统一resize为100x100
设置数据生成器,减小内存负担。
def data_generator(all_img_name, all_label, batch_size, h=100, w=100):
    """
    该函数用于生成批量的数据,用于fit_generator批量训练
    :param all_train_name:
    :param batch_size:
    :return:
    """

    batches = len(all_img_name) // batch_size

    while True:
        for i in range(batches):
            name_batch = all_img_name[i * batch_size: (i + 1) * batch_size]
            label_batch = all_label[i * batch_size: (i + 1) * batch_size]
            # label 转化为one-hot编码
            Y = to_categorical(label_batch, num_classes=2)

            X = np.array([])
            for j in range(batch_size):
                img_path = name_batch[j]
                labels = label_batch

                # 读取img
                img = cv.imread(img_path)
                # resize
                img = cv.resize(img, (h, w))/255.0

                if len(X.shape) < 3:
                    X = img[np.newaxis, :, :]
                else:
                    X = np.concatenate((X, img[np.newaxis, :, :]), axis=0)

            yield (X, Y)
二、定义网络结构
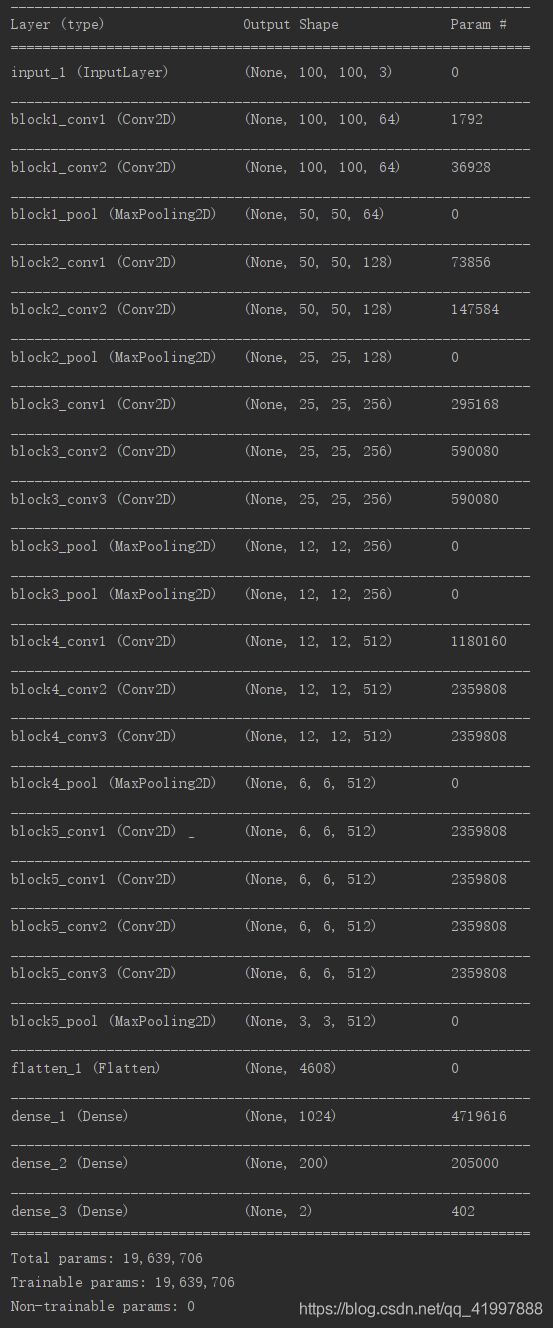
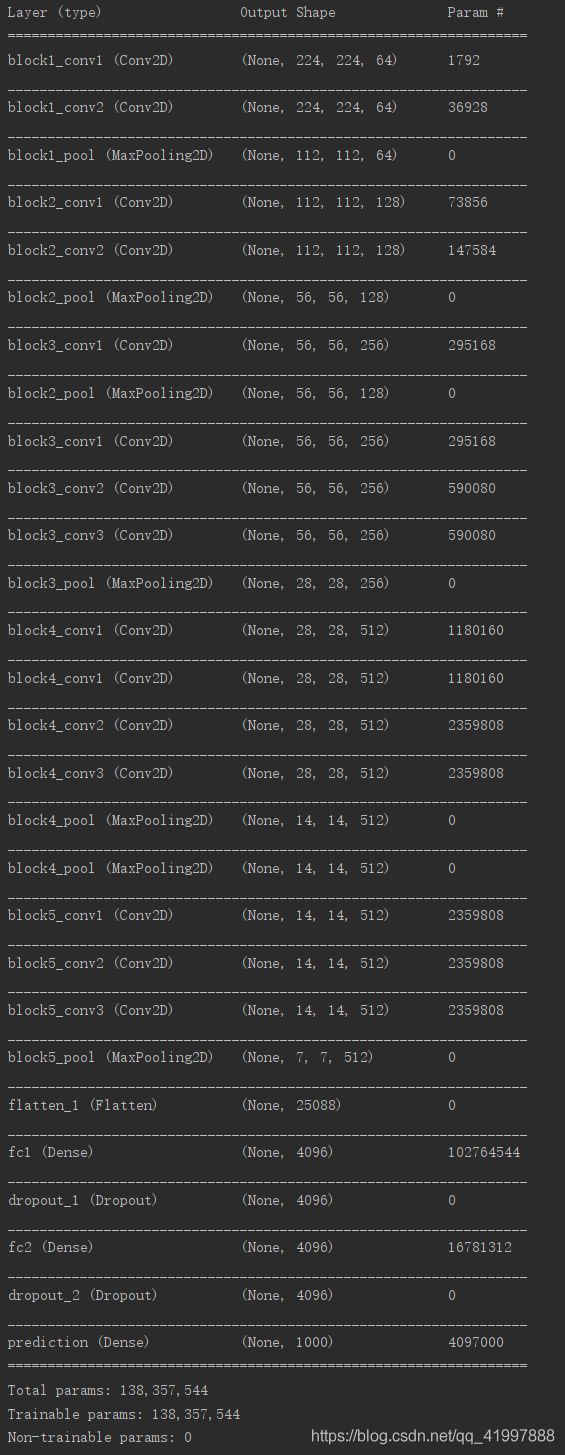
在这里我们以VGG16的结构为基础,去掉其后面的全连接层,加上自己设计的3个全连接层,下图左图为我使用的网络结构右图为VGG16的网络结构,我修改了网络的输入大小,vgg16的大小为224x224我的大小为100x100
keras封装了vgg模型的函数
model = keras.applications.vgg16.VGG16(include_top=True, weights='imagenet', input_tensor=None, input_shape=None, pooling=None, classes=1000)
你可以在下面这个地址下载VGG16的权重(如果你设置weights参数为imagenet的话他会自动下载)
https://github.com/fchollet/deep-learning-models/releases/download/v0.1/vgg16_weights_tf_dim_ordering_tf_kernels_notop.h5参数
include_top:是否保留顶层的3个全连接网络
weights:None代表随机初始化,即不加载预训练权重。'imagenet'代表加载预训练权重,这里输入权重的地址,如果你填的是imagenet那么他会自动从github上下载VGG16的权重
input_tensor:可填入Keras tensor作为模型的图像输出tensor
input_shape:可选,仅当include_top=False有效,应为长为3的tuple,指明输入图片的shape,图片的宽高必须大于48,如(200,200,3)
返回值
pooling:当include_top=False时,该参数指定了池化方式。None代表不池化,最后一个卷积层的输出为4D张量。‘avg’代表全局平均池化,‘max’代表全局最大值池化。
classes:可选,图片分类的类别数,仅当include_top=True并且不加载预训练权重时可用。
def vgg_model(vgg_weights_path):
    # 定义模型
    base_model = VGG16(weights=vgg_weights_path,
                       include_top=False, input_shape=(100, 100, 3))

    x = Flatten()(base_model.output)
    x = Dense(1024, activation="relu")(x)
    x = Dense(200, activation="relu")(x)
    y_pred = Dense(2, activation="softmax")(x)

    model = Model(inputs=base_model.input, outputs=y_pred)
    model.summary()

    return model
训练
使用sklearn.model_selection的train_test_split函数来划分训练集与测试集
train_X, test_X, train_Y, test_Y = train_test_split(x_name, y, test_size=0.2, random_state=0)
使用keras里面的fit_generator()函数来进行批量训练
history = model.fit_generator(generator=data_generator(train_X, train_Y, batch_size, h, w),
                    steps_per_epoch=len(train_X) // batch_size,
                    epochs=epoch, verbose=1, validation_data=data_generator(test_X, test_Y, h, w),
                    validation_steps=len(test_X) // batch_size)
在这里我是使用GPU来进行训练的,一个epoch大概3-4分钟左右
预测
读取要预测的图片,然后通过模型,得到概率,使用np.argmax函数将概率转化为label,并显示图像
# 加载模型
model = load_model(model_path)
pred = model.predict(img_list, batch_size=4)
# print(pred)
for index, i in enumerate(pred):
    maxer = np.argmax(i)

    # 猫0狗1
    if maxer == 0:
        print(img_name_list[index], "is a cat!")
        img = cv.imread(os.path.join(image_path, img_name_list[index]))
        cv.imshow("is a cat", img)
        cv.waitKey(0)

    else:
        print(img_name_list[index], "is a dog!")
        img = cv.imread(os.path.join(image_path, img_name_list[index]))
        cv.imshow("is a dog", img)
        cv.waitKey(0)

print("over!")
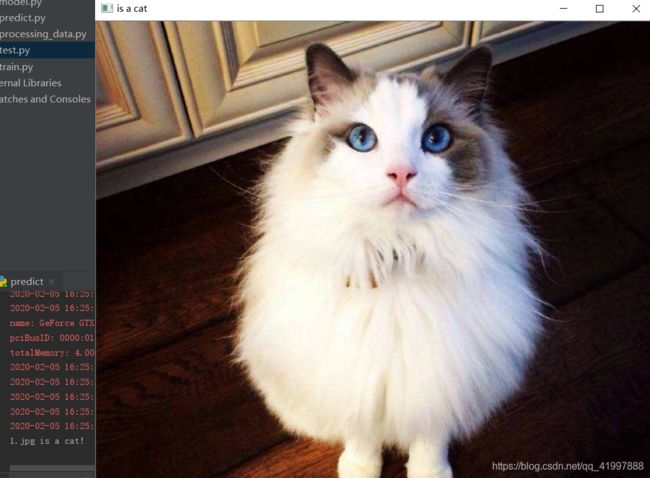
预测效果如下,我总共训练了4个epoch,在训练集上的精度达到了98%,在测试集上的精度达到了95%,稍微有点过拟合,加个dropout然后稍微调一下应该就好了。
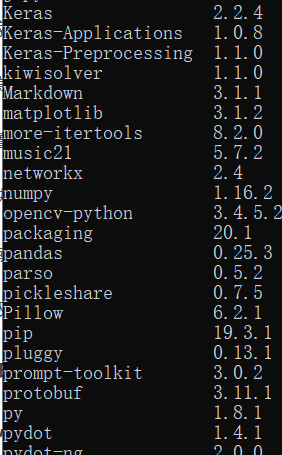
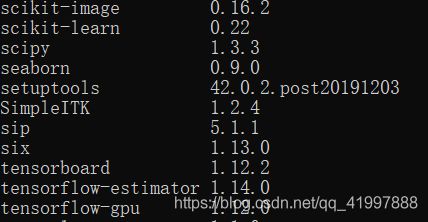
我使用的环境及库版本:
python3.6(anaconda虚拟环境)
win10
emmm我觉得你只要保证tensorflow 和keras、opencv的版本没问题就可以了,当然你也不需要严格按照我的版本来,只要不报错就行(tf保持在12左右,keras保持在2.2左右,opencv保持在3.?左右),另外我的tf是gpu版的,用cpu版的也可以,不过你需要调一下自己的tf和keras版本。。。。(对新手来说配置gpu版的可能比较繁琐,建议用cpu版)
总结
keras真的是简洁方便,所有的代码都在我的github上---------》https://github.com/henryccl/dogvscat/tree/master
如何运行?
1.首先在训练前你需要下载数据集和VGG16的权重(下载地址在上面有提到)
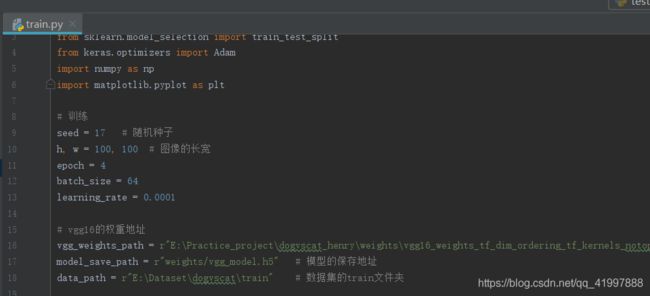
2.配置参数,下面是我自己配的超参数,你如果想调的话可以自己改,不改也行,不过最重要的,还是要最下面的三行地址,一定要改成你自己的文件地址,不然会报错。
3.然后运行train.py文件,python train.py就可以开始训练啦!
如果你遇到问题,欢迎你和我讨论
