使用python-Django创建Web站点
一.安装Django和virtualenv虚拟环境
加入清华镜像参数会快很多
-i https://pypi.tuna.tsinghua.edu.cn/simple
1.安装Django
pip install Django -i https://pypi.tuna.tsinghua.edu.cn/simple
2.安装virtualenv
在开发过程中,可能因为项目众多导致包混乱或者版本冲突,所以选择虚拟环境使不同的项目隔离开。
pip install virtualenv -i https://pypi.tuna.tsinghua.edu.cn/simple
二.创建Django项目
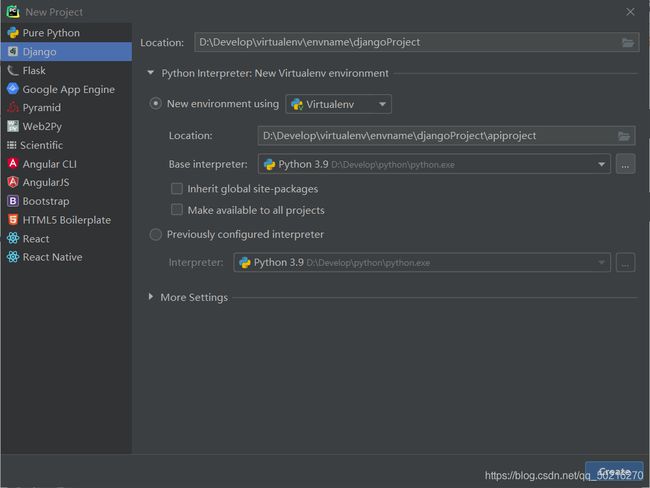
1.pycharm创建Django
如果安装无误的话,可以直接在pycharm中搭建Django项目,pycharm会自动帮我们搭建虚拟环境。
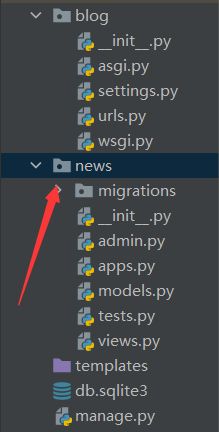
2.文件目录
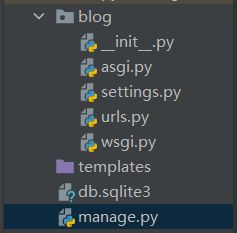
2.1 manage.py:命令行集成工具,有助于管理项目。
2.2 settings.py:Django项目的设置和配置信息
2.3 urls.py:包含项目的所以URL信息,是用户访问Django与应用的方式
2.4 wsgi.py:是兼容WSGI的Web服务器的入口点
2.5 __init__.py:指明blog目录是一个python项目
3.指令集
在相应的文件路径的终端输入pip manage.py,可以查看指令集。
终端输入:pip manage.py
Type ‘manage.py help
’ for help on a specific subcommand. Available subcommands:
[auth]
changepassword
createsuperuser[contenttypes]
remove_stale_contenttypes[django]
check
compilemessages
createcachetable
dbshell
diffsettings
dumpdata
flush
inspectdb
loaddata
makemessages
makemigrations
migrate
sendtestemail
shell
showmigrations
sqlflush
sqlmigrate
sqlsequencereset
squashmigrations
startapp
startproject
test
testserver[sessions]
clearsessions[staticfiles]
collectstatic
findstatic
runserver
4.启动web服务
终端输入:python manage.py runserver
Watching for file changes with StatReloader
Performing system checks…System check identified no issues (0 silenced).
You have 17 unapplied migration(s). Your project may not work properly
until you apply the migrations for app(s): admin, auth, contenttypes,
sessions. Run ‘python manage.py migrate’ to apply them. January 24,
2021 - 13:19:23 Django version 3.0.11, using settings ‘blog.settings’
Starting development server at http://127.0.0.1:8000/ Quit the server
with CTRL-BREAK. [24/Jan/2021 13:19:41] “GET / HTTP/1.1” 200 16351
[24/Jan/2021 13:19:41] “GET /static/admin/css/fonts.css HTTP/1.1” 200
423 [24/Jan/2021 13:19:41] “GET
/static/admin/fonts/Roboto-Regular-webfont.woff HTTP/1.1” 200 85876
[24/Jan/2021 13:19:41] “GET
/static/admin/fonts/Roboto-Light-webfont.woff HTTP/1.1” 200 85692 Not
Found: /favicon.ico [24/Jan/2021 13:19:41] “GET /favicon.ico HTTP/1.1”
404 1970 [24/Jan/2021 13:19:41] “GET
/static/admin/fonts/Roboto-Bold-webfont.woff HTTP/1.1” 200 86184
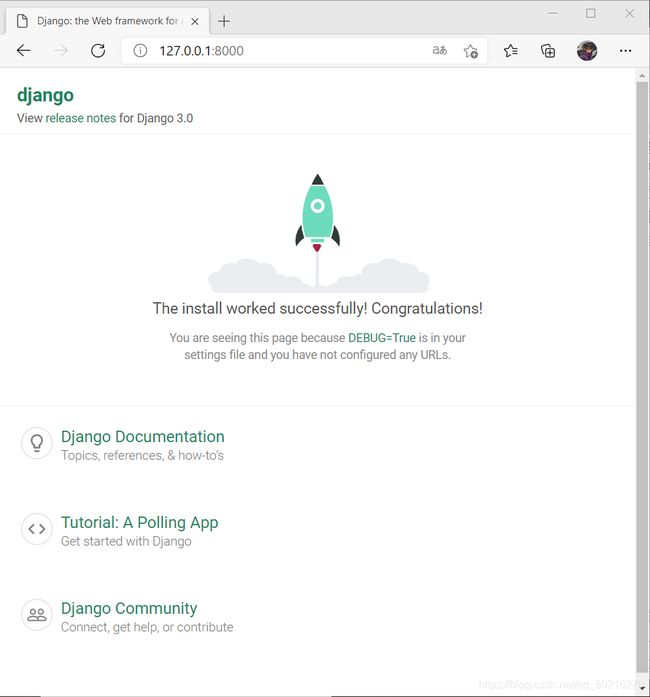
5.访问http://127.0.0.1:8000
这样一个简单的Django项目就完成了
三.创建数据库
终端输入:python manage.py migrate
返回:
Operations to perform:
Apply all migrations: admin, auth, contenttypes, sessions
Running migrations:
Applying contenttypes.0001_initial… OK
Applying auth.0001_initial… OK
Applying admin.0001_initial… OK
Applying admin.0002_logentry_remove_auto_add… OK
Applying admin.0003_logentry_add_action_flag_choices… OK
Applying contenttypes.0002_remove_content_type_name… OK
Applying auth.0002_alter_permission_name_max_length… OK
Applying auth.0003_alter_user_email_max_length… OK
Applying auth.0004_alter_user_username_opts… OK
Applying auth.0005_alter_user_last_login_null… OK
Applying auth.0006_require_contenttypes_0002… OK
Applying auth.0007_alter_validators_add_error_messages… OK
Applying auth.0008_alter_user_username_max_length… OK
Applying auth.0009_alter_user_last_name_max_length… OK
Applying auth.0010_alter_group_name_max_length… OK
Applying auth.0011_update_proxy_permissions… OK
Applying sessions.0001_initial… OK
Traceback (most recent call last):
File “D:\Develop\virtualenv\envname\blog\manage.py”, line 22, in
main()
File “D:\Develop\virtualenv\envname\blog\manage.py”, line 18, in main
execute_from_command_line(sys.argv)
File “D:\Develop\python\lib\site-packages\django-3.0.11-py3.9.egg\django\core\management_init_.py”, line 401, in execute_from_command_line
utility.execute()
File “D:\Develop\python\lib\site-packages\django-3.0.11-py3.9.egg\django\core\management_init_.py”, line 395, in execute
self.fetch_command(subcommand).run_from_argv(self.argv)
File “D:\Develop\python\lib\site-packages\django-3.0.11-py3.9.egg\django\core\management\base.py”, line 341, in run_from_argv
connections.close_all()
File “D:\Develop\python\lib\site-packages\django-3.0.11-py3.9.egg\django\db\utils.py”, line 230, in close_all
connection.close()
File “D:\Develop\python\lib\site-packages\django-3.0.11-py3.9.egg\django\utils\asyncio.py”, line 26, in inner
return func(*args, **kwargs)
File “D:\Develop\python\lib\site-packages\django-3.0.11-py3.9.egg\django\db\backends\sqlite3\base.py”, line 261, in close
if not self.is_in_memory_db():
File “D:\Develop\python\lib\site-packages\django-3.0.11-py3.9.egg\django\db\backends\sqlite3\base.py”, line 380, in is_in_memory_db
return self.creation.is_in_memory_db(self.settings_dict[‘NAME’])
File “D:\Develop\python\lib\site-packages\django-3.0.11-py3.9.egg\django\db\backends\sqlite3\creation.py”, line 12, in is_in_memory_db
return database_name == ‘:memory:’ or ‘mode=memory’ in database_name
TypeError: argument of type ‘WindowsPath’ is not iterable
四.生成Django应用
一个Django网站可能包含多个Django应用,可以使用manage.py创建。
终端输入:python manage.py startapp news
五.构造Django应用
1.创建视图
在views.py中书写相要的试图。
from django.shortcuts import render
from django.http import HttpResponse


# Create your views here.

def index(request):
    return HttpResponse("Hello World")
2.映射到url
在news目录中创建一个新的urls.py文件,并编写代码。
from django.conf.urls import url
from . import views

urlpatterns = [
    url(r'^$', views.index, name='index')
]
3.把news中的urls.py加入到blog中的urls.py中
编辑blog/urls.py.。
"""blog URL Configuration

The `urlpatterns` list routes URLs to views. For more information please see:
    https://docs.djangoproject.com/en/3.1/topics/http/urls/
Examples:
Function views
    1. Add an import:  from my_app import views
    2. Add a URL to urlpatterns:  path('', views.home, name='home')
Class-based views
    1. Add an import:  from other_app.views import Home
    2. Add a URL to urlpatterns:  path('', Home.as_view(), name='home')
Including another URLconf
    1. Import the include() function: from django.urls import include, path
    2. Add a URL to urlpatterns:  path('blog/', include('blog.urls'))
"""
from django.contrib import admin
from django.urls import path
from django.conf.urls import include,url
from django.contrib import admin
urlpatterns = [
    path('admin/', admin.site.urls),
    url(r'^news/',include('news.urls')),
]
4.启动runserver服务验证
终端输入:python manage.py runserver
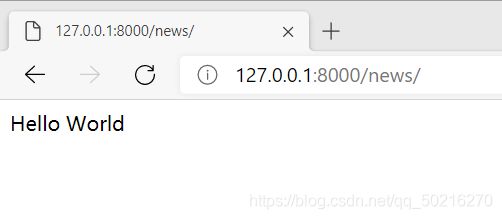
访问http://127.0.0.1:8000/news/,成功如图。
六.定义模型
1.编辑news/models.py文件,创建Post模型
from django.db import models


# Create your models here.
class Post(models.Model):
    title = models.CharField(max_length=20)
    content = models.CharField(max_length=20)
    publish_date = models.DateTimeField('date published')
2.激活应用
应用news对应的配置类是NewsConfig,位于news/app.py中,因此索引路径是news.apps.NewsConfig,将其添加到blog/setting.py中
INSTALLED_APPS = [
    'django.contrib.admin',
    'django.contrib.auth',
    'django.contrib.contenttypes',
    'django.contrib.sessions',
    'django.contrib.messages',
    'django.contrib.staticfiles',
    'news.apps.NewsConfig',
]
七.迁移数据库
1.迁移
终端输入:python manage.py makemigrations news
返回:
Migrations for ‘news’:
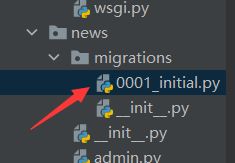
news\migrations\0001_initial.py
- Create model Post
生成:
2.输出迁移文件对应的sql代码
终端输入:python manage.py sqlmigrate news 0001
–
– Create model Post
–
CREATE TABLE “news_post” (
“id” integer NOT NULL PRIMARY KEY AUTOINCREMENT,
“title” varchar(20) NOT NULL, “content” varchar(20) NOT NULL,
“publish_date” datetime NOT NULL);
3.把以上内容变更到数据库中
终端输入:python manage.py migrate
Operations to perform:
Apply all migrations: admin, auth, contenttypes, news, sessions
Running migrations:
Applying news.0001_initial… OK
八.管理站点
1.创建账户,输入相应信息
终端输入:python manage.py createsuperuser
Username (leave blank to use ‘yh’): admin
Email address: [email protected]
Password:
Password (again):
Superuser created successfully.
2.启动服务验证
python manage.py runserver
3.把添加的模型加入到管理的站点中
在news/admin.py中编辑代码
from django.contrib import admin
from .models import Post
# Register your models here.
admin.site.register(Post)
启动服务
python manage.py runserver
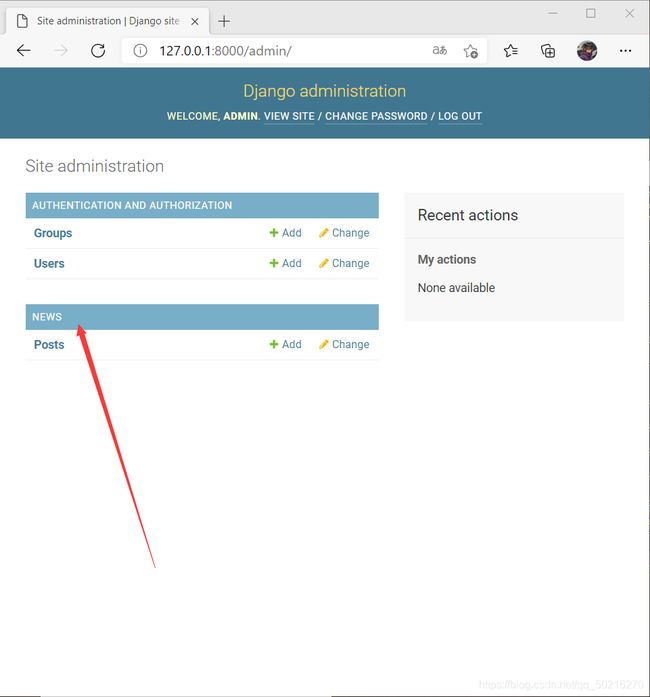
再次访问http://127.0.0.1:8000/admin/login/?next=/admin/,登陆后可以查看到post已经加入进去。
4.修改显示方式
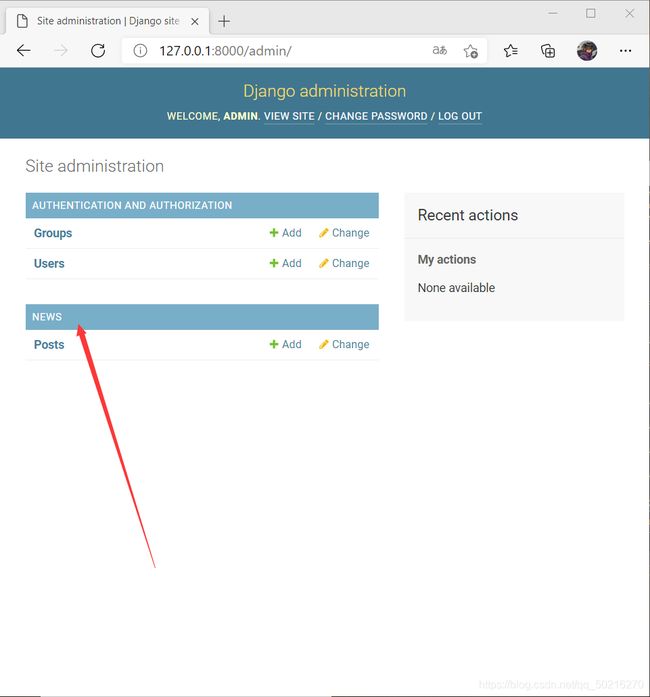
添加了几条post后发现显示的全是project,添加一下__str__方法即可
from django.db import models


# Create your models here.
class Post(models.Model):
    title = models.CharField(max_length=20)
    content = models.CharField(max_length=20)
    publish_date = models.DateTimeField('date published')

    def __str__(self):
        return self.title
九.编辑视图
现在news项目已经有了数据和管理后台,下面做个页面将其展示出来
1.编辑news/views文件,使用正则把url匹配到视图上
from django.shortcuts import render
from django.http import HttpResponse


# Create your views here.

def index(request):
    return HttpResponse("Hello World")


def detail(request, post_id):
    return HttpResponse("You are looking at post {}".format(post_id))
2.编辑urls.py文件,将前面的detail映射到新加的视图中
from django.conf.urls import url
from django.contrib import admin
from . import views
urlpatterns = [
url(r'^$', views.index, name='index'),
url(r'^(?P[0-9]+)/$' , views.detail, name='datail')
]
3.启动服务后再次访问即可,就相当于调用了函数
4.给view.py加入数据库API
from django.shortcuts import render
from django.http import HttpResponse
from .models import Post


# Create your views here.

def index(request):
    latest_post_list = Post.objects.order_by('-publish_date')[:5]
    output = ', '.join([p.title for p in latest_post_list])
    return HttpResponse(output)


def detail(request, post_id):
    return HttpResponse("You are looking at post {}".format(post_id))
