opencv-python 对彩色图像做直方图均衡化(+自己实现源码)
环境:spyder(python 3.7 ) opencv-python (4.1.2.30)
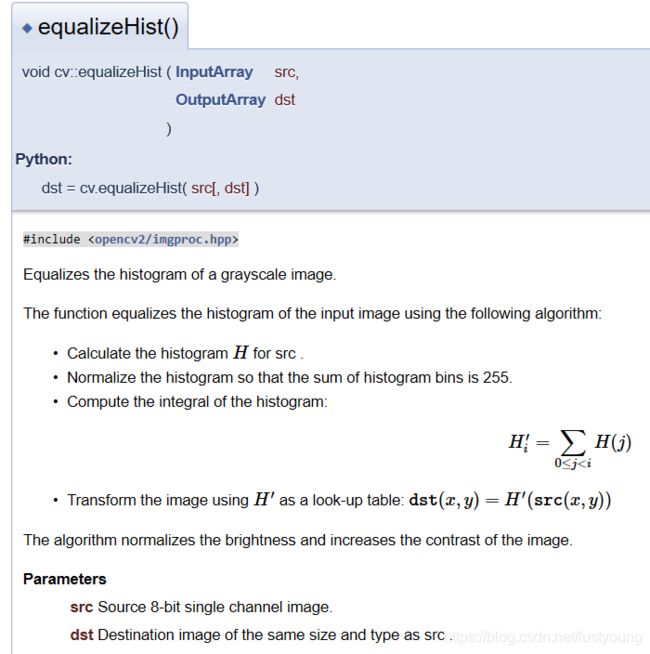
opencv-python中有一个函数cv.equalizeHist(single_channel_img)可以非常方便的对图像进行直方图均衡化处理
直方图均衡化增加了图像的对比度,待会我们通过例子就可以看出图片明显的区别,这里需要注意的一点是, src参数必须是8比特的单通道图像,否者报错。
import cv2 as cv
import numpy as np
from matplotlib import pyplot as plt

test=cv.imread("test.bmp",-1)

B,G,R = cv.split(test) #get single 8-bits channel
EB=cv.equalizeHist(B)
EG=cv.equalizeHist(G)
ER=cv.equalizeHist(R)
equal_test=cv.merge((EB,EG,ER))  #merge it back
cv.imshow("test",test)
cv.imshow("equal_test",equal_test)
hist_EB=cv.calcHist([EB],[0],None,[256],[0,256])
hist_EG=cv.calcHist([EG],[0],None,[256],[0,256])
hist_ER=cv.calcHist([ER],[0],None,[256],[0,256])
hist_b=cv.calcHist([B],[0],None,[256],[0,256])
plt.plot(hist_EB,'b');
plt.plot(hist_b,'r');
plt.show()
代码的结果:
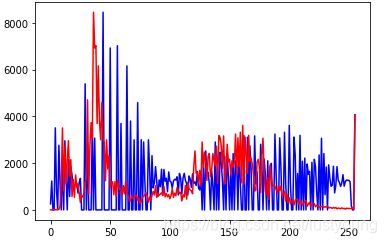
(由于网页原因,尺寸有拉伸)但是不影响观察到右边的图像对比度更高。代码的最后两行展示了均衡前和均衡后的Blue通道的像素分布。
(红色代表均衡前的,蓝色代表均衡之后的,是不是感觉蓝色均衡很多)
到这里系统自带的函数就已经展示完了。但是我写了个自己的版本的,希望看看效果,以下。
终于写好了,我该打,犯了一个低级错误,下次写程序不能听歌!!
def my_equalizehist(single):
    hist=cv.calcHist([single],[0],None,[256],[0,256])
    num_of_pixels=single.size
    ratio=np.zeros(256)
    transf_map=np.zeros(256)
    result=single.copy()
    j=0
    for i in hist:
        if j>0:
            ratio[j]=i/num_of_pixels+ratio[j-1]
        else:
             ratio[j]=i/num_of_pixels
        transf_map[j]=round(ratio[j]*255)
        j=j+1
    j=0
    for i in transf_map:
"""错误"""
        result[result==j]=i
        j=j+1
        #这里会反复对已经做过映射的像素赋值,最后的图很可能是大部分白色,务必注意
    return result
这是可以正常运行的版本
def my_equalizehist(single):
    hist=cv.calcHist([single],[0],None,[256],[0,256])
    num_of_pixels=single.size
    ratio=np.zeros(256)
    transf_map=np.zeros(256)
    result=single.copy()
    j=0
    for i in hist:
        if j>0:
            ratio[j]=i/num_of_pixels+ratio[j-1]
        else:
             ratio[j]=i/num_of_pixels
        transf_map[j]=round(ratio[j]*255)
        j=j+1
    for i in range(single.shape[0]):
        for j in range(single.shape[1]):
            result[i][j]=transf_map[single[i][j]]
        #result[result==j]=k[j]
    return result

res=my_equalizehist(B)
cv.imshow("res",res)
hist_res=cv.calcHist([res],[0],None,[256],[0,256])
plt.plot(hist_res);
plt.show()
结果与之前的EB的对比图
均衡之后几乎完全一致。
自己实现纯属自己最直接的想法,建议使用CV2库内的函数,因为运算速度肯定比自己写的快。


