单页面应用
前言
如今 React, Vue 等视图层框架大行其道,为前端开发提供了不少便利性,但是仅仅只是这些的话,缺少完善的前端路由系统,在单页应用中,我们希望能够通过前端路由来控制整个单页面应用,而后端仅仅只是获取数据接口。本文主要围绕以下三个问题来进行阐述:
- 单页面应用为什么需要路由系统?
- 单页面应用路由实现原理是什么?
- 如何实现一个简单的 react-router?
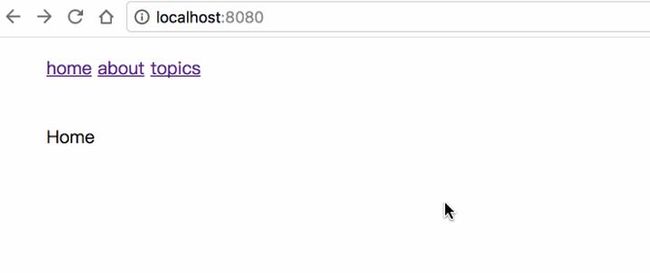
接下来我们围绕一个简单的例子展开,通过路由原理将其实现。
如果觉得本文有帮助,可以点 star 鼓励下,本文所有代码都可以从 github 仓库下载,读者可以按照下述打开:
git clone https://github.com/happylindz/blog.git
cd blog/code/router
yarn
建议你 clone 下来,方便你阅读代码,跟我一起测试查看效果。
为什么需要路由系统
最开始的时候网页都是多页面的,后来随着 ajax 技术的出现,才慢慢有了像 React、Vue 等 SPA 框架,当然,缺少路由系统的 SPA 框架有其存在的弊端:
- 用户在使用过程中,url 不会发生变化,那么用户在进行多次跳转之后,如果一不小心刷新了页面,又会回到最开始的状态,用户体验极差。
- 由于缺乏路由,不利于 SEO,搜索引擎进行收录。
主流的前端路由系统是通过 hash 或 history 来实现的,下面我们一探究竟。
Hash 路由
url 上的 hash 以 # 开头,原本是为了作为锚点,方便用户在文章导航到相应的位置。因为 hash 值的改变不会引起页面的刷新,聪明的程序员就想到用 hash 值来做单页面应用的路由,并且当 url 的 hash 发生变化的时候,可以触发相应 hashchange 回调函数。
所以我们可以写一个 Router 对象,代码如下:
class Router {

  constructor() {

    this.routes = {};
    this.currentUrl = '';
  }
  route(path, callback) {

    this.routes[path] = callback || function() {};
  }
  updateView() {

    this.currentUrl = location.hash.slice(1) || '/';
    this.routes[this.currentUrl] && this.routes[this.currentUrl]();
  }
  init() {

    window.addEventListener('load', this.updateView.bind(this), false);
    window.addEventListener('hashchange', this.updateView.bind(this), false);
  }
}
- routes 用来存放不同路由对应的回调函数
- init 用来初始化路由,在 load 事件发生后刷新页面,并且绑定 hashchange 事件,当 hash 值改变时触发对应回调函数
<div id="app">
  <ul>
    <li>
      <a href="#/">homea>
    li>
    <li>
      <a href="#/about">abouta>
    li>
    <li>
      <a href="#/topics">topicsa>
    li>
  ul>
  <div id="content">div>
div>
<script src="js/router.js">script>
<script>
  const router = new Router();
  router.init();
  router.route('/', function () {

    document.getElementById('content').innerHTML = 'Home';
  });
  router.route('/about', function () {

    document.getElementById('content').innerHTML = 'About';
  });
  router.route('/topics', function () {

    document.getElementById('content').innerHTML = 'Topics';
  });
script>
在对应 html 中,只要将所有链接路径前加 # 即可做成软路由,而不去触发刷新页面。
读者可以尝试并查看效果:
yarn hash
// open http://localhost:8080
值得注意的是在第一次进入页面的时候,需要触发一次 onhashchange 事件,保证页面能够正常显示,用 hash 在做路由跳转的好处在于简单实用,便于理解,但是它虽然解决解决单页面应用路由控制的问题,但是在 url 却引入 # 号,不够美观。
History 路由
History 路由是基于 HTML5 规范,在 HTML5 规范中提供了 history.pushState || history.replaceState 来进行路由控制。
当你执行 history.pushState({}, null, '/about') 时候,页面 url 会从 http://xxxx/ 跳转到 http://xxxx/about 可以在改变 url 的同时,并不会刷新页面。
先来简单看看 pushState 的用法,参数说明如下:
- state:存储 JSON 字符串,可以用在 popstate 事件中
- title:现在大多浏览器忽略这个参数,直接用 null 代替
- url:任意有效的 URL,用于更新浏览器的地址栏
这么说下来 history 也有着控制路由的能力,然后,hash 的改变可以出发 onhashchange 事件,而 history 的改变并不会触发任何事件,这让我们无法直接去监听 history 的改变从而做出相应的改变。
所以,我们需要换个思路,我们可以罗列出所有可能触发 history 改变的情况,并且将这些方式一一进行拦截,变相地监听 history 的改变。
对于一个应用而言,url 的改变(不包括 hash 值得改变)只能由下面三种情况引起:
- 点击浏览器的前进或后退按钮
- 点击 a 标签
- 在 JS 代码中触发 history.push(replace)State 函数
只要对上述三种情况进行拦截,就可以变相监听到 history 的改变而做出调整。针对情况 1,HTML5 规范中有相应的 onpopstate 事件,通过它可以监听到前进或者后退按钮的点击,值得注意的是,调用 history.push(replace)State 并不会触发 onpopstate 事件。
经过分析,下面就简单实现一个 history 路由系统,代码如下:
class Router {

  constructor() {

    this.routes = {};
    this.currentUrl = '';
  }
  route(path, callback) {

    this.routes[path] = callback || function() {};
  }
  updateView(url) {

    this.currentUrl = url;
    this.routes[this.currentUrl] && this.routes[this.currentUrl]();
  }
  bindLink() {

    const allLink = document.querySelectorAll('a[data-href]');
    for (let i = 0, len = allLink.length; i < len; i++) {

      const current = allLink[i];
      current.addEventListener(
        'click',
        e => {

          e.preventDefault();
          const url = current.getAttribute('data-href');
          history.pushState({}, null, url);
          this.updateView(url);
        },
        false
      );
    }
  }
  init() {

    this.bindLink();
    window.addEventListener('popstate', e => {

      this.updateView(window.location.pathname);
    });
    window.addEventListener('load', () => this.updateView('/'), false);
  }
}
Router 跟之前 Hash 路由很像,不同的地方在于 init 初始化函数,首先需要获取所有特殊的链接标签,然后监听点击事件,并阻止其默认事件,触发 history.pushState 以及更新相应的视图。
另外绑定 popstate 事件,当用户点击前进或者后退的按钮时候,能够及时更新视图,另外当刚进去页面时也要触发一次视图更新。
修改相应的 html 内容
<div id="app">
  <ul>
    <li><a data-href="/" href="#">homea>li>
    <li><a data-href="/about" href="#">abouta>li>
    <li><a data-href="/topics" href="#">topicsa>li>
  ul>
  <div id="content">div>
div>
<script src="js/router.js">script>
<script>
  const router = new Router();
  router.init();
  router.route('/', function() {

    document.getElementById('content').innerHTML = 'Home';
  });
  router.route('/about', function() {

    document.getElementById('content').innerHTML = 'About';
  });
  router.route('/topics', function() {

    document.getElementById('content').innerHTML = 'Topics';
  });
script>
跟之前的 html 基本一致,区别在于用 data-href 来表示要实现软路由的链接标签。
当然上面还有情况 3,就是你在 JS 直接触发 pushState 函数,那么这时候你必须要调用视图更新函数,否则就是出现视图内容和 url 不一致的情况。
setTimeout(() => {

  history.pushState({}, null, '/about');
  router.updateView('/about');
}, 2000);