esp32小车
esp32小车
- 前言
- 开始
-
-
- 代码分析
-
-
-
- 作者
-
-
-
前言
有同学可能已经注意到了,在我的github中参杂着一些c++的github
这些就是esp32做的内容
开始
其中serial test tool串口调试器的使用参见另一片文章
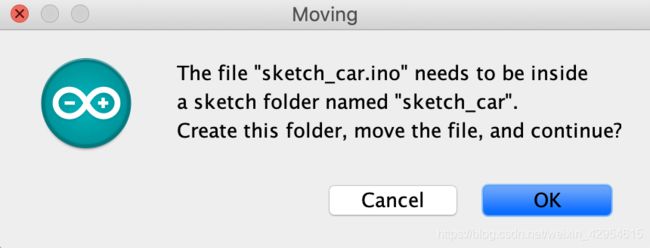
上传sketch_car.ino是会有以下问题 ,请点击OK
后上传,此处使用DOIT ESP32 DEVKIT V1上传,需要安装驱动并将espressif解压并将文件夹移动到
完成后使用串口调试器发送udlrs即可
代码分析
初始化:
#include
#include "ssd1306.h"
#include "ssd1306_console.h"
Ssd1306Console  console;
int readleft = 0;
int readright = 0;
long leftnum = 0;
long rightnum = 0;
BluetoothSerial SerialBT;
void setup() {
  ssd1306_128x64_i2c_init();
  ssd1306_clearScreen();
  ssd1306_setFixedFont(ssd1306xled_font6x8);
  ledcSetup(0, 5000, 10);
  ledcSetup(1, 5000, 10);
  ledcSetup(2, 5000, 10);
  ledcSetup(3, 5000, 10);
  ledcAttachPin(2, 2);
  ledcAttachPin(4, 3);
  ledcAttachPin(13, 0);
  ledcAttachPin(27, 1);
  SerialBT.begin("car");
  pinMode(12, INPUT);
  pinMode(14, INPUT);
}
显示圈数:
void loop() {
  console.print("L:");
  console.print(leftnum);
  console.print('\t');
  console.print("R:");
  console.println(rightnum);
计算圈数:
  if (digitalRead(12) == HIGH) {
    readleft ++;
  }
  if (digitalRead(14) == HIGH) {
    readright ++;
  }
  if (readleft == 112) {
    readleft = 0;
    leftnum ++;
  }
  if (readright == 112) {
    readright = 0;
    rightnum ++;
  }
执行蓝牙端口命令
  while (SerialBT.available()) {
    char input = SerialBT.read();
    if (input == 'u') {
      forward();
    } else if (input == 'd') {
      backward();
    } else if (input == 'l') {
      left();
    } else if (input == 'r') {
      right();
    } else if (input == 's') {
      Stop();
    }
  }
}
动作函数
void forward() {
  ledcWrite(0, 900);
  ledcWrite(1, 0);
  ledcWrite(2, 900);
  ledcWrite(3, 0);
}
void backward() {
  ledcWrite(0, 0);
  ledcWrite(1, 900);
  ledcWrite(2, 0);
  ledcWrite(3, 900);
}
void right() {
  ledcWrite(0, 0);
  ledcWrite(1, 900);
  ledcWrite(2, 900);
  ledcWrite(3, 0);
}
void left() {
  ledcWrite(0, 900);
  ledcWrite(1, 0);
  ledcWrite(2, 0);
  ledcWrite(3, 900);
}
void Stop() {
  ledcWrite(0, 1);
  ledcWrite(1, 1);
  ledcWrite(2, 1);
  ledcWrite(3, 1);
}
github传送门
作者
hit-road
拜拜,下课!
hit-road不定期跟新,不见不散!
