python图像处理笔记(六):手动获取坐标标注图像
引言
之前的两篇文章有提到图片标注,但一个是用yolo算法给识别到的图像加框,一个是根据霍夫变换做直线与圆的检测,本篇想总结一下根据鼠标点击来对图像做一些填充处理的方式。
opencv鼠标事件
介绍的内容参考自OpenCV - 处理鼠标事件(Python实现),关于opencv鼠标点击有多少种事件,我们可以通过dir过滤筛选出带"EVENT"的字样,为:
import cv2
events=[i for i in dir(cv2) if 'EVENT'in i]  #将全部事件保存在列表中
print (events)                               #将列表打印
然后就能知道相关事件:
EVENT_FLAG_LBUTTON 1         #左鍵拖曳
EVENT_FLAG_RBUTTON 2         #右鍵拖曳
EVENT_FLAG_MBUTTON 4         #中鍵拖曳
EVENT_FLAG_CTRLKEY 8         #(8~15)按Ctrl不放事件
EVENT_FLAG_SHIFTKEY 16       #(16~31)按Shift不放事件
EVENT_FLAG_ALTKEY 32         #(32~39)按Alt不放事件

EVENT_MOUSEMOVE 0            #滑动
EVENT_LBUTTONDOWN 1          #左键点击
EVENT_RBUTTONDOWN 2          #右键点击
EVENT_MBUTTONDOWN 3          #中键点击
EVENT_LBUTTONUP 4            #左键放开
EVENT_RBUTTONUP 5            #右键放开
EVENT_MBUTTONUP 6            #中键放开
EVENT_LBUTTONDBLCLK 7        #左键双击
EVENT_RBUTTONDBLCLK 8        #右键双击
EVENT_MBUTTONDBLCLK 9        #中键双击
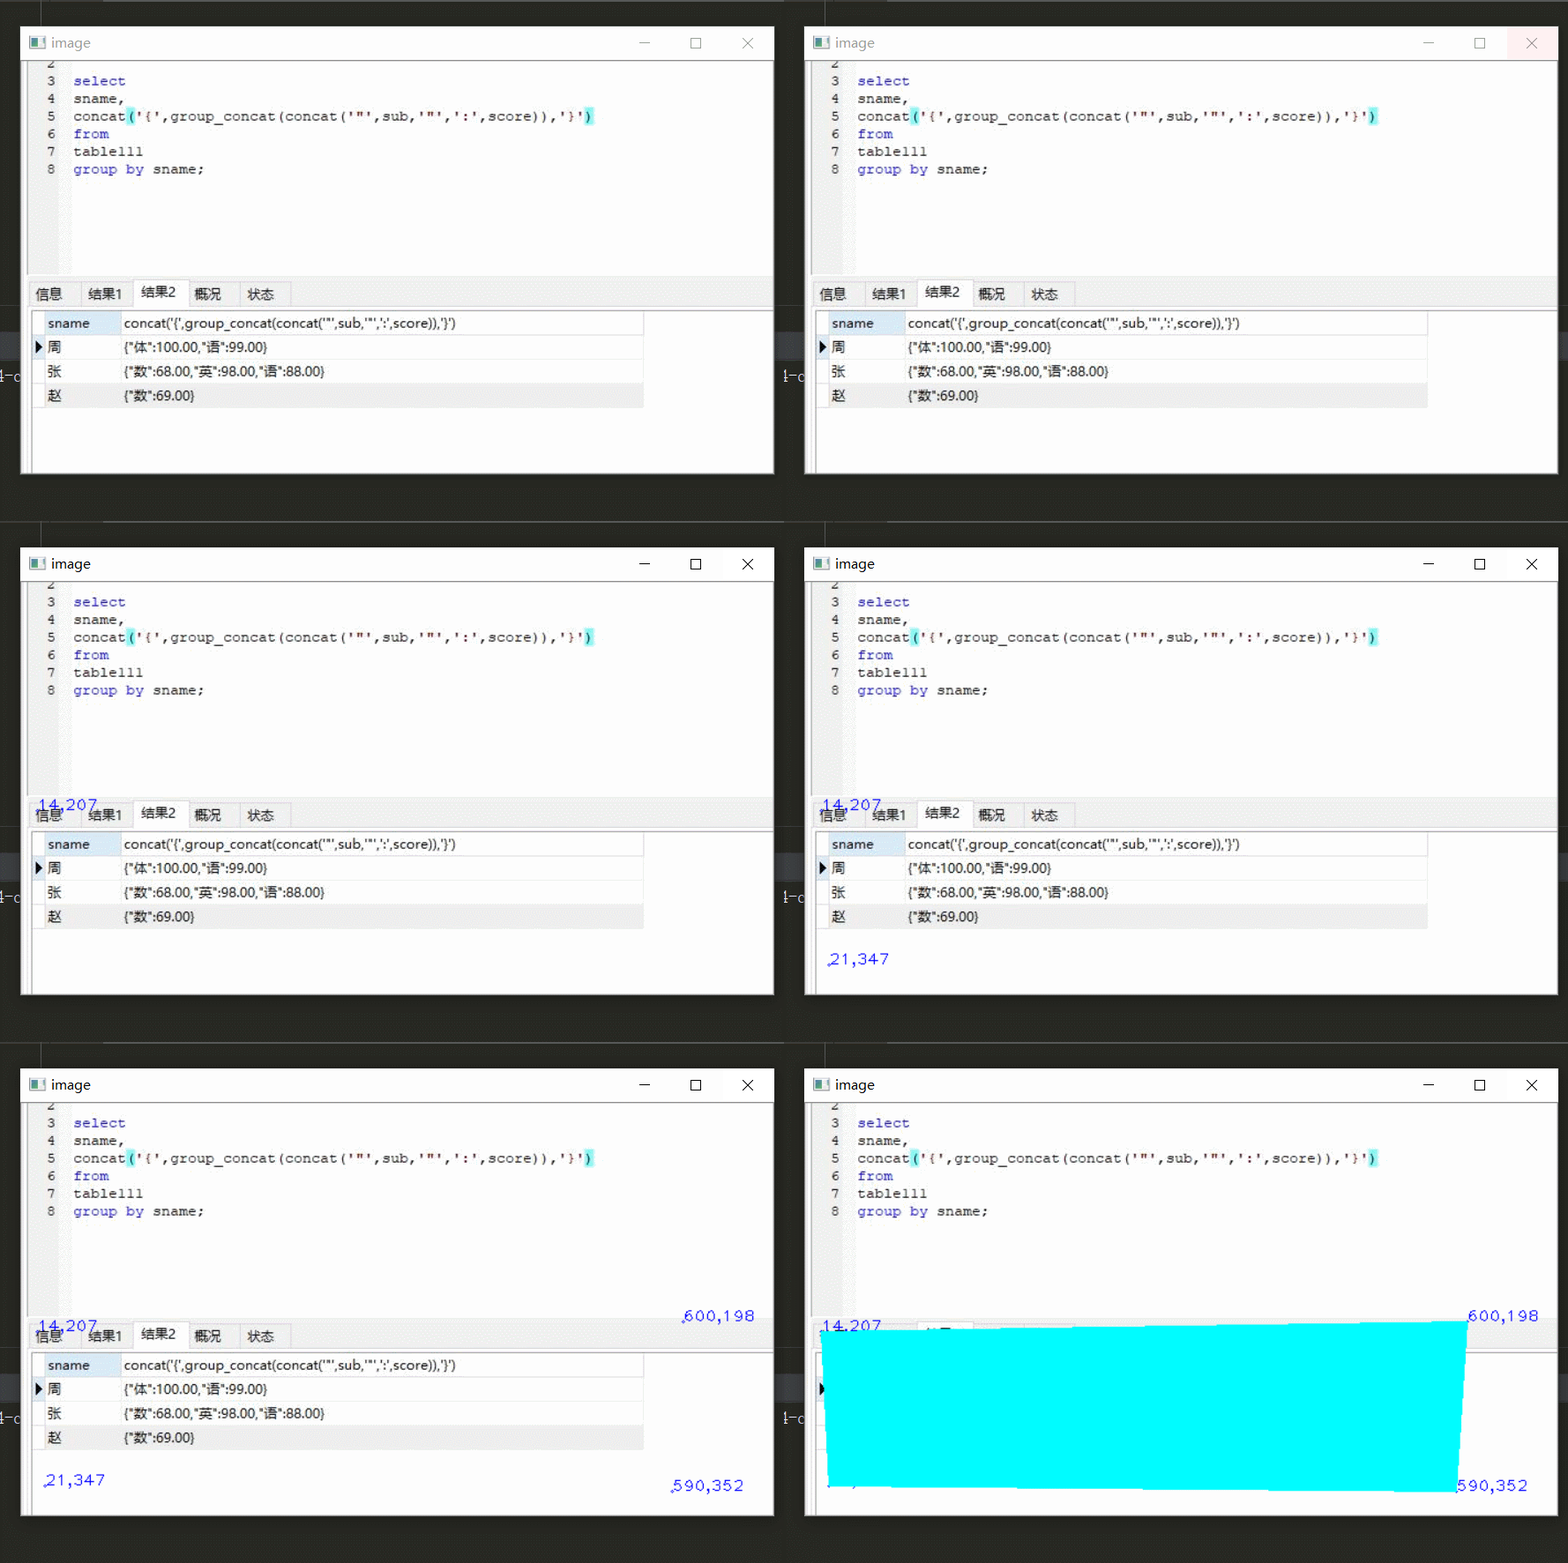
那么根据相关事件类别,就能绑定相应事件完成,绑定鼠标左键与fillPoly完成任意形状的填充:
# coding: utf-8
import cv2
import numpy as np

img = cv2.imread(r"C:\Users\admin\Pictures\Saved Pictures\333.jpg")

# print img.shape

a = []

def on_EVENT_LBUTTONDOWN(event, x, y, flags, param):
    global a
    if event == cv2.EVENT_LBUTTONDOWN:
        xy = "%d,%d" % (x, y)
        a.append([x,y])
        cv2.circle(img, (x, y), 1, (255, 0, 0), thickness=1)
        cv2.putText(img, xy, (x, y), cv2.FONT_HERSHEY_PLAIN,
                    1.0, (255, 0, 0), thickness=1)
        # cv2.(img, int(xy), int(a[-1]), color=(255, 0, 0), thickness=1)
        cv2.imshow("image", img)
        k = cv2.waitKey(0)
        if (k == ord('s')):
            cc = np.array([a], dtype=np.int32)
            # print(cc)
            # qq = np.array([[[0,0],[100,0],[100,100],[0,100]]])
            # print(qq)
            cv2.fillPoly(img, np.array(cc), (255, 255, 0))
            cv2.imshow("image", img)
            a.clear()


cv2.namedWindow("image")
cv2.setMouseCallback("image", on_EVENT_LBUTTONDOWN)
cv2.imshow("image", img)


while (True):
    try:
        cv2.waitKey(100)
    except Exception:
        cv2.destroyWindow("image")
        break

cv2.waitKey(0)
cv2.destroyAllWindow()

对图像区域进行填充的业务场景一般是需要针对图像的某处区域做着重算法分析,或者说对比测试才会使用,因为在项目里会有奇效。然后我当时是直接根据前端传值并通过查询数据库自动匹配区域达到目的,然后根据watchdog与其它程序出的图做对比,这也只是一种。上述这种手动的,还能加入撤销以及自动做成标注,可以参考给深度学习入门者的Python快速教程 - 番外篇之Python-OpenCV:
因为上述参考链接中的代码基于python2,所以我改成了python3的并添加了一些注释,如果想要撤销回上一次的操作,可以跟我上述那样,用一个全局列表对其进行append和pop,也可以写成类来不断调用:
import os
import cv2

# tkinter是Python内置的简单GUI库,实现一些比如打开文件夹,确认删除等操作十分方便
from tkinter.filedialog import askdirectory
from tkinter.messagebox import askyesno


# 定义标注窗口的默认名称
WINDOW_NAME = 'Simple Bounding Box Labeling Tool'

# 定义画面刷新的大概帧率(是否能达到取决于电脑性能)
FPS = 24

# 定义支持的图像格式
SUPPOTED_FORMATS = ['jpg', 'jpeg', 'png']

# 定义默认物体框的名字为Object,颜色蓝色,当没有用户自定义物体时用默认物体
DEFAULT_COLOR = {
     'Object': (255, 0, 0)}

# 定义灰色,用于信息显示的背景和未定义物体框的显示
COLOR_GRAY = (192, 192, 192)

# 在图像下方多出BAR_HEIGHT这么多像素的区域用于显示文件名和当前标注物体等信息
BAR_HEIGHT = 16

# 上下左右,ESC及删除键对应的cv.waitKey()的返回值
# 注意这个值根据操作系统不同有不同,可以通过6.4.2中的代码获取
KEY_UP = 65362
KEY_DOWN = 65364
KEY_LEFT = 65361
KEY_RIGHT = 65363
KEY_ESC = 27
KEY_DELETE = 65535

# 空键用于默认循环
KEY_EMPTY = 0

get_bbox_name = '{}.bbox'.format


# 定义物体框标注工具类
class SimpleBBoxLabeling:

    def __init__(self, data_dir, fps=FPS, window_name=None):
        self._data_dir = data_dir
        self.fps = fps
        self.window_name = window_name if window_name else WINDOW_NAME

        # pt0是正在画的左上角坐标,pt1是鼠标所在坐标
        self._pt0 = None
        self._pt1 = None

        # 表明当前是否正在画框的状态标记
        self._drawing = False

        # 当前标注物体的名称
        self._cur_label = None

        # 当前图像对应的所有已标注框
        self._bboxes = []

        # 如果有用户自定义的标注信息则读取,否则用默认的物体和颜色
        label_path = '{}.labels'.format(self._data_dir)
        self.label_colors = DEFAULT_COLOR if not os.path.exists(label_path) else self.load_labels(label_path)

        # 获取已经标注的文件列表和还未标注的文件列表
        imagefiles = [x for x in os.listdir(self._data_dir) if x[x.rfind('.') + 1:].lower() in SUPPOTED_FORMATS]
        labeled = [x for x in imagefiles if os.path.exists(get_bbox_name(x))]
        to_be_labeled = [x for x in imagefiles if x not in labeled]

        # 每次打开一个文件夹,都自动从还未标注的第一张开始
        self._filelist = labeled + to_be_labeled
        self._index = len(labeled)
        if self._index > len(self._filelist) - 1:
            self._index = len(self._filelist) - 1

    # 鼠标回调函数
    def _mouse_ops(self, event, x, y, flags, param):

        # 按下左键时,坐标为左上角,同时表明开始画框,改变drawing标记为True
        if event == cv2.EVENT_LBUTTONDOWN:
            self._drawing = True
            self._pt0 = (x, y)

        # 左键抬起,表明当前框画完了,坐标记为右下角,并保存,同时改变drawing标记为False
        elif event == cv2.EVENT_LBUTTONUP:
            self._drawing = False
            self._pt1 = (x, y)
            self._bboxes.append((self._cur_label, (self._pt0, self._pt1)))

        # 实时更新右下角坐标方便画框
        elif event == cv2.EVENT_MOUSEMOVE:
            self._pt1 = (x, y)

        # 鼠标右键删除最近画好的框
        elif event == cv2.EVENT_RBUTTONUP:
            if self._bboxes:
                self._bboxes.pop()

    # 清除所有标注框和当前状态
    def _clean_bbox(self):
        self._pt0 = None
        self._pt1 = None
        self._drawing = False
        self._bboxes = []

    # 画标注框和当前信息的函数
    def _draw_bbox(self, img):

        # 在图像下方多出BAR_HEIGHT这么多像素的区域用于显示文件名和当前标注物体等信息
        h, w = img.shape[:2]
        canvas = cv2.copyMakeBorder(img, 0, BAR_HEIGHT, 0, 0, cv2.BORDER_CONSTANT, value=COLOR_GRAY)

        # 正在标注的物体信息,如果鼠标左键已经按下,则显示两个点坐标,否则显示当前待标注物体的名称
        label_msg = '{}: {}, {}'.format(self._cur_label, self._pt0, self._pt1) \
            if self._drawing \
            else 'Current label: {}'.format(self._cur_label)

        # 显示当前文件名,文件个数信息
        msg = '{}/{}: {} | {}'.format(self._index + 1, len(self._filelist), self._filelist[self._index], label_msg)
        cv2.putText(canvas, msg, (1, h + 12),
                    cv2.FONT_HERSHEY_SIMPLEX,
                    0.5, (0, 0, 0), 1)

        # 画出已经标好的框和对应名字
        for label, (bpt0, bpt1) in self._bboxes:
            print(self._bboxes,"..........11111")
            label_color = self.label_colors[label] if label in self.label_colors else COLOR_GRAY
            cv2.rectangle(canvas, bpt0, bpt1, label_color, thickness=2)
            cv2.putText(canvas, label, (bpt0[0] + 3, bpt0[1] + 15),
                        cv2.FONT_HERSHEY_SIMPLEX,
                        0.5, label_color, 2)

        # 画正在标注的框和对应名字
        if self._drawing:
            label_color = self.label_colors[self._cur_label] if self._cur_label in self.label_colors else COLOR_GRAY
            if self._pt1[0] >= self._pt0[0] and self._pt1[1] >= self._pt0[1]:
                cv2.rectangle(canvas, self._pt0, self._pt1, label_color, thickness=2)
            cv2.putText(canvas, self._cur_label, (self._pt0[0] + 3, self._pt0[1] + 15),
                        cv2.FONT_HERSHEY_SIMPLEX,
                        0.5, label_color, 2)
        return canvas

    # 利用repr()导出标注框数据到文件
    @staticmethod
    def export_bbox(filepath, bboxes):
        if bboxes:
            with open(filepath, 'w+') as f:
                for bbox in bboxes:
                    line = repr(bbox) + '\n'
                    f.write(line)
        elif os.path.exists(filepath):
            os.remove(filepath)

    # 利用eval()读取标注框字符串到数据
    @staticmethod
    def load_bbox(filepath):
        bboxes = []
        with open(filepath, 'r') as f:
            line = f.readline().rstrip()
            while line:
                bboxes.append(eval(line))
                line = f.readline().rstrip()
        return bboxes

    # 利用eval()读取物体及对应颜色信息到数据
    @staticmethod
    def load_labels(filepath):
        label_colors = {
     }
        with open(filepath, 'r') as f:
            line = f.readline().rstrip()
            while line:
                label, color = eval(line)
                label_colors[label] = color
                line = f.readline().rstrip()
        return label_colors

    # 读取图像文件和对应标注框信息(如果有的话)
    @staticmethod
    def load_sample(filepath):
        img = cv2.imread(filepath)
        bbox_filepath = get_bbox_name(filepath)
        bboxes = []
        if os.path.exists(bbox_filepath):
            bboxes = SimpleBBoxLabeling.load_bbox(bbox_filepath)
        return img, bboxes

    # 导出当前标注框信息并清空
    def _export_n_clean_bbox(self):
        bbox_filepath = os.sep.join([self._data_dir, get_bbox_name(self._filelist[self._index])])
        self.export_bbox(bbox_filepath, self._bboxes)
        self._clean_bbox()

    # 删除当前样本和对应的标注框信息
    def _delete_current_sample(self):
        filename = self._filelist[self._index]
        filepath = os.sep.join([self._data_dir, filename])
        if os.path.exists(filepath):
            os.remove(filepath)
        filepath = get_bbox_name(filepath)
        if os.path.exists(filepath):
            os.remove(filepath)
        self._filelist.pop(self._index)
        print('{} is deleted!'.format(filename))

    # 开始OpenCV窗口循环的方法,定义了程序的主逻辑
    def start(self):

        # 之前标注的文件名,用于程序判断是否需要执行一次图像读取
        last_filename = ''

        # 标注物体在列表中的下标
        label_index = 0

        # 所有标注物体名称的列表
        labels = list(self.label_colors.keys())

        # 待标注物体的种类数
        n_labels = len(labels)

        # 定义窗口和鼠标回调
        cv2.namedWindow(self.window_name)
        cv2.setMouseCallback(self.window_name, self._mouse_ops)
        key = KEY_EMPTY

        # 定义每次循环的持续时间
        delay = int(1000 / FPS)

        # 只要没有按下Esc键,就持续循环
        while key != KEY_ESC:

            # 上下键用于选择当前标注物体
            if key == KEY_UP:
                if label_index == 0:
                    pass
                else:
                    label_index -= 1

            elif key == KEY_DOWN:
                if label_index == n_labels - 1:
                    pass
                else:
                    label_index += 1

            # 左右键切换当前标注的图片
            elif key == KEY_LEFT:
                # 已经到了第一张图片的话就不需要清空上一张
                if self._index > 0:
                    self._export_n_clean_bbox()

                self._index -= 1
                if self._index < 0:
                    self._index = 0

            elif key == KEY_RIGHT:
                # 已经到了最后一张图片的话就不需要清空上一张
                if self._index < len(self._filelist) - 1:
                    self._export_n_clean_bbox()

                self._index += 1
                if self._index > len(self._filelist) - 1:
                    self._index = len(self._filelist) - 1

            # 删除当前图片和对应标注信息
            elif key == KEY_DELETE:
                if askyesno('Delete Sample', 'Are you sure?'):
                    self._delete_current_sample()
                    key = KEY_EMPTY
                    continue

            # 如果键盘操作执行了换图片,则重新读取,更新图片
            filename = self._filelist[self._index]
            if filename != last_filename:
                filepath = os.sep.join([self._data_dir, filename])
                img, self._bboxes = self.load_sample(filepath)

            # 更新当前标注物体名称

            self._cur_label = labels[label_index]

            # 把标注和相关信息画在图片上并显示指定的时间
            canvas = self._draw_bbox(img)
            cv2.imshow(self.window_name, canvas)
            key = cv2.waitKey(delay)

            # 当前文件名就是下次循环的老文件名
            last_filename = filename

        print('Finished!')

        cv2.destroyAllWindows()
        # 如果退出程序,需要对当前进行保存
        print(filename,get_bbox_name(filename),".......",os.sep.join([self._data_dir, get_bbox_name(filename)]), self._bboxes)
        self.export_bbox(os.sep.join([self._data_dir, get_bbox_name(filename)]), self._bboxes)

        print('Labels updated!')


if __name__ == '__main__':
    dir_with_images = askdirectory(title='Where are the images?')
    labeling_task = SimpleBBoxLabeling(dir_with_images)
    labeling_task.start()

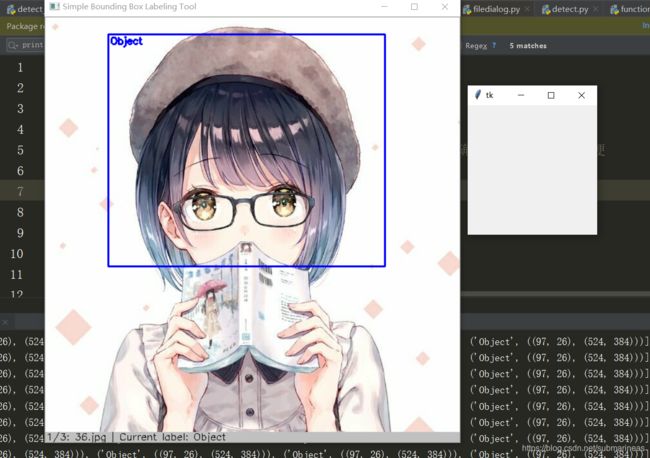
因为这个程序需要做一个label集,和图片在同级目录下,如果没做的话默认是标注object,这相当于一个手动标注图像数据点的小demo,而其实python官方有自带的,名字叫做labelme,安装非常简单直接pip,具体效果可以看【图像语义分割】Label data的标注–Labelme(python):

这就更加完善以及功能化了。另外如果是自动标注,向弄监控的话,可以参考我之前写过的一篇python中watchdog文件监控与检测上传